
Rainbow Cake Recipe
You would think I’ve made enough rainbow cakes, but I simply couldn’t resist sharing one more epic rainbow cake recipe with you.
I am a big fan of color, but I hate all the dishes rainbow cakes make! Making six different colors of cake batter is such a pain.
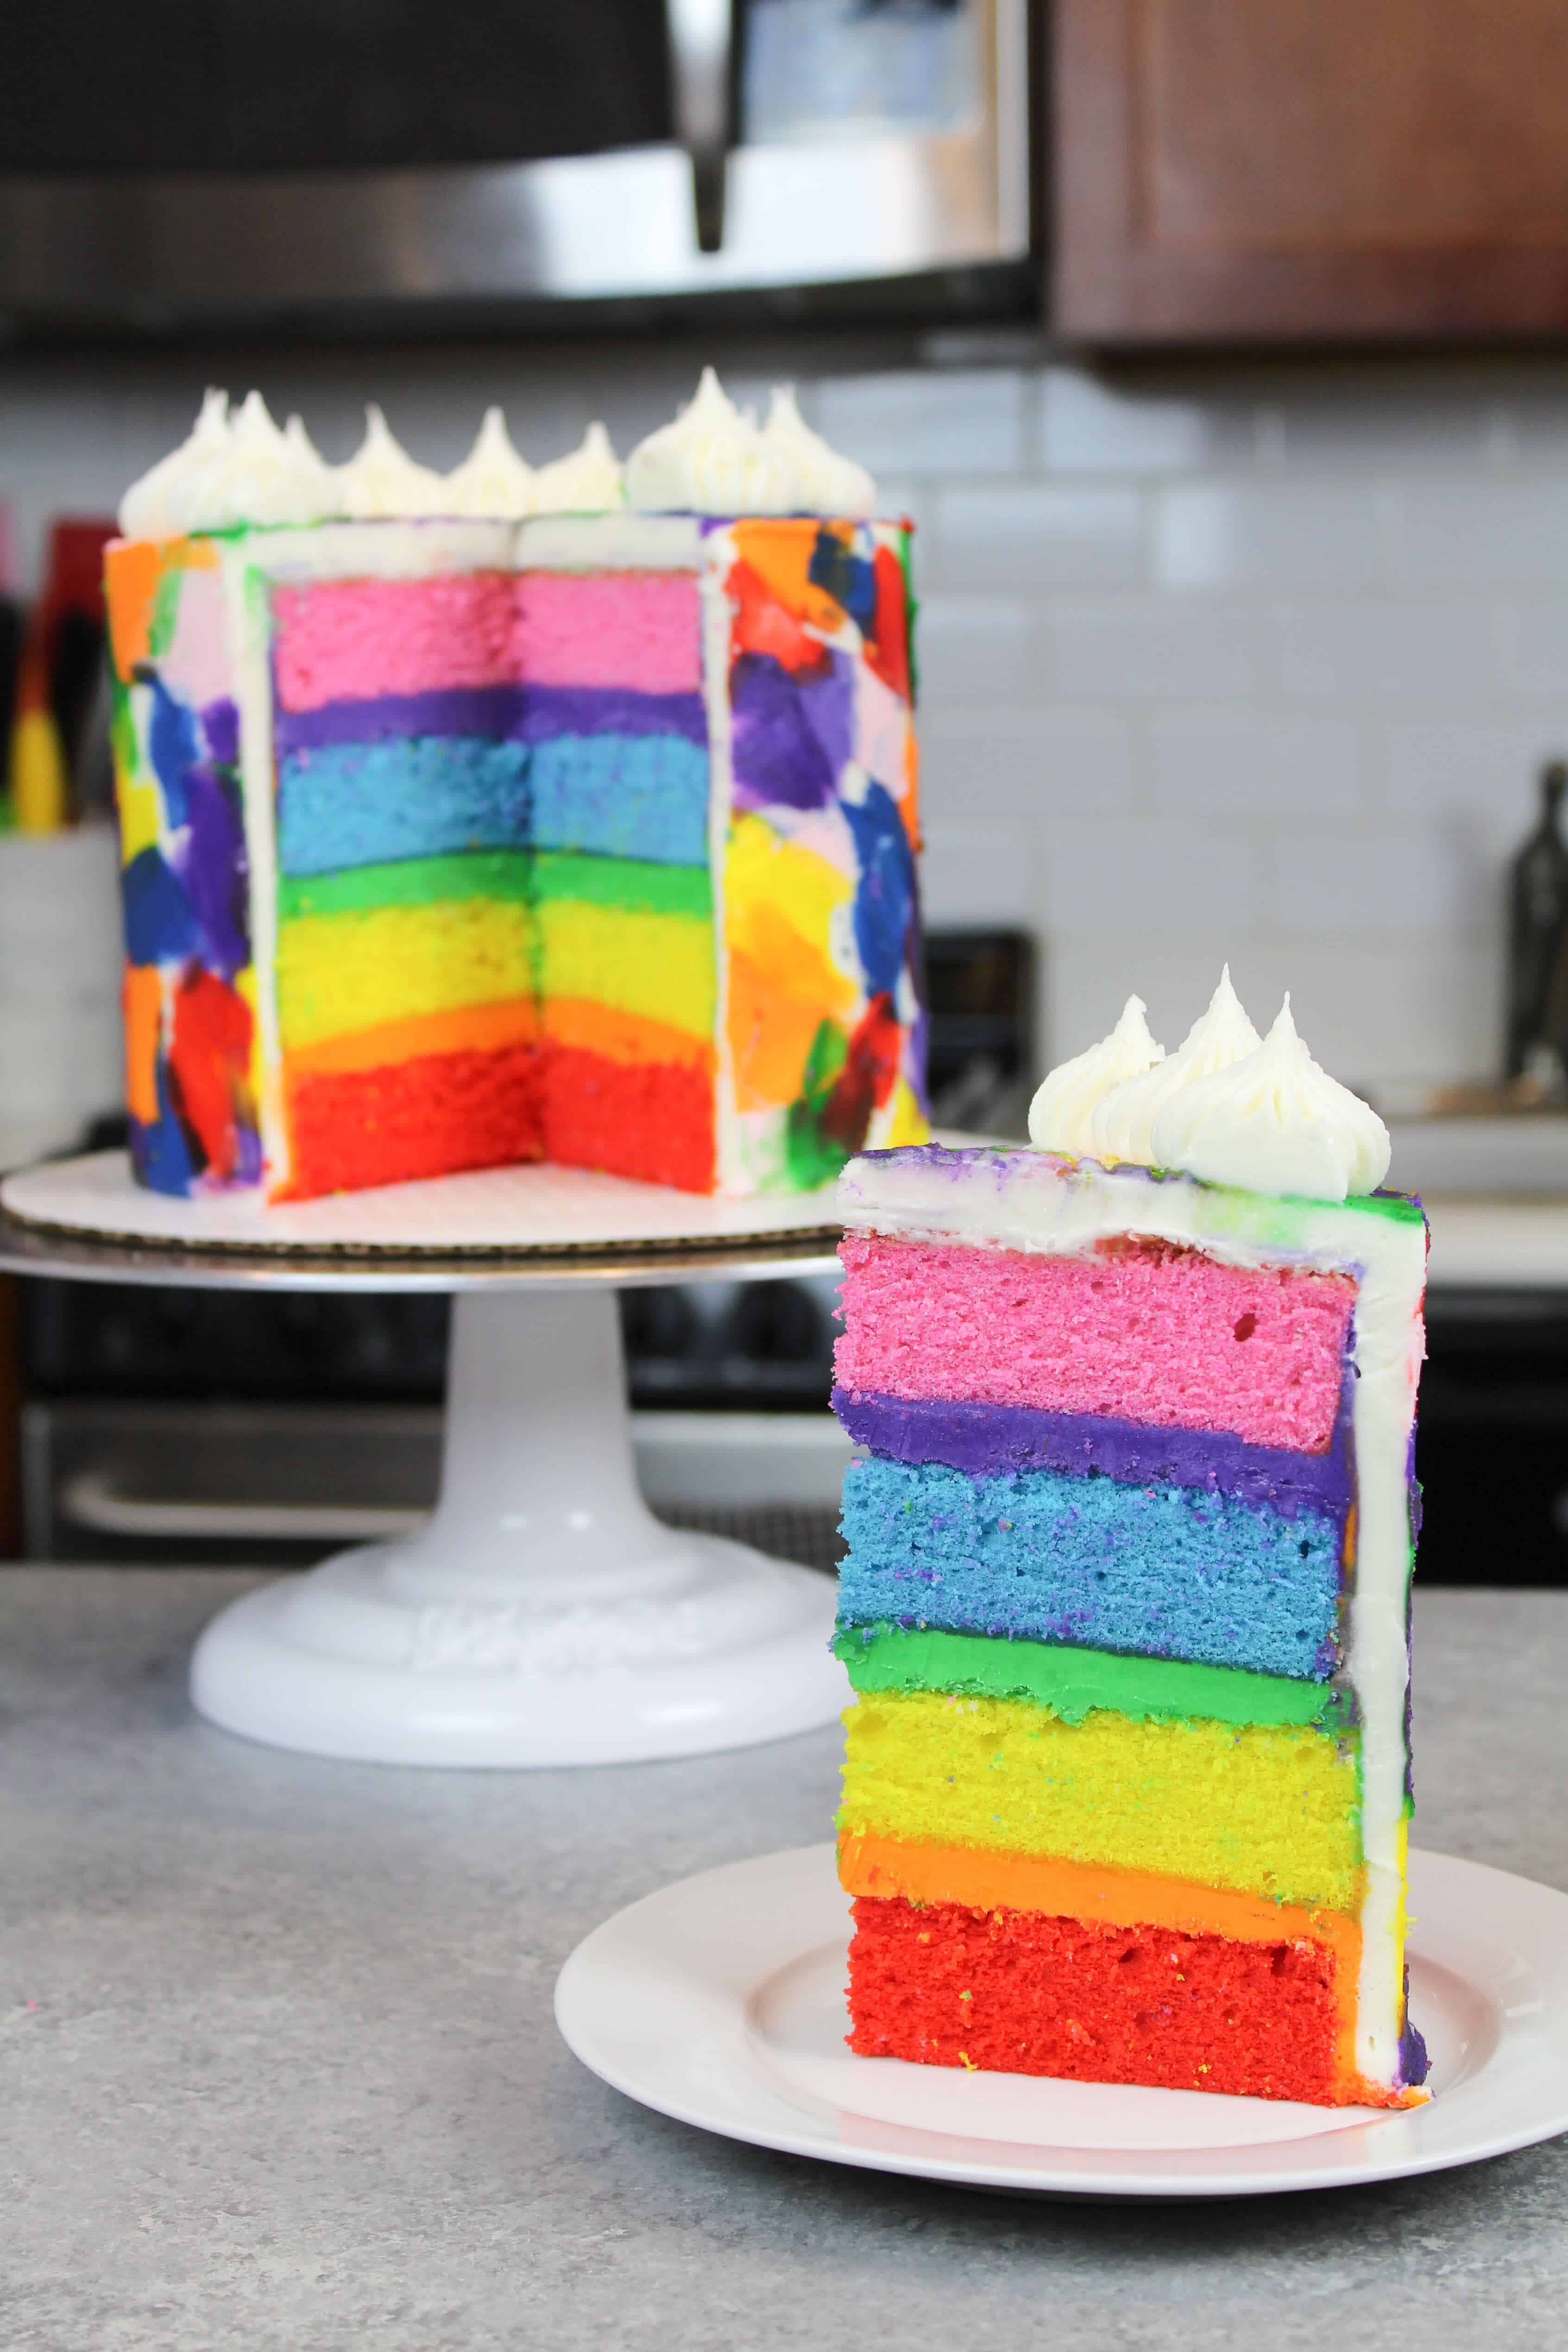
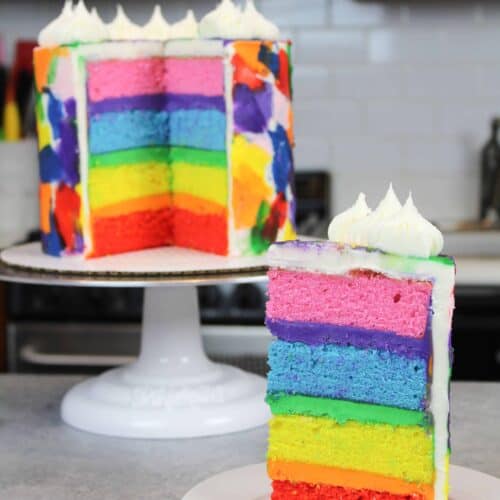
To mix things up, this rainbow layer cake creates the rainbow using both the cake layers AND the frosting!!
The Colors Of The Rainbow (and more)
While I’m fully aware of ROYGBV, I went a little wild and threw a pink cake layer on top of this rainbow cake.
My vanilla layer cake recipe makes four, seven-inch layers, and I didn’t want to waste any batter.
However, you could make three, eight-inch cake layers and not have a fourth cake layer if you really want to stick to colors of the visual spectrum.

It’s funny because whenever I make a cake I feel like I’m already bracing myself for negative comments from people.
Not so much on here (all of you are wonderful!), but more so on the videos of this cake that I’ll share on Instagram and YouTube.
“There’s no pink in the rainbow!” “UGH, haven’t you heard of ROYGBV?” “How did you mess up the rainbow?”
It’s just a part of my thought process now, especially when I’m blogging or editing videos. But you know what? I like the pink layer in this cake!!! And the world is just going to have to deal with that.

How Do You Make Such Vibrant Cake Layers and Frosting?
I used gel food coloring to color both my cake layers and my frosting in this rainbow cake recipe.
Liquid food coloring can work, too, but you won’t be able to get the same vibrant colors.
You also can throw off the consistency of the vanilla cake batter if you add too much liquid food coloring.
I highly recommend using gel food coloring. Gel food coloring is incredibly concentrated, so it allows you to use less. A couple of drops will create beautiful, bright colors.
Gel food coloring is also thicker and won’t change the consistency of the cake batter. Americolor gel food coloring is my favorite brand, and I order bottles of it on Amazon. I’m super particular, but most brands work pretty well.
In addition to recommending gel food coloring, I recommend getting gel food coloring that comes in a squirt bottle rather than a small tub. It’s much easier to use and a lot less messy.
I use large squirt bottles of gel food coloring, which are a much better deal per ounce. These bottles seem to last forever (even for me!), and I love not having to constantly order more tiny bottles.
However, I think I use gel food coloring more than the average home baker.
If you aren’t as into it or use it on a more one-off basis, you can also purchase smaller squirt bottles online, which come in both 0.75 oz. and 4.5 oz bottles.
Tips for Making the Best Rainbow Cake
- Properly measure your flour. Either spoon it into the cup measure and then level it with a knife or use a kitchen scale.
- Make sure your ingredients are at room temperature to help them mix together better.
- Don’t level your cake layers until they are completely cooled.
- Make sure your buttercream is the right consistency before frosting your cake! It will help give your cake proper structure and make it easier to decorate.
- If your cake layers turn out less than perfect, I recommend reading my cake troubleshooting guide to see where things might’ve gone awry.
Making This Four Layer Rainbow Cake in Advance and Storage Tips
You can make your cake layers in advance and freeze them. It breaks the process up and makes it more approachable.
Make your frosting ahead of time, too, or save any leftover frosting! It can be stored in an airtight container in the fridge for up to 2 weeks or in the freezer for up to a month. Be sure to give it a good stir once it thaws to get the consistency nice and smooth again.
A frosted cake can last in the fridge for up to a week or in the freezer for up to a month. The frosting locks in all the moisture, keeping the cake fresh and delicious!
If you cut into the cake and have leftovers, use any remaining frosting to cover the cut section to keep it moist and store it in the fridge for up to a week.
Share Your Creations With Me!
If you try this rainbow cake recipe, please tag me @chelsweets and use the #chelsweets so that I can see your amazing creations!
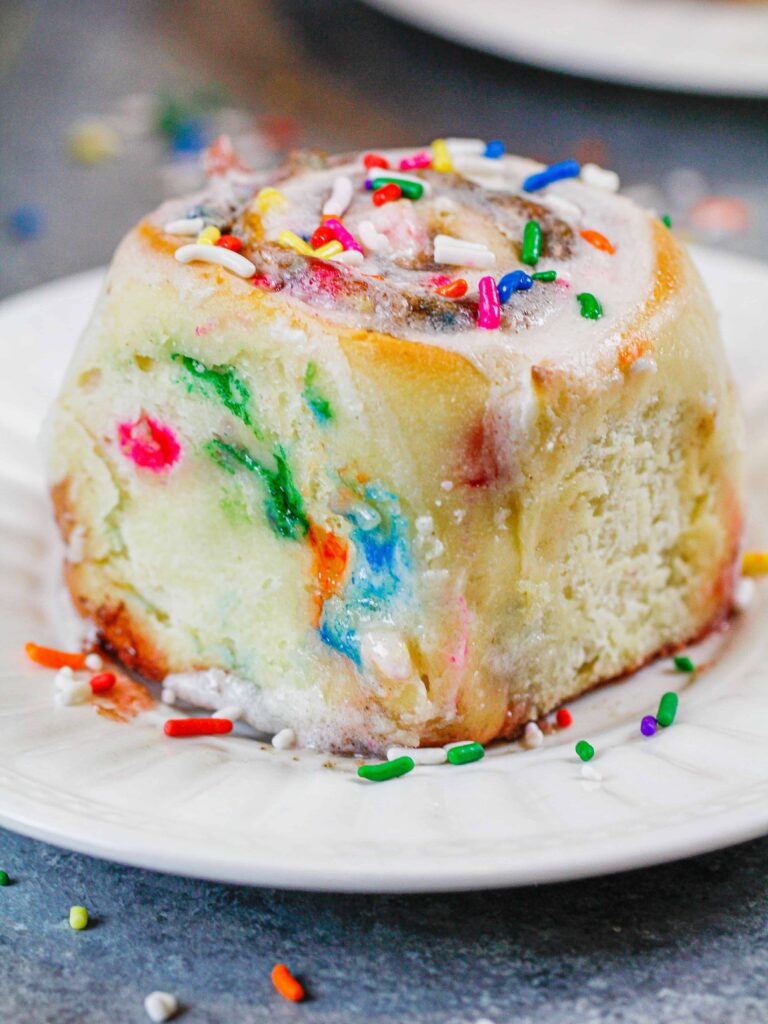
Other Recipes You Might Like:

Rainbow Cake Recipe
Ingredients
Rainbow Cake Layers
- 3 cups all-purpose flour 390g
- 3 cups granulated sugar 600g
- 2 1/2 tsp baking powder 10g
- 1 tsp fine salt 6g
- 1 cup unsalted butter, room temperature 226g – 2 sticks
- 1 Tbsp vanilla extract or vanilla bean paste 12g
- 1 cup carton egg whites or 7 large egg whites, room temperature 240g
- 1 1/2 cups buttermilk, room temperature 345g
- 1/8 cup vegetable or canola oil 28g
- Red, yellow, blue, and pink gel food coloring
Vanilla Buttercream Frosting
- 3 cups unsalted butter, room temperature 678g
- 11 cups powdered sugar 1375g
- 1 tsp fine salt 6g
- 1/3 cup heavy whipping cream, room temperature 75g
- 1 1/2 Tbsp vanilla extract or vanilla bean paste 18g
- Red, orange, yellow, green, blue, purple, and pink gel food coloring
Instructions
Rainbow Cake Layers
- Preheat the oven to 350°F. Line four, 7-inch round cake pans with parchment rounds and grease with a light spray of non-stick cooking spray.
- Mix together all dry ingredients (3 cups flour, 2 1/2 tsp baking powder, 3 cups sugar, and 1 tsp salt) in a stand mixer with a paddle with a few gentle pulses.
- Mix chunks of 1 cup room-temperature butter slowly into the dry mix on a low speed. Continue to mix until no large chunks of butter remain and the mixture becomes crumbly.
- Pour in 1 cup of egg whites and mix on low until just incorporated. Mix in the 1 1/2 cups of buttermilk in two installments on a low speed.
- Add in 1 Tbsp vanilla and 1/8 cup oil and mix at a low speed until fully incorporated. Scrape down the sides of the bowl with a spatula, then beat on low speed for about 15 seconds.
- Divide the batter evenly between four bowls (about 450 grams of batter per bowl). Create red, yellow, blue, and pink batter using a couple of drops of gel food coloring. Mix by hand with a spatula until the batter is evenly colored.
- Pour each color into one of the prepared cake pans.
- Bake for 34-37 minutes or until a toothpick comes out clean. Allow the pans to cool for 10 minutes, then run an offset spatula around the perimeter of the pan to separate the cake from the pan.
- Place cake layers into the freezer for 45 minutes to accelerate the cooling process. Once the layers are fully cooled, carefully flip the pans and remove the layers from the pans.
- Use a serrated knife to level the tops of the layers, and then frost as desired.
Vanilla Buttercream Frosting
- While the cake layers bake and cool, make the vanilla buttercream frosting.
- Beat 3 cups of unsalted butter on a medium speed for 30 seconds with a paddle attachment, until smooth. Slowly add in the 11 cups powdered sugar, 1 cup at a time. Alternate with small splashes of 1/3 cup cream.
- Once fully mixed, add in the 1 1/2 Tbsp vanilla and 1 tsp salt, and beat on low until the ingredients are fully incorporated and the desired consistency is reached.
- If the frosting is too thick, add in additional cream (1 teaspoon at a time). If the frosting is too thin, add in more powdered sugar (quarter of a cup at a time).
- To create the colorful buttercream used to fill the cake, place 1 cup of frosting into three separate bowls. Color them orange, green, and purple with a couple of drops of gel food coloring.
- Leave the rest of the buttercream white until the cake has been assembled.
Assembling This Rainbow Cake
- Stack and frost cake layers on a greaseproof cake board, using a dab of frosting to help stick the first cake layer to the board.
- Start with the red cake layer on the bottom. Top with a thick layer of orange buttercream. Leave about 1/4 of a cup of frosting in the bowl to decorate the sides of the cake later.
- Top with the yellow cake layer, then frost with the green buttercream, reserving a tiny bit of green buttercream.
- Next, add the blue cake layer and top with some purple buttercream (leaving a bit for the decoration later).
- Top the cake with the pink cake layer, placing it upside down to make it easier to frost (with the caramelization from the bottom of the pan facing upward).
- Apply a thin coat of frosting around the cake, to fully cover the cake layers. Smooth using a bench scraper, then chill the cake in the fridge (10 minutes) or freezer (5 minutes) until the frosting is firm to the touch.
- Add a second, thicker layer of frosting to the cake and smooth it using a bench scraper. Place the cake in the freezer to chill for 10-15 minutes or in the fridge for 30 minutes.
- Place about 1 1/2 cups of white buttercream into a piping bag fitted with an Ateco 869 frosting tip (a very large French tip)
- In four other small bowls, color about 1/2 cup of frosting to make red, yellow, blue, and pink buttercream.
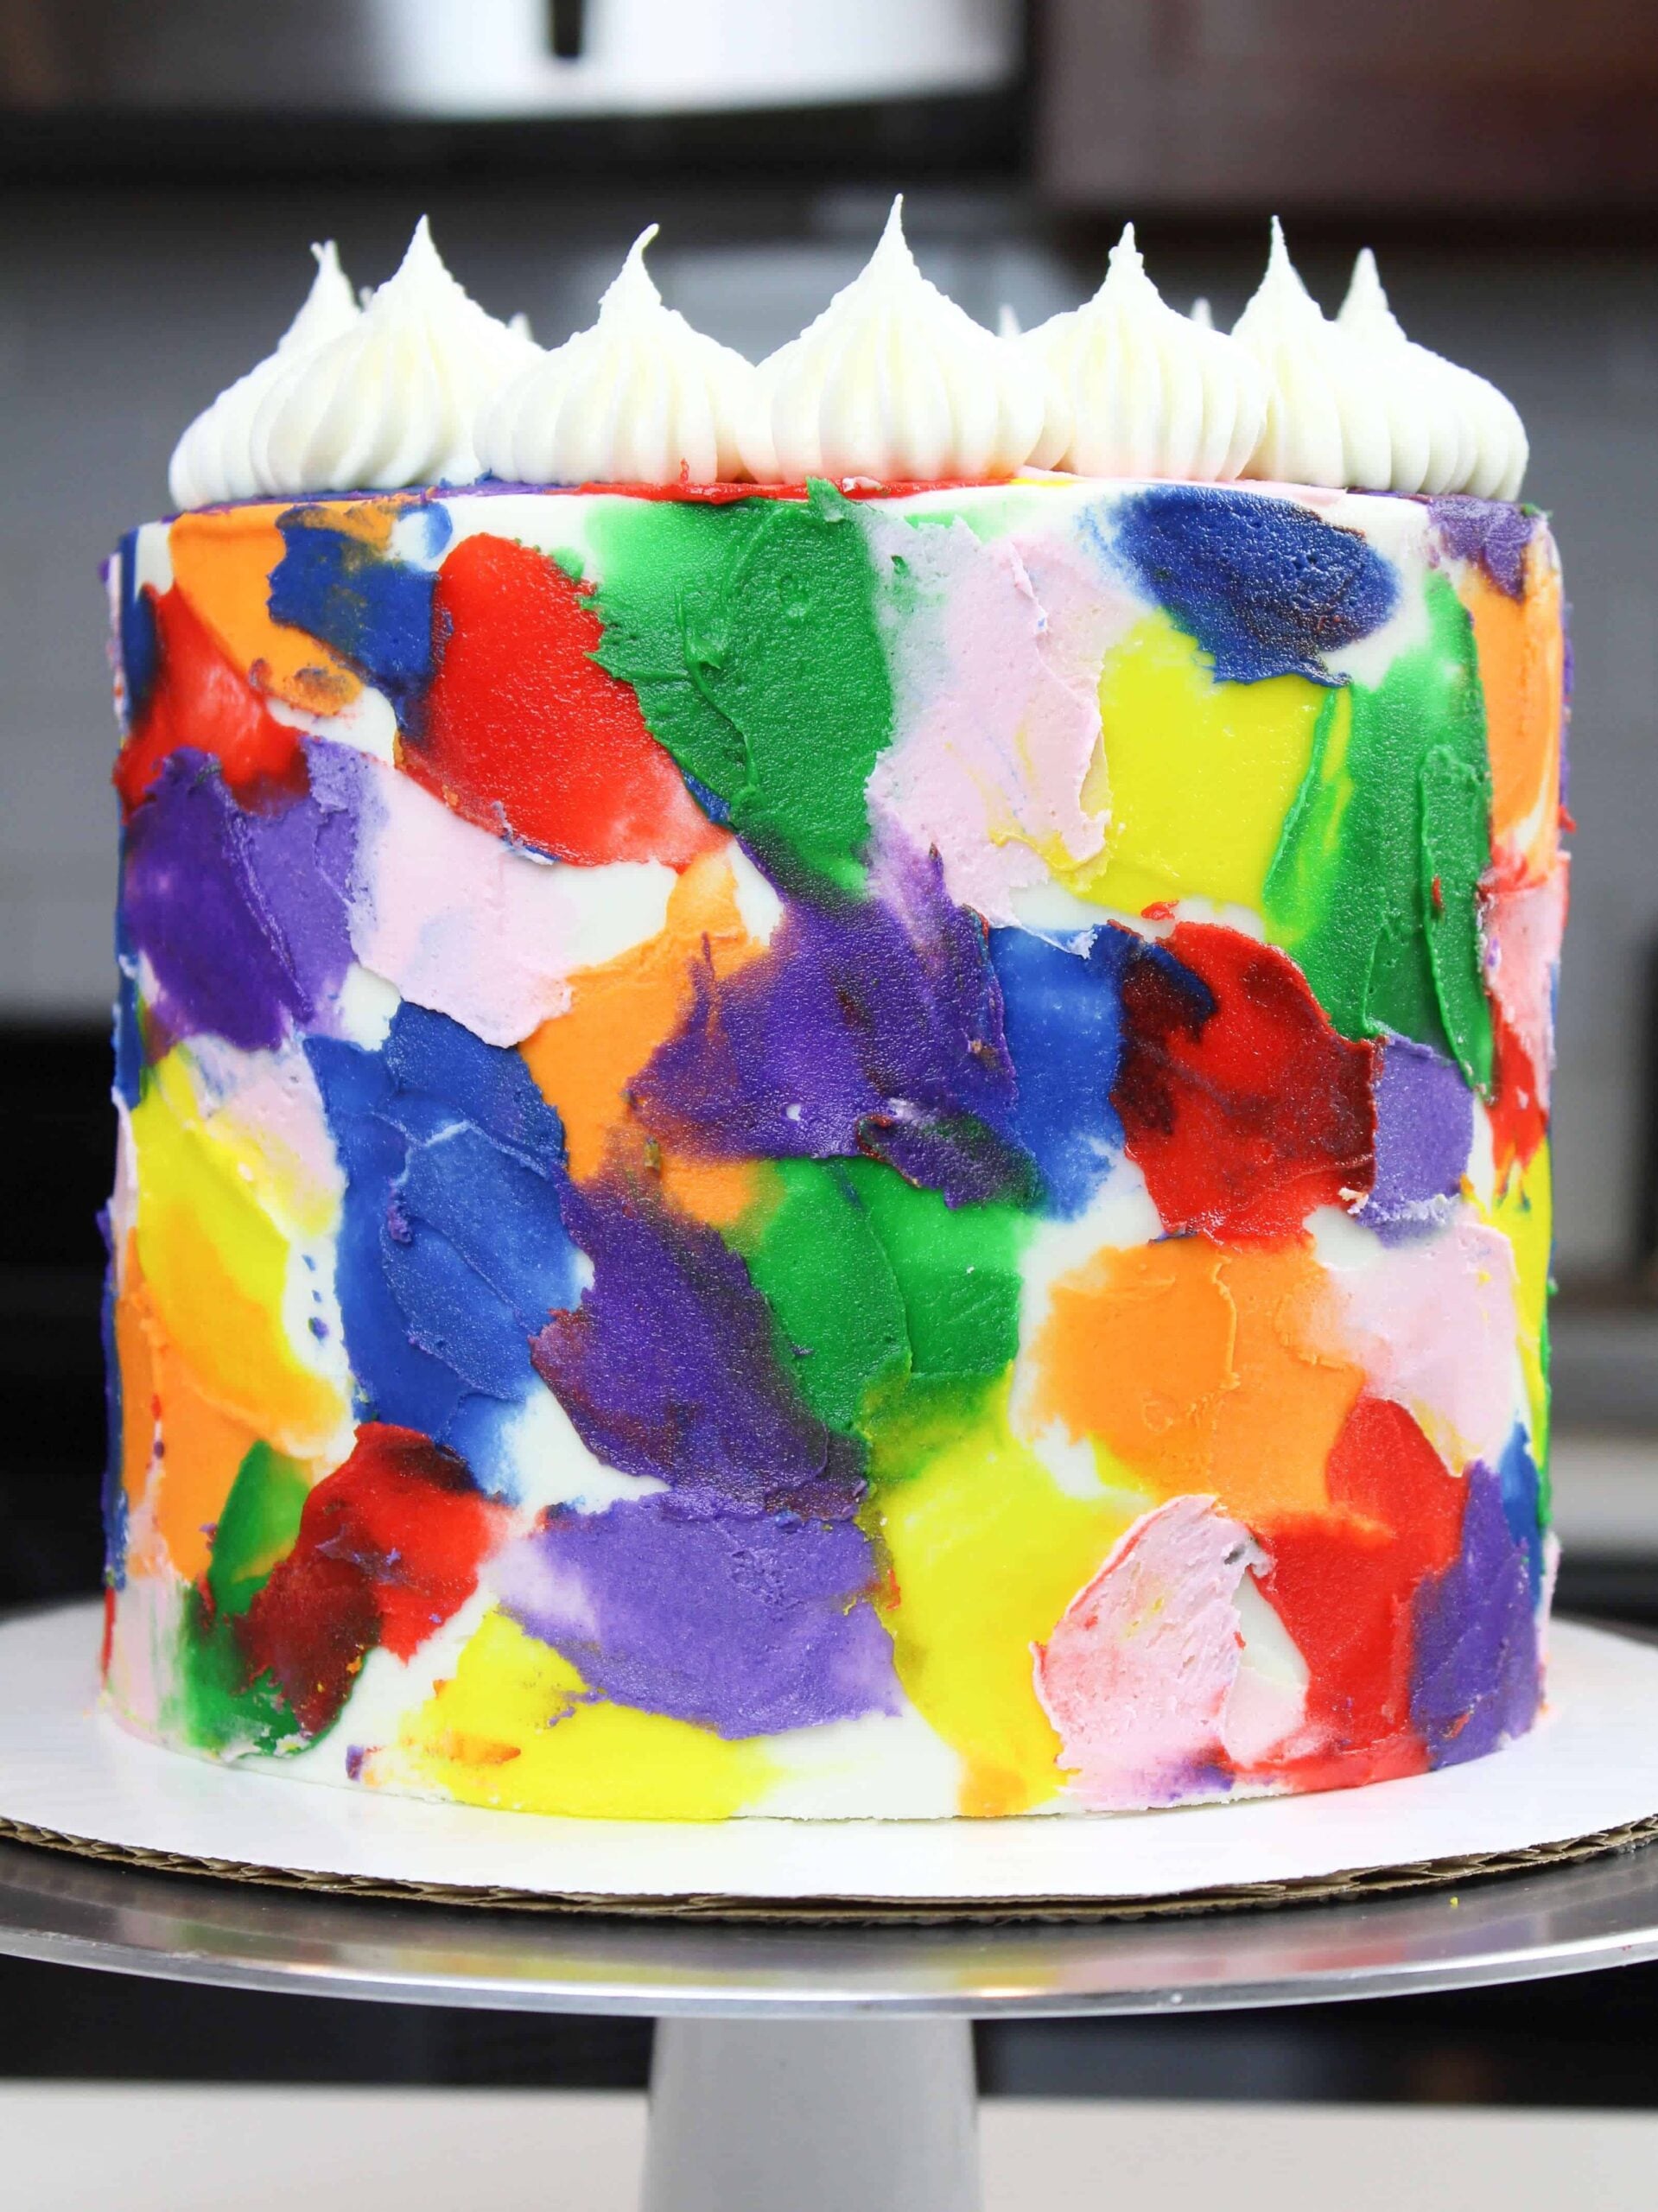
- Using a small offset spatula, spread dabs of each color of frosting around the chilled cake. Feel free to overlap and have fun with this step!
- Top the cake with a border of white buttercream frosting, and then cut it and enjoy!
Video
Notes
How Many People Does This Cake Feed?
If you make this cake with 4, 7-inch cake layers or 3, 8-inch cake layers, it will feed about 24 people. For more information on cake sizes and servings, check out my cake portion guide.Recipe Variations – Making This Cake in Different Sizes
One batch of this recipe makes about 10 cups of batter or about 1800 grams. If you plan to use four circular cake pans, add 450 grams of batter into each pan. If you want to make a tiered cake or a different-sized cake with this recipe, check out my cake portion guide to see how many batches of batter you'll need. This recipe can also be used to make a sheet cake! One batch will make a 1, 9 x13-inch cake layer that's about 1.5 inches tall once leveled. Bake for 45-55 mins at 350 F / 175 C, or until a toothpick inserted in the center comes out with a few moist crumbs. Bake time can vary a lot based on the type of pan you use, if you use heating cores, and your oven. I recommend using heating cores if you have them; they help sheet cake layers bake more evenly and quickly. For more details on how to convert this cake recipe and others into sheet cakes, check out my sheet cake guide. Last but not least, you can also make cupcakes using this recipe. Fill the liners 3/4 full and bake them at 350 F / 175 C for 19-21 minutes, or until a toothpick inserted in the center comes out with a few moist crumbs. Or, if you want to make just one batch of cupcakes, I highly recommend trying my vanilla cupcake recipe.Tips for Making the Best Rainbow Layer Cake
- Ingredients at room temperature mix together better! Set out any cold ingredients ahead of time.
- Properly measure the flour (spoon it into the cup measure, then level). Or better yet, use a kitchen scale to measure your dry ingredients.
- Use a scale to weigh your cake pans as you fill them. It will make your cake layers bake to the same height and bake more evenly.
- Make sure the buttercream is the right consistency. This will help give the cake proper structure and make it easier to decorate.
- Level the room temperature or thawed cake layers with a serrated knife to make them easier to stack.
- Chill your cake layers in the freezer for about 20 minutes before assembling the cake. It makes it so much easier to stack and frost them!
- If your cake layers turn out less than perfect, read my cake troubleshooting guide to see where things might've gone awry.
I love the pink layer!
haha aw thanks Rose!! I love it too 🙂
Hi,
I made a cake similar to your rainbow cake for my nieces birthday Saturday.
I was wondering if you put the cake in the fridg after you put frosting in between the layers and assemble it before you put the final coat of frosting on?
I hope my cake comes out as nice as yours.
Laurel
I love your IG and that you are so brave and took the leap to follow your passion. I have noticed some cakes you use eggs, and some egg whites and buttermilk? What prompts that decision? Is it about moisture? the color consistency? I enjoy home baking, and I like to know the all the reasons! Thanks!!!!
Thank you Angie!! For me, it comes down to the texture and color of the batter! In general I like egg whites with buttermilk best, but sometimes whole eggs make more sense, or I don’t want to use buttermilk because it can overpower more subtle flavors like matcha or rose water. It really comes down to preference though, and I try to make my recipes in a way that highlights the key flavor / star ingredient, and tastes best overall <3
Hello, what is the cook time if making this in 3, 8″ layers?
Hi Mary! 3, 8-inch cake layers should take 35-38 minutes to bake through!
Hi what is the red colour actuslly called, I used it for my cake and it hasn’t turned out anywhere near as vibrant as yours appears. Thankyou
The red gel food coloring I use is made by americolor, and the shade is super red (here’s the link, I get it on amazon: https://amzn.to/2UENLuA)! What brand of food coloring are you using??
What cake pans do you use? The lighter colored Fat Daddio’s or just any pan? I’m using dark heavy (i think they are cuisinart brand) pans and my cakes come out too dark on the sides and bottom. Help!!
Hi Sara,
I do use the lighter colored fat daddio’s pans (here’s the link to the exact ones I use: https://amzn.to/2U7QXzd). Dark pans can definitely impact the way your cake layers bake and caramelize!! I love the pans I use, and think they help my cake layers bake up evenly. You can also try using baking strips to help minimize the browning around the sides of you cake layers. I hope that helps, happy baking!
Hi Chelsea,
Thank you very much for your recipe. It’s very well written, and the metric equivalents are SO useful. I had tried another recipe for a rainbow cake and it was a disaster. After that I spent a lot of time looking for a recipe that inspired confidence, and I’m glad I found yours. Now we have a very happy little 8yo. Thank you again!
Hi Peter,
Np, so happy you found them useful 🙂 Happy baking!!
Hello! How many 6 inch layers would this recipe make?
Hi Trip,
It depends on how thick you want the layers to be! It can be used to make four to six 6 inch layers. Hope that makes sense!! <3
Hello! I intend to make this cake for my daughters birthday this weekend. Could I make it a day in advance? Would I need to keep it in the fridge overnight?
All the best
Hi Elena,
You totally can! A frosted cake can stay good in the fridge for up to a week! As long as the frosting is completely covering the cake layers, it should lock in all the moisture, and the cake should stay nice and moist 🙂
I let cakes sit in the fridge overnight, or for a few days all the time! I usually leave my cakes just open in the fridge without a covering! It should be fine as long as you don’t have anything fragrant in your fridge (like fish or onions).
Hi Chelsea,
I tried making your rainbow layer cake. Absolutely love this recipe and appreciate the detailed instructions My cake layers didn’t come out as fluffy as yours, do you think I just need to mix it for longer prior to baking?
Also, I used the Americolor food coloring you recommended and my frosting doesn’t seem as vibrant as yours. Do you mix the colors at all to make it more vibrant?
Thank you!!
Hi Tania,
Sometimes when people make colored batter like this, the batter gets overmixed as they mix in the food coloring, which can lead to dense cake layers. I’d actually suggest trying to mix the batter less! you can try adding a bit more food coloring next time to make the frosting brighter, or make the frosting a couple days in advance. As the frosting sits, the color intensifies. Hope that helps, happy baking!
Hi Chelsweets,
Would this work with Swiss meringue buttercream? Buttercream always seems to be so sweet. thanks
Would this work well with a whipped frosting? I am wanting to do 6″ smash cake size also. Don’t know how much I would need to cut down the recipe.
Hi, can I use plain flour in the recipe and just normal egg whites?
Hi I was wondering if I decide to leave out the pink should I still put the white frosting on top of the purple?
Hi,
How much would I have to scale up the recipe if I want to use 9″ pans? would it would work If I made a batch and a half for 4- 9″ pans?
This Rainbow cake looks beautiful and seems to be tasty. Thanks for the awesome recipe. To know more about Rainbow cake visit us at https://www.carlosbakery.com/
Hello Chelsea,
Can I replace the buttercream frosting with cream cheese frosting and still obtain the same result?
Thank you!
Hi Marco,
You can totally replace the buttercream with cream cheese frosting in this recipe as long as it’s a cream cheese buttercream like this: https://chelsweets.com/the-best-cream-cheese-frosting/
The key thing is that the frosting is stiff enough to keep the cake layers in place! Some cream cheese frostings are thin and have a super high ratio of cream cheese to butter (or no butter at all), which make it harder to frost onto a cake. As long as there are least equal parts cream cheese and butter (or preferably more butter than cream cheese) it should work. Hope that helps, happy baking!
It Was So Good Baking! 😀
Hi Roman,
Yay! So happy to hear that, thank you for sharing!! 🙂
How thick would you say your layers are? 1 inch?
Hi Kym,
Great question! These cake layers are about 1 inch tall once they’re leveled. Hope that helps, happy baking!
I found the cake a tad bit sweet for my taste – can i add more salt to reduce the sweetness – please advise, thanks.
Hi Marion,
Great question! You can add a 1/2 tsp more salt to balance out the sweetness or you can also use a less sweet frosting! I love my hybrid frosting, it’s kind of like a mix between swiss meringue buttercream and American buttercream! Here’s the link: https://chelsweets.com/not-too-sweet-buttercream-frosting/
Hope that helps, happy baking!
@Chelsweets, thank you so much for your reply and suggestions, will definitely try out both options
Of course! I’m always here to help 🙂
Hi Chelsey, I’d really love to adapt this recipe to use less sugar. Have you ever tried it with less? Do you think I could reduce it by one third to 400g without it affecting the outcome too much? I’m scared to experiment in case it ends up a big fail but 600g is so much sugar! Thanks for your advice 🙂
Hi Pippa,
Great question! Sadly the texture of the cake layers is a lot less tender if you decrease the amount of sugar. I don’t recommend it! If you really want to use less sugar, you could use 500g, but even with that it won’t be quite as soft. Hope that helps, happy baking!