
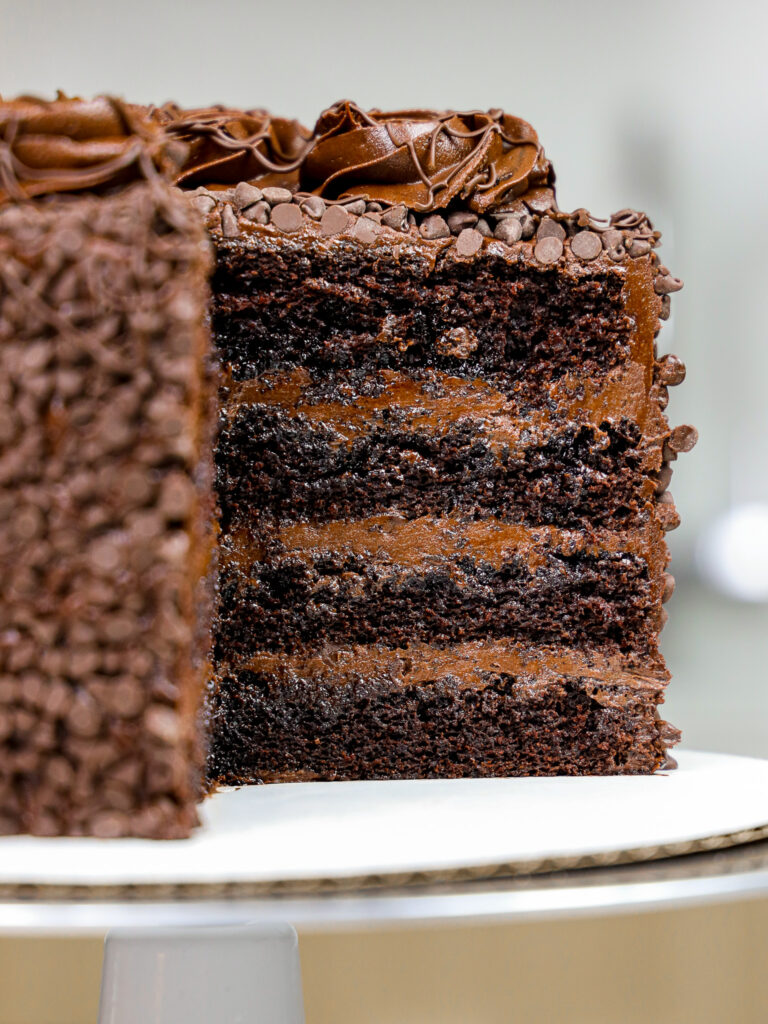
Tuxedo Cake
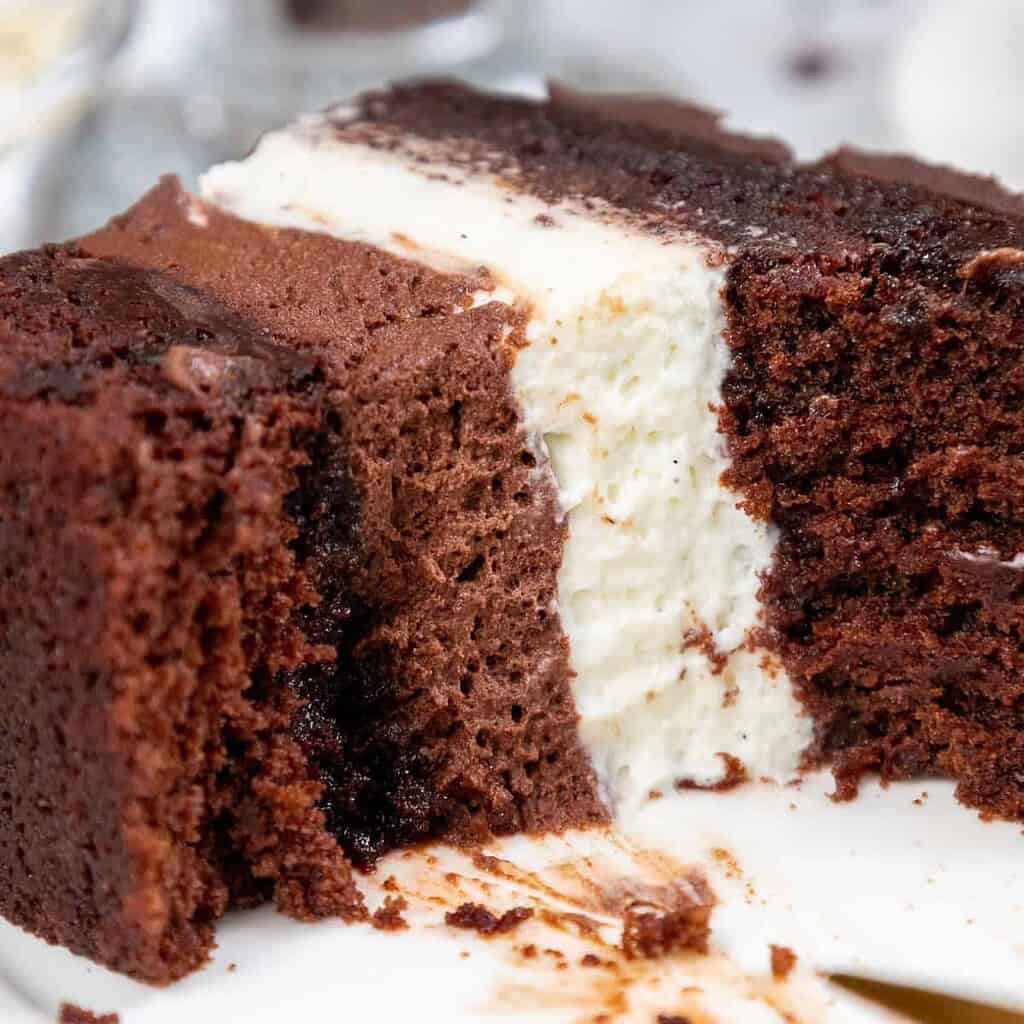
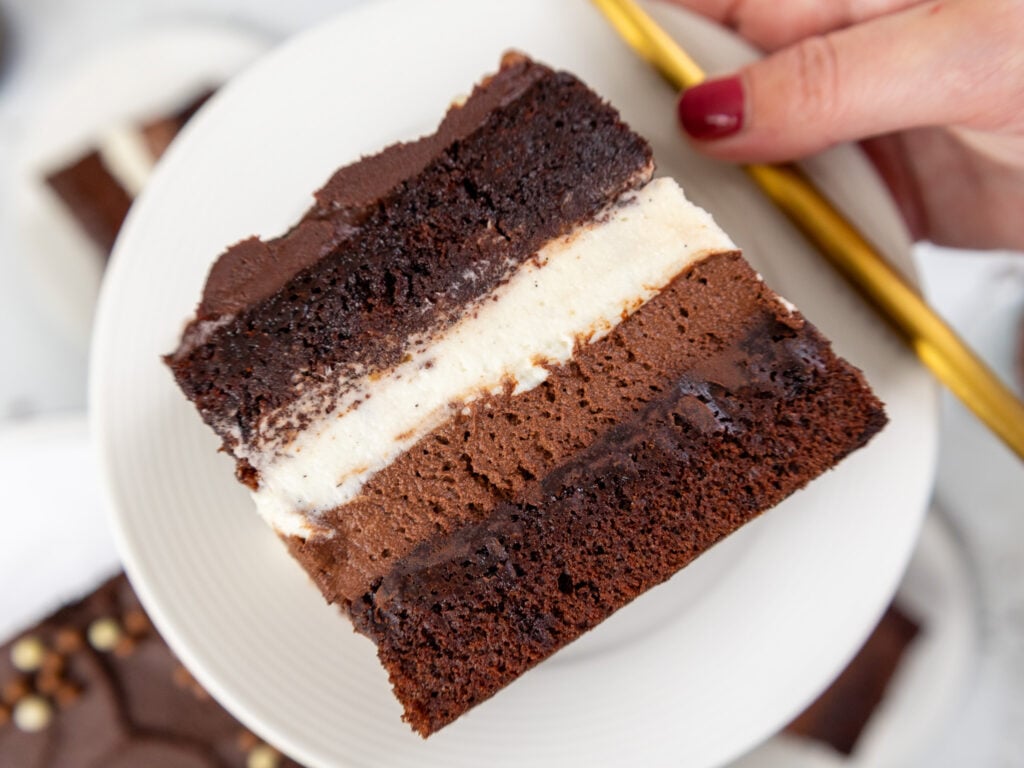
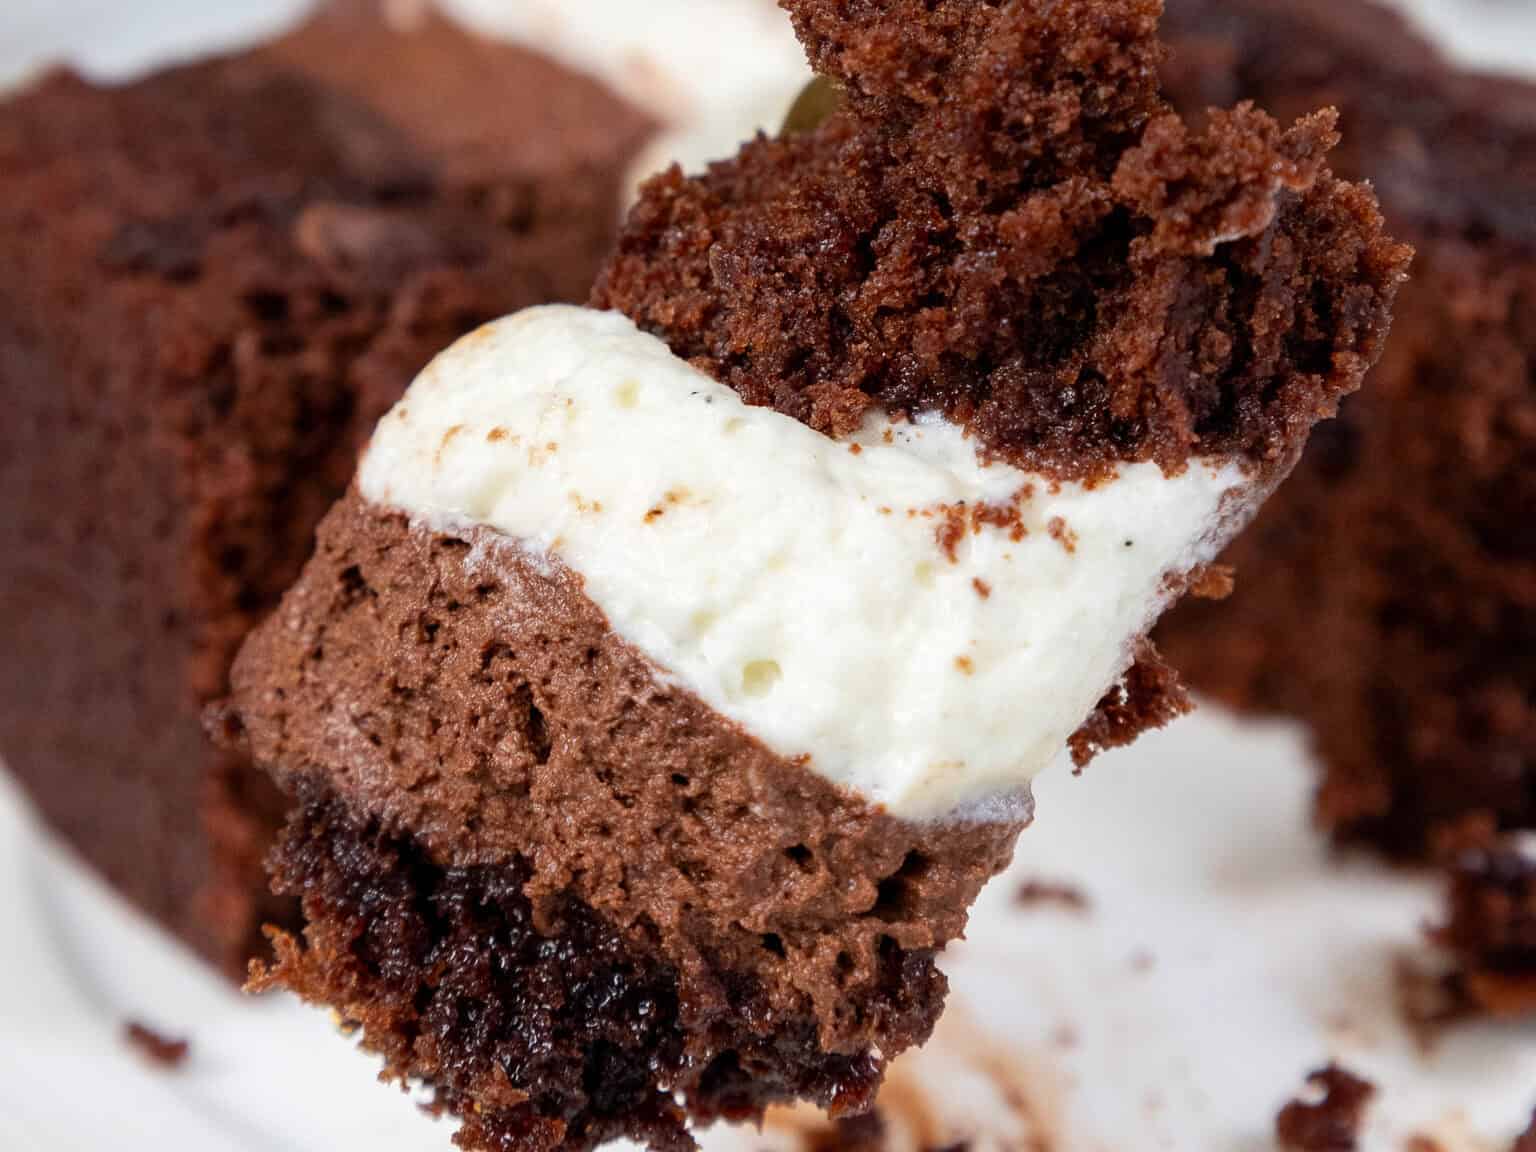
This tuxedo cake is my from-scratch take on the Costco tuxedo cake. It’s made with dense, fudgy chocolate cake layered with fluffy dark + white chocolate mousse.
It’s ultra-decadent but totally doable at home, with a rich chocolate ganache topping and an optional chocolate simple syrup for extra moisture.
This Recipe At a Glance
- Flavor: Deep chocolate with creamy dark + white chocolate mousse
- Texture: Dense/fudgy layers + light mousse filling
- Skill level: Intermediate (I walk you through each step)
- Perfect for: Birthdays, holidays, and Costco cake fans
- Makes: One 2-layer cake (9×13 cut in half or 2×9-inch layers) + mousse + ganache
- Time note: Needs chill time (mousse sets best after 2+ hours)
What is a Tuxedo Cake?
If you look up what a tuxedo cake is online, you’ll find a few different answers. While most involve a decadent chocolate cake base and white and chocolate ganache, that’s where the similarities end.
Costco’s tuxedo cake has become a fan favorite, and I think it’s the best example of what a classic tuxedo cake should be.
Costco adds brownie bits. This version skips them, but you can add 1/2–3/4 cup brownie bits or crushed Oreos between the mousse layers.
How to Make This Chocolate Tuxedo Mousse Cake
To make sure your chocolate tuxedo cake turns out as amazing as possible, let’s walk through each step together! I’ve also included a video tutorial of the process below.
Step 1: Make the White and Dark Chocolate Mousse
Make the white and dark chocolate mousse first, so it has time to chill and firm up.
Place a large mixing bowl and hand mixer beaters or the bowl of a stand mixer and whisk attachment in the freezer. This makes it easier and quicker to whip up the whipped cream for the mousse.
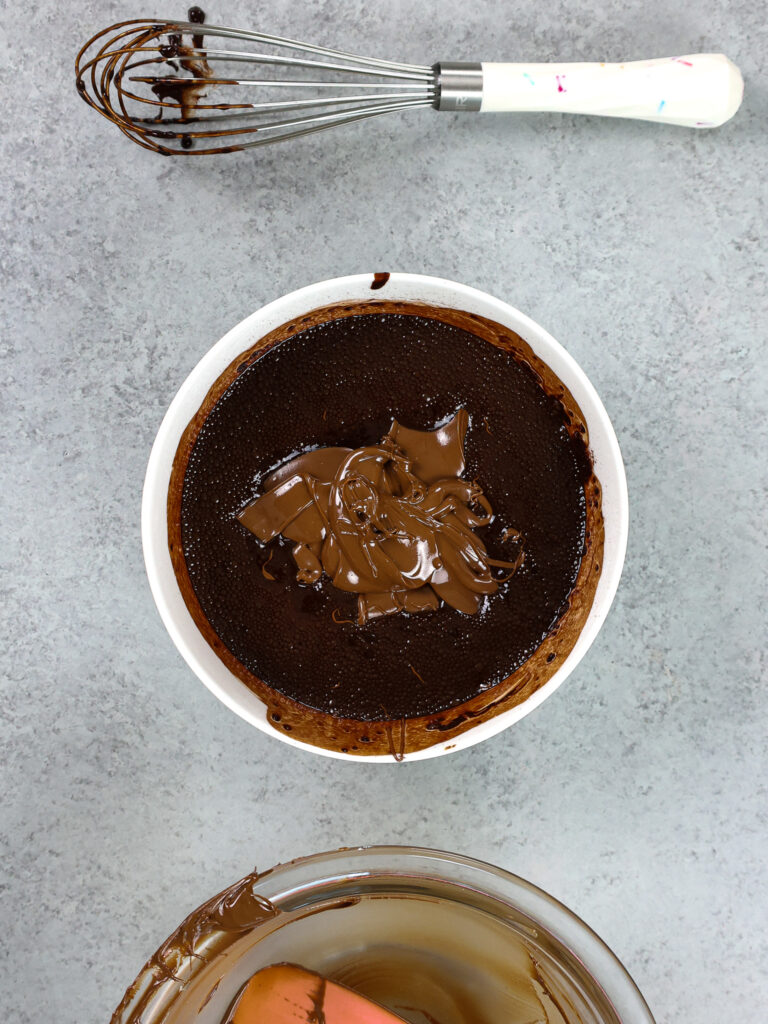
Melt the chocolate chips by placing them in a medium-sized, heat-proof bowl. Heat in 20 to 30-second increments in the microwave, stirring after each interval until the chocolate is completely melted and smooth.
In a small bowl, whisk together the warm water and cocoa powder. Pour into the melted chocolate and whisk together until smooth. The mixture should be somewhat thick. Set aside.
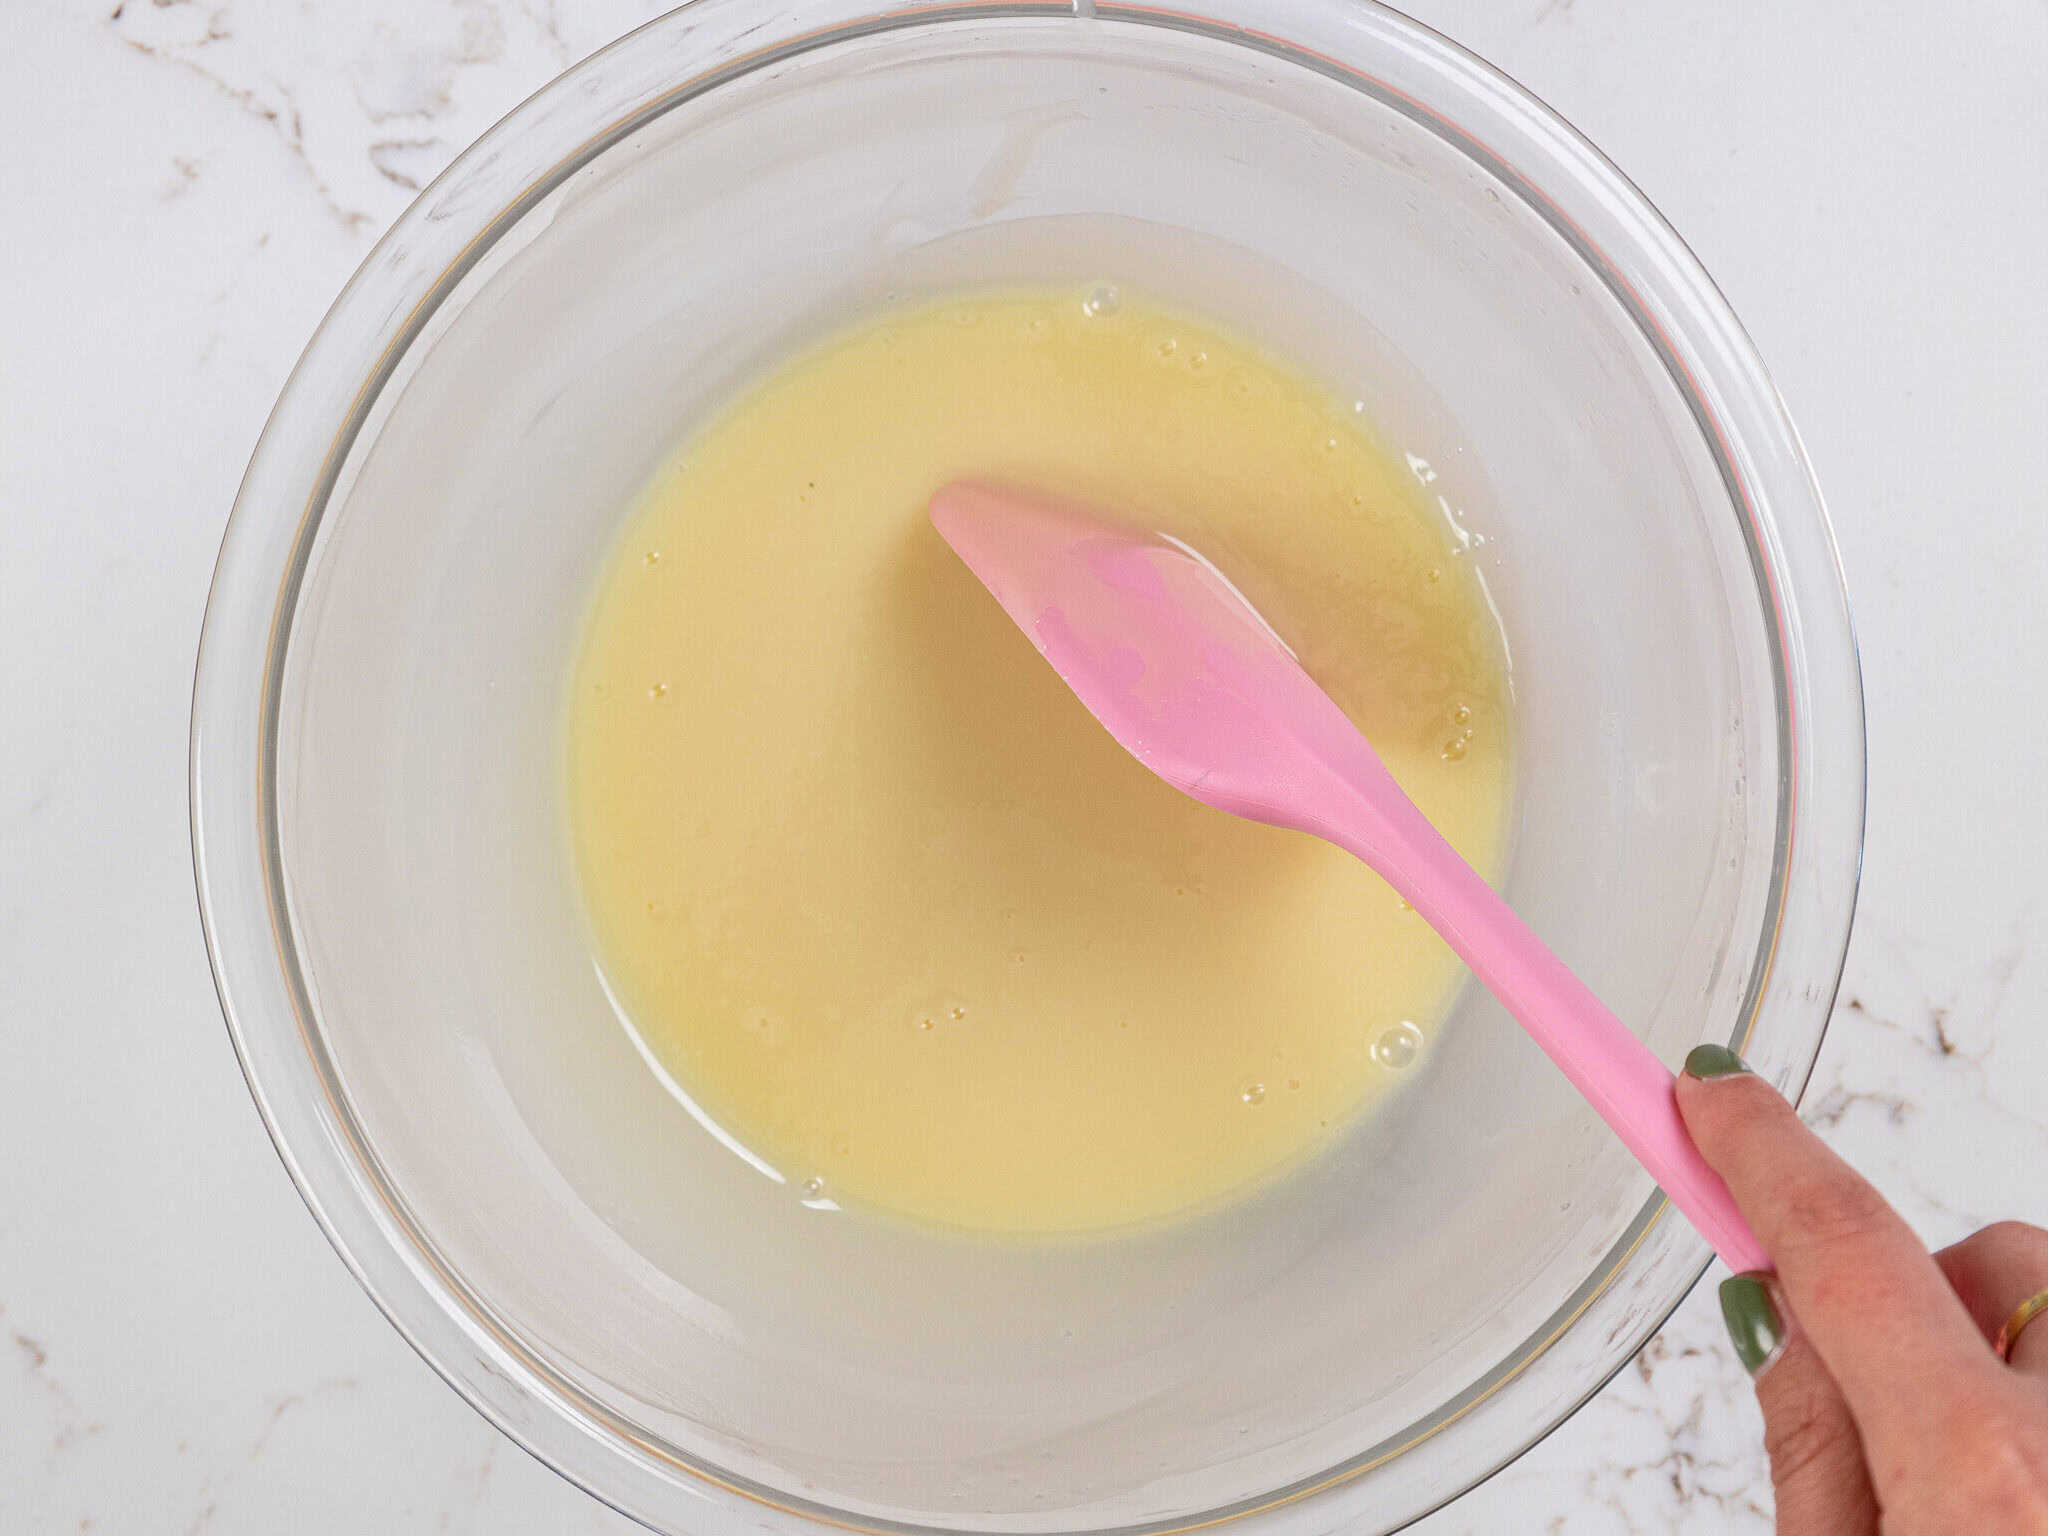
Then add the white chocolate chips and heavy cream in a medium-sized, heat-proof bowl. Heat for 45-60 seconds in the microwave, then let the mixture sit for a minute.
Stir until combined with a rubber spatula. The white chocolate should be completely melted, and the mixture should be smooth. Set aside.
Add the heavy cream, powdered sugar, vanilla extract, and a pinch of fine salt in a large bowl or the bowl of a stand mixer fitted with a whisk attachment.
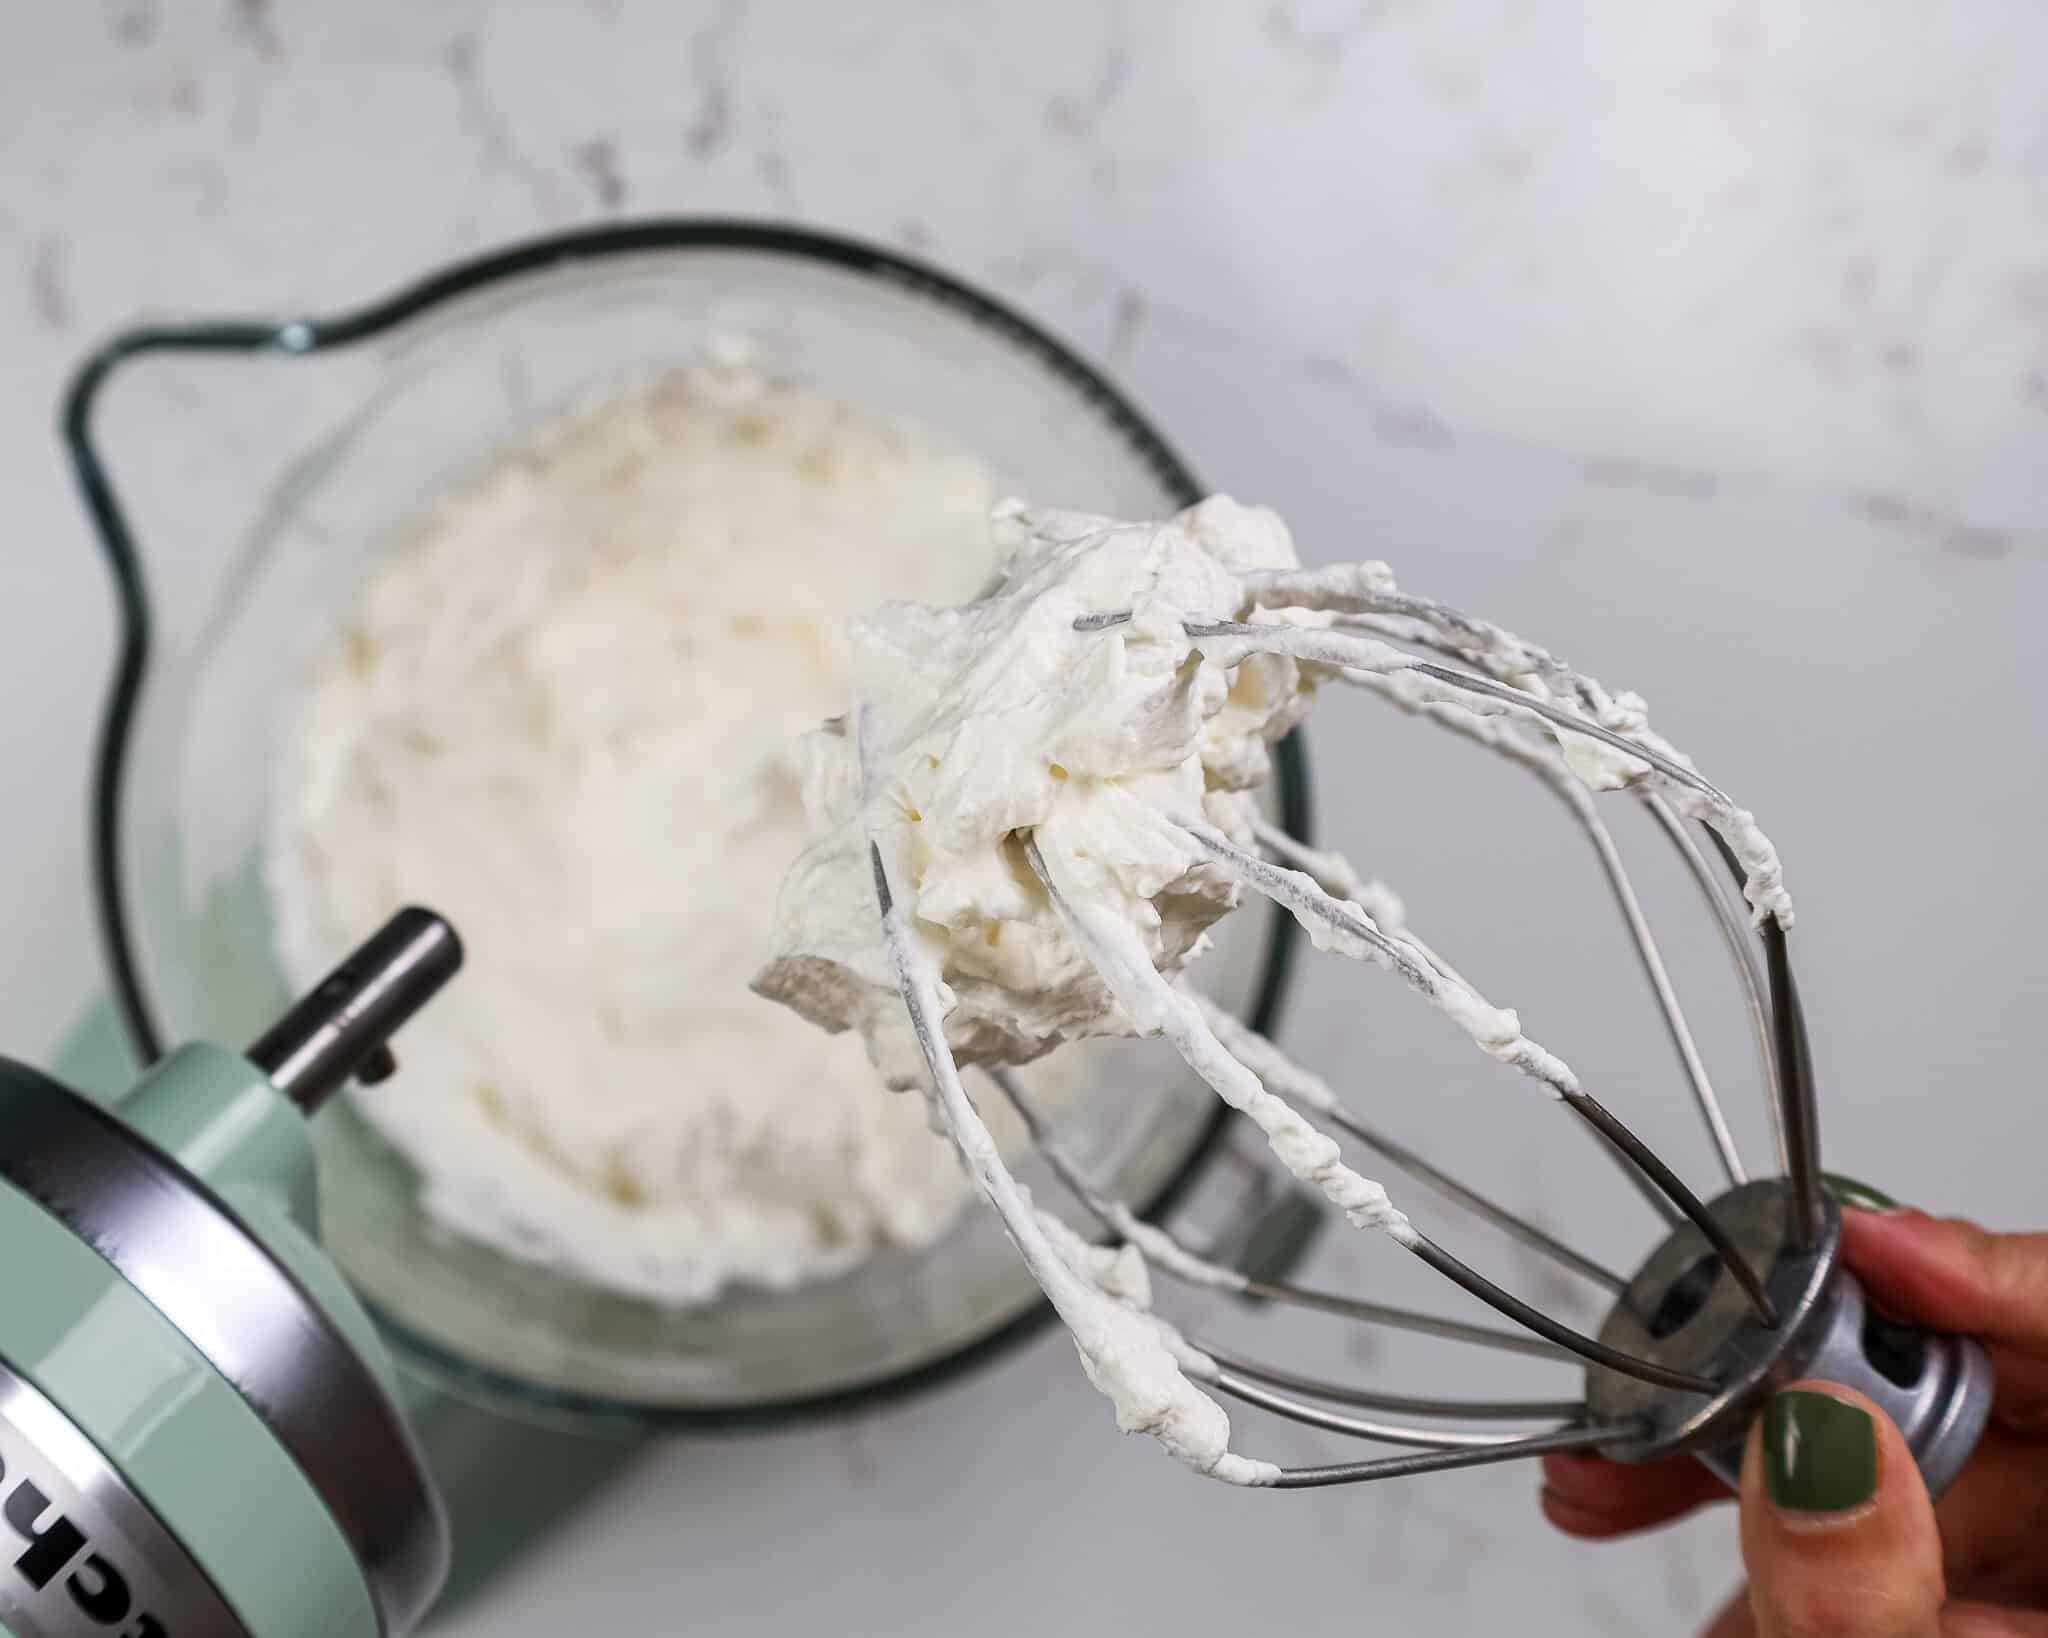
Mix on medium-high speed until the whipped cream starts to gather in the whisk attachment and you can see texture around the edges of the bowl.
At this stage, the whipped cream should be thick and able to keep its shape. This usually takes about 2-3 minutes in my stand mixer.
Scoop half of the whipped cream into a separate bowl, and mix in the chocolate/cocoa/water mixture using a rubber spatula.
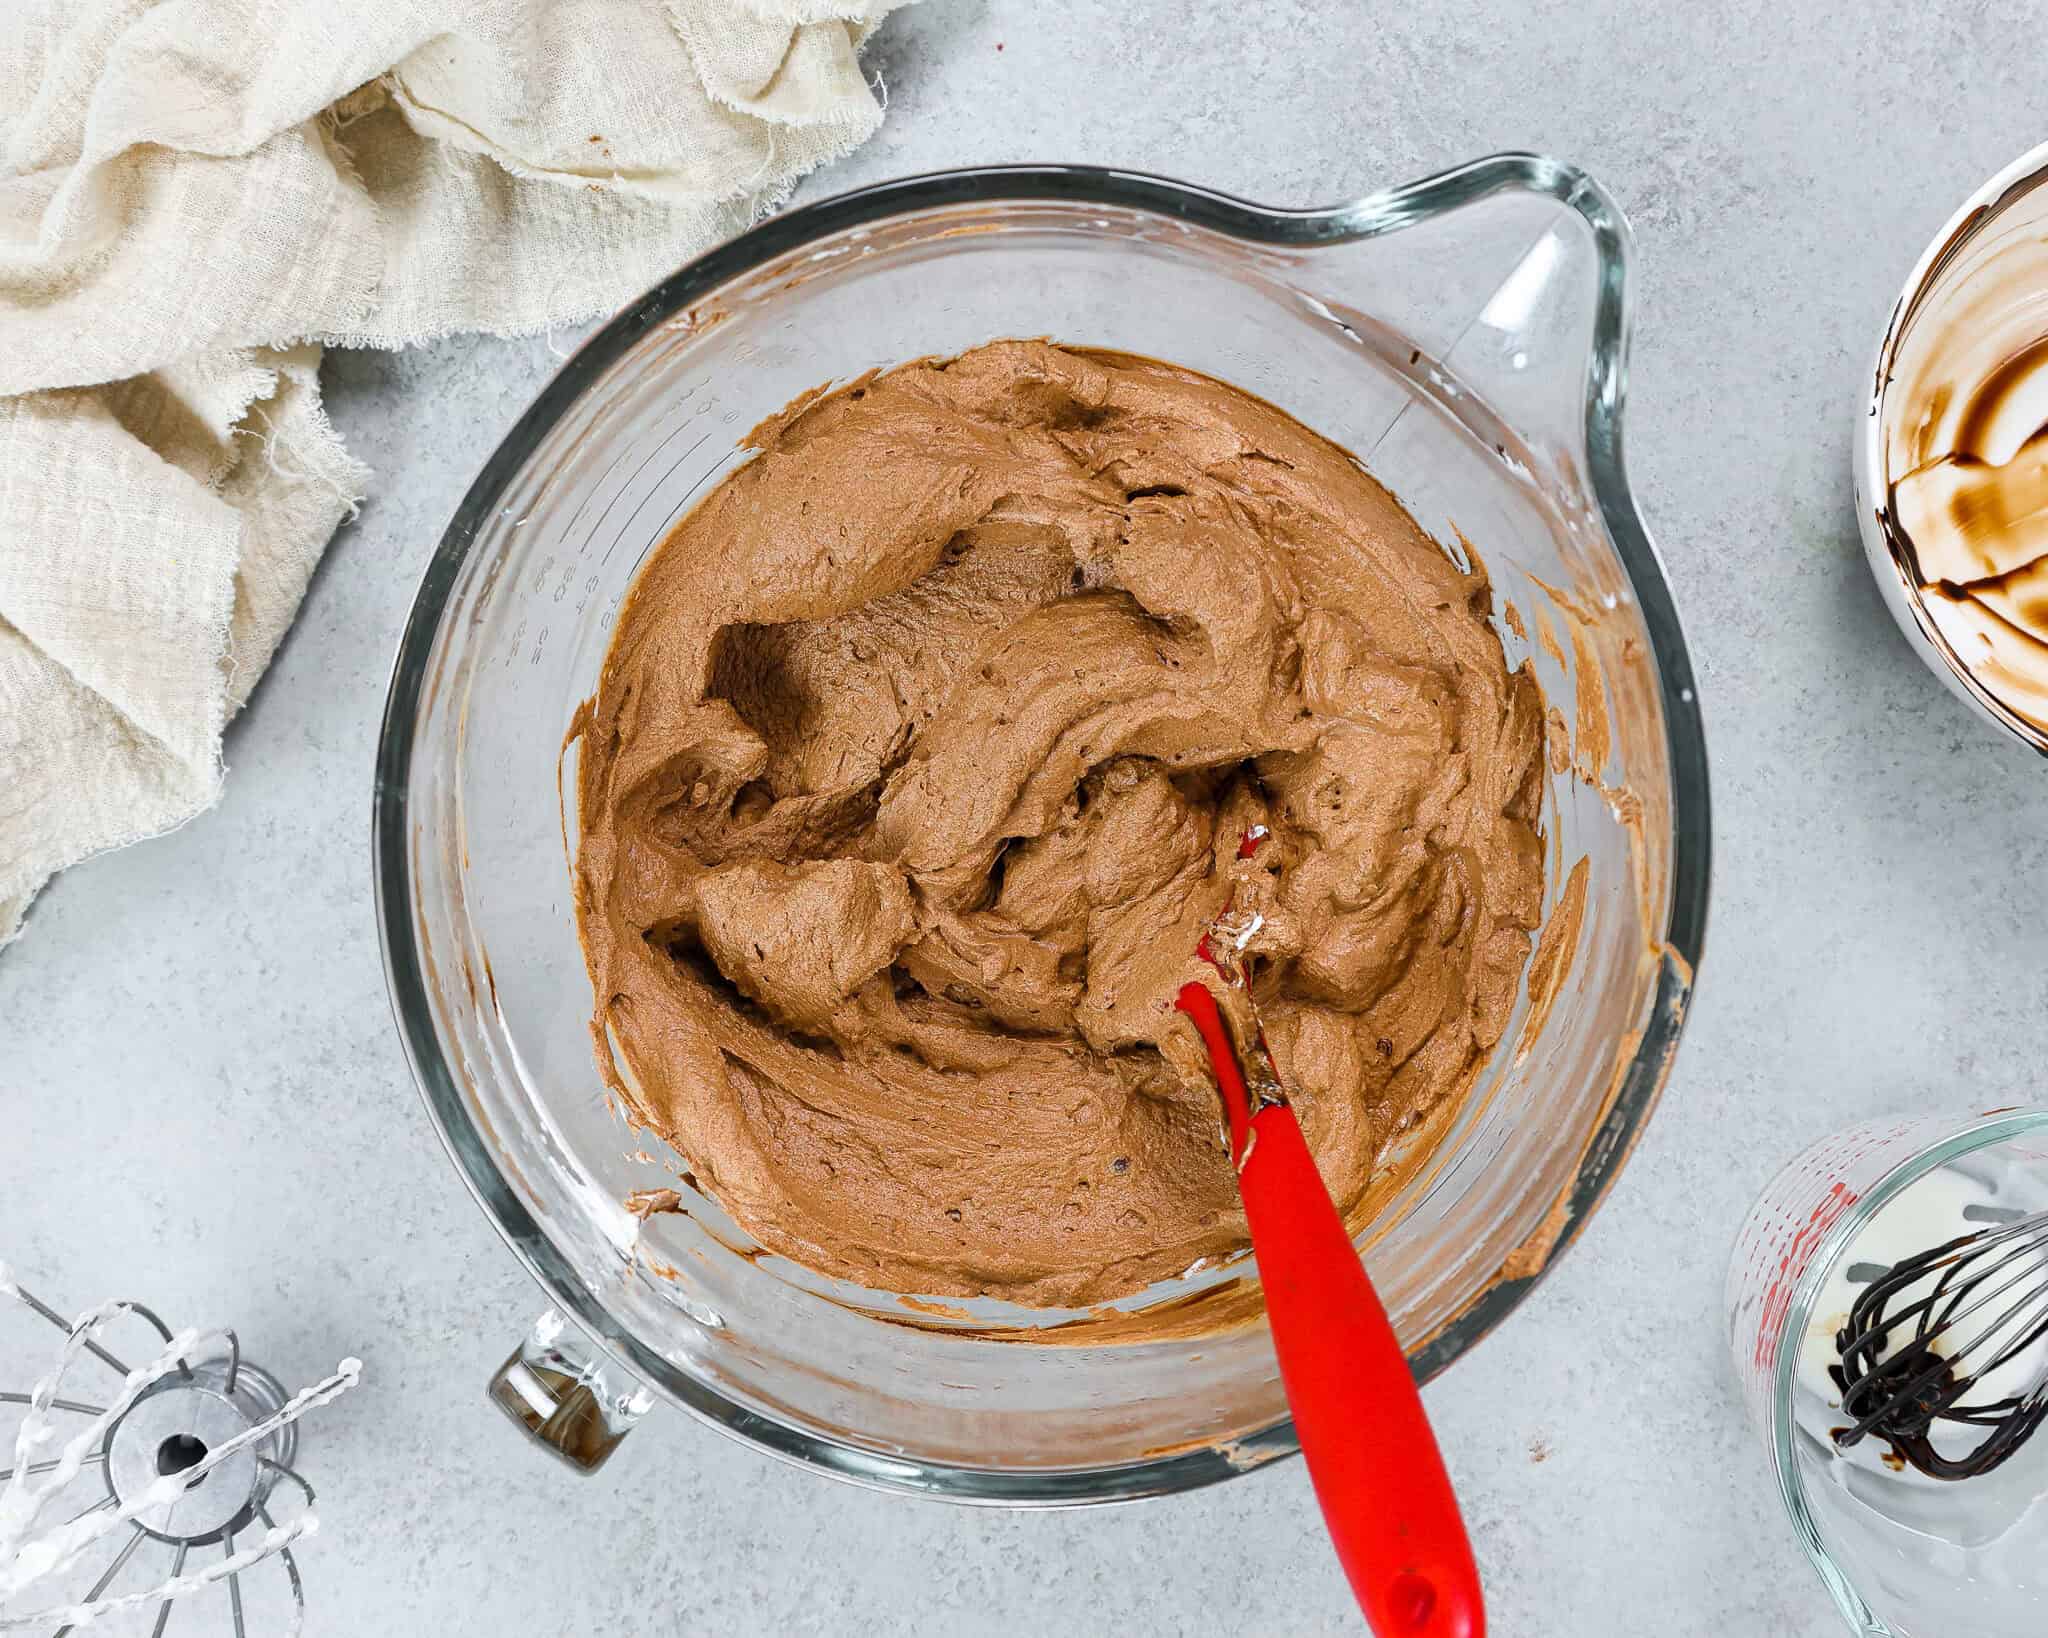
Use the spatula to swoop around the sides of the bowl and pull through the center until the ingredients are fully combined. Be careful not to over-mix the mousse, or it will become deflated and lose its structure.
Pour the melted white chocolate/heavy cream mixture into the remaining whipped cream using a rubber spatula.
At this point, the white chocolate mixture should have cooled down a bit and should still be fluid, but shouldn’t be hot to the touch.
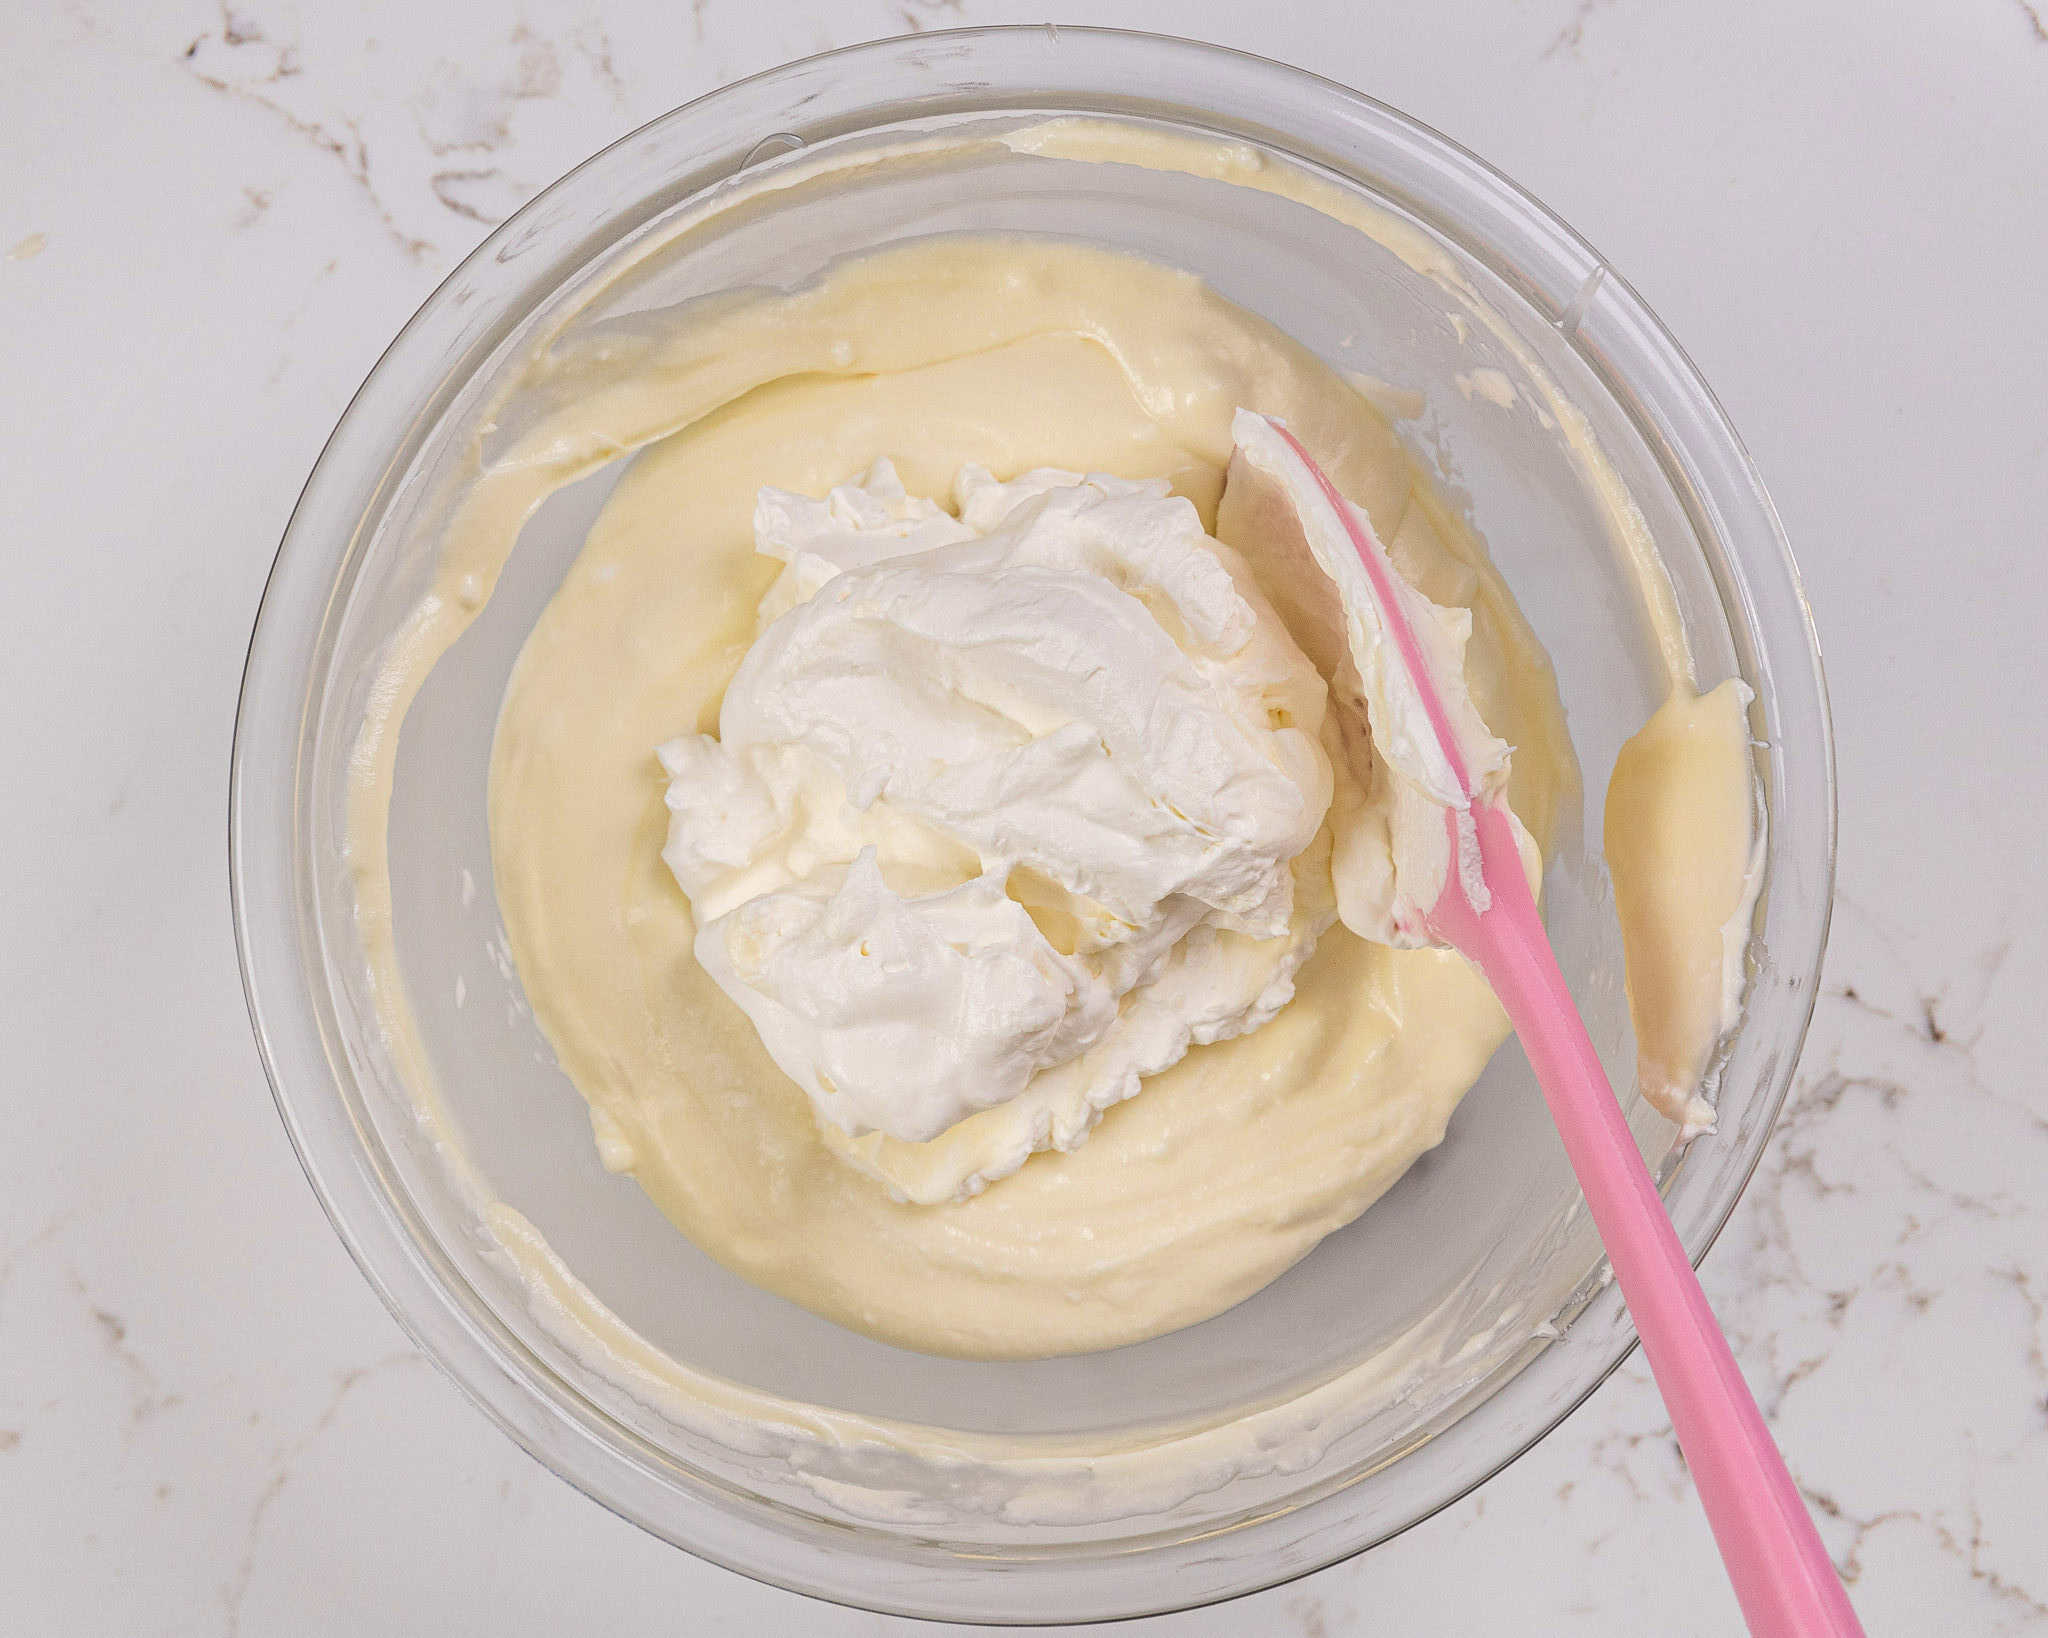
Use the spatula to swoop around the sides of the bowl and pull through the center.
Cover both bowls of mousse with plastic wrap or scoop each mousse into its own piping bag and chill in the refrigerator for at least 2 hours.
Step 2: Make the Chocolate Ganache Frosting
While the mousse chills, make the chocolate ganache frosting.
Add the heavy cream to a medium-sized bowl and heat it until it just begins to bubble. This can be done in either the microwave or a double boiler.
Then pour in the dark chocolate and corn syrup and let the mixture sit for a minute.
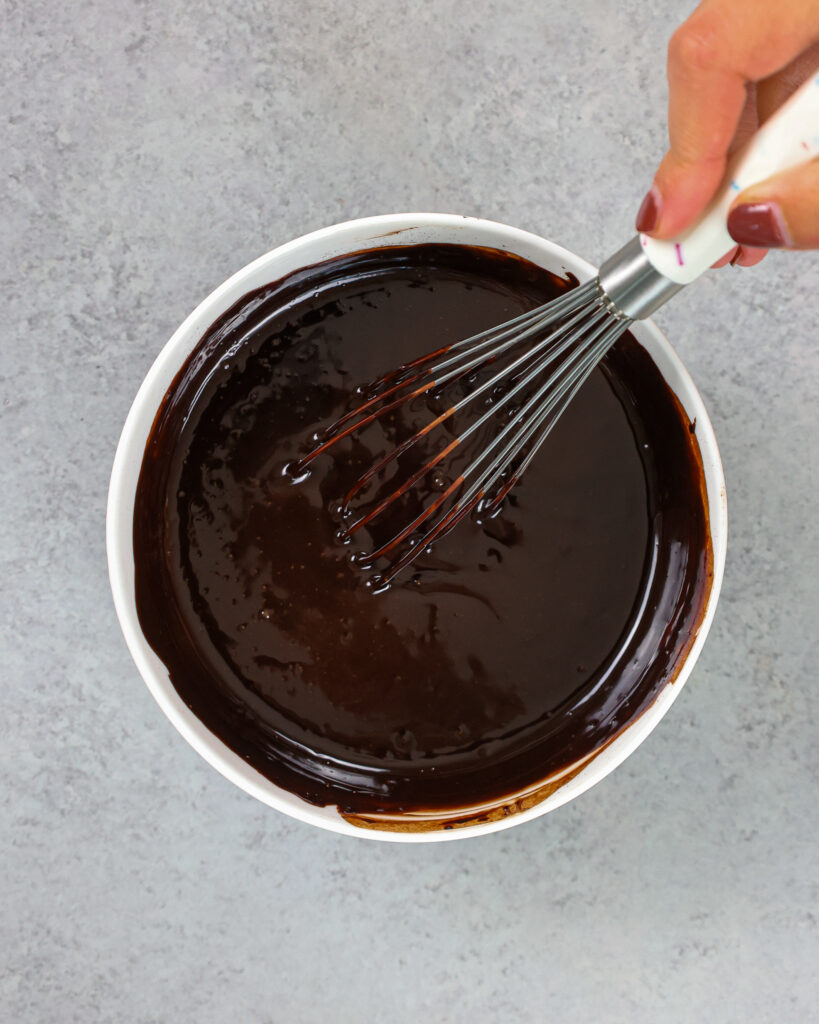
After a minute, the chocolate should be softened. Stir the mixture until the cream and chocolate are combined and the mixture is smooth.
If any bits of chocolate aren’t fully melted, heat the mixture again for 15 seconds and stir until smooth.
Then mix in the unsalted butter and fine salt.
Cover with plastic wrap placed flush against the top of the ganache to prevent it from forming a skin, then set aside to cool to room temperature.
If you need to make this topping in advance, it can be covered and stored in the fridge for up to a month.
The ganache should thicken and be scoopable once it reaches room temperature. If you want to accelerate the cooling process, place the bowl in the fridge.

Step 3: Bake and Level the Chocolate Cake Layers
Next, make the chocolate cake batter following the recipe card at the bottom of this post.
Preheat the oven and line and grease a 9×13-inch cake pan or 2, 9-inch cake pans with parchment paper and non-stick spray.
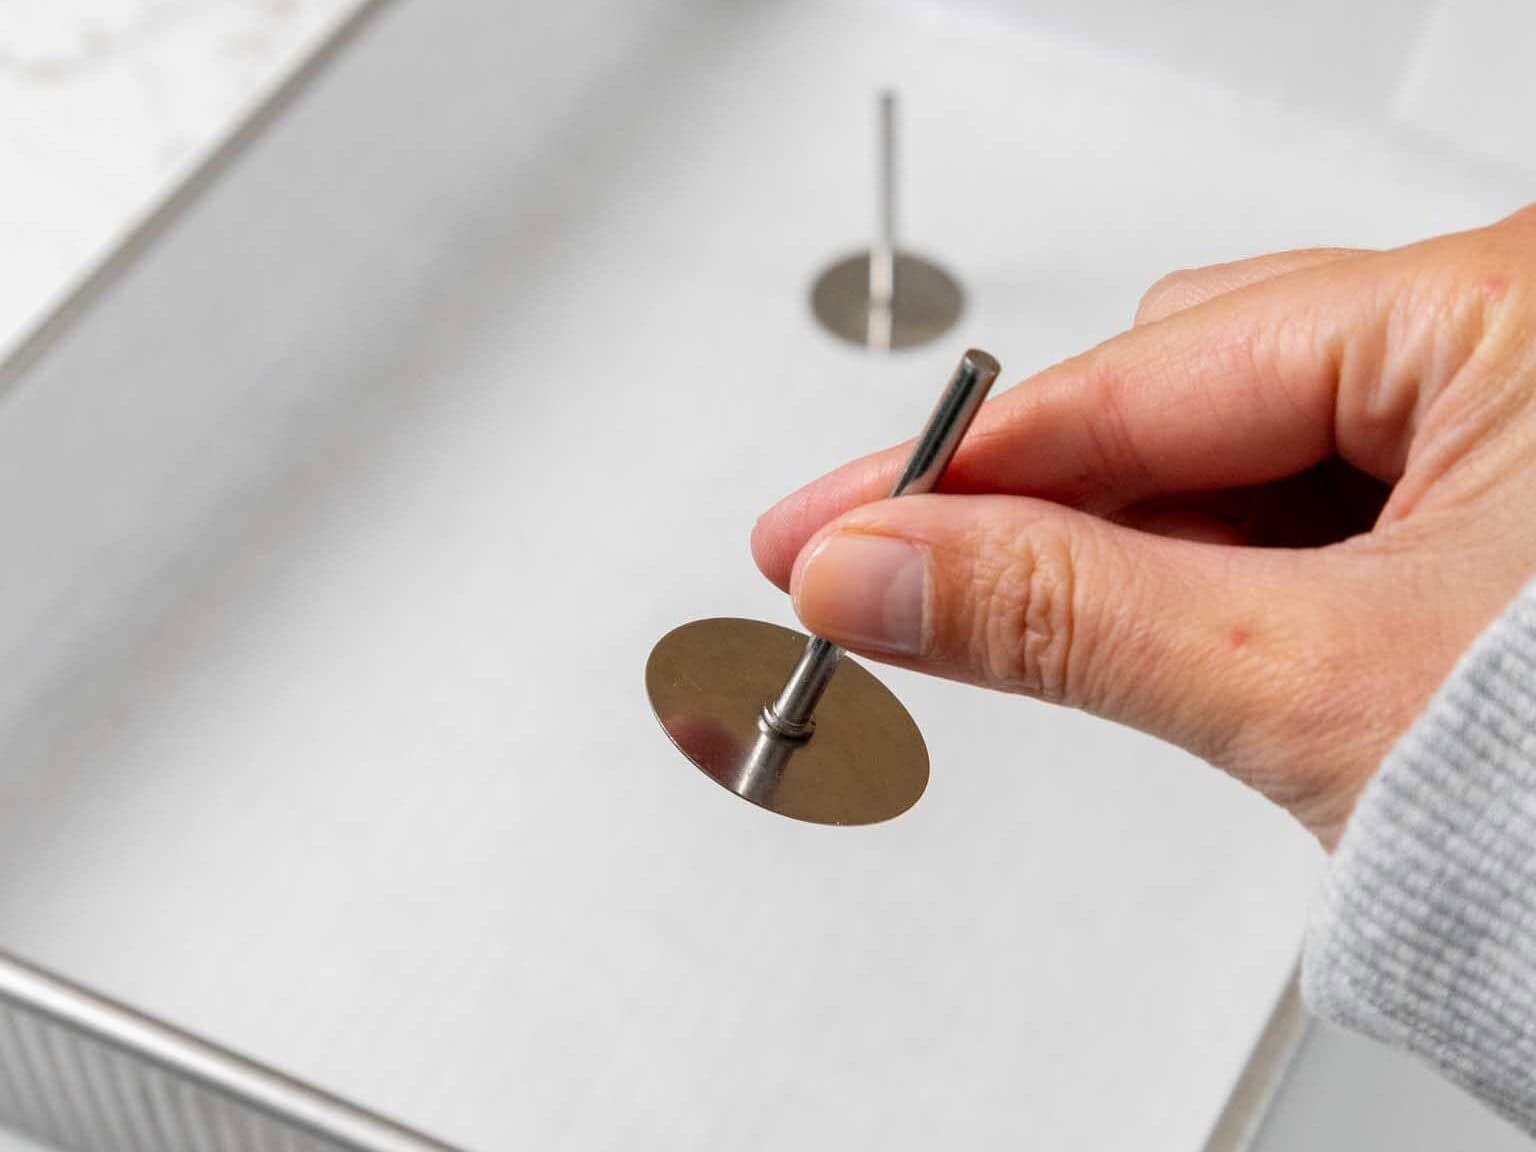
If you have heating cores, place two heating cores in the 13×9 pan or one heating core in each 9-inch pan and generously spray them with non-stick spray. This helps the cake bake up more evenly and quickly.
Pour the batter into the prepared pan(s). Bake a 9×13-inch pan for 40-45 minutes (add 3-5 minutes if you aren’t using heating cores), or bake 2, 9-inch cake pans for 34-37 minutes (add 2-3 minutes if you aren’t using heating cores).
Let the pans cool for 10 minutes, then run a small offset spatula around the perimeter of the pan to separate the cake from the pan.
Then place the cake layer(s), pan and all, into the freezer for 30 minutes to accelerate the cooling process. Once the layer(s) are fully cooled, carefully flip the pans and remove the layers.
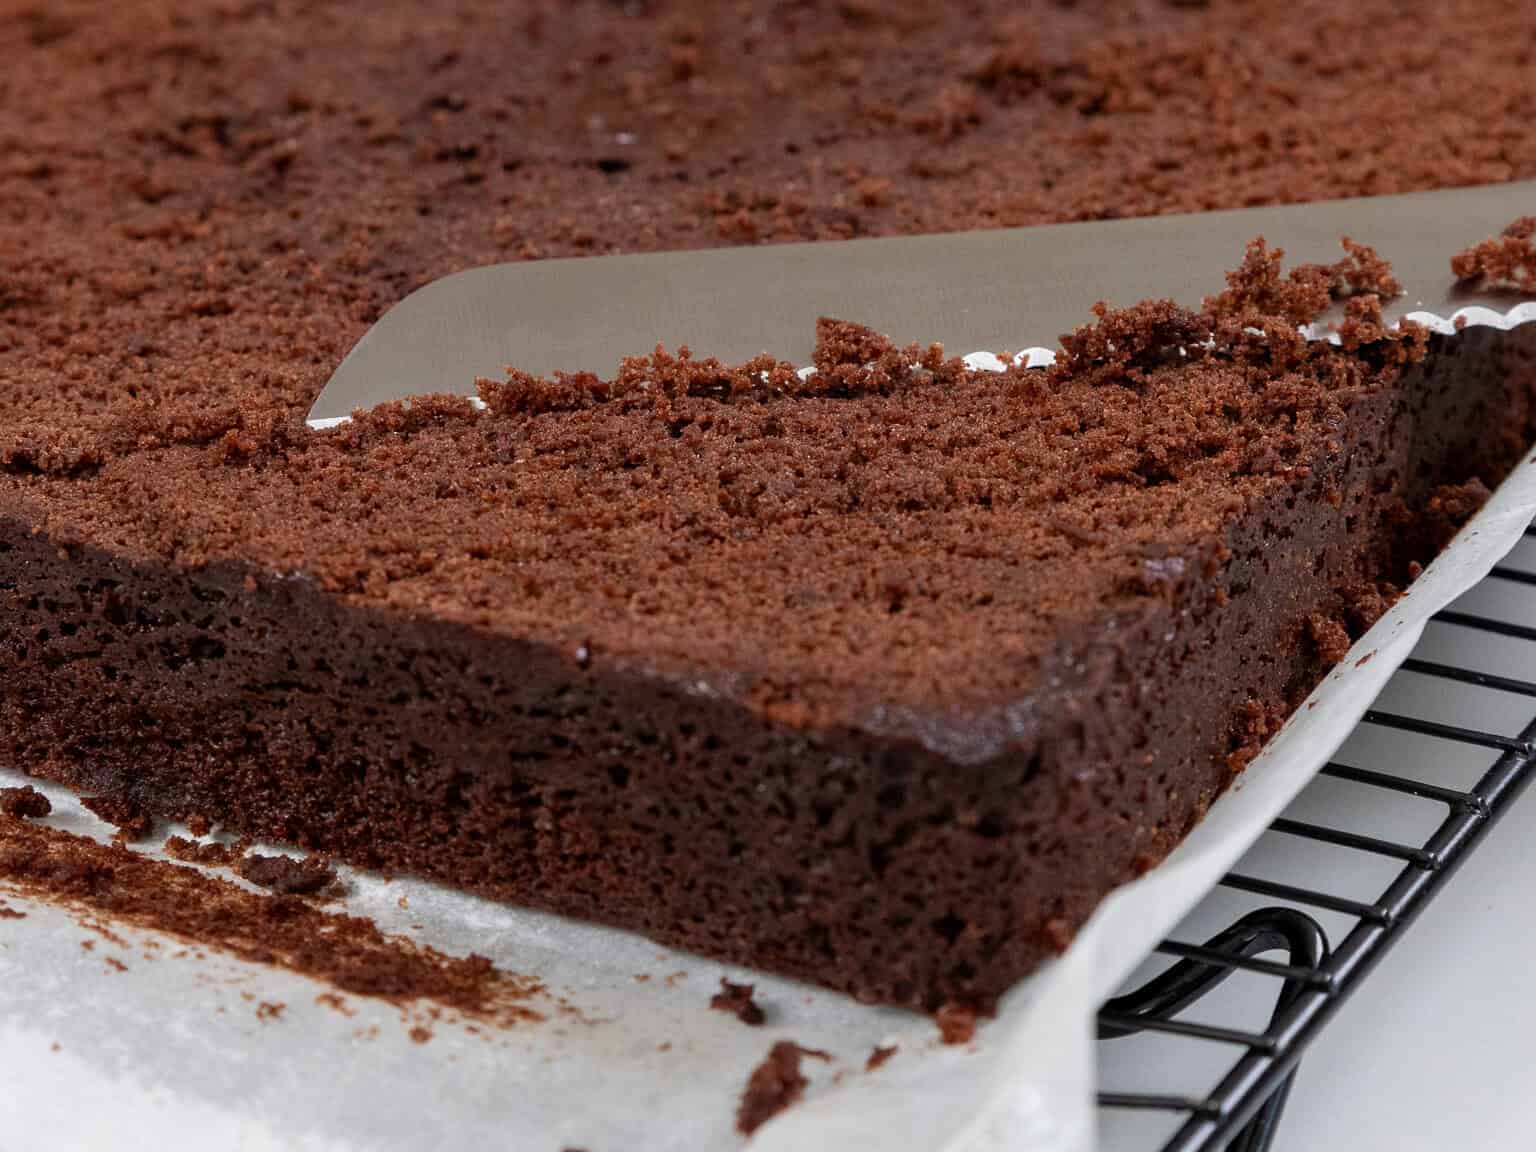
Use a serrated knife to level the top of the layers. If you made a 9×13-inch cake, cut it in half to make 2, 9×6.5-inch pieces.
Wrap and freeze the layers at this point if you’re making them in advance. If you do make these cake layers in advance and freeze them, let them thaw for about 20 minutes before making this cake.
The cake layers should still be slightly cold to the touch, which will make it easier to assemble the cake.
Step 4: Make the Chocolate Simple Syrup
The chocolate simple syrup in this recipe is optional but recommended.
The cake bakes up pretty moist on its own, but I like to add simple syrup so it stays moist for several days, especially since the sides are exposed to air.
It only takes a couple of minutes to make, and I think it’s worth it!
After bringing the water and granulated sugar to a boil, remove the pan from heat and stir in the unsweetened cocoa powder. Then, pour the mixture into a separate container to cool.
Step 5: Stack and Fill the Cake Layers
Now that all our components are ready for this tuxedo cake, it’s time to assemble it!
Spread a bit of chocolate ganache on a grease-proof cake board or flat plate to help keep the cake in place, then center the first cake layer on top of the ganache.
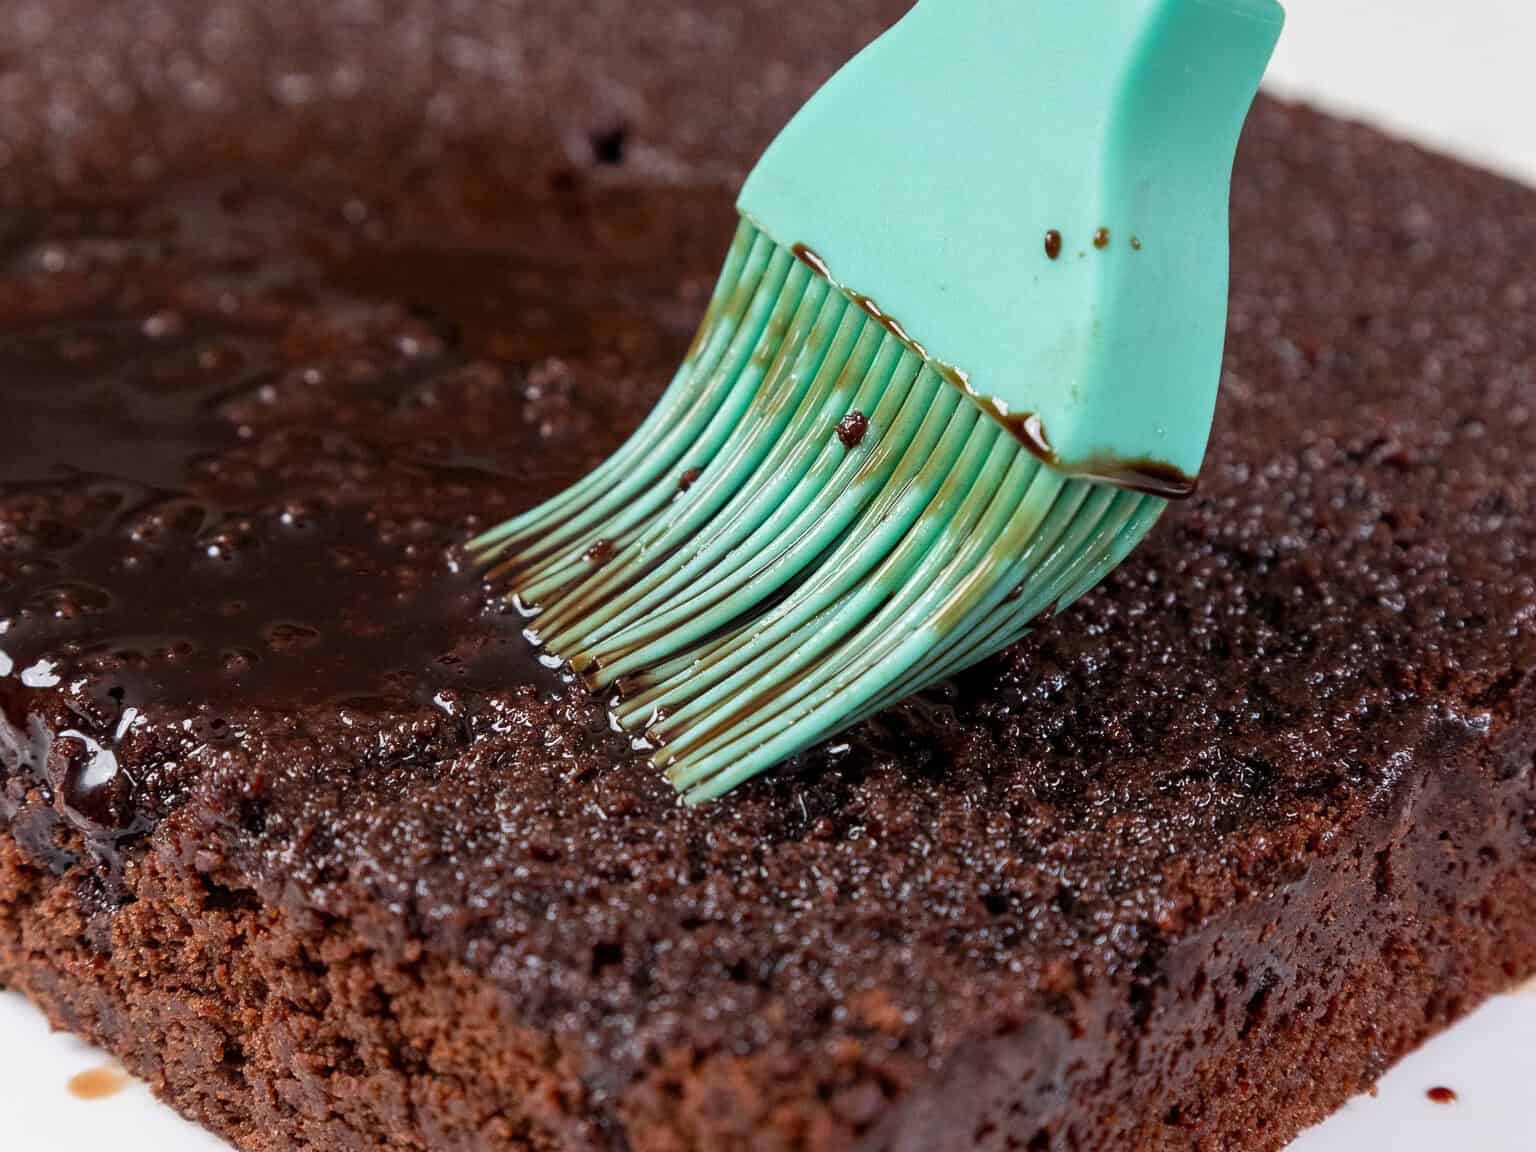
If you made the chocolate simple syrup, generously brush it over the cake layer using a silicone brush or a clean kitchen brush.
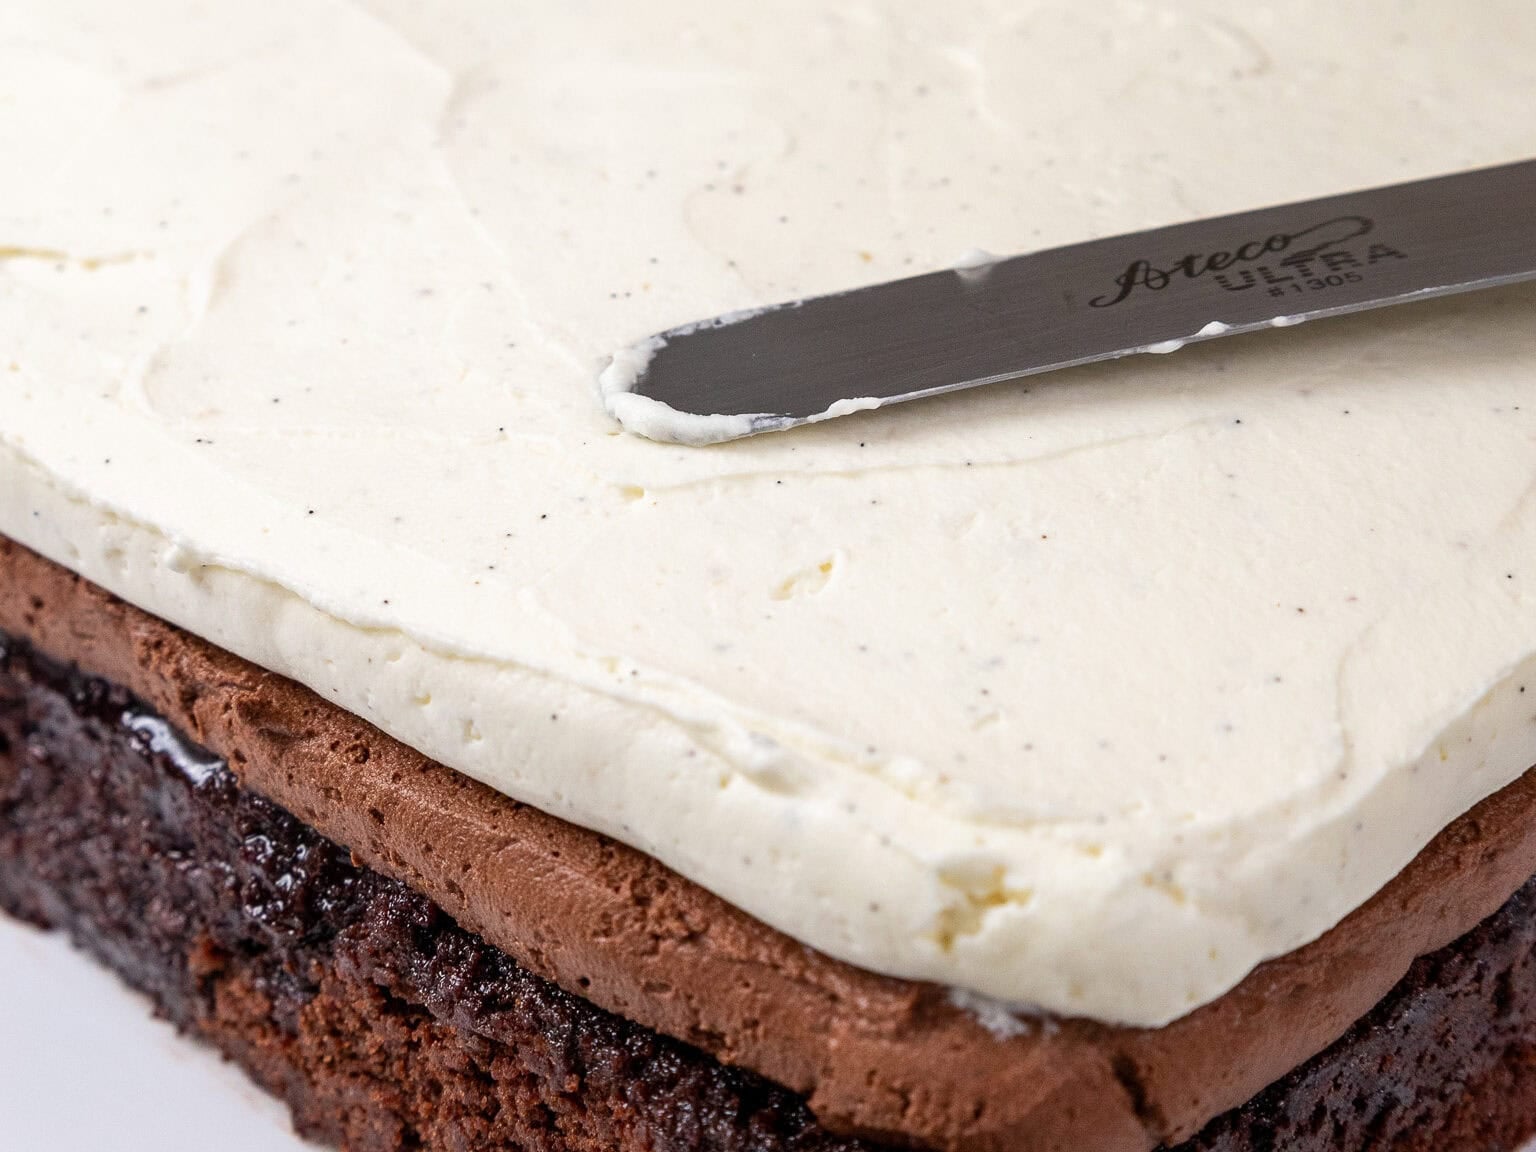
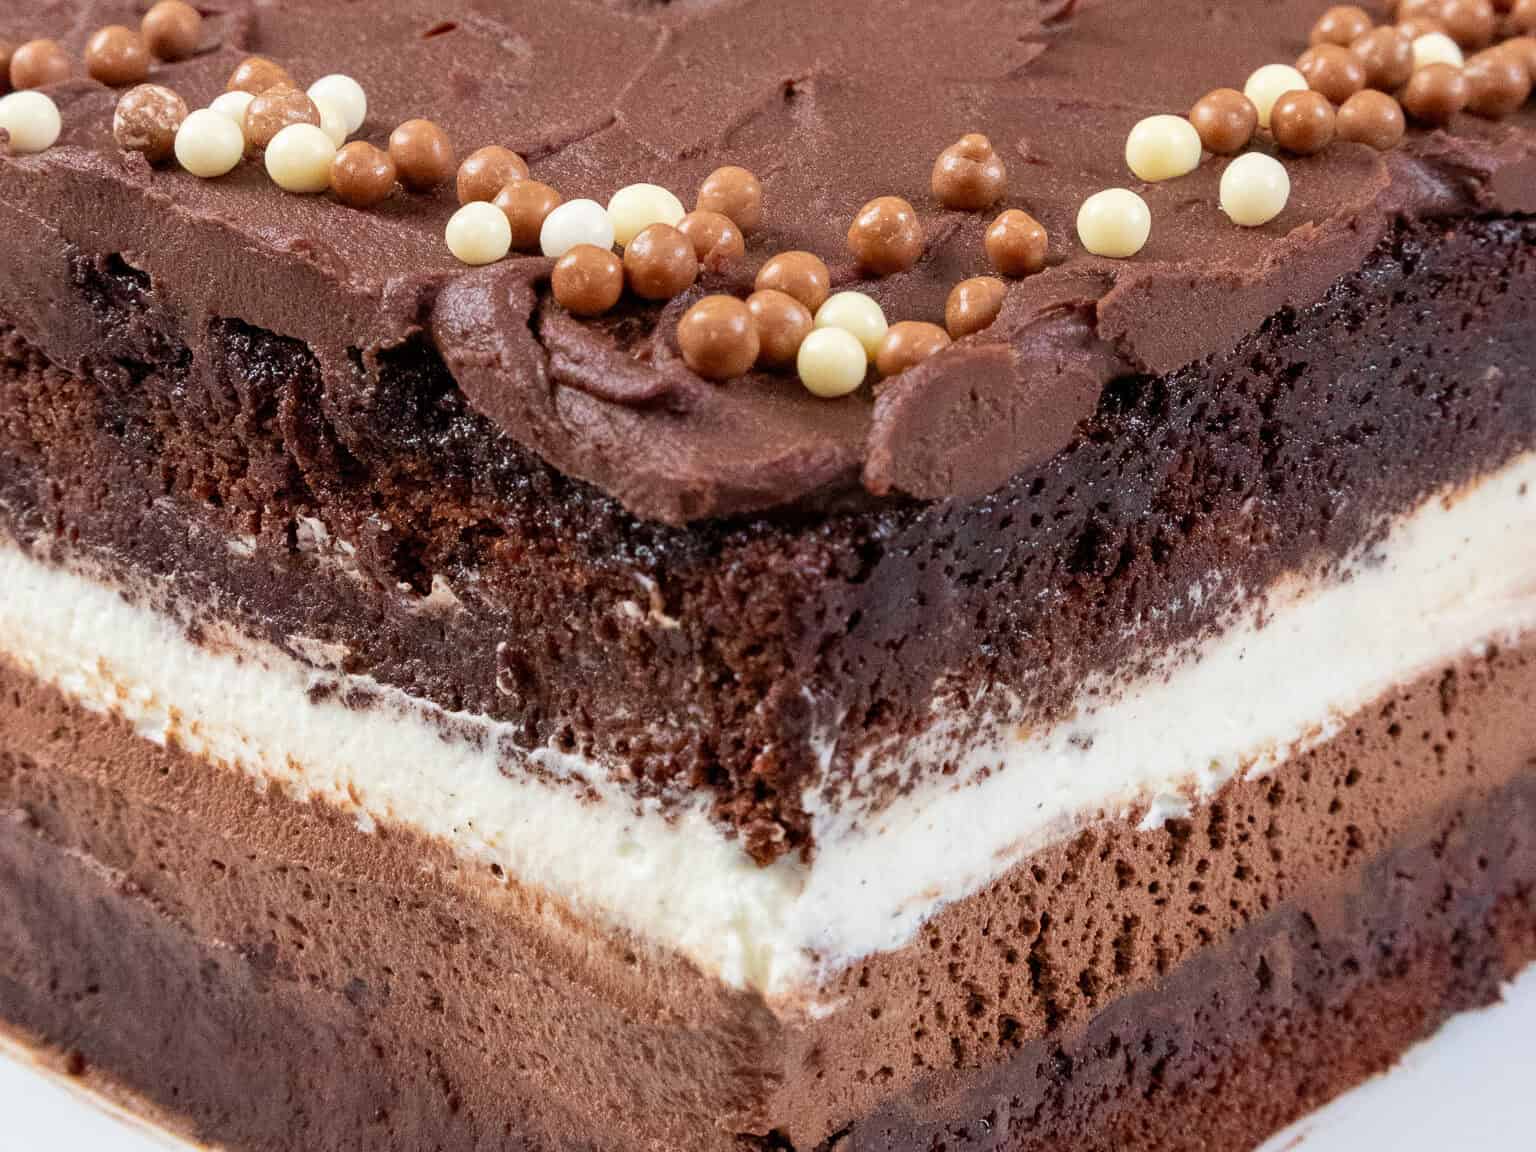
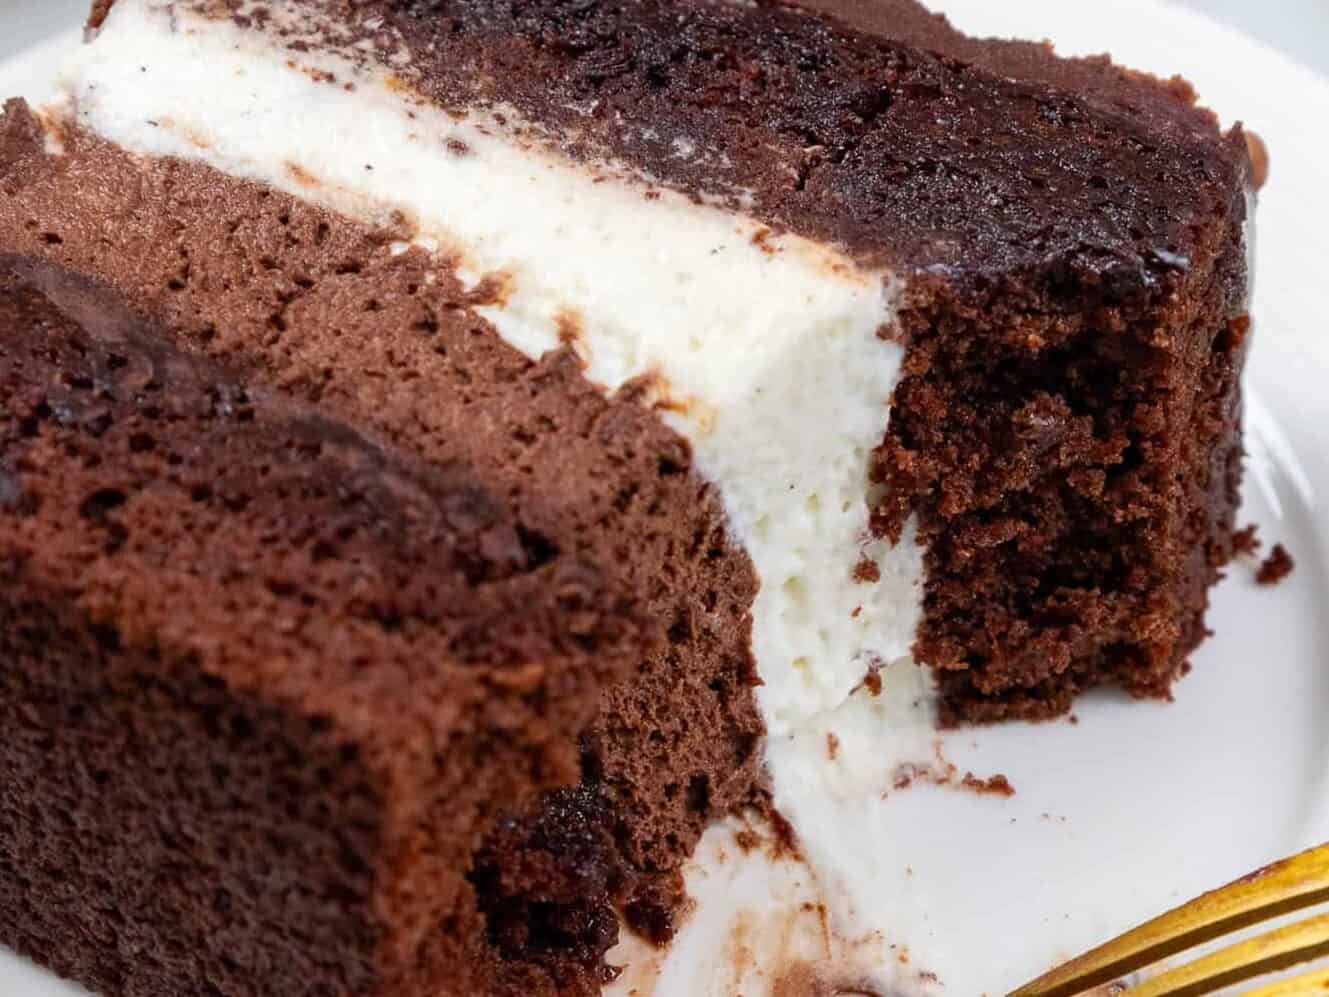
Cover the cake in an even layer of dark chocolate mousse, then top it with an even layer of white chocolate mousse.
Place the remaining cake layer on top of the mousse and soak the top of the layer with chocolate simple syrup.
Use a small offset spatula or piece of acetate sheet to clean up the sides of the cake and give the mousse a sharp edge that’s flush with the cake layers.
Chill the cake in the fridge for 15 minutes to help it keep its shape. Then spread the chocolate ganache in a thick layer on top of the cake with a small offset spatula.
Decorate the top of the cake with chocolate sprinkles and chocolate pearls, then enjoy!
I like to cut and serve this cake cold straight out of the fridge, but you can also let it sit at room temperature for up to an hour before serving if you want it to be less cold.
I don’t recommend leaving this cake out at room temperature for longer than that, or else the mousse will deflate and lose its shape!
Substitutions & Swaps: Dark Chocolate Cake Layers
While I love this tuxedo cake just the way it is, I know some of you might not have all these ingredients on hand.
Below are some swaps and substitutions that can be made in this recipe:
- All-Purpose Flour – This recipe turns out best with AP flour, but you can use a gluten-free flour blend or cake flour if needed.
- Granulated Sugar – I do not recommend reducing the amount of sugar or changing the type of sugar, as it will change the texture of the cake layers.
- Dark Cocoa Powder – I like to use dark or Dutch-processed cocoa powder in this recipe. However, it would also taste great with regular cocoa powder, too!
- Unsalted Butter – If you only have salted butter on hand, you can use it in place of the unsalted butter in this recipe. Just be sure to omit the salt that this recipe calls for. You can also use vegan butter in its place (and also omit the salt)!
- Egg Whites – I like to use egg whites from a carton, but you can also use 4 large eggs in place of the egg whites in this recipe. Or, if you have an egg allergy, you can use a flaxseed egg or an egg replacer.
- Buttermilk – You can also use full-fat yogurt, sour cream, whole milk, or an alternative yogurt or milk (almond, soy, oat) if you’re dairy-free.
- Vegetable Oil – You can use any flavorless oil in this recipe. Canola or even sunflower oil would work great!
White and Dark Chocolate Mousse Substitutes
- White Chocolate – You can use good-quality white chocolate chips, baking chocolate, or white chocolate bars.
- Dark Chocolate – Any good-quality chocolate with 60% cocoa or more will work for the dark chocolate mousse.
- Heavy Whipping Cream – Use heavy cream or heavy whipping cream (milk fat % of at least 30%). To make dairy-free and vegan chocolate mousse cake filling, use coconut cream.
- Powdered Sugar – You need a fine sugar like powdered sugar to give the whipped cream a smooth consistency. I don’t recommend using granulated sugar or other types of sugar to make the mousse.
Making This Tuxedo Cake in Advance & Storage Tips
You can make these cake layers in advance and freeze them. It breaks the process up and makes it more approachable.
The white and dark chocolate mousse can also be made in advance! It can be made up to 2 days ahead of time and stored in the fridge.
You can also make the chocolate ganache frosting ahead of time or save any leftover frosting! Store it in an airtight container in the fridge for up to a month.
This cake can be stored in the fridge for up to 3 days or in the freezer for a month. I recommend covering the cake with plastic wrap or placing it in an airtight container to keep it moist.
Troubleshooting
Why is my white chocolate mousse too soft?
White chocolate mousse is naturally a bit softer than dark chocolate mousse, especially once it starts to warm up.
- Chill longer: Let the mousse (and the assembled cake) chill at least 2 hours so it can fully set.
- Assemble cold: Keep the cake layers and mousse cold while stacking. If your kitchen is warm, chill the cake between steps.
- Don’t overmix: Fold just until combined. Over-folding can deflate the whipped cream and make the mousse looser.
- Optional (for extra stability): If you need a firmer mousse for a hot day or travel, you can add a small amount of gelatin. Bloom 1 tsp powdered gelatin in 1 Tbsp water for 5 minutes. Microwave 5–10 seconds until fully liquid. Stir 1–2 Tbsp of the mousse base into the melted gelatin (this tempers it), then pour that mixture back into the mousse base while stirring. Then, fold in the whipped cream as usual.
Why is my cake sliding or the mousse squishing out?
This usually happens when the mousse is too soft at assembly time.
- Your chocolate base may have been too warm: If the melted chocolate/cream mixture is warm when you fold it into whipped cream, it can soften and deflate the mousse.
- Chill before stacking: If the mousse feels loose, refrigerate it for 20-30 minutes before assembling.
- Chill mid-assembly: After you stack and smooth the sides, chill the cake 15-20 minutes before adding ganache.
- Use a gentle touch: Pressing down on the top layer can push mousse out the sides. Set it on gently and chill in the fridge to help the cake fully firm up.
Why did my white chocolate seize or turn grainy?
White chocolate is finicky and can seize or separate if it overheats.
- Use low, gentle heat: Microwave in short bursts (10-20 seconds), stirring well between each burst.
- Stop before it looks fully melted: Let residual heat finish the job as you stir.
- Avoid overheating in certain bowls: Some bowls retain heat and can keep “cooking” the chocolate after the microwave stops.
- If it’s already grainy: Keep stirring first. If it stays separated/grainy, sadly, it’s best to remake it. Grainy white chocolate won’t fold smoothly into mousse.
Why is my ganache hard to cut or making the mousse ooze out?
A thick ganache layer can set firm in the fridge and squish the mousse when you slice.
- Keep the ganache layer thin: Pour just enough to cover the top. Thicker = firmer once chilled.
- Use a hot, dry knife: Run the knife under hot water, dry it off, then slice. Wipe and rewarm between cuts.
- Let it sit briefly before slicing: If the cake is rock-hard cold, let it sit 10–15 minutes so the ganache softens slightly (but don’t leave it out too long or the mousse will soften too much).
How am I supposed to cut the cake layers?
If you bake the cake in a 9×13-inch pan and cut it in half to stack, you’ll end up with two pieces that are about 9×6.5 inches each. Try to cut as evenly as possible so the layers stack neatly.
Frequently Asked Questions
Can I make this in round cake pans instead of a 9×13?
Yes. You can bake this in round pans instead of a 9×13. Round layers will usually need a bit longer in the oven. For 8-inch rounds, bake 3 layers at 350°F for 33–35 minutes.
Bake until the center is set, and a toothpick comes out with a few moist crumbs.
How far ahead can I make tuxedo cake?
This is a great make-ahead cake. You can bake the cake layers 1-2 days ahead (wrap tightly and refrigerate) or freeze them for longer storage. The mousse layers need chill time to set, so I recommend assembling the cake at least a few hours before serving (or the day before).
Can I freeze tuxedo cake (with mousse)?
Yes. Freeze the fully assembled cake until firm, then wrap it well. Thaw overnight in the fridge before serving. For the cleanest slices, cut it cold and wipe your knife between cuts.
Do I have to use Dutch-processed cocoa?
No. Dutch-processed cocoa gives a deeper, darker chocolate flavor, but regular unsweetened cocoa will still work. The cake may be slightly lighter in color and a bit less intense in chocolate flavor.
How do I get clean slices?
Chill the cake well, then use a hot, dry knife (run it under hot water, dry it off, slice, wipe, repeat). If the ganache is very firm, let the cake sit 10-15 minutes before slicing so it softens slightly.
Tips for Making the Best Tuxedo Cake
- When making the dark chocolate and white chocolate mousse, chill your mixing bowl and whisk attachment in the freezer. It makes it easier and quicker to whip up the whipped cream for the mousse.
- Ingredients at room temperature mix together better! Set out any cold ingredients that need to be at room temperature ahead of time.
- Properly measure the flour (spoon it into the cup measure, then level it). Or better yet, use a kitchen scale to measure your dry ingredients.
- Level your room temperature or thawed cake layer(s) with a serrated knife to make them easier to stack.
- Chill your cake layer(s) in the freezer for about 20 minutes before assembling the cake. It makes it so much easier to stack and frost them!
Let Me Know What You Think
If you try this tuxedo cake recipe, I’d love to hear what you think! Please leave a rating below and a comment to let me know your thoughts.
Tuxedo Cake (Costco Copycat!)
Ingredients
Dark and White Chocolate Mousse
- 1/2 cup or 4 oz. good quality dark chocolate chips 90g
- 1/3 cup water, warm 80ml
- 1/4 cup dark or Dutch-processed cocoa powder 25g
- 3/4 cup good quality white chocolate chips 130g
- 2 1/3 cups cold heavy whipping cream, divided 560ml
- 1/4 cup powdered sugar 30g
- 2 tsp vanilla extract or vanilla bean paste 8ml
- 1/2 tsp fine salt 3g
Chocolate Ganache Frosting
- 3/4 cup heavy whipping cream, room temperature 180g
- 1 cup dark (60-65% cocoa) chocolate chips 175g
- 2 Tbsp unsalted butter, room temperature 30g
- 1 Tbsp light corn syrup – optional 20g
- 1/4 tsp fine salt 2g
Dark Chocolate Cake
- 2 1/2 cups granulated sugar 500g
- 2 1/4 cups all-purpose flour 280g
- 3/4 cup dark or Dutch-processed cocoa powder 75g
- 2 1/2 tsp baking powder 10g
- 1 tsp fine salt 6g
- 1 cup unsalted butter, room temperature 226g
- 1 cup carton egg whites or 7 large egg whites, room temperature 240g
- 1 1/2 cups buttermilk, room temperature 360g
- 2 Tbsp vegetable or canola oil 30g
- 2 tsp vanilla extract or vanilla bean paste 8g
- 1 tsp instant espresso – optional
Chocolate Simple Syrup – Optional
- 1/2 cup water 120g
- 1/2 cup granulated sugar 100g
- 1 Tbsp unsweetened cocoa powder, sifted 8g
Instructions
Dark and White Chocolate Mousse Filling
- Make the mousse first, so it has time to chill. Or better yet, make this mousse in advance! It can be made 1-2 days ahead of time.
- Place a large mixing bowl and hand mixer beaters or the bowl of a stand mixer and whisk attachment in the freezer. This makes it easier and quicker to whip up the whipped cream for the mousse.
- Melt 1/2 cup of dark chocolate chips in a medium-sized, heat-proof bowl. Heat in 20-30 second increments in the microwave, stirring after each interval until the chocolate is completely melted and smooth. You can also use a double boiler if you don't have a microwave.
- In a small bowl, whisk together 1/3 cup of warm water and 1/4 cup of dark cocoa powder. Pour into the melted dark chocolate and whisk together until smooth. The mixture should be somewhat thick. Set aside.
- Add 3/4 cup of white chocolate chips and 1/3 cup of heavy cream to a medium-sized, heat-proof bowl. Heat for 45-60 seconds in the microwave, then let the mixture sit for a minute. Stir until combined with a rubber spatula. The white chocolate should be completely melted, and the mixture should be smooth. You can also use a double boiler if you don't have a microwave. Set aside.
- Then pour 2 cups of heavy cream, 1/4 cup of powdered sugar, 2 tsp of vanilla extract or vanilla bean paste, and 1/2 tsp of fine salt into a large bowl, or the bowl of a stand mixer fit with a whisk attachment.
- Mix on medium-high speed until the whipped cream starts to gather in the whisk attachment and you can see texture around the edges of the bowl. The whipped cream should be thick and able to keep its shape. This usually takes about 2 1/2 to 3 minutes in my stand mixer.
- Scoop half of the whipped cream into a separate bowl, and mix in the chocolate/cocoa/water mixture using a rubber spatula. Use the spatula to swoop around the sides of the bowl and pull through the center until the ingredients are fully combined. Be careful not to over-mix the mousse, or it will become deflated and lose its structure.
- Pour the melted white chocolate/heavy cream mixture into the remaining whipped cream and fold together using a rubber spatula. At this point, the white chocolate mixture should have cooled down a bit and should still be fluid, but not hot to the touch. Use the spatula to swoop around the sides of the bowl and pull through the center. Be careful not to over-mix the mousse, or it will become deflated and lose its structure.
- Cover both bowls of mousse with plastic wrap or scoop each mousse into its own piping bag and chill in the refrigerator for at least 2 hours.
Chocolate Ganache Frosting
- Make the chocolate ganache next, because it needs time to cool and thicken before it's used to frost this cake.
- Heat 3/4 cup of heavy cream in a heatproof bowl in the microwave for 45 seconds, until it's just beginning to bubble.
- Gently pour 1 cup of dark chocolate chips into the heavy cream. Make sure the chips are fully covered with cream. Let the mixture sit for 1 minute. If you want to use milk chocolate to make the ganache, use 1/3 cup (80g) of heavy cream and 1 1/3 cups (240g) of milk chocolate.
- Stir slowly until the cream and chocolate combine and the mixture is smooth. If any bits of chocolate aren't fully melted, heat the mixture again for 15 seconds and stir until smooth.
- Mix in 2 Tbsp of room temperature unsalted butter, 1 Tbsp corn syrup, and 1/4 tsp fine salt until combined.
- Cover with plastic wrap to prevent the ganache from forming a skin, then set aside to cool to room temperature. If you're in a rush, pour the ganache into a wide, shallow container to help it cool down faster. If you need to make this in advance, it can be covered and stored in the fridge for up to a month.
Dark Chocolate Cake Layers
- While the mousse chills, make the dark chocolate cake layers. Preheat oven to 350°F / 175°C and line and grease a 9×13-inch quarter sheet cake pan or 2, 9-inch cake pans with parchment paper and non-stick spray. If you have heating cores, place two heating cores in the 13×9 pan or one heating core in each 9-inch pan and generously spray them with non-stick spray. This helps the cake bake up more evenly and quickly. Set aside.
- Mix 2 1/2 cups sugar, 2 1/4 cups all-purpose flour, 3/4 cup dark cocoa powder, 2 1/2 tsp baking powder, and 1 tsp salt together in a stand mixer with a paddle attachment or hand mixer until fully combined.
- Mix 1 cup of room temperature, unsalted butter slowly into the dry ingredients at a low speed. Continue to mix until no large chunks of butter remain and the mixture looks like moist sand.
- Pour in 1 cup of egg whites and mix on low until just incorporated. Mix in 1 1/2 cups of buttermilk in two installments on a low speed.
- Add in 2 Tbsp of vegetable oil, 2 tsp of vanilla extract, and 1 tsp of instant espresso. Mix on a low speed until incorporated. Scrape down the sides of the bowl with a rubber spatula, then beat on a medium speed for about 30 seconds to make sure everything is properly mixed together.
- Pour the batter into the prepared pan(s). Bake a 9×13-inch pan for 40-45 minutes (add 3-5 minutes if you aren't using heating cores), or bake 2, 9-inch cake pans for 34-37 minutes (add 2-3 minutes if you aren't using heating cores).
- Let the pans cool for 10 minutes, then run a small offset spatula around the perimeter of the pan to separate the cake from the pan. Then place the pan(s) in the freezer for 30 minutes to speed up cooling. Once the layer(s) are fully cooled, carefully flip the pans and remove the layer(s).
- Use a serrated knife to level the top of the layer(s). If you made a 9×13-inch cake, cut it in half to make 2, 9×6.5-inch pieces. Set aside.
- Wrap and freeze the layers at this point if you're making them in advance. If you do make these cake layers in advance and freeze them, let them thaw for about 20 minutes before making this cake. The cake layers should still be slightly cold to the touch, which will make it easier to assemble the cake.
Chocolate Simple Syrup – Optional
- This step is optional, but I love to soak the cake layers in chocolate simple syrup so the cake stays moist for several days, especially since the sides of the cake aren't covered. Pour 1/2 cup of water and 1/2 cup of granulated sugar into a small saucepan. Cook over medium heat, stirring occasionally until the mixture starts to boil.
- Remove from heat and whisk in 1 Tbsp cocoa powder. Pour into a small bowl to cool to room temperature, then cover and set aside. If you're making this in advance, it can be stored in an airtight container in the fridge for up to 3 weeks.
Assembling this Chocolate Tuxedo Mousse Cake
- Now that all our components are ready for this tuxedo cake, it's time to assemble it! Spread a bit of chocolate ganache on a grease-proof cake board or flat plate to help keep the cake in place, then center the first cake layer on top of the ganache.
- If you made the chocolate simple syrup, generously brush it over the cake layer using a silicone brush or a clean kitchen brush.
- Cover the cake in an even layer of dark chocolate mousse, then top it with an even layer of white chocolate mousse.
- Place the remaining cake layer on top of the mousse and soak the top of the layer with chocolate simple syrup. Use a small offset spatula or piece of acetate sheet to clean up the sides of the cake and give the mousse a sharp edge that's flush with the cake layers.
- Chill the cake in the fridge for 15 minutes to help it keep its shape. Then spread the chocolate ganache in a thick layer on top of the cake with a small offset spatula.
- Decorate the top of the cake with chocolate sprinkles and/or chocolate pearls, then enjoy! Serve cold for the cleanest slices, or for a less-chilled bite, let it sit at room temp up to 1 hour. Don’t leave it out longer than that or the mousse will soften/deflate.
Video
Notes
My Tips for Making the Best Tuxedo Cake
- When making the chocolate and white chocolate mousse, chill your mixing bowl and whisk attachment in the freezer. It makes it easier and quicker to whip up the whipped cream for the mousse.
- Ingredients at room temperature mix together better! Set out any cold ingredients that need to be at room temperature ahead of time.
- Properly measure your flour (spoon into the cup measure, then level). Or better yet, use a kitchen scale to measure your dry ingredients.
- Level your room temperature or thawed cake layer(s) with a serrated knife to make them easier to stack.
- Chill your cake layer(s) in the freezer for about 20 minutes before assembling the cake. It makes it so much easier to stack and frost them!
Making This Tuxedo Cake in Advance & Storage Tips
You can make these cake layers in advance and freeze them. It breaks the process up and makes it more approachable. The white and dark chocolate mousse can also be made in advance! It can be made up to 2 days in advance and stored in the fridge. You can also make the chocolate ganache frosting ahead of time or save any leftover frosting! It can be stored in an airtight container in the fridge for up to a month. This cake can also be stored in the fridge for up to 3 days or in the freezer for up to a month. I recommend covering the cake with plastic wrap or placing it in an airtight container to keep it moist.Nutrition
Other Recipes You Might Like:

I made this recipe and it was awesome!!
However the white mousse was a little soft, I was wondering can I add gelatin to the mousse to thicken it?
Hi Adelaide,
So happy to hear you love this recipe!! The white chocolate mousse is slightly softer than the chocolate mousse, especially if it warms to room temperature. You can add a bit of gelatin (dissolve it in cold water, then warm it up until it’s a liquid, let it cool slightly, then add it into whipped cream once it’s been mixed with the powdered sugar and whipped up. Hope that helps, happy baking!
I’m excited to make this for my son’s 2nd birthday which is a construction theme. I’m going to add crushed Oreo to the outside to look like dirt. Any ideas how I make it slightly more dirt cake like? Would sprinkling crushed Oreos between layers when assembling work? Open to any ideas?
Also concerned about it setting properly. Excited but intimidated!
This would be perfect for that Sarah! Hmm, to make it more dirt-like you could double the ganache recipe, cover the entire cake with ganache, then gently press crushed oreos around the whole thing!
And you can totally add Oreos between the cake layers / in the mousse! It will set just fine as long as the cake is kept chilled 🙂 Hope that helps and that the cake turns out amazing!! I’m sure your son is going to love it, he’s one lucky little guy!
hi, is it okay if the dutch pressed cocoa powder is unsweetened? i am looking at buying the “Ghirardelli Premium Baking Cocoa 100% Cocoa Dutch Process Unsweeted”
Absolutely!! That is exactly, what you want, any type of unsweetened cocoa powder will work great 🙂 Happy baking!
You mention brownie bits between the mousse layers, but I don’t see any mention of those in the actual recipe.
Hi Kristl,
Like I mention in the post – this tuxedo cake recipe is a humble nod to Costco’s tuxedo cake and contains all the same components – except for the bits of brownie!! Hope that helps clarify, happy baking!
I made this for a work and it was huge hit. I was unable to find Dutch Processed Cocoa and used unsweetened cocoa powder instead and it still turned out perfectly. It was helpful to make it over two days. Thank you for the delicious recipe.
This is a great recipe…….but let’s face is……Costco tuxedo cake cannot be duplicated.
Can the receipe be done in round tin 8inch if so what should be bake time
@Janice, I’m wondering the same thing. Will report back as I am going to go ahead and try it out this Friday for a birthday.
Apologies for the delayed response on this Janice! You can use this recipe to make 3, 8-inch cake layers with two layers of filling. Bake them at 350 F for 33-35 minutes, or until a toothpick inserted in the center comes out with a few moist crumbs. Hope that helps, happy baking 🙂
Hello,
Thank you for sharing this recipe! I’m planning to make this for Thanksgiving. Can you please clarify whether there is a difference between dark cocoa powder, dark or dutch processed cocoa baking powder and unsweetened cocoa powder as listed in the recipe? And if each one is indeed different, can you share the brands you used?
Hello,
I have made the tuxedo cake twice and each time the white mousse is not stable and the top layer of the cake keeps sliding off. The white mousse squishes out.
Also, how long can I keep the cake out at room temperature before serving?
Thanks.
Same issue, please let me know why this might be! 🙁 Was very excited for this recipe.
Hi Megan,
Oh no, I’m sorry that happened, especially after making it twice! The white chocolate mousse is naturally softer than the dark chocolate mousse, but it should still be stable enough to hold the top cake layer.
A few things can make it too soft. Make sure the whipped cream is beaten until it’s thick and holds its shape before folding in the white chocolate mixture. The white chocolate and cream mixture should also be cooled so it’s not hot to the touch, but still fluid. If it’s too warm, it can deflate the whipped cream and make the mousse loose.
The mousse also really needs time to chill before assembly. I recommend chilling it for at least 2 hours, and if it still feels soft, refrigerate it a bit longer before stacking the cake. It also helps to assemble the cake with cold cake layers and to avoid pressing down on the top layer, since that can push the mousse out the sides.
For extra stability, especially if your kitchen is warm or you need to transport the cake, you can add a small amount of gelatin to the white chocolate mousse. I’ve added notes to the post explaining how to do that.
I hope that helps if you give it another try!
Can you freeze the cake with the mousse or just the layers?
Hi Laura,
You can freeze the cake with a mousse as well! Just move it to the fridge so that it can gradually thaw the day before you plan to eat it. Hope that helps, happy baking!
Thanks for this recipe! one question. Can we subsitute your cake recipe for our own dark chocolate cake recipe or is this a special cake/brownie mixture? Your cake layers look more like brownie than cake.
You absolutely can! I think that would be delicious 🙂 Hope it turns out amazing Crystal!
Question: the recipe says for a 9”x13” cake use a serrated knife to make 2, 4.5”x6.5”
cake slices. I’m confused. Should it be 2, 4.5”x13” cakes?
Thanks
I’m so sorry for the confusion Vic! This was one of the first recipes I worked on after my maternity leave and I think my brain wasn’t quite up to speed. Mom brain is so real!!!!
Once cut, you should end up with 2, 9×6.5-inch pieces. Thank you so much for pointing this out, I’ve updated it above. Happy baking!!
how much heavy cream should be added to white chocolate to melt the white chocolate !!!
Hi Swati,
I mention this in step 5 of the mousse filling section “Add 3/4 cup of white chocolate chips and 1/3 cup of heavy cream in a medium-sized, heat-proof bowl. Heat for 45-60 seconds in the microwave, then let the mixture sit for a minute. Stir until combined with a rubber spatula. The white chocolate should be completely melted, and the mixture should be smooth. You can also use a double boiler if you don’t have a microwave. Set aside.”
This is then folded into half of the whipped cream in step 9. Hope that helps, happy baking!
and also should we divide the tipping cream equally between the two mousse
Hi Swati,
You make one batch of whipped cream, divide it between two bowls then add the chocolate ganache to one to make chocolate mousse, and add the white chocolate ganache to the other to make white chocolate mousse. Hope that helps, happy baking!
Perfect!! Thank you for sharing:)
Of course! So happy it turned out great Debra, thanks for sharing!
Hi Chelsea! I made this cake for Christmas and while each component was delicious, I could not get the mousse to stay in the cake. As soon as I piped on the mouse and put on the top cake layer, all of the mousse squished out. I had made the mousse in advance and it had a full day to chill. I was thinking that maybe the cake layers (while delicious) may have been too heavy for the filling and that’s why it squished out? While it was very tasty, the cake ended up looking like a mess and was served deconstructed. Everything was completely cooled and set before assembling, just wanted to know if you had any tips. Thanks!
Hi Emily,
I’m so sorry to hear that happened!
I haven’t run into that, but my first thought would be that either the chocolate mixture may have been a little bit too warm when folded into the whipped cream, or that the mousse may have been a tiny bit overmixed! Either of those things will make the mousse less firm, and would cause it to squish out:/ If you don’t think it’s either of those, let me know and we can keep troubleshooting!
Hi I am excited to try out your recipe. I am currently making my list of things I need to make this. On your ingredient list, you list 7 large egg whites? Is that correct? I appreciate your help.
Hi Patty,
It is! I usually use egg whites from a carton to keep things simple, so it’s just a cup of egg whites. You can also use 4 large, whole eggs in place of the egg whites if needed, but the texture will be a little bit denser. Hope that helps, happy baking!
The taste was great but cutting this cake was a nightmare. Honestly added so much stress to my Christmas and the presentation was horrible. The ganache becomes hard and even with a hot knife, when I cut through it, mousse oozed out everywhere. I spent several hours making this dessert, only to be embarrassed by it. When I made the cake, the layers were nice and firm and it held up the entire time in the refrigerator.
I am so sorry to hear that Shelly :/ That is such a bummer!
What type of knife were you using? Usually a hot, dry knife very slowly pressed into cold ganache with cut through it as long as you let the heat of the knife work its magic. Out of curiosity, how thick was your ganache layer?
I made the cake last night and the white chocolate mousse was a disaster. But it still tasted good. The trouble started right at the beginning when melting the white chocolate into the heavy cream I couldn’t get it to be a smooth mixture, it kept acting like it was cuddling, and then when it was chilling the fat separated into grainy globules from the liquid and that was before I tried folding in the whipped cream. I tried repeating it but it was very soft and still granular.
So sorry to hear that Ashley!! It sounds like the white chocolate may have gotten too hot. Some microwaves are a lot hotter than others, and I wonder if that’s what happened here :/ How long did you heat the white chocolate for in the microwave? What type of white chocolate did you use, and what type of bowl? Some types of bowls like glass retain heat longer.
You are so right that if you couldn’t get the white chocolate and heavy cream mixture smooth, it would make the mousse curdled too. Hopefully we’ll be able to figure out what happened to avoid it in the future!!
I’ve done research on melting chocolate for dipping cookies or fruit and the recipes say slowly heat chocolate to 105, then dip when it cools between 85-90 degrees. There’s a tempering process for melting chocolate to keep in mind. Going above the recommended temps can hurt the end result. So I could microwave with caution… 🙂
Excellent recipe.
Thank you Karen 🙂