
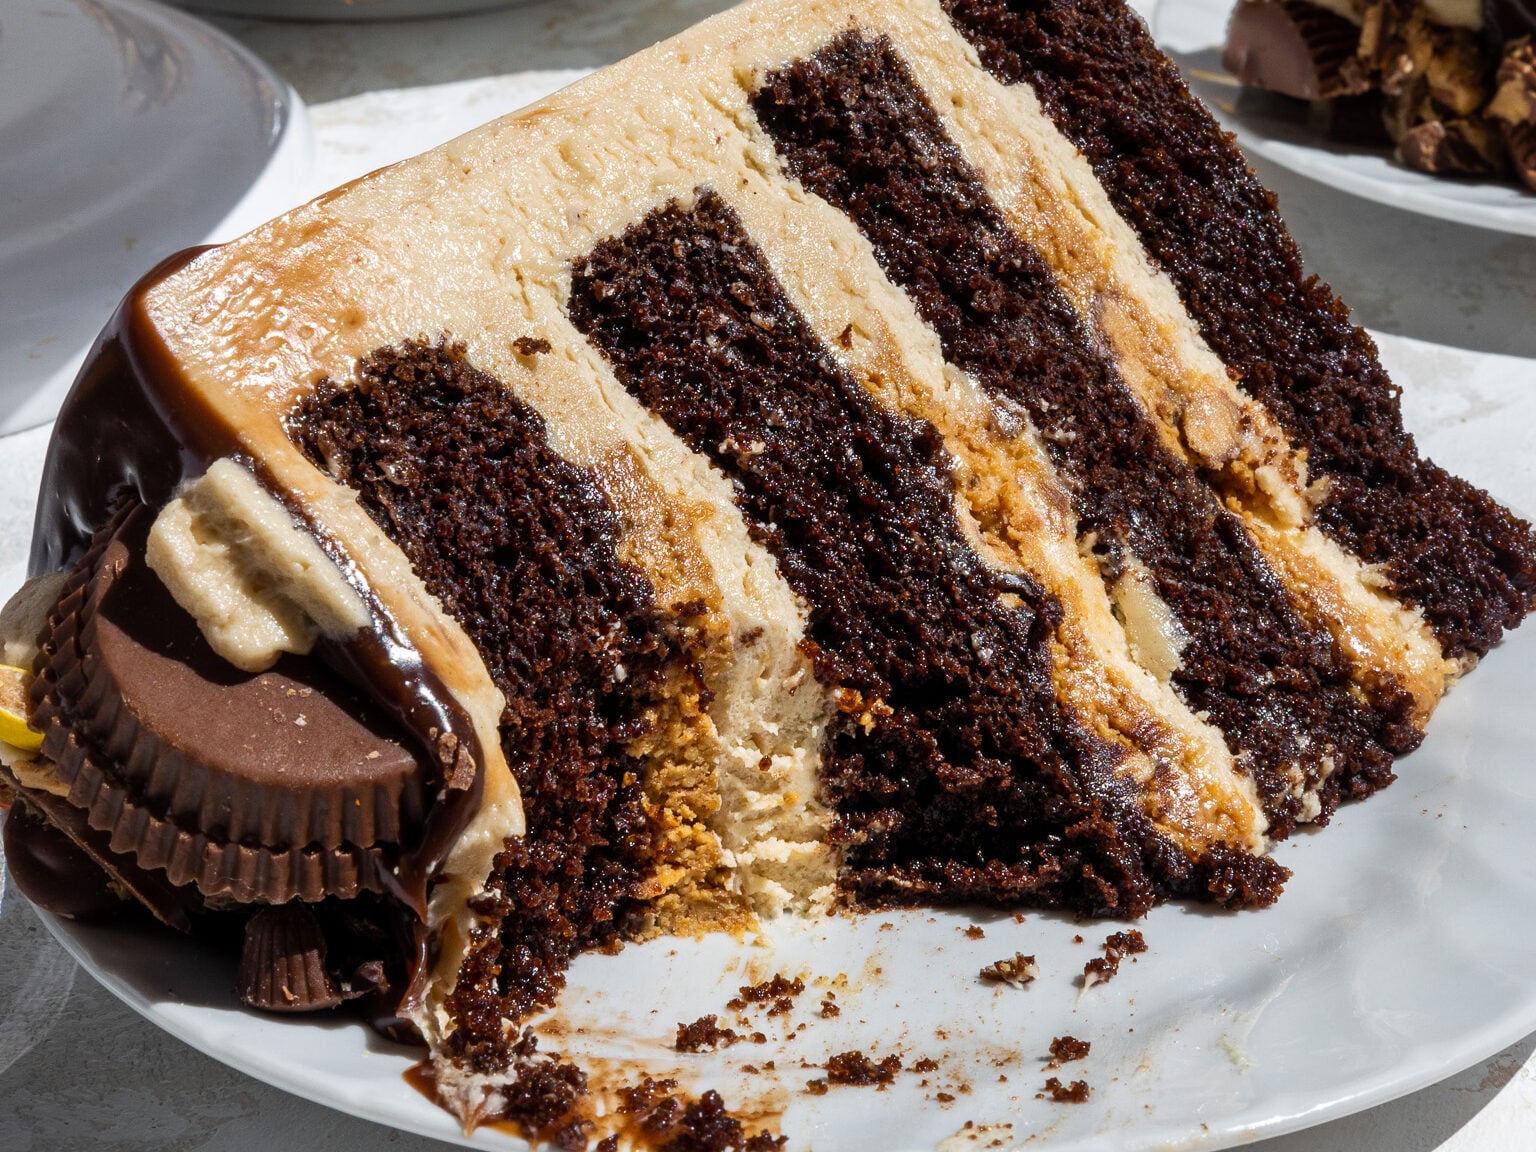
Reese’s Chocolate Peanut Butter Cake
Love Reese’s?? Then this Reese’s chocolate peanut butter cake recipe is for you! It’s made with moist chocolate cake layers, creamy peanut butter frosting, and loads of Reese’s peanut butter cups.
How to Make This Reese’s Chocolate Peanut Butter Cake
To make sure this cake turns out as amazing as possible, let’s walk through each step together! I’ve also included a video tutorial in the recipe card below.
I figured it might be helpful to know what tools I use too, so I’ve shared a list below.
Not all of these are mandatory, but they make the process a lot easier. If you don’t have all these things on hand, feel free to improvise and work with what you have.
- 3, 8-inch cake pans or 4, 7-inch cake pans
- Serrated Knife
- Spinning cake stand
- Electric hand mixer or stand mixer
- 10-inch greaseproof cake board or flat plate
- Large offset spatula
- 1 Large piping bag
Step 1: Bake the Chocolate Cake Layers
The first step is to make the chocolate cake batter following the recipe card at the bottom of this post.
Divide the batter evenly between the prepared cake pans. Bake the layers for 23-26 minutes or until a toothpick comes out with a few moist crumbs.
Remove the cake layers from the oven and let them cool in the pans for about 30 minutes.
Gently run an offset spatula around the rim of the cake pans to loosen them, then flip the cake layers onto wire racks to finish cooling.
Once cooled, use a serrated knife to level the top of each cake layer.

If you’re making these in advance, you can wrap and freeze them at this point.
Step 2: Make the Peanut Butter Buttercream Frosting
While the cake layers bake and cool, make the peanut butter buttercream.
I like to use my American buttercream (ABC) as a base because it is super easy to make, and the sweetness of the frosting pairs so nicely with the salty peanut butter.
If you aren’t a fan of ABC, I’d recommend adding peanut butter to a batch of my Swiss meringue buttercream or 1.5 batches of my hybrid buttercream.
This frosting can also be made in advance if needed and kept in the fridge for up to a month.
Step 3: Stack and Fill the Cake Layers
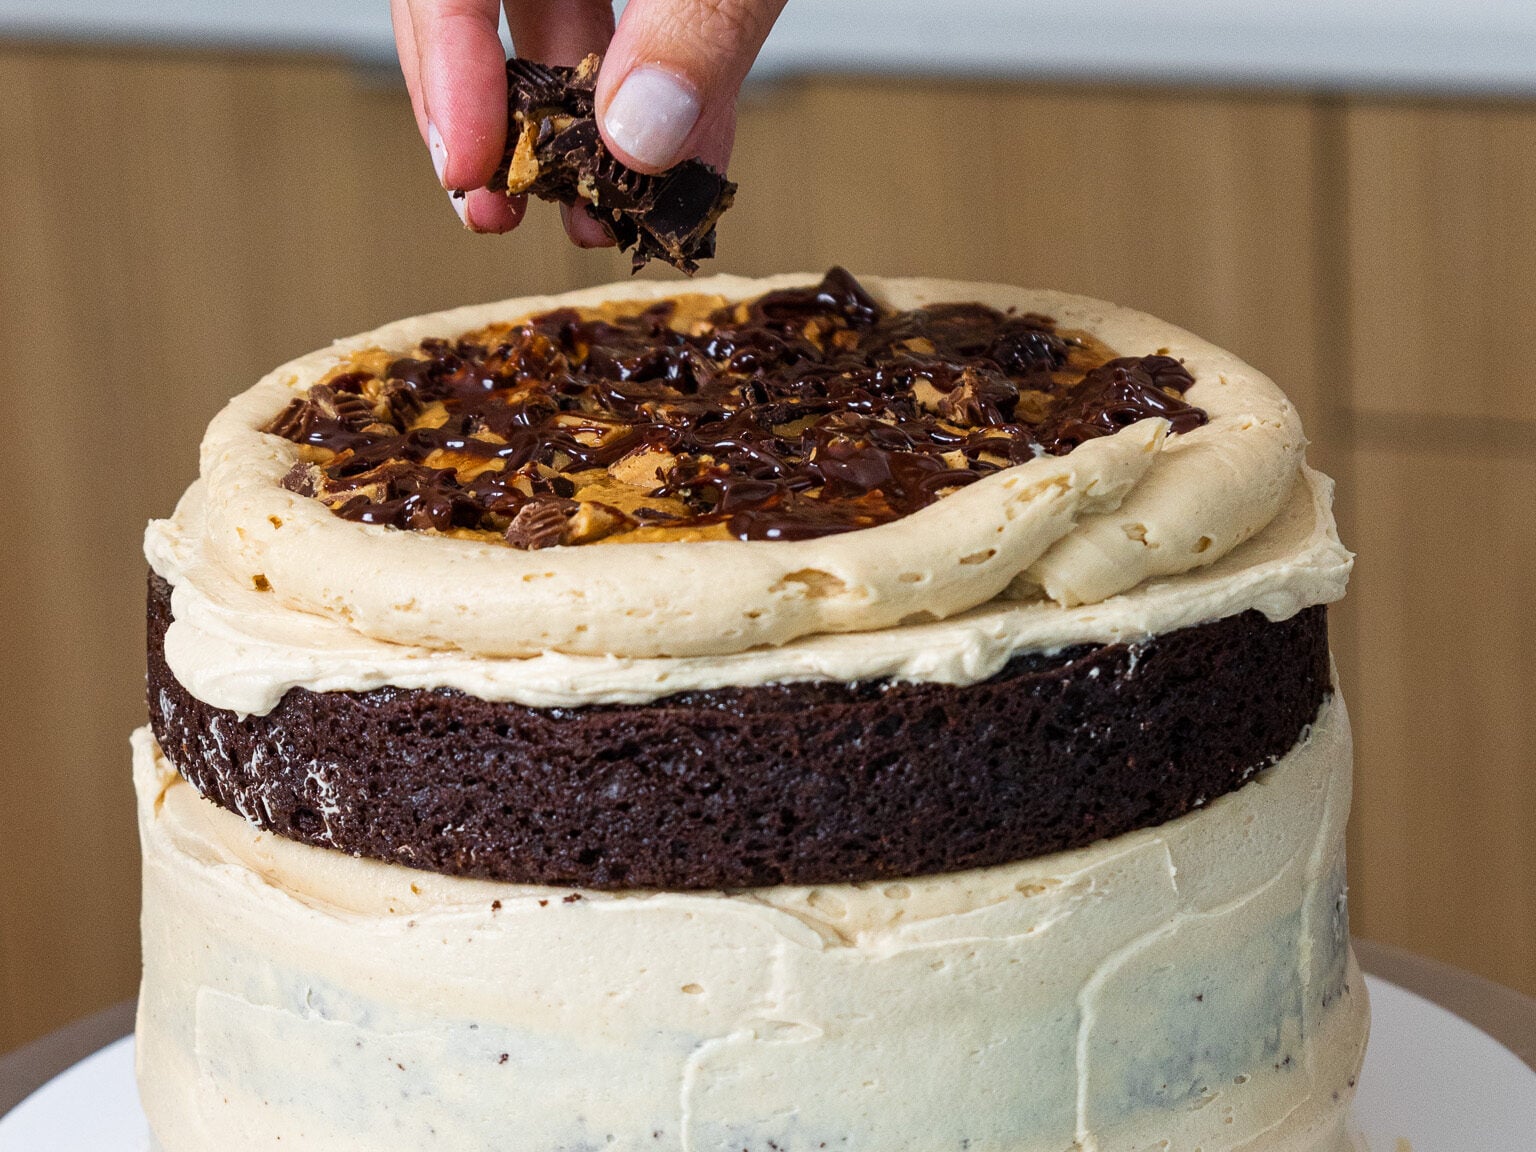
Then it’s time to assemble this cake! Stack and frost the cake layers on a greaseproof cake board or flat plate. Use a dab of buttercream to help stick the first cake layer to the board.
Spread a thin layer of buttercream on top of the cake layer.
Pipe a ring of buttercream around the edge of the cake layer and fill the center with your favorite peanut butter. I like to add about 1/3 cup of peanut butter between each layer.
Sprinkle 1/2 cup of chopped Reese’s peanut butter cups on top of the peanut butter.
Flip the top cake layer upside down to make the cake easier to frost and get sharp corners.
Step 4: Chill and Crumb Coat the Cake
Chill the cake in the freezer for 5-10 minutes to prevent the layers from sliding, then add a thin coat of frosting around the cake that fully covers the cake layers.
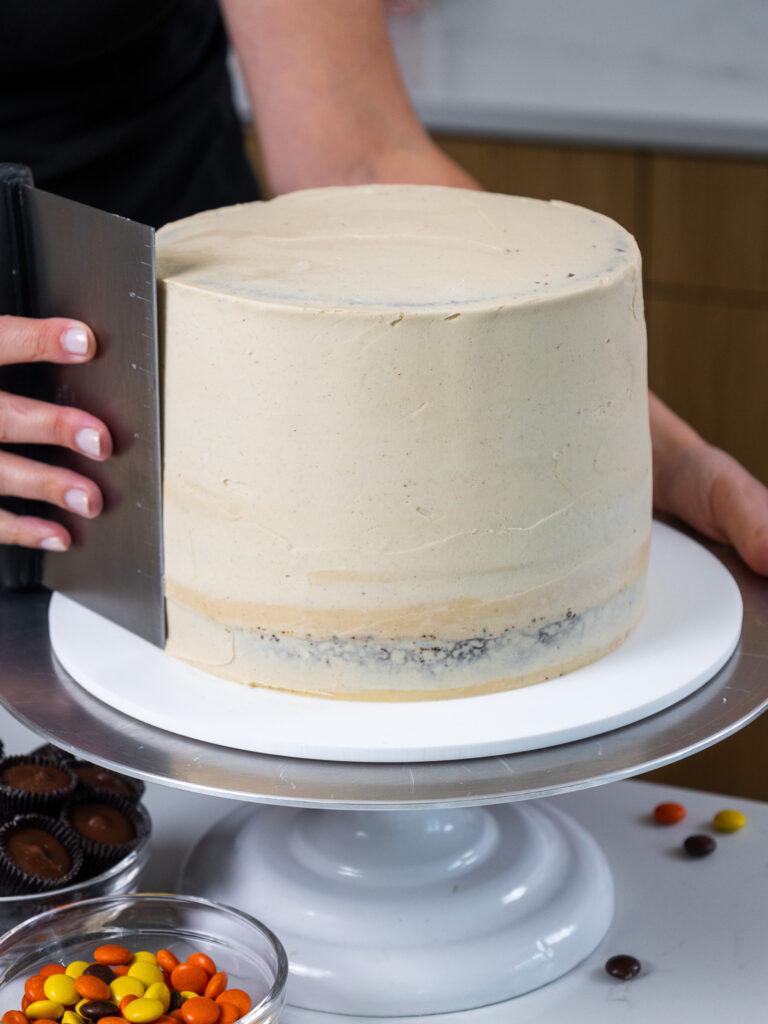
Smooth using a bench scraper, then chill the cake again in the fridge (30 minutes) or freezer (10 minutes) until the frosting is firm to the touch.
Step 5: Add the Second Layer of Frosting
Then add a second, thicker layer of peanut butter frosting to the cake and smooth using a bench scraper and offset spatula.
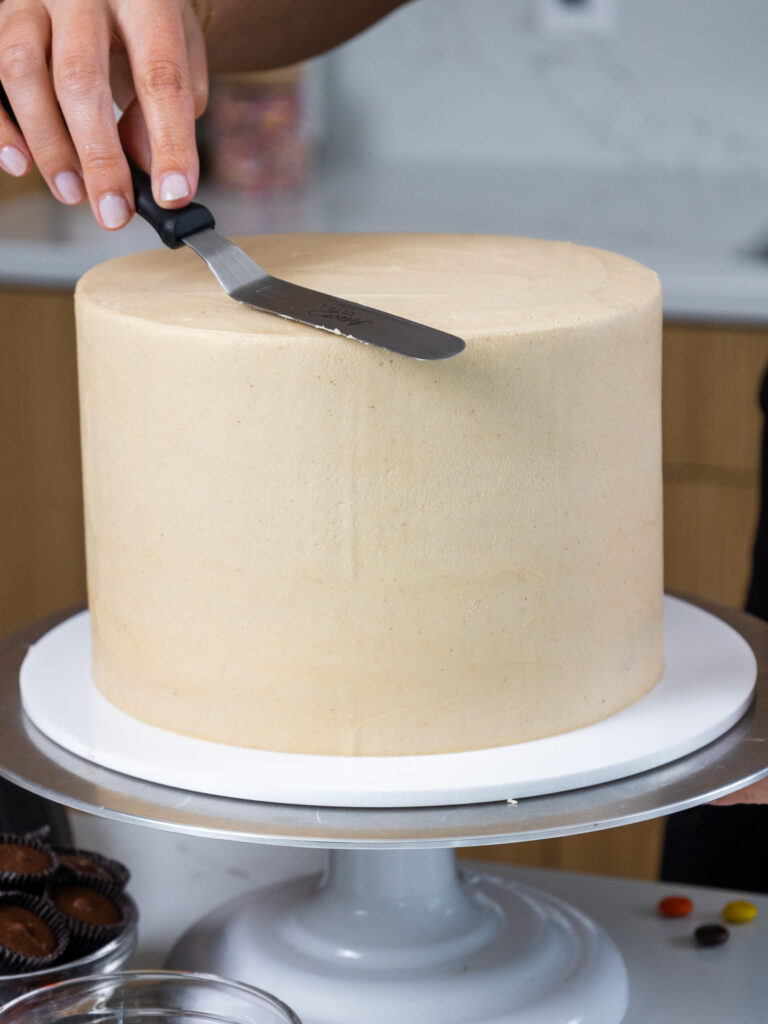
Then chill the cake one more time in the fridge (20 minutes) or freezer (5 minutes) until the frosting is firm to the touch.
Step 6: Make the Chocolate Ganache Drip & Decorate This Reese’s Chocolate Peanut Butter Cake
The last component is the chocolate ganache. Bring the heavy cream to a simmer, then pour it over the milk chocolate.
Stir until the cream and chocolate are combined and smooth. If the mixture seems too thin or thick, you can add a touch more chocolate chips or heavy cream.
The type of cream and chocolate that you use can affect the consistency, along with the temperature of the ganache. Feel free to adjust as needed.
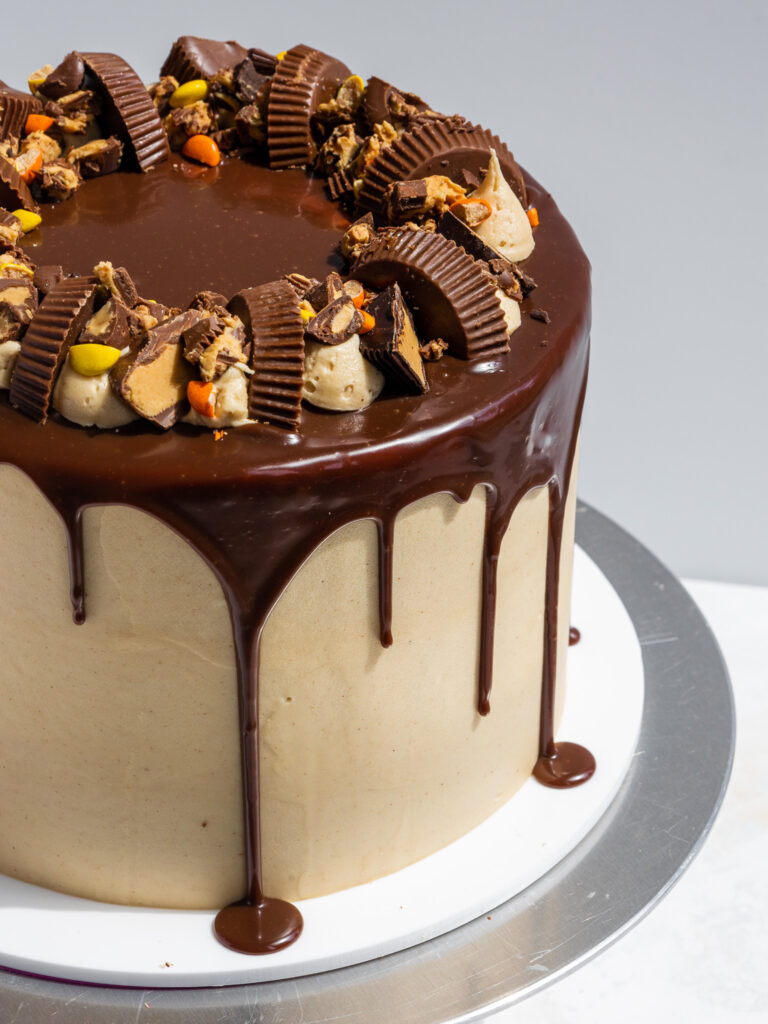
Pour the warm chocolate ganache on top of the cake and gently push it over the edge of the cake using a small offset spatula.
Chill the cake again in the freezer for 5 minutes to give the ganache time to set a bit.
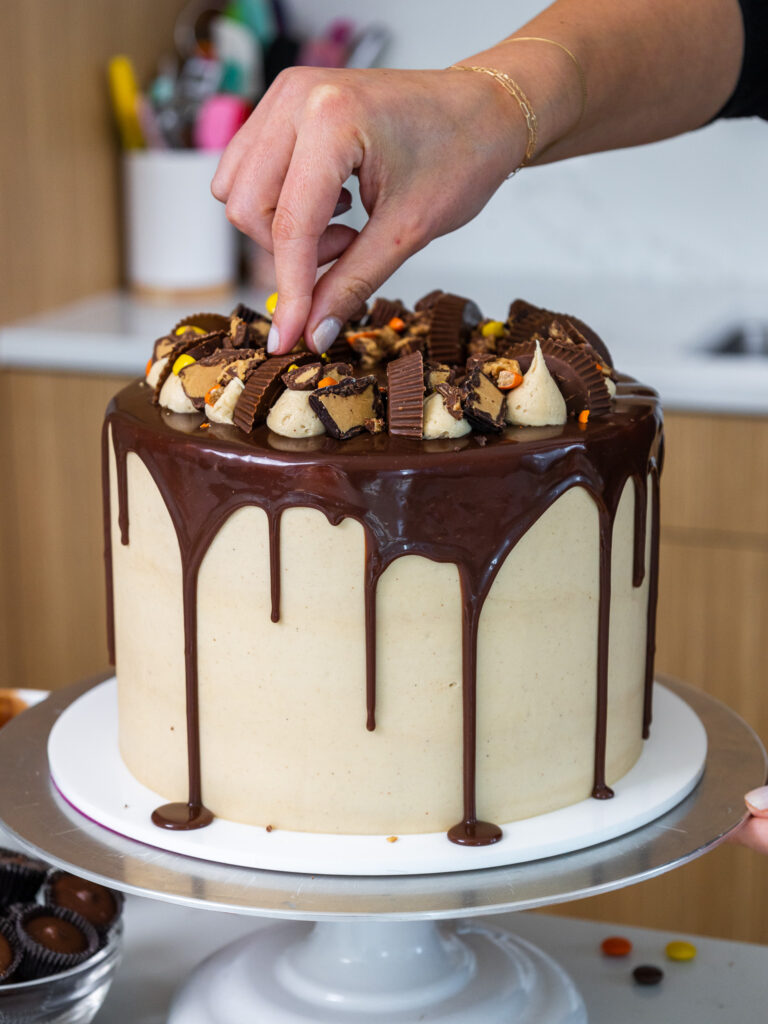
Add the remaining chopped up peanut butter cups and buttercream in a ring around the top of the cake, then enjoy!
Substitutions and Swaps – Chocolate Cake Layers
This recipe uses quite a few ingredients, and I know you might not have them all on hand. Or if you have food allergies or restrictions, I’ve got you covered.
Below are some swaps and substitutions that can be made in this cake recipe.
- All-Purpose Flour – This recipe turns out best with all-purpose flour. However, you can swap in a good gluten-free flour blend (like this) if needed. Just be sure to stir the batter longer than normal to help give the cake proper structure, and let the batter sit for about 20 minutes before baking it if you opt to make a gluten-free version.
- Granulated Sugar – I do not recommend reducing the amount of sugar or changing the type of sugar, as it will change the texture of the cake layers.
- Baking Cocoa – I like to use the Ghirardelli or Hershey’s brand of unsweetened baking cocoa, but you can use any brand! You can also use dark or black cocoa powder.
- Buttermilk – You can also use full-fat yogurt, sour cream, whole milk, or an alternative yogurt or milk (almond, soy, oat).
- Vegetable Oil – Any flavorless oil can be used in this recipe. Canola, vegetable, or even sunflower oil would all work great. I don’t recommend olive oil, though, as it has a strong flavor and will change the taste of the cake.
- Eggs – This recipe uses 2 large eggs. If you have an egg allergy, you can try using a vegan egg replacer.
Substitutions and Swaps – Peanut Butter Buttercream
- Unsalted Butter – If you only have salted butter on hand, you can use it in place of the unsalted butter. Just be sure to omit the salt that this frosting recipe calls for. You can also use vegan butter in its place.
- Peanut Butter – I recommend making this frosting with creamy peanut butter that is shelf-stable. I usually use JIF or Skippy. Natural peanut butters that separate easily can cause the frosting to break.
- Heavy Cream – Whipping cream, coconut cream, or alternative milk (soy, almond, oat, coconut) will work fine in this frosting recipe if that’s what you have on hand.
- Vanilla Extract – Other extracts can also be used in place of the vanilla extract if needed.
Making This Chocolate Peanut Butter Layer Cake in Different Sizes
One batch of batter is about 1500g, so I add roughly 500g to each of my cake pans when using 3, 8-inch cake pans, or 375g to my cake pans when using 4, 7-inch cake pans.
You can also use one batch of batter to make 2, 9-inch cake layers or 4, 6-inch cake layers. Bake time will be a few minutes longer at 350°F/175°C.
If you want to make chocolate peanut butter cupcakes, this recipe can be used to make 2 dozen cupcakes. Fill the liners 3/4 full and bake for 18-21 minutes at 350°F/175°C.
If you want to make a tiered cake with this recipe, check out my cake batter calculator to see how many batches of batter you’ll need.
Can This Cake Be Made in Advance?
Short answer – yes! I highly recommend making the components of this cake in stages. It breaks the process up and makes it so much more approachable!
The cake layers can be made in advance and frozen. They taste just as great when they’re frozen as when they’re fresh, I promise!
You can also make the frosting ahead of time or save any leftover frosting! It can be stored in an airtight container in the fridge for up to a month.
Be sure to give it a good stir once it thaws to get the consistency nice and smooth again.
A frosted cake can be stored for up to a week in the fridge as long as there’s no fresh fruit in it. The buttercream will lock all the moisture in and keep it fresh.
If you cut into the cake and have leftovers, use any remaining frosting to cover the cut section to keep it moist and store it in the fridge for up to a week.
Tips for Making the Best Reese’s Chocolate Peanut Butter Cake
- Properly measure the flour. Either spoon it into the cup measure, then level with a knife, or use a kitchen scale to measure your dry ingredients.
- Ingredients at room temperature mix together better, so be sure to set out any cold ingredients ahead of time.
- Use a scale to weigh your cake pans as you fill them. It helps the cake layers bake to the same height and bake more evenly.
- Chill the cake layers in the freezer for about 20 minutes before assembling the cake. This makes them easier to stack and frost.
- Level the room temperature or thawed cake layers with a serrated knife to make them easier to stack and fill.
- Chill the cake before adding the crumb coat. This will help lock the filling in place and prevent the cake layers from sliding.
- If your cake layers turn out less than perfect, check out my cake troubleshooting guide to try to figure out what happened.
Let Me Know What You Think!
If you make this Reese’s chocolate peanut butter cake recipe, I’d love to hear what you think! Let me know by leaving a rating and comment below.
And don’t forget to tag me @chelsweets and use #chelsweets if you share on social media so that I can see your amazing creations.
Reese’s Chocolate Peanut Butter Cake
Equipment
Ingredients
Moist Chocolate Cake Recipe
- 2 cups all-purpose flour 260g
- 2 cups granulated sugar 400g
- 3/4 cup unsweetened cocoa powder, sifted 75g
- 2 tsp baking powder 8g
- 1 1/2 tsp baking soda 9g
- 1 tsp fine salt 6g
- 1 cup warm water 240g
- 1 cup full-fat sour cream, room temperature 255g
- 1/2 cup vegetable or canola oil 110g
- 2 large eggs, room temperature 112g
- 2 tsp vanilla extract or vanilla bean paste 8g
- 1 tsp instant espresso or coffee – optional 1g
Peanut Butter Buttercream Frosting
- 1 1/2 cups (3 sticks) unsalted butter, room temperature 339
- 1 cup creamy peanut butter 250g
- 1 tsp vanilla extract or vanilla bean paste 4g
- 1/2 tsp fine salt 3g
- 7 cups powdered sugar 904g or 2 lb. bag
- 1/3 cup heavy whipping cream, room temperature 80g
Chocolate Ganache
- 1/3 cup heavy whipping cream, room temperature 80g
- 1/2 cup milk chocolate chips 85g
Additional Cake Filling and Decoration
- 1 cup peanut butter
- 2 cups chopped Reese’s peanut butter cups
Instructions
Chocolate Cake Layers
- Make the chocolate cake layers first so that they have time to cool. Preheat the oven to 350°F/175°C. Grease and line three eight-inch cake pans.
- Sift or whisk together 2 cups flour, 2 cups sugar, 3/4 cup cocoa powder, 2 tsp baking powder, 1 1/2 tsp baking soda, and 1 tsp salt in a large bowl. Set aside.
- In a separate, large bowl, add 1 cup warm water, 1 cup sour cream, 1/2 cup oil, 2 eggs, 2 tsp vanilla, and 1 tsp instant espresso and whisk together until fully incorporated.
- Mix the dry ingredients into the wet ingredients until they're just combined, and the batter is mostly smooth (a few small lumps are ok).
- Divide the batter evenly between the prepared cake pans and bake for 23-26 minutes or until a toothpick comes out with a few moist crumbs.
- Remove the cake layers from the oven and let them cool in the pans for about 30 minutes. Gently run an offset spatula around the rim of the cake pans to loosen them, then flip them onto wire racks to finish cooling.
- Once cooled, use a serrated knife to level the top of each cake layer. If you are making these in advance, wrap and freeze them at this point.
Peanut Butter Buttercream Frosting
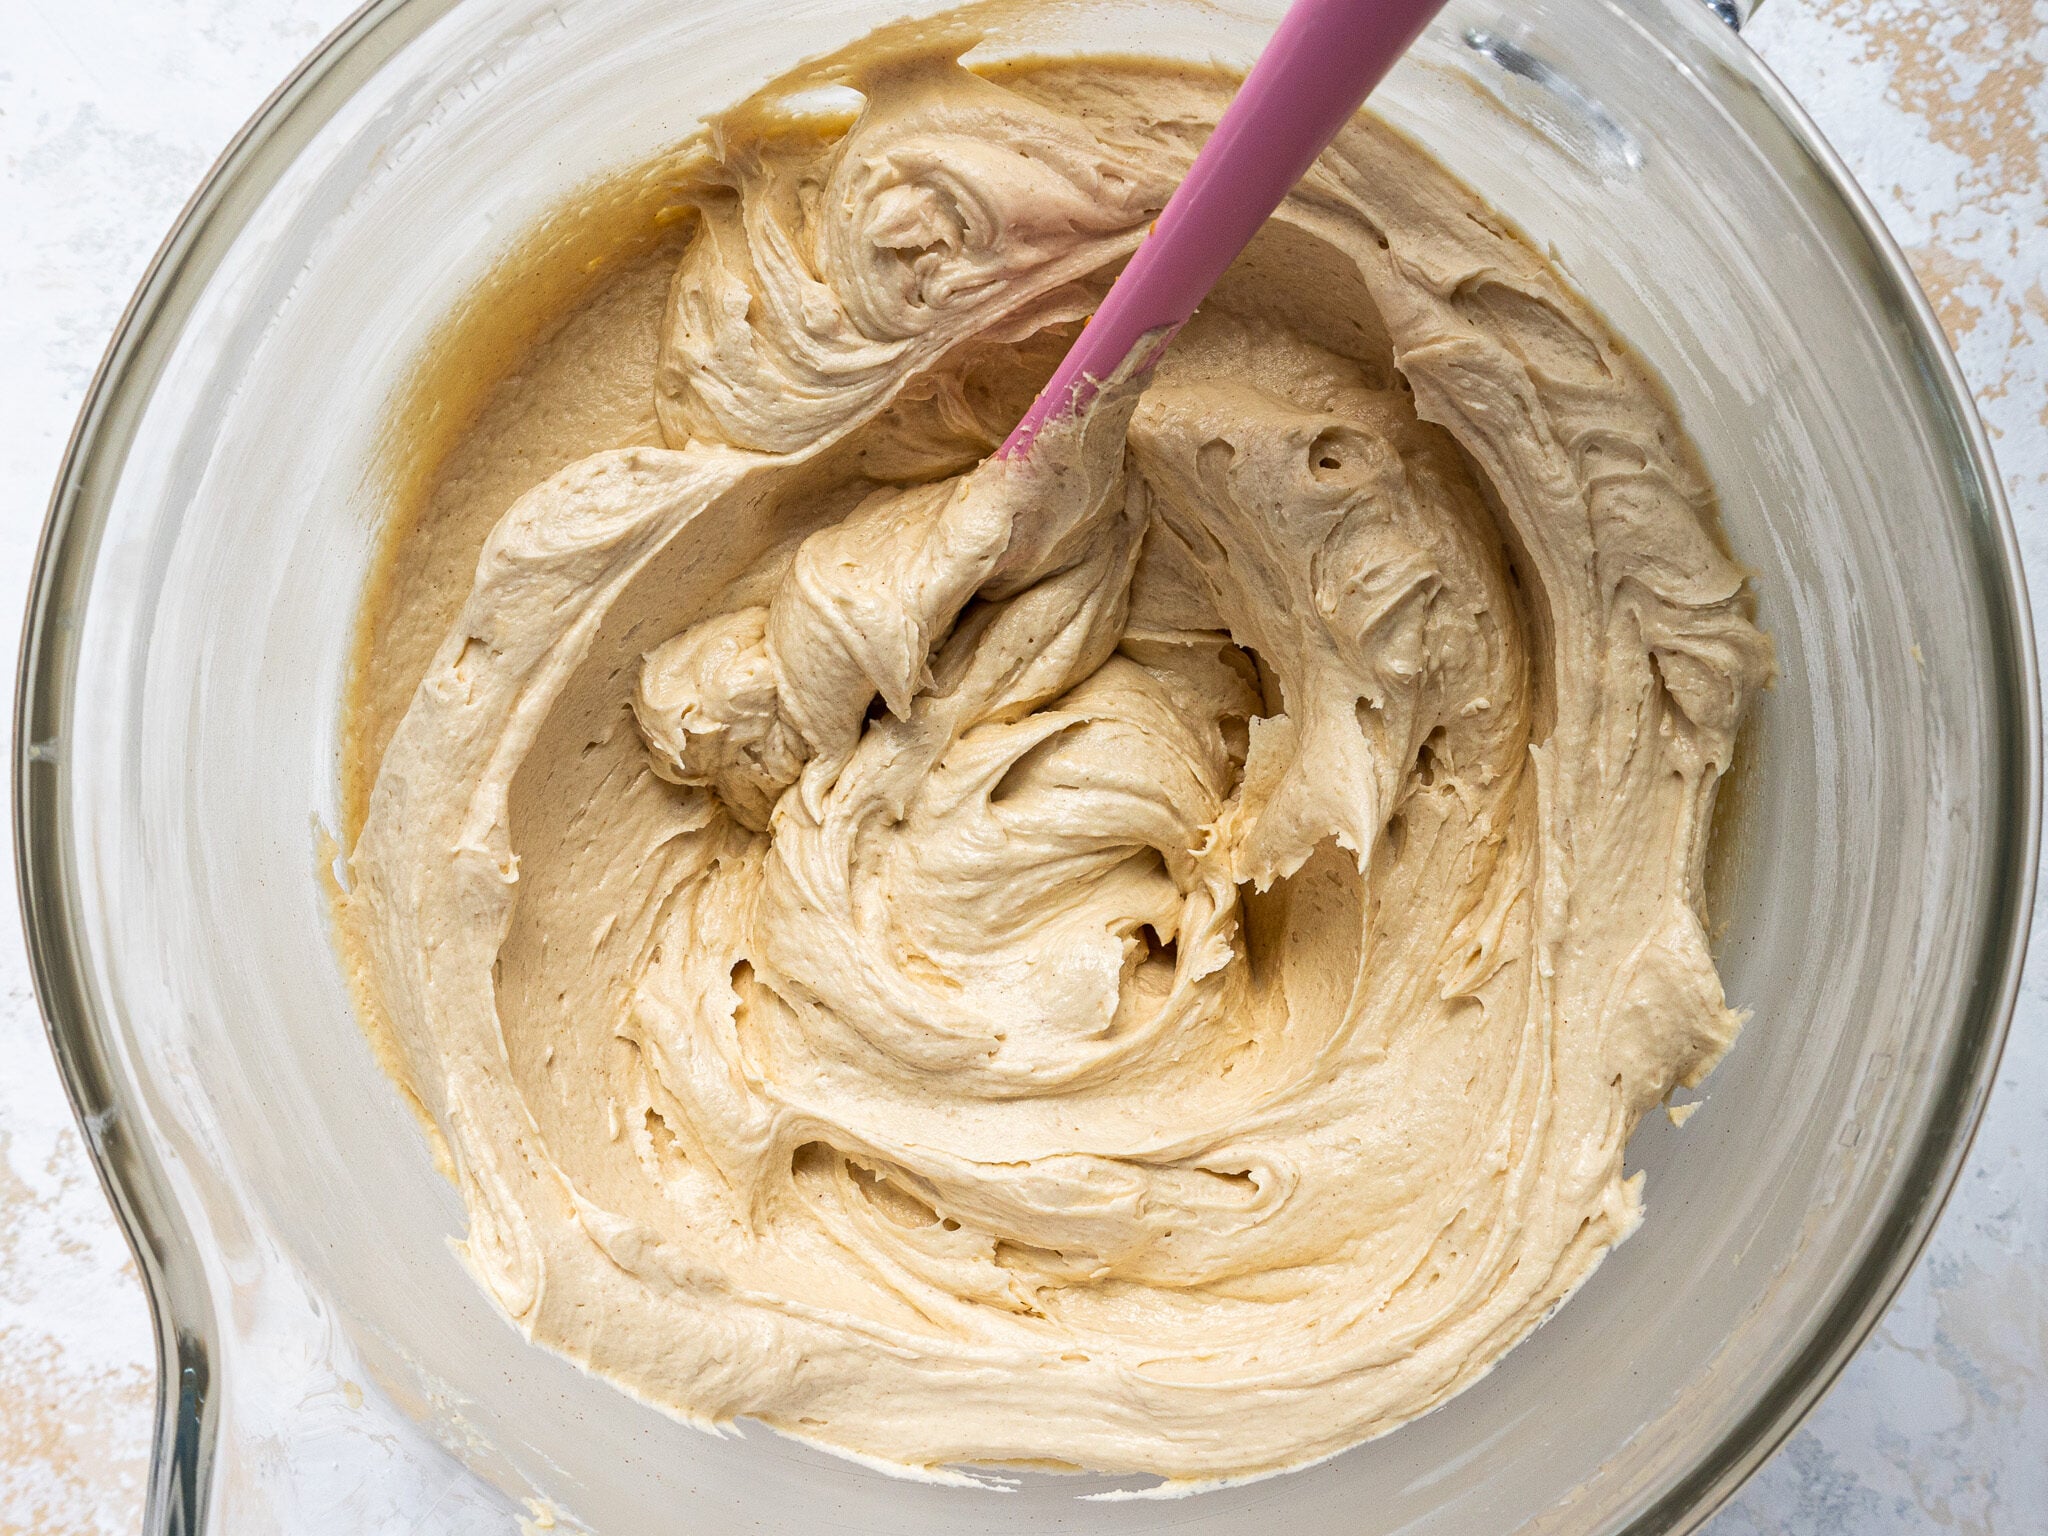
- While the cake layers bake and cool, make the buttercream frosting. In a large bowl or the bowl of a stand mixer, beat 1 1/2 cups of butter and 1 cup of creamy peanut butter on a medium speed for 30 seconds with a paddle attachment or hand mixer until smooth.
- Mix in 1 tsp vanilla extract and 1/2 tsp salt on a low speed until the ingredients are incorporated.
- Gradually mix in 7 cups of powdered sugar and 1/3 cup of heavy cream on a low speed. Scrape the sides and bottom of the bowl as needed with a rubber spatula.
- Mix on low until the desired consistency is reached. If the frosting seems too thick, add in additional cream (1 Tbsp at a time). If the frosting seems too thin, add in more powdered sugar (1/4 cup at a time).
- Place 1/3 of the frosting into a large piping bag fitted with a large round piping tip, or cut an opening that's about 3/4-inch at the base of the bag. Cover the remaining frosting with plastic wrap to prevent crusting and set aside.
Assembling this Reese's Cake
- Then it's time to assemble the cake. Stack and frost the cake layers on a greaseproof cake board or flat plate using a dab of buttercream to help stick the first cake layer to the board.
- Spread a thin layer of buttercream on top of the cake layer. Then pipe a ring of buttercream around the edge of the cake layer and fill the center with your favorite peanut butter. I like to add about 1/3 cup of peanut butter between each layer. Sprinkle 1/2 cup of chopped Reese's peanut butter cups on top of the peanut butter.
- Repeat with the remaining cake layers. Flip the top cake layer upside down to make the cake easier to frost and get sharp corners. Gently press down on top of the cake with your hands once all the layers are stacked to press out any air that's between the layers.
- Chill the cake in the freezer for 5-10 minutes to prevent the layers from sliding, then add a thin coat of frosting around the cake that fully covers the cake layers. Smooth using a bench scraper, then chill the cake in the fridge (20 minutes) or freezer (5 minutes) until the frosting is firm to the touch.
- Then add a second, thicker layer of peanut butter frosting to the cake and smooth using a bench scraper and an offset spatula. Then chill the cake one more time in the fridge (20 minutes) or freezer (5 minutes) until the frosting is firm to the touch.
Chocolate Ganache Drips
- While the cake chills, make the chocolate ganache. Heat 1/3 cup of heavy cream in a heatproof bowl in the microwave for 30-45 seconds, until it's just beginning to bubble. Gently pour 1/2 cup of milk chocolate chips into the heavy cream, making sure they are fully covered with cream. Let the mixture sit for 1 minute.
- Stir until the cream and chocolate are combined and smooth. If the mixture seems too thin or thick, you can add a touch more chocolate chips or heavy cream. The type of cream and chocolate that you use can affect the consistency, along with the temperature of the ganache. Feel free to adjust as needed.
Decorating This Reese's Cake
- Pour the chocolate ganache on top of the cake and gently push it over the edge of the cake using a small offset spatula. Chill the cake again in the freezer for 5 minutes to give the ganache time to set a bit.
- Add the remaining chopped-up peanut butter cups and buttercream in a ring around the top of the cake, then enjoy!
Video
Notes
Making this Reese’s Layer Cake in Different Sizes
One batch of batter is about 1500g, so I add roughly 500g to each of my cake pans when using 3, 8-inch cake pans. You can also use one batch of batter to make 2, 9-inch cake layers or 4, 6-inch cake layers. Bake time will be a few minutes longer at 350°F/175°C. If you want to make a tiered cake with this recipe, check out my cake batter calculator to see how many batches of batter you’ll need. If you want to make Reese’s cupcakes, this recipe can be used to make 2 dozen cupcakes. Fill the liners 3/4 full and bake at 350°F/175°C for 20-22 minutes.My Tips for Making the Best Reese’s Chocolate Peanut Butter Cake
- Ingredients at room temperature mix together better! Be sure you set out any cold ingredients ahead of time.
- Properly measure your flour (spoon into the cup measure, then level). Or better yet, use a kitchen scale to measure your dry ingredients.
- Mix your cake batter just until the ingredients are incorporated. This will ensure your cake layers are tender and fluffy.
- Use a scale to weigh your cake pans as you fill them. This makes sure each pan has the same amount of batter and will make your cake layers bake to the same height and bake more evenly.
- Level your room temperature or thawed cake layers with a serrated knife to make them easier to stack.
- Chill your cake layers in the freezer for about 20 minutes before assembling the cake. It makes it so much easier to stack and frost them!
Making This Reese’s Chocolate Peanut Butter Cake in Advance & Storage Tips
I highly recommend making the components of this cake in stages. It breaks the process up and makes it so much more approachable! The cake layers can be made in advance and frozen. They taste just as great when they’re frozen as when they’re fresh, I promise! You can make the frosting ahead of time or save any leftover frosting! It can be stored in an airtight container in the fridge for up to a month or in the freezer for 3 months. The ganache can also be stored in the fridge for up to a month. Be sure to give it a good stir once it thaws to get the consistency nice and smooth again. A frosted cake can last in the fridge for a week or in the freezer for a month. The buttercream locks in the moisture and keeps the cake fresh and delicious! If you cut into the cake and have leftovers, use any remaining frosting to cover the cut section to keep it moist and store it in the fridge for up to a week.Nutrition
Other Recipes You Might Like:
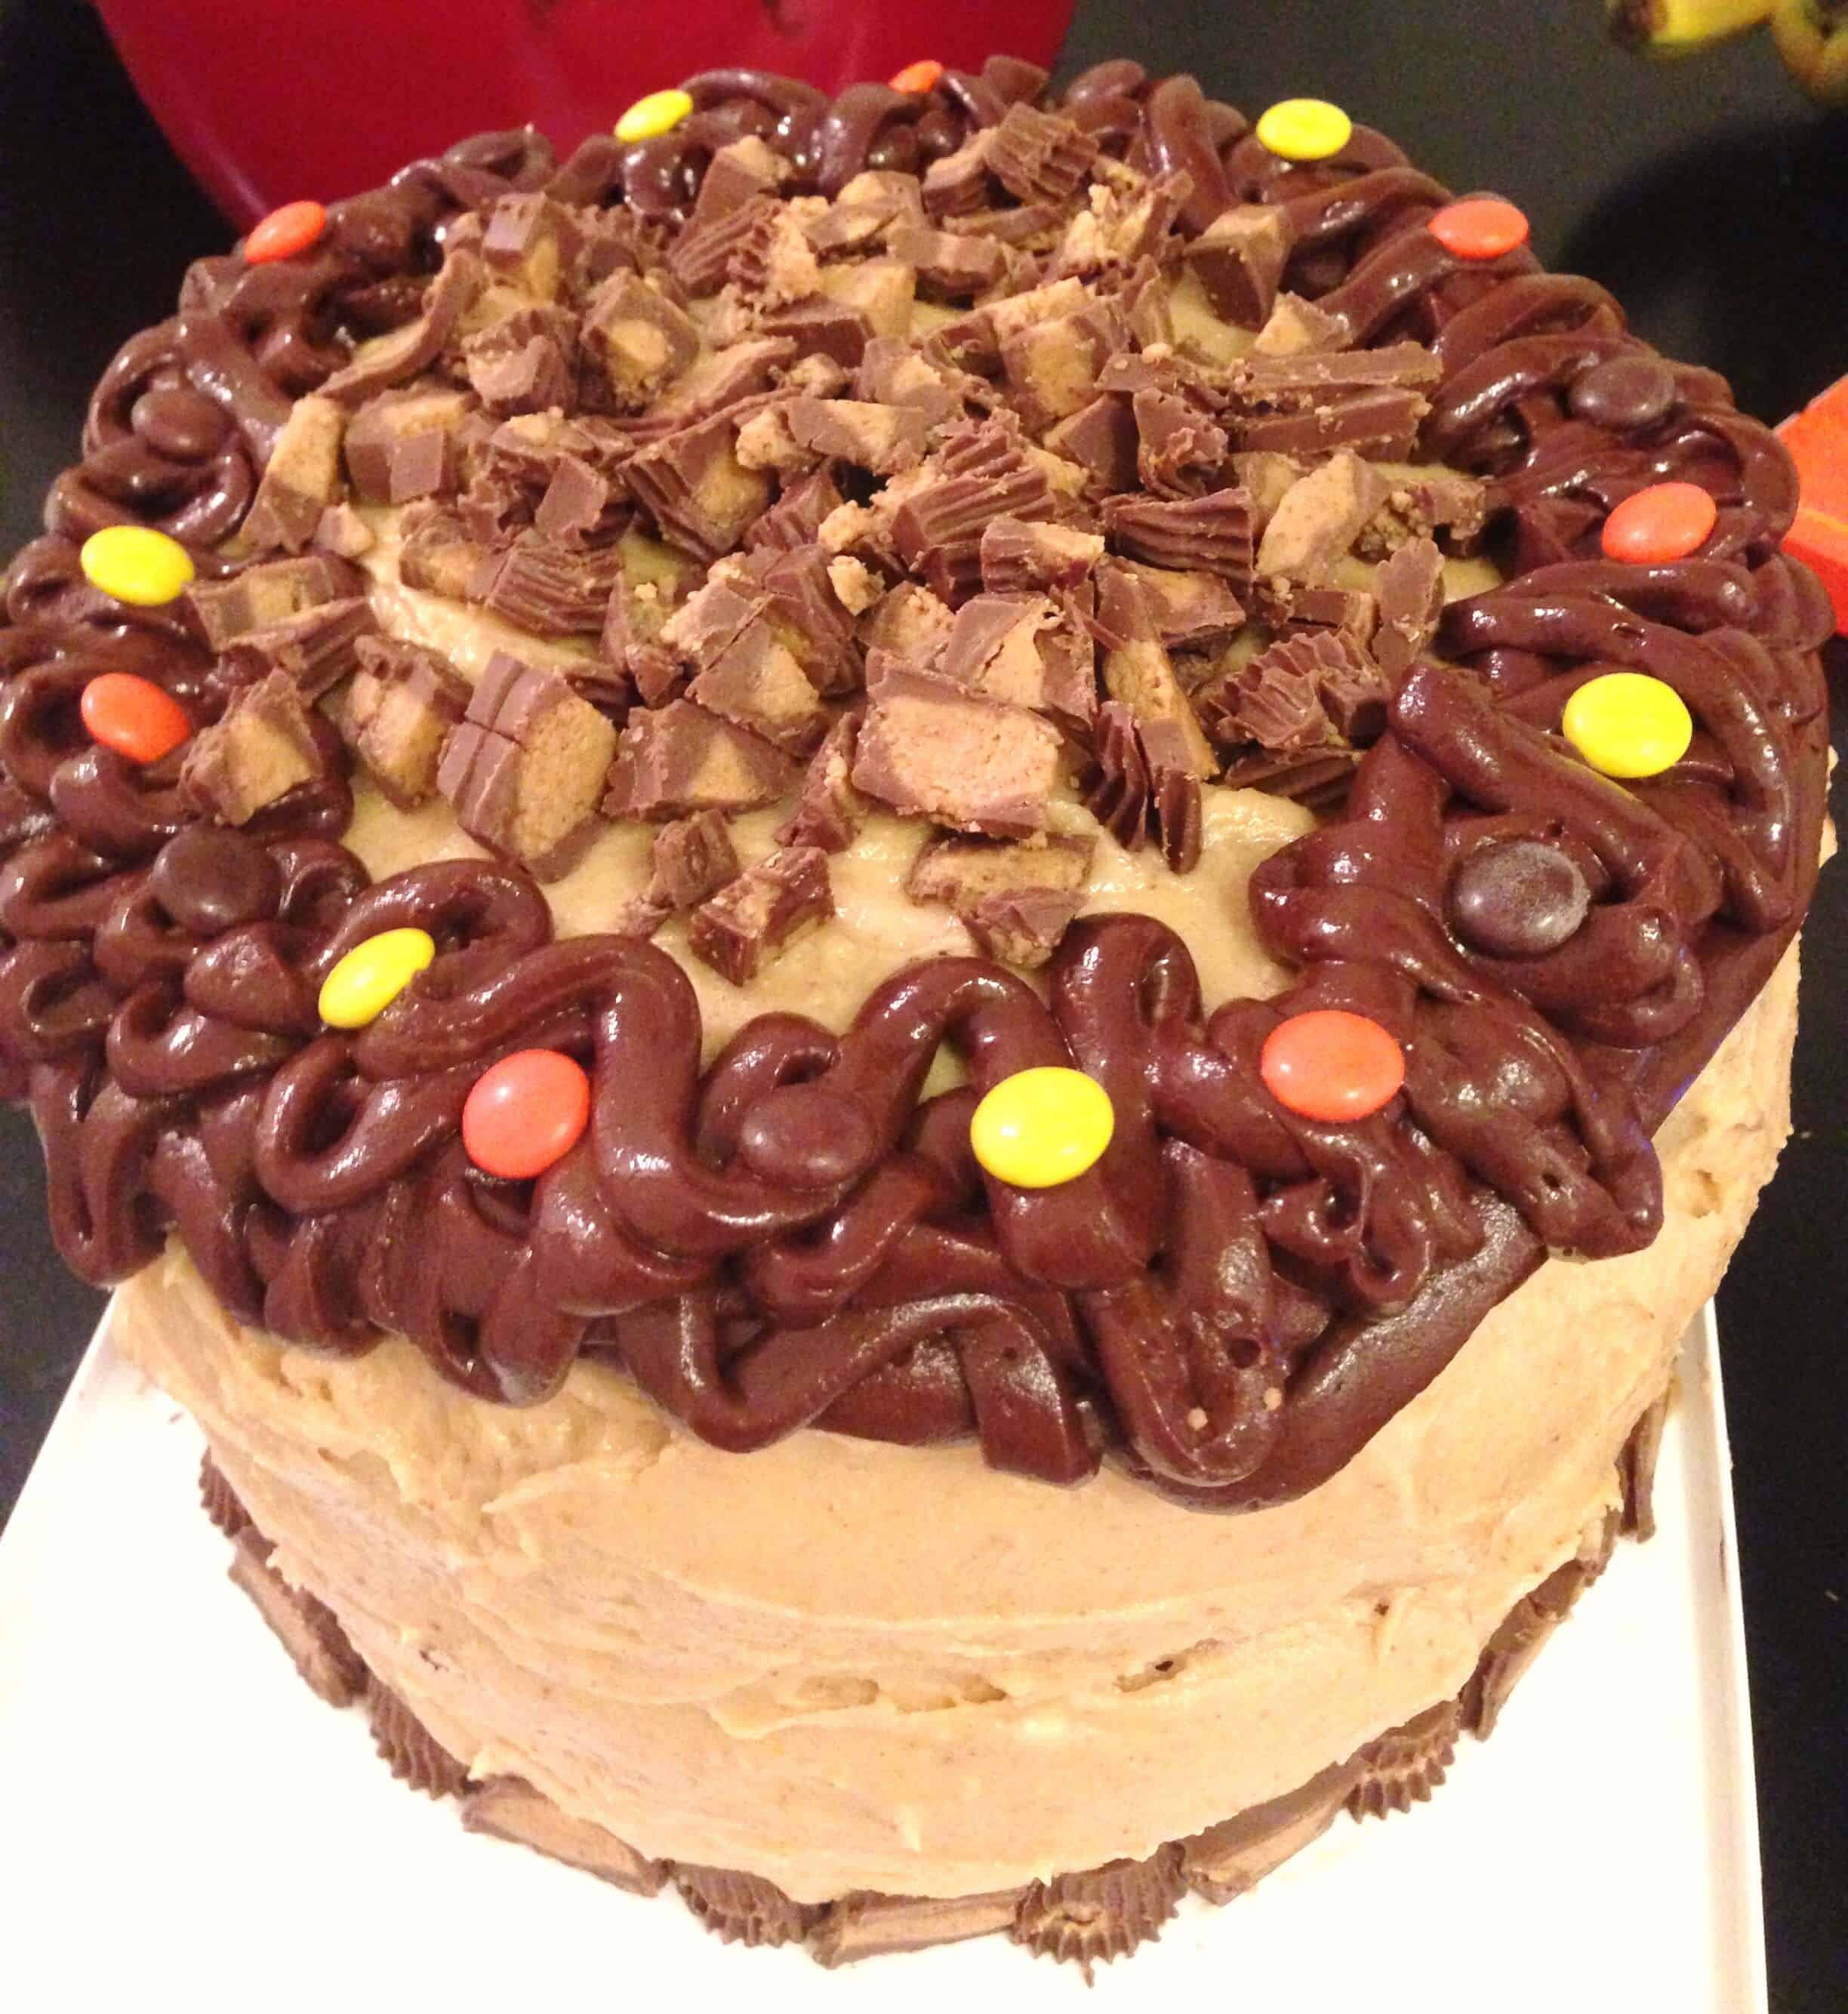
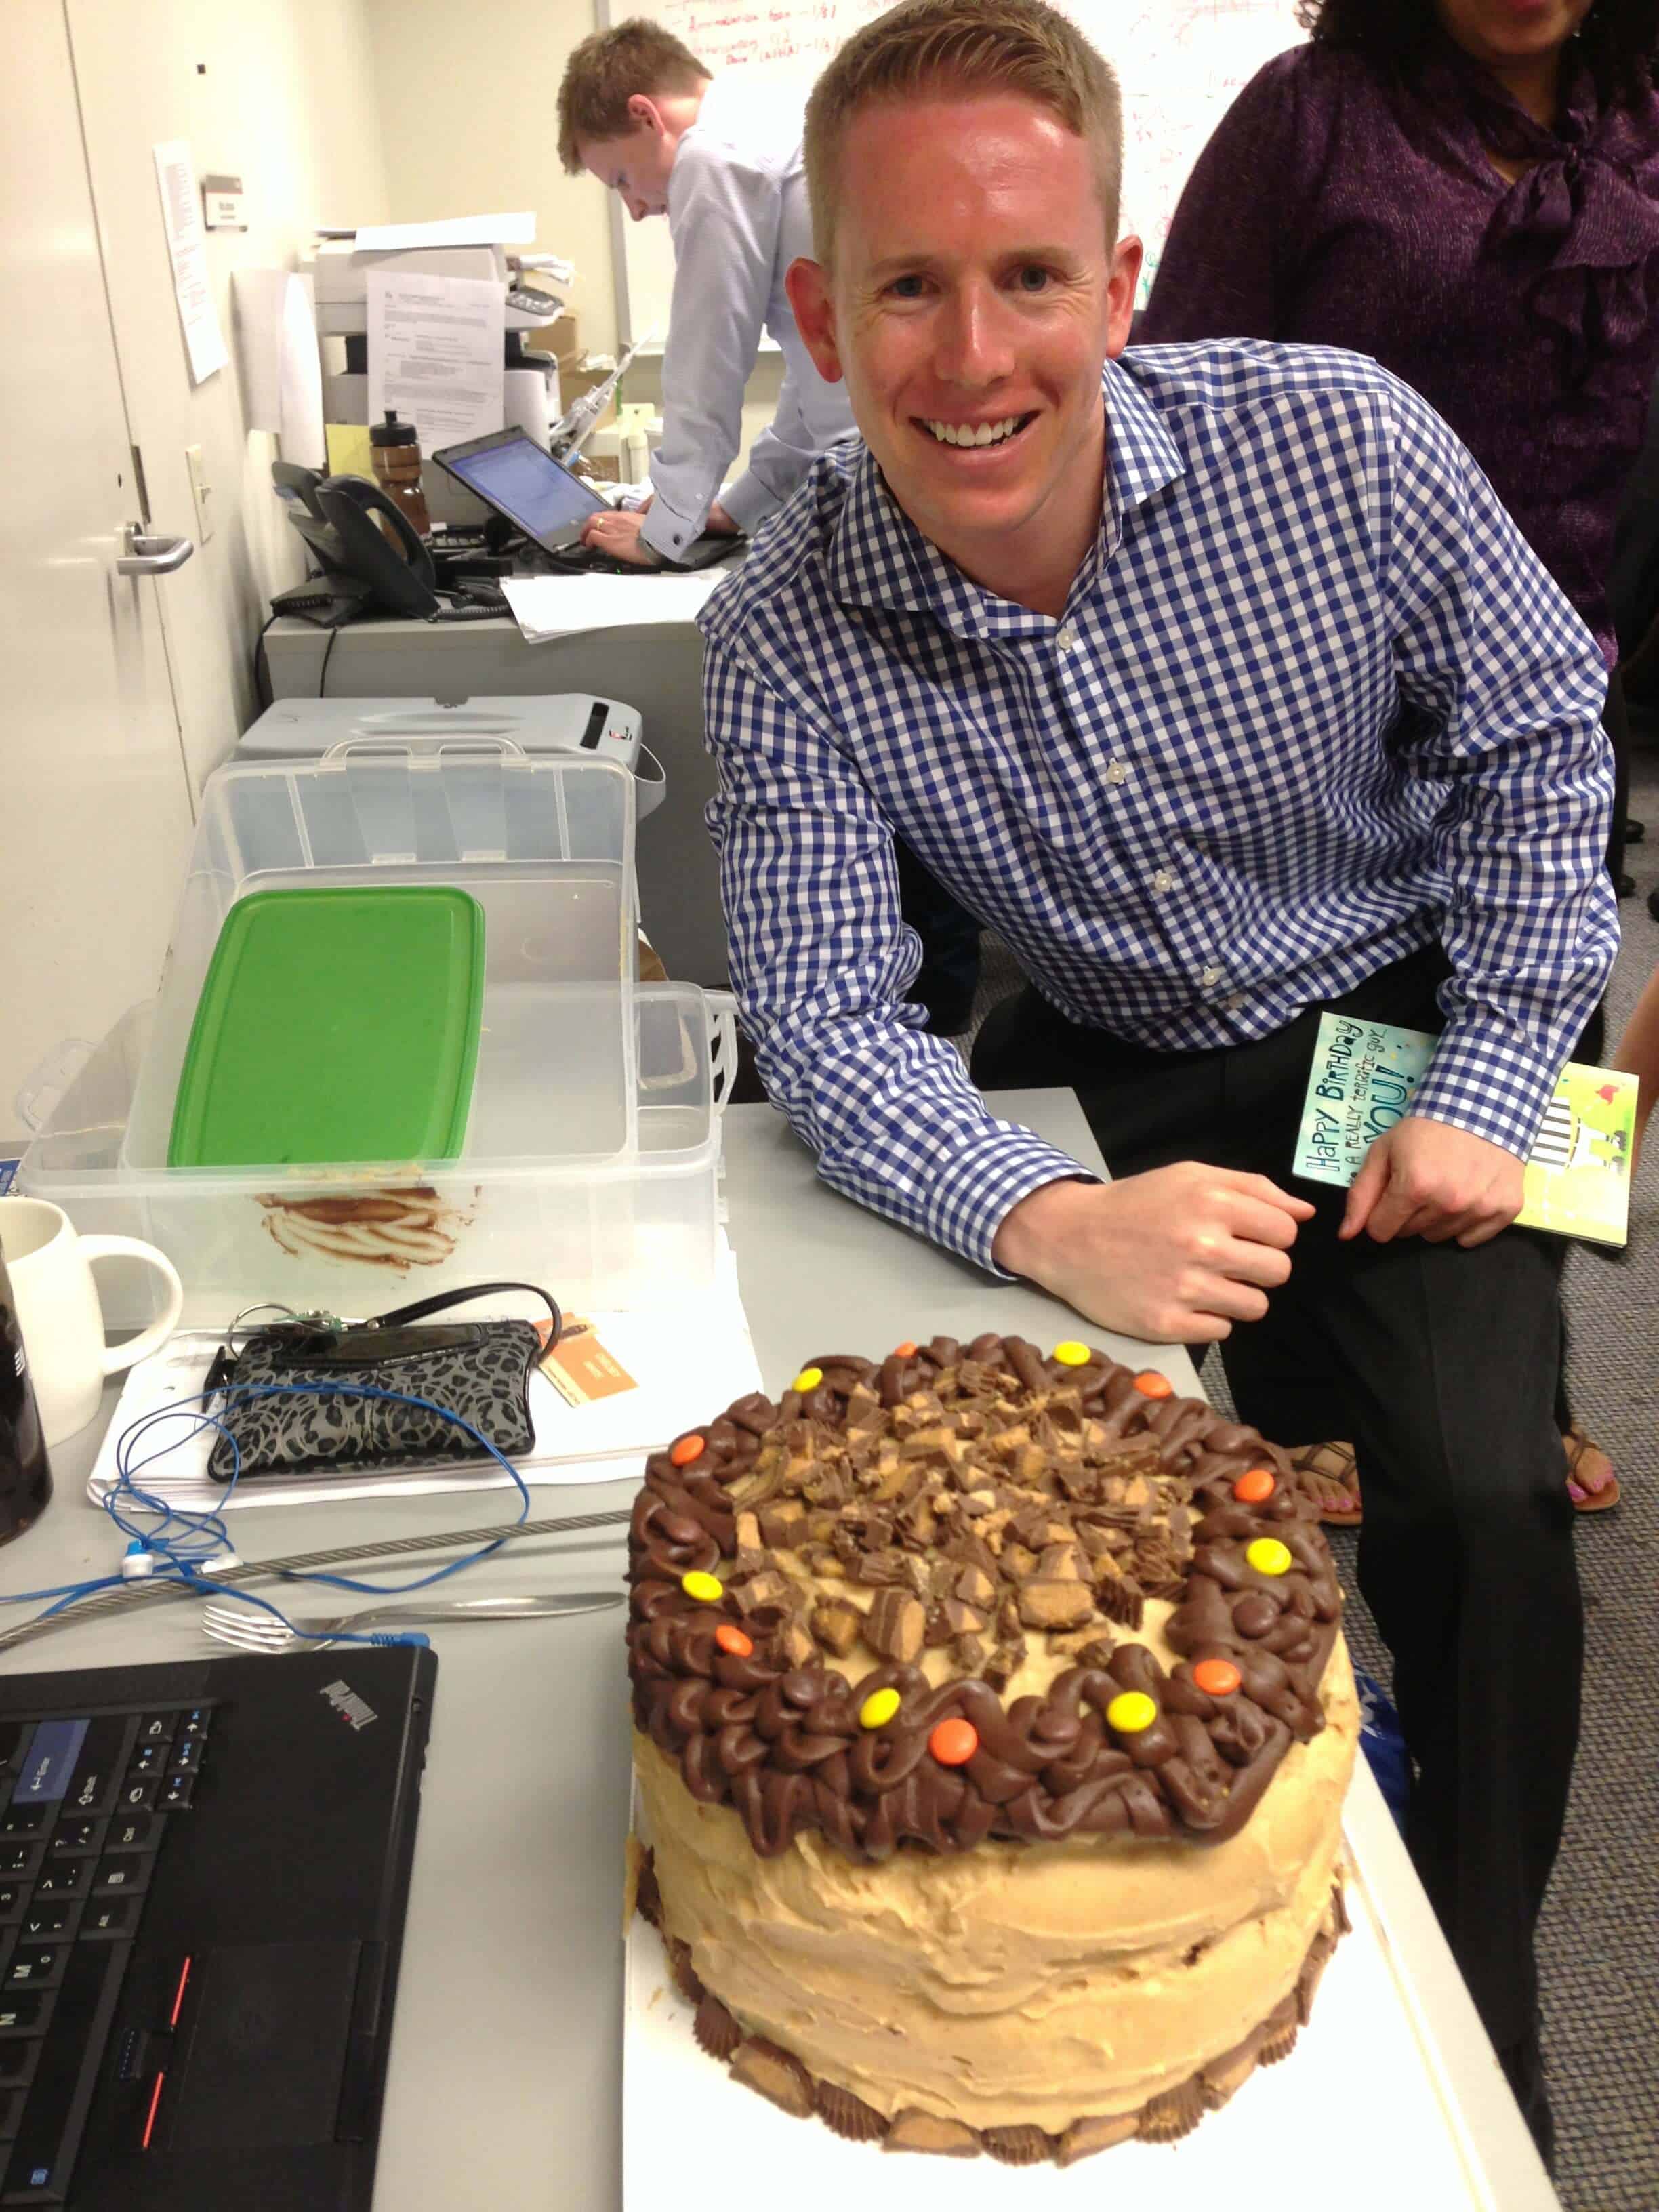
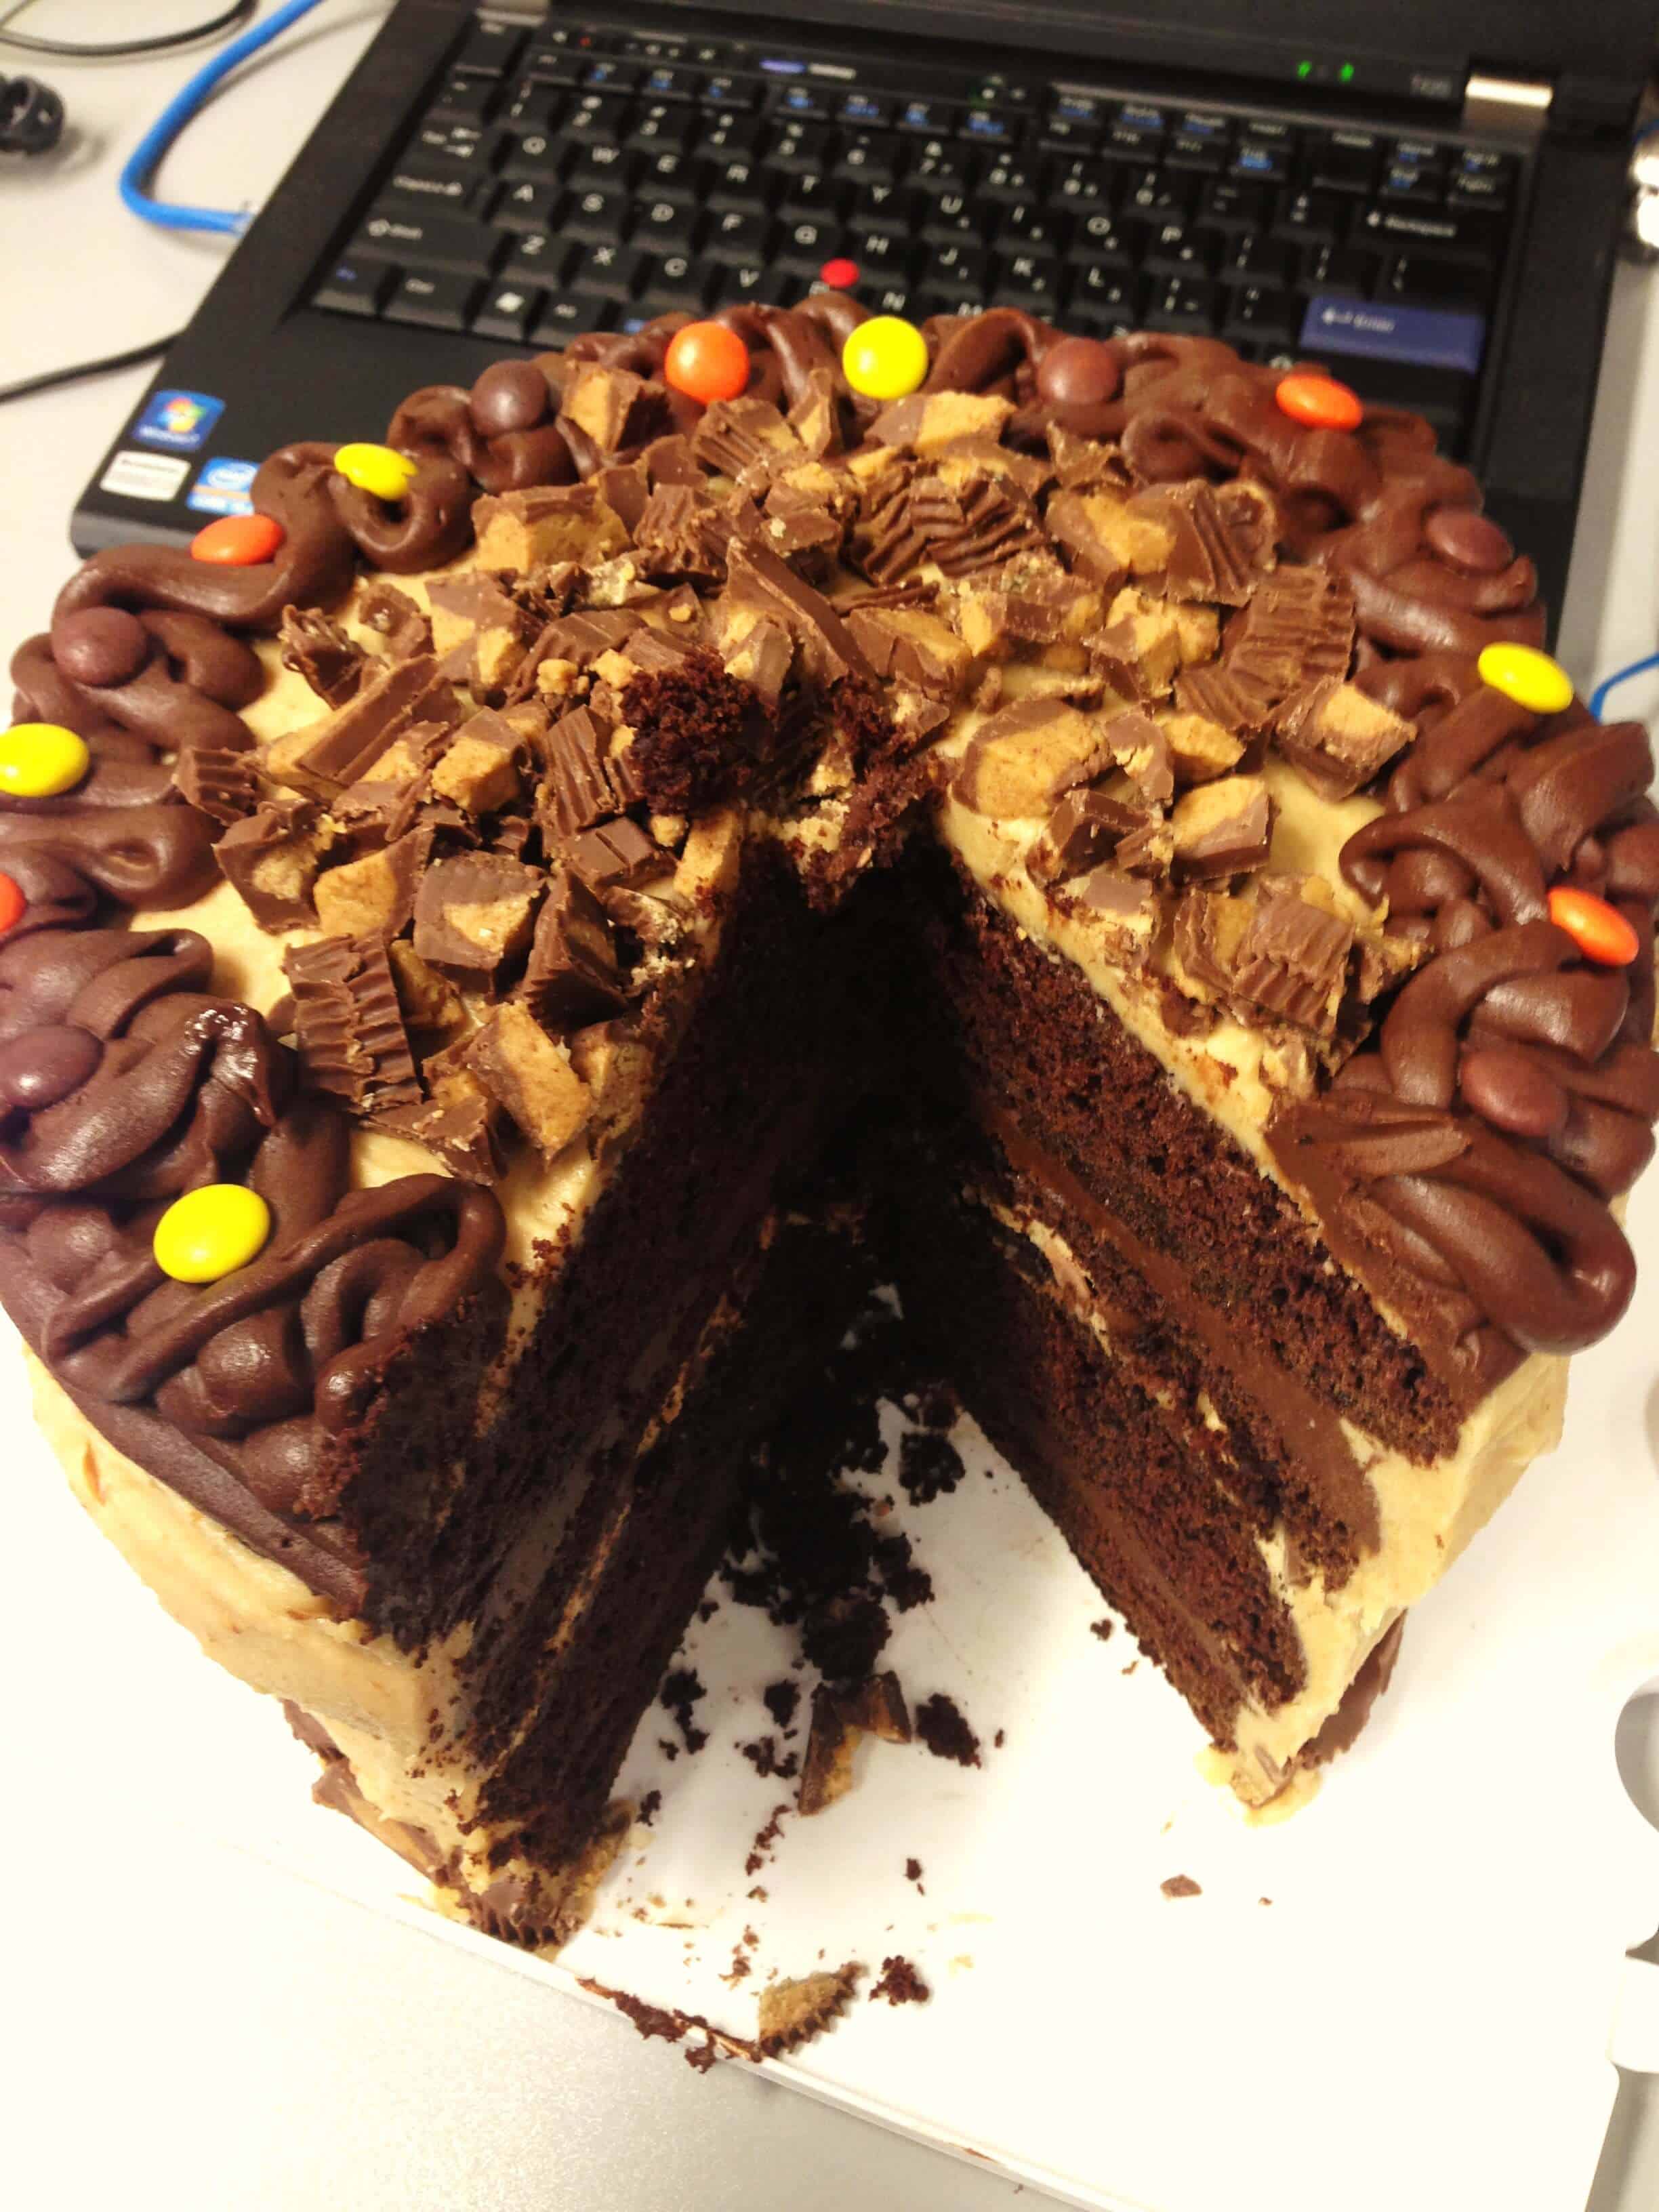
Below are some of the original pictures of this cake from back in 2013!!
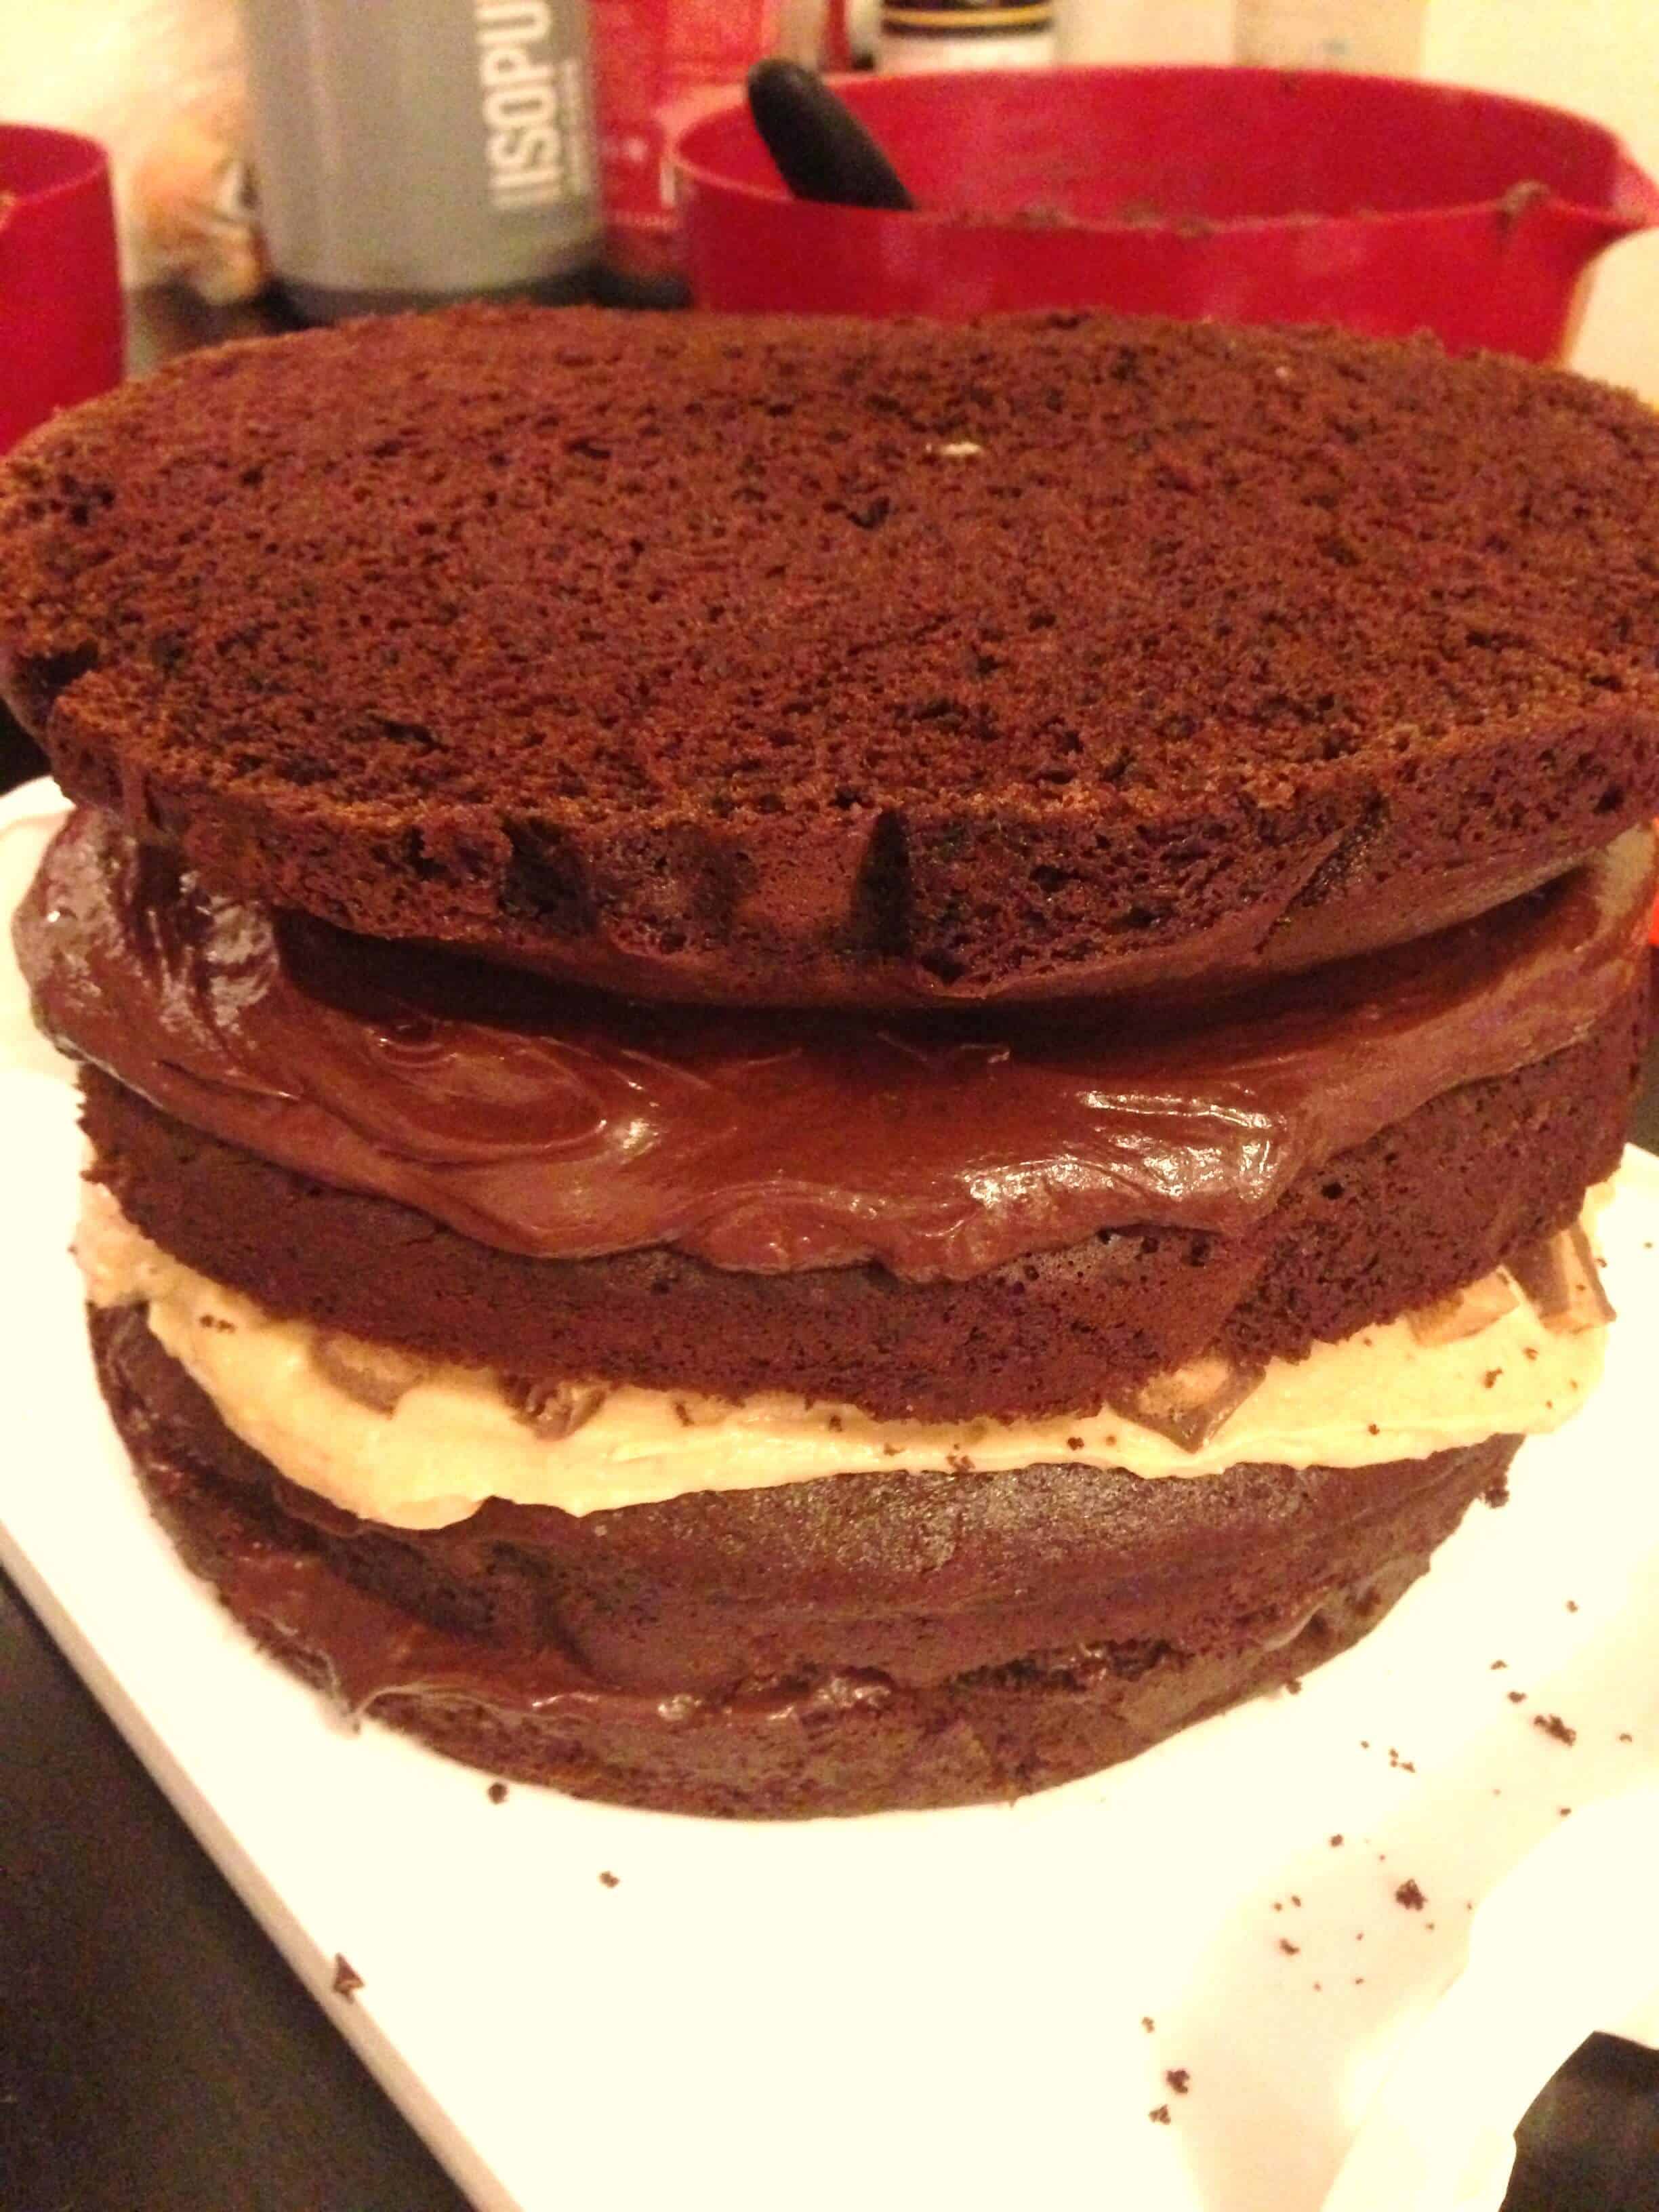

Not sure what happened on this one. Maybe it was supposed to be 3 9inch pans? But I literally had an over fire from all the cake that bubbled out of the pans while baking. Epic fail for the birthday party ?
Hi Jen,
I’m so sorry to hear that! That’s such a bummer :/
How tall are your cake pans? Mine are 2 inches! This recipe is 10 years old and back from when I first started blogging. It’s in dire need of a revamp, and I plan to rework this recipe and post later this month. Stay tuned!!
Can this be made in cupcakes?
Hi Paulina,
I haven’t used this recipe to make cupcakes, but you should be able to! I’d recommend filling the liners 3/4 full and bake them for 18-21 minutes or until a toothpick inserted in the center comes out with a few moist crumbs.
Hope that helps, happy baking!
Hi Chels do u have a recipe for a single layer chocolate cake that is a descent height?
Hi Ren,
Sadly I don’t!! I should work on that though!!
I loved this cake! I made it for a BBQ and it was a huge hit! I’ve never made a three layer cake before and now I think all of my cakes will need to be three layers, the frosting to cake ratio was so much better than with my standard two layer cakes. Thanks for a great recipe!
*Just an FYI though, in the recipe for the ganache you have milk chocolate chips, but in the instructions you say semi-sweet 🙂
Yay!! So happy to hear that Elizabeth! 🙂
And thank you for pointing that out, I’ve updated the recipe card! The drip definitely turns out best with milk chocolate!!
I made this recipe for my husband‘s birthday this last week! Every year for the last five years, I’ve made him a chocolate cake with peanut butter frosting. When I saw she had updated this recipe, I thought I would give it a try for the first time. I used spelt flour instead of wheat, and I also made it entirely dairy free. It was SO good!! The only thing I didn’t add was the instant coffee because I didn’t have any. I made mine with 9” rounds with 3 layers of cake (so I doubled the recipe and we snacked on the remaining layer ?). SO SO GOOD! The only issue I ran into was my first batch sticking to the pans because I forgot to cut out parchment circles to line the bottom of my cake pans (which is something I always do just as a safety precaution on my part lol). But the second batch I used parchment, and they came out perfectly.
So happy to hear your husband’s cake turned out so great Autumn 🙂 Thank you for sharing!!
I’ve made this cake many many times and it always turns out great!
Aw I’m so happy to hear that Alisa!! Thank you so much for sharing 🙂
This tasted absolutely amazing! Everyone loved it! My only concern was that my cake layers seemed quite sticky. Maybe I added too many wet ingredients or underbaked it? I only used a whisk to mix it, not an electric mixer. Any suggestions?
Hi, so I’m a new baker and I don’t have well it is going to sound silly but I do not have a stand mixer or hand mixer for the buttercream. So I hand mix it.
Is it possible to half this recipe to make only 12 cupcakes? Or will that throw the chemistry off and make them turn out weird?
Hi Kaitlyn,
You can totally have this recipe to make only 12 cupcakes, that should work just fine 🙂 Hope that helps, happy baking!
Cake turned out amazing! I wanted to post a pic of it on here but it was such a crowd pleaser! My partner thought I was lying and that I used a box mix. The instructions were perfect! Thank you,
Mark
Hi Mark,
Thank you so much for sharing! I wish we could share pics on here, I’d love to see it!! And that is too funny, I’m so happy to hear it turned out so delicious 🙂
This recipe looks fabulous! I am hoping to yield two 8″ layers. It seems like I could simply multiply the recipe by 2/3 — wondering if there are any potential issues with doing that?
Hi Nat,
You are totally right, you can absolutely do that 🙂 I hope it turns out great!! Happy baking!
This turned out perfectly!! Cake was moist, frosting had just the right amount of peanut butter, and directions were so easy to follow!!
Hi Jennifer,
Ahh that makes me so happy to hear!! I’m thrilled everything turned out perfectly. Thanks so much for the sweet feedback!
Ask ChatGPT
If I could give this recipe 10 stars, I would 10 star it all day long. I was worried that I may not have cooked it long enough, even though it came out clean on the poke test. After freezing the cakes over night, wrapped in plastic wrap, the decorating went off without a hitch. OMG can I say, this was a HIT. It was so moist… So good… I started baking and decorating cakes for family events almost a year ago, and have made and decorated half a dozen cakes or more now and this by far the best. This was my first homemade, non box cake. I have to say, superb. This is for sure on my rotation now. Thank you for such an amazing cake recipe.
Hi Eddie,
Wow, this totally made my day!! I’m beyond honored that this was your first homemade (non-box!) cake and that it was such a hit! It sounds like you nailed every step, from baking to freezing to decorating, and I love that it’s earned a spot in your regular rotation. What a huge milestone in your baking journey!! Thank you for sharing it with me, and happy baking! 🙂
I’ve made this cake Gluten-free two times and it has been totally Amazing!!! Everyone says it’s the best chocolate cave they have ever had…. and cannot believe that it is GF to boot. Thank you so much for your recipes!!
Hi Trinda,
That’s wonderful to hear! I’m so glad the gluten-free version turned out so well for you, and I love that it’s been such a hit with everyone who’s tried it. It’s the best compliment when no one can even tell it’s GF. Thank you for sharing, I’m thrilled you’re enjoying the recipes 🙂
Just made this cake for my stepdaughters 15th birthday and I ran into a couple issues like forgetting to buy cocoa powder cause either didn’t see it on the recipe ingredients (my fault) so ended up using 175g of melted chocolate and honestly with the instructions on how to apply the frosting (putting it in a freezer) it has to be the best looking cake I’ve ever baked thank you so much (wish I could upload pics to show it off) I’m looking forward to surprising her with it and actually trying it out
Hi Jonathon,
Ahh I love this so much!! Even with the cocoa powder swap, it sounds like you totally made it work — and I bet the melted chocolate gave it such a rich flavor. I’m so glad the frosting tips helped too, and what a great way to celebrate your stepdaughter’s birthday. She’s going to be thrilled! Wish I could see the pictures, but I can already tell it turned out amazing!!
The cake turned out beautifully! My son-in-law absolutely loved it!
Hi Brenda,
Ahh that makes me so happy to hear!! I’m so glad it turned out beautifully and that your son-in-law loved it 🙂 Thank you for sharing!!
Made this for our friend’s birthday! He is our Reese’s obsessed king! ? With that being said, he’s a tough critic and he LOVED this cake! I cut the recipe in half, baked it in a loaf pan and did two layers. Turned out beautiful!
Hi KC,
Haha I love that!! This is the perfect cake for him! I’m so glad he approved, that’s the highest compliment from a true peanut butter lover!! Doing a half batch in a loaf pan with two layers is such a smart idea for a smaller celebration, so happy it was a hit!
Should I use Semi Sweet Chocolate or Milk Chocolate Chips for the Chocolate Ganache?
Hi Jennifer,
Milk chocolate chips work best! But you can use semi sweet if needed! You’ll just want to add a tiny bit more heavy cream (like a Tbsp!). Hope that helps, happy baking!
Love this recipe! Made for my husband’s birthday in a bundt pan. Sliced in 2 layers & filled w peanut butter frosting & pb cups. Even better the next day- so moist. Did exchange the water for buttermilk, will definitely make again.
Love that so much, it sounds delicious!!!!! Thank you for sharing Elizabeth 🙂
I made this cake for a friend’s birthday who loves Reese’s peanut butter cups and I am shocked at how well it turned out! I followed your directions exactly and I’m thrilled with result.This is truly the most decadent cake I’ve ever made and I’m sure everyone will thoroughly enjoy it. Thank you for all the added tips and tricks throughout the recipe. It makes for a sunning display as well!
I am so happy to hear that Donna, that’s wonderful that it turned out so well and that my tips and tricks were helpful!! It definitely is a decadent cake, I hope everyone loves it!!!! 🙂
I recently made this recipe and it was amazing. I do want to know are you able to freeze the cake after it has been assembled?
Hi Tamaika,
So happy to hear to hear that! And yes you can totally freeze this cake once it’s assembled! It can be frozen for up to a month. I recommend moving it to the fridge the day or two before you plan to cut into the cake to let it gradually thaw, and then pull it out from the fridge a couple hours before you plan to cut into it. Hope that helps, and that your cake turns out great!
what would measurements be to just do 2 8inch pans?
Hi Lisa,
The easiest way to do that is to use my small batch chocolate recipe for the cake layers (exact same recipe, just 2/3 the amount of batter), and make 2, 8-inch cake layers (it can also be used to make 3, 6-inch cake layers). Here’s the link: https://chelsweets.com/small-batch-chocolate-cake-recipe-6-inch-cake/
Hope that helps, happy baking!