
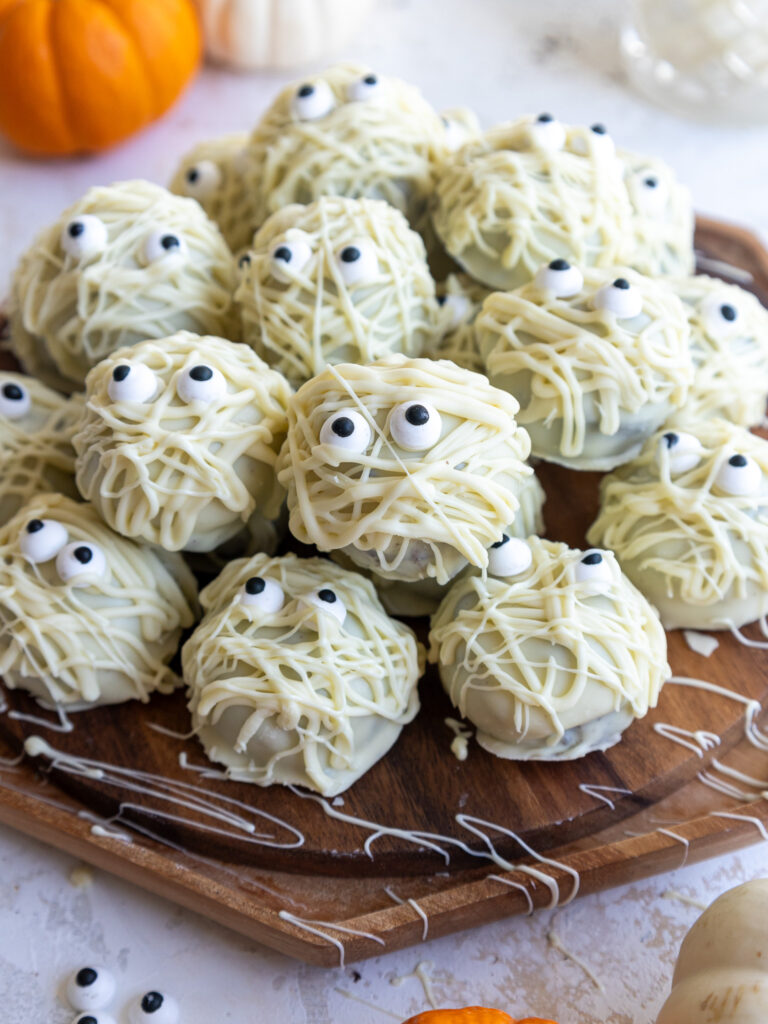
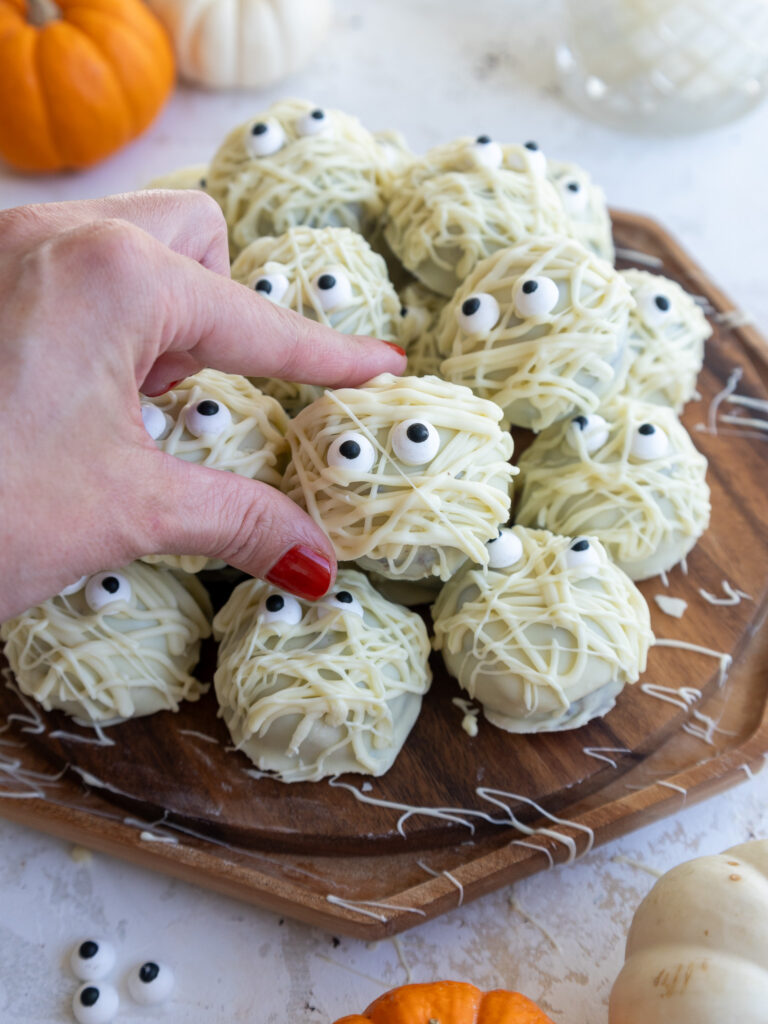
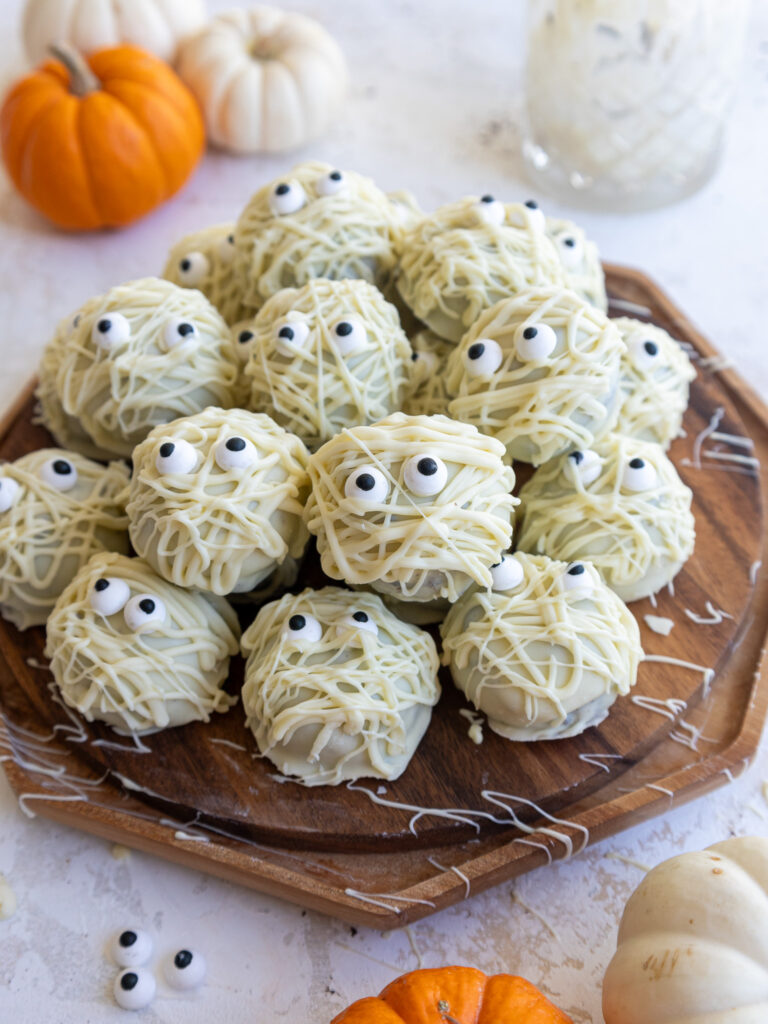
Mummy Cake Pops
These delicious, 5-ingredient mummy cake pops come together in a flash and are such a crowd-pleaser. They’re the perfect Halloween dessert!
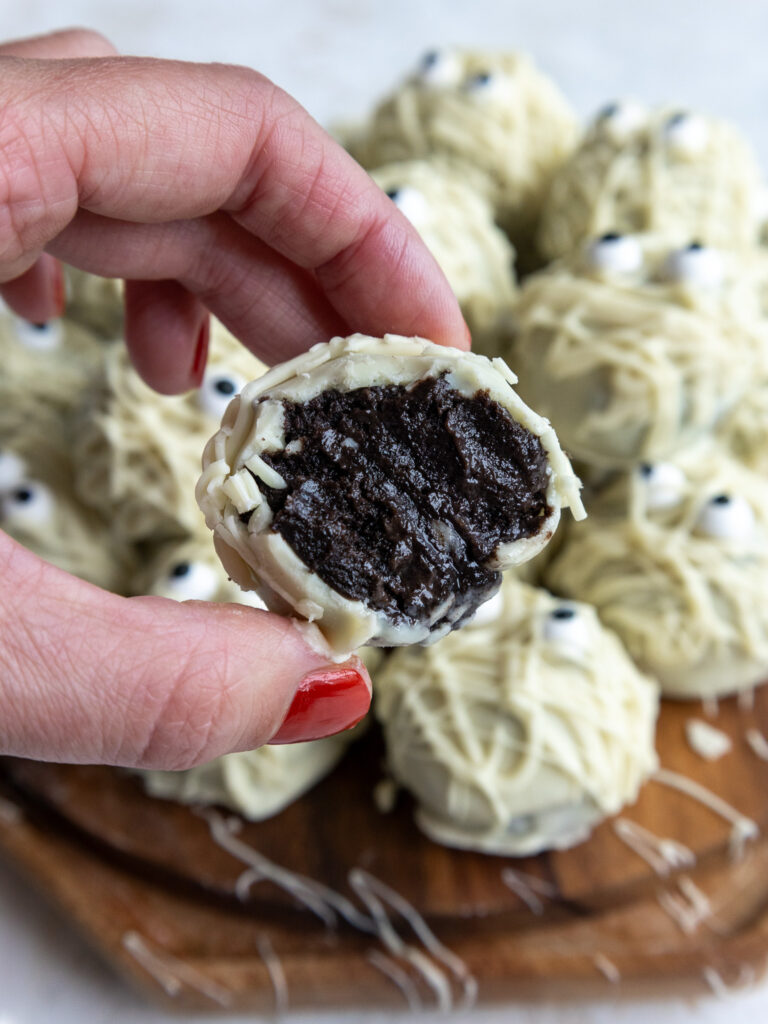
And while I like to call them cake pops for simplicity purposes, they’re really more like mummy Oreo balls – but that just doesn’t have the same ring to it, though.
I chose to make these with crushed Oreos and cream cheese simply because they’re so easy to make and delicious. I first tasted one back in 2012, and I haven’t looked back since. I’ve always thought they tasted about 10x better than cake pops.
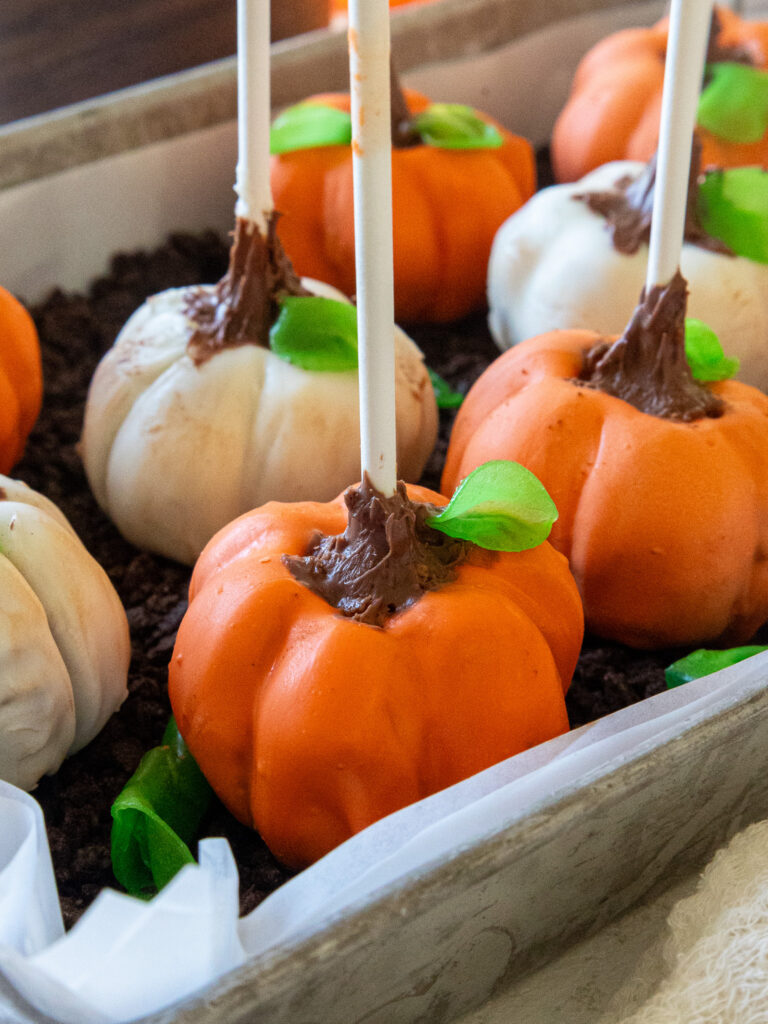
However, if you’re deadset on making these with actual cake, I’d recommend using my pumpkin cake pop recipe, but following the decoration instructions outlined below.
How To Make These Mummy Cake Pops
Let’s walk through each step together to make sure these cake pops turn out as amazing as possible. I’ve also shared a list of recommended tools (not all of them are necessary but they’re helpful to have), along with step-by-step pictures.
I think these look cuter without sticks and chose not to use them. However, if you want to use them, you’ll need 30 lollipop sticks.
Recommended Equipment
- Food processor
- 1 Tbsp cookie scoop or large spoon
- Large, flat plate
- Parchment paper
- 2 forks
- 1 small piping bag or Ziplock bag
Step 1: Make the Oreo Filling
Line a large, flat plate with parchment paper and set aside.
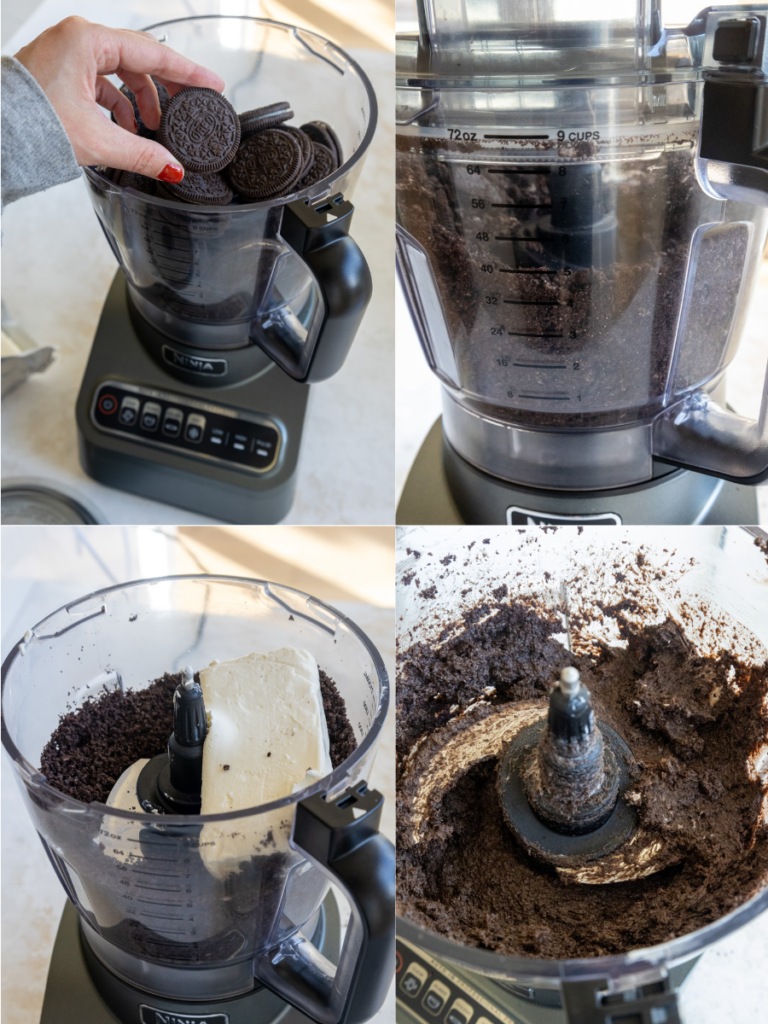
Place 36 Oreo cookies in a food processor and pulse until the cookies have been broken down into fine, uniform-sized crumbs. If you don’t have a food processor, crush the Oreos in a ziplock bag with a rolling pin or wine bottle.
Add 1 cup of full-fat cream cheese to the food processor and continue to pulse until the ingredients are fully combined and the mixture looks like wet dough.
Step 2: Scoop and Chill the Cake Pops
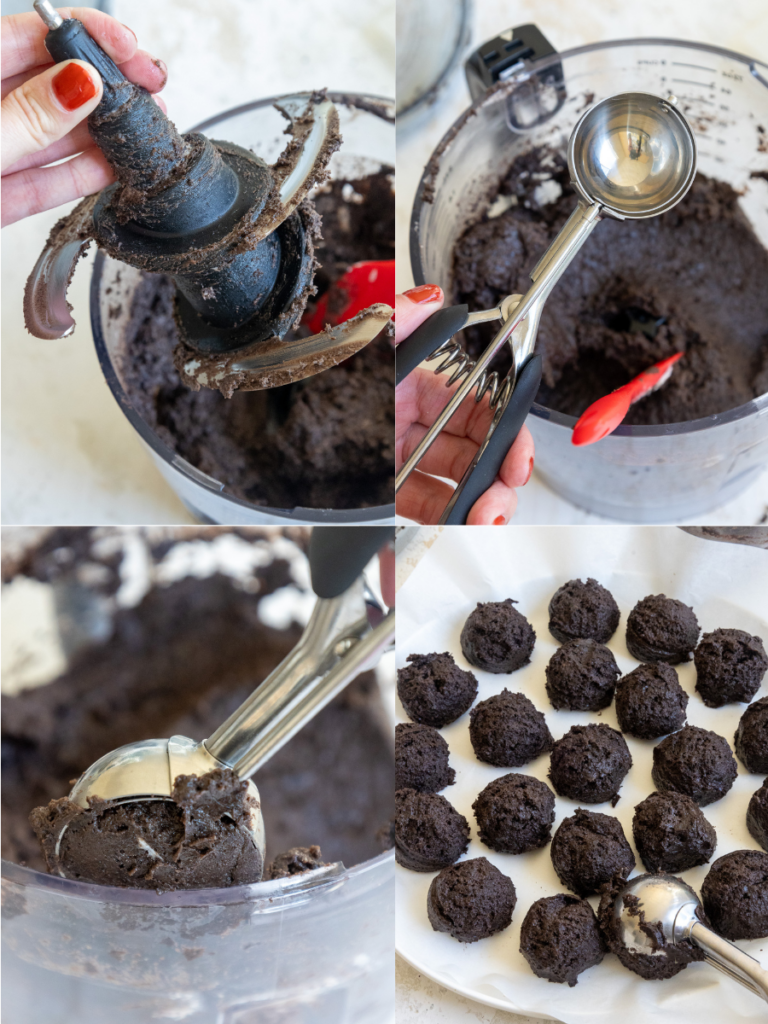
Use a 1 Tbsp cookie scoop or a similar-sized spoon to scoop about 30 Oreo balls onto the prepared pan.
I like them to be similar-sized for aesthetic purposes, but it’s ok if they vary in size a bit since we aren’t baking them. Place them in the freezer to chill for 30 minutes.
Step 3: Melt and Thin the White Chocolate
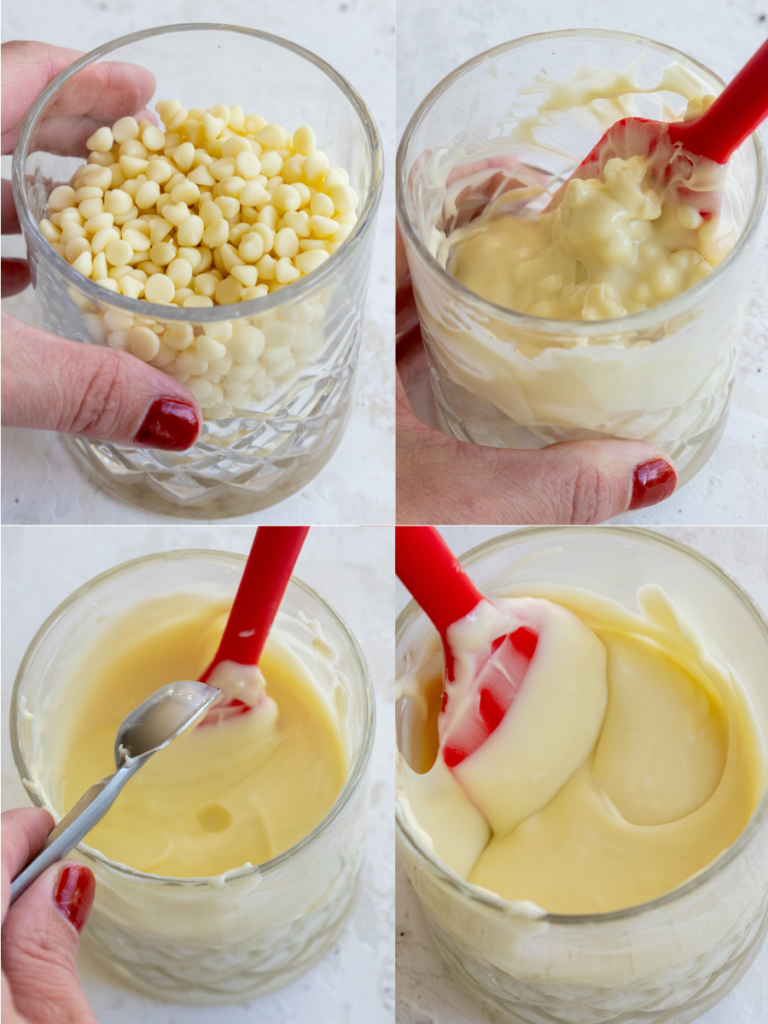
Once the Oreo balls are fully chilled, melt 2 cups (350g) of white chocolate in a short, wide, heat-proof glass. A short glass makes it way easier to dunk the Oreo balls!
I like to use a heavy, thick glass because it retains heat well and keeps the white chocolate fluid throughout the dipping process (it takes a while to dip them all).
Heat the white chocolate in 15-second intervals, stirring between, until smooth. Once the chocolate is fully melted, stir in 2 tsp vegetable or canola oil to thin the white chocolate.
Step 4: Coat the Oreo Balls
Take half of the Oreo balls out of the freezer (doing this in phases prevents them from getting too soft and makes them easier to coat) and toss them one at a time into the white chocolate, gently pressing down to fully coat it in white chocolate.
Use a fork to carefully lift it out of the white chocolate, and tap the fork against the top of the glass to let any excess white chocolate run off.
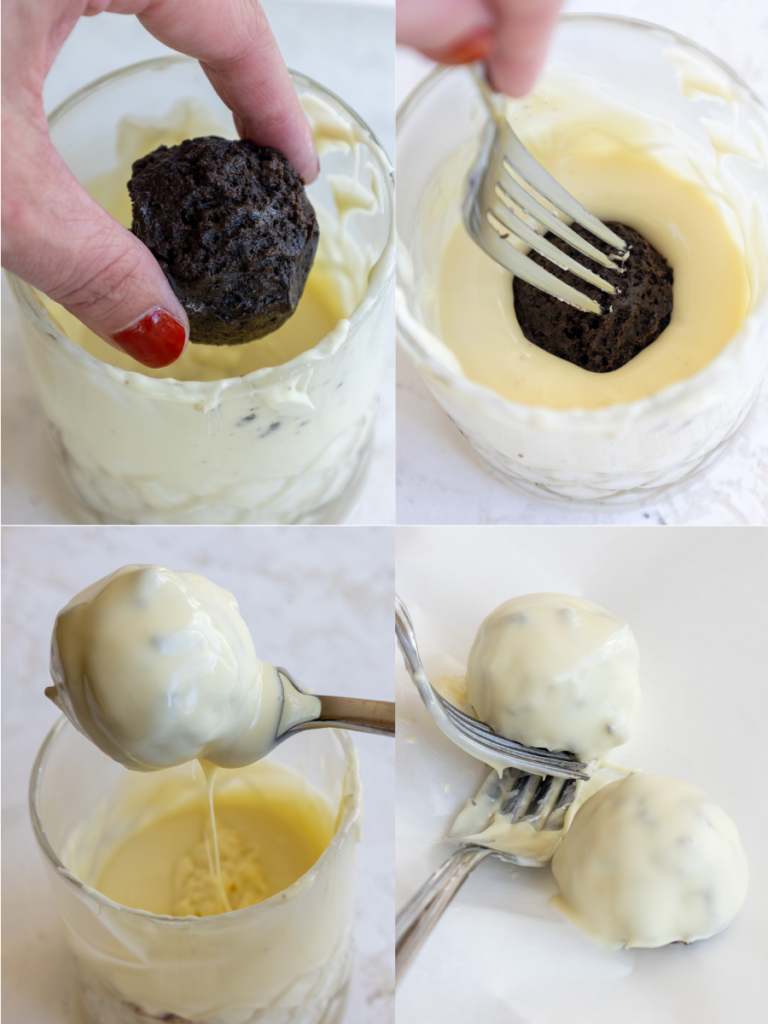
Use another fork to carefully slide the Oreo ball off the fork and back onto the parchment-lined plate. While the white chocolate is still wet, press two eyeball sprinkles on the top of the Oreo ball. Repeat with the remaining Oreo balls.
As you repeat this process, the white chocolate will get progressively more filled with bits of Oreo and look “dirtier.” I like to think of it as giving the mummies an aged look – they really shouldn’t be pristine white anyway!!
Don’t worry as this happens, most of it will get covered up with the second layer of white chocolate that will be drizzled on later.
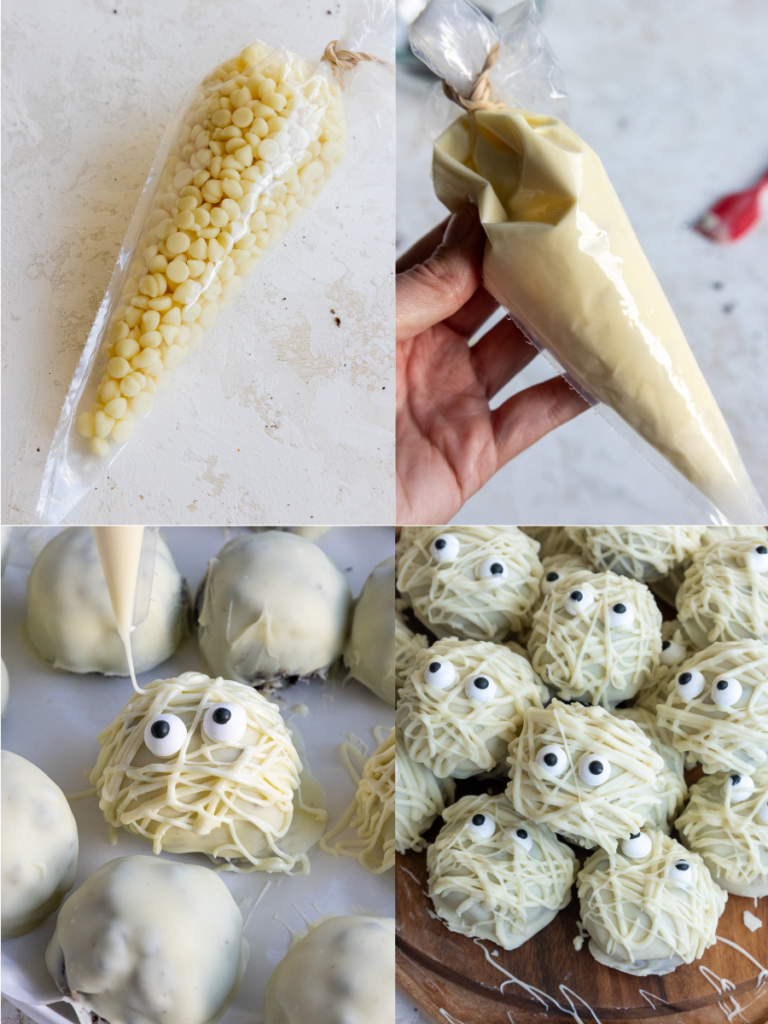
Step 5: Melt and Drizzle the Remaining White Chocolate
Once all the Oreo balls are coated, place the remaining 1 cup of white chocolate chips in a small piping bag and seal the top with a rubber band. Place the bag in the microwave and heat in 15-second intervals until mostly melted.
Then gently massage the bag with your fingertips – the residual heat will melt any bits of unmelted chocolate.
Cut a small opening (about 1/4 inch) at the base of the bag, then drizzle the white chocolate over each Oreo ball and enjoy!
These can sit at room temperature for a few hours but need to be stored in the fridge because of the cream cheese.
Place them in the fridge for about 15 minutes before moving them into an airtight container to help the white chocolate fully set.
If you make these in advance, they can be kept in the fridge for up to a week.
How Many Cake Pops Does this Recipe Make?
This recipe makes about 30 mummy cake pops using 1 Tbsp of dough each. You can increase or decrease the yield by adjusting the size of each little mummy.
You can also half or double this recipe to adjust the yield as needed.
Tips for Making the Best Mummy Cake Pops
- If the cake pops start to soften or fall apart as you try to dunk them, you may need to either pop them back in the freezer to firm up or heat the white chocolate a bit more (in 15-second intervals) to make it more fluid.
- Use a 1 Tbsp cookie scoop to make uniformly-sized mummy cake pops.
- If you don’t have eyeball sprinkles, you can always melt down a little bit of dark chocolate to look like eyes.
- Place these in the fridge for about 15 minutes to help the white chocolate fully set before moving them into an airtight container.
Making These Mummy Cake Pops in Advance & Storage Tips
These treats can be made in advance and keep super well! Store them in an airtight container in the fridge for up to a week. They will taste just as good a few days in as when you first made them!
Let Me Know What You Think!
If you make these mummy cake pops, I’d love to hear what you think! Let me know by leaving a rating and comment below.
And don’t forget to tag me @chelsweets use #chelsweets if you share on social media so that I can see your amazing creations.

Mummy Cake Pops
Ingredients
Mummy Cake Pops
- 36 classic Oreo cookies – centers and all 400g
- 1 cup (8 oz) full-fat cream cheese, room temperature 226g
- 3 cups good-quality white chocolate chips or chopped-up white chocolate 525g
- 2 tsp vegetable or canola oil 12g
- 60 small eyeball sprinkles
Recommended Equipment
- Large, flat plate
- Food processor
- 1 Tbsp cookie scoop
- Parchment paper
- 2 forks
- Small piping bag or Ziplock bag
Instructions
Mummy Cake Pops
- Line a large, flat plate with parchment paper and set aside.
- Place 36 Oreo cookies in a food processor and pulse until the cookies have been broken down into fine, uniform-sized crumbs. If you don't have a food processor, crush the Oreos in a ziplock bag with a rolling pin or wine bottle.
- Add 1 cup of full-fat cream cheese to the food processor and continue to pulse until the ingredients are fully combined and the mixture looks like wet dough. If the cream cheese doesn't mix in easily, cut it into smaller pieces.
- Carefully remove the blade attachment and scrape it off using a rubber spatula. Then use a 1 Tbsp cookie scoop or a similar-sized spoon to scoop about 30 Oreo balls onto the prepared pan. I like them to be similar-sized for aesthetic purposes, but it's ok if they vary in size a bit since we aren't baking them. Place in the freezer to chill for 30 minutes.
- Once the Oreo balls are fully chilled, melt 2 cups (350g) of white chocolate in a short, wide, heat-proof glass. A short glass makes it way easier to coat the Oreo balls! I like to use a heavy, thick glass because it retains heat well and keeps the white chocolate fluid throughout the dipping process (it takes a while to dip them all). Heat the white chocolate in 15-second intervals, stirring between, until smooth. Once the chocolate is fully melted, stir in 2 tsp vegetable or canola oil to thin the white chocolate.
- Take half of the Oreo balls out of the freezer (doing this in phases prevents them from getting too soft and makes them easier to coat) and toss them one at a time into the white chocolate, gently pressing down to fully coat it in white chocolate. Use a fork to carefully lift it out of the white chocolate, and tap the fork against the top of the glass to let any excess white chocolate run off.
- Use another fork to carefully slide the Oreo ball off the fork and back onto the parchment-lined plate. While the white chocolate is still wet, press two eyeball sprinkles on the top of the Oreo ball. Repeat with the remaining Oreo balls. As you repeat this process, the white chocolate will get progressively more filled with bits of Oreo and look "dirtier." I like to think of it as giving the mummies an aged look – they really shouldn't be pristine white anyway!! Don't worry as this happens, most of it will get covered up with the second layer of white chocolate that will be drizzled on later.
- Once all the Oreo balls are coated, place the remaining 1 cup of white chocolate chips in a small piping bag and seal the top with a rubber band. Place the bag in the microwave and heat in 15-second intervals until mostly melted. Then gently massage the bag with your fingertips – the residual heat will melt any bits of unmelted chocolate.
- Cut a small opening (about 1/4 inch) at the base of the bag, then drizzle the white chocolate over each Oreo ball and enjoy! These can sit at room temperature for a few hours but need to be stored in the fridge because of the cream cheese. Place them in the fridge for about 15 minutes before moving them into an airtight container to help the white chocolate fully set. If you make these in advance, they can be kept in the fridge for up to a week.
Notes
Tips for Making the Best Mummy Cake Pops
- If the cake pops start to soften or fall apart as you try to dunk them, you may need to either pop them back in the freezer to firm up or heat the white chocolate a bit more (in 15-second intervals) to make it more fluid.
- Use a 1 Tbsp cookie scoop to make uniformly sized mummy cake pops.
- If you don’t have eyeball sprinkles, you can always melt down a little bit of dark chocolate to look like eyes.
- Place these in the fridge for about 15 minutes to help the white chocolate fully set before moving them into an airtight container.
Making These Mummy Cake Pops in Advance & Storage Tips
These treats can be made in advance and keep super well! Store them in an airtight container in the fridge for up to a week. They will taste just as good a few days in as when you first made them!Nutrition
Other Recipes You Might Like:
Good morning,
Can I use melting chocolate instead of white chips?
Thank you,
Gina L.
Hi Gina,
You absolutely can! I believe melting chocolate is similar to candy melts, right? If that’s the case, skip adding the oil in, and dip the oreo balls straight into the melted melting chocolate. Hope that helps, happy baking!
These turned out great and everyone loved them! Highly recommend
So happy to hear that Stephanie!! Thank you for sharing 🙂
So so cute!!