
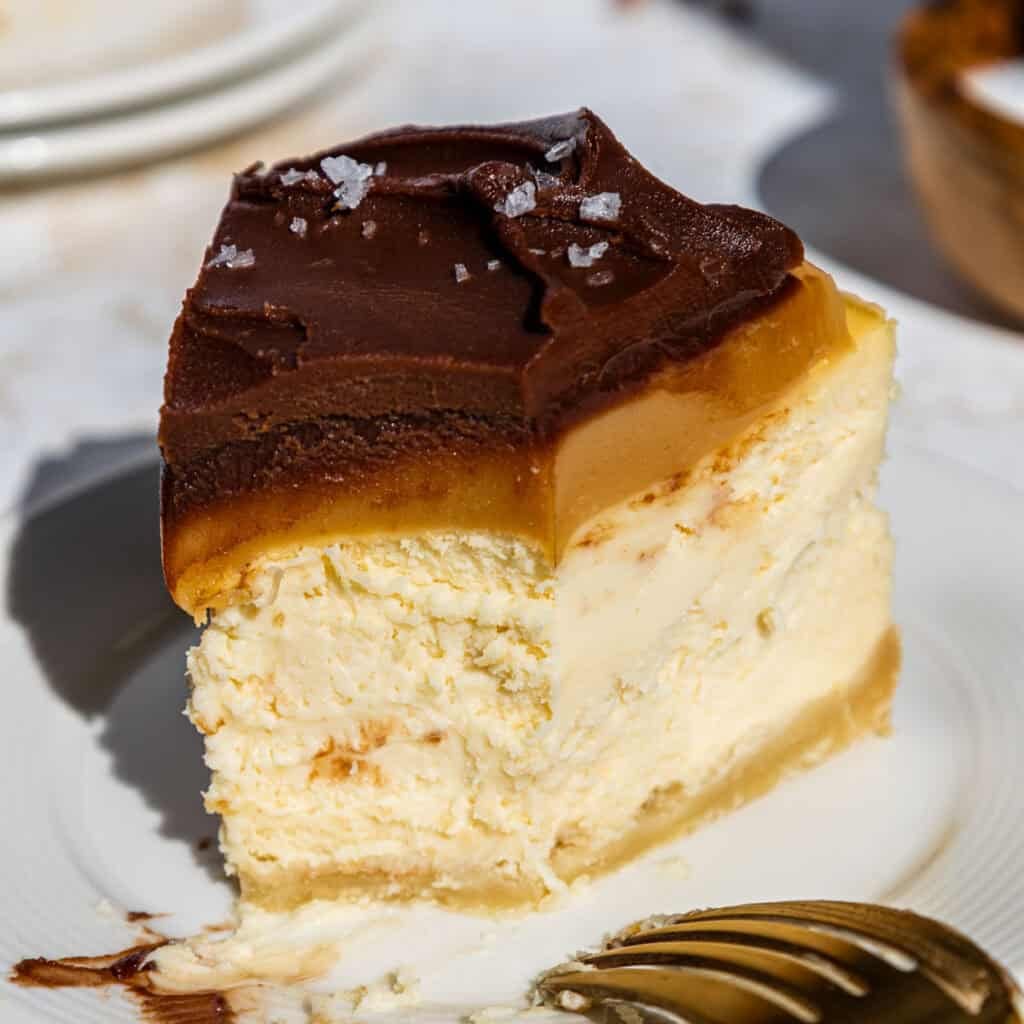
Millionaire Cheesecake
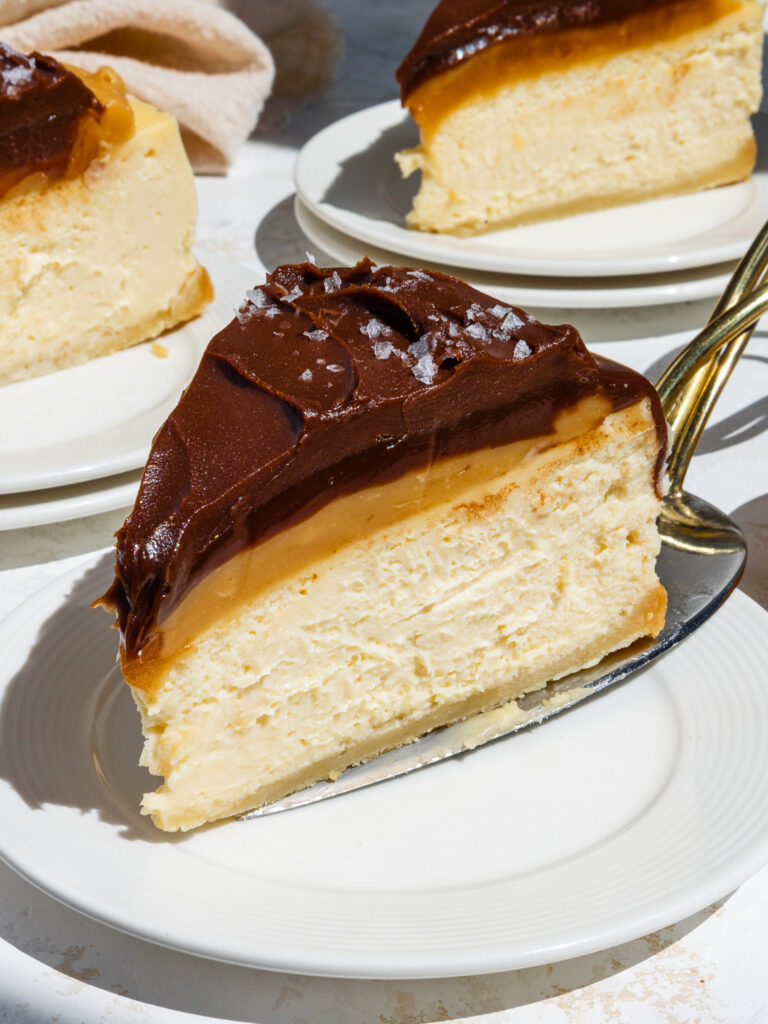
This millionaire cheesecake is made with a buttery shortbread crust and topped with decadent layers of caramel and chocolate ganache.
It’s a decadent combination that will keep you coming back for more!
How to Make This Millionaire Cheesecake
Let’s walk through each step of this cheesecake recipe to make sure it turns out as amazing as possible.
I’ve also shared a video tutorial below in the recipe card at the bottom of this post.
Step 1: Make the Caramel
Make the caramel filling first so that it can thicken up before being added to the cheesecake batter.
Heat the sweetened condensed milk, butter, brown sugar, and light corn syrup over medium heat in a heavy saucepan.
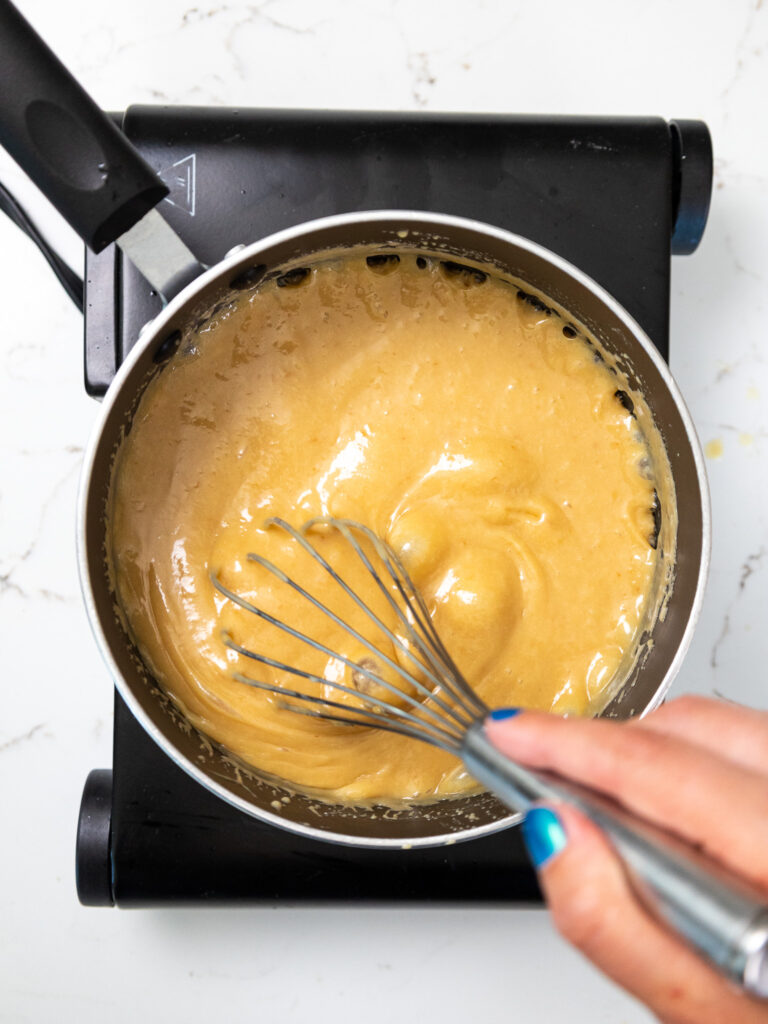
Stir frequently and allow the mixture to come to a gentle boil. Once this happens, turn the heat down to let the caramel simmer.
Continue to stir frequently until the mixture thickens and becomes a medium caramel color (about 10 minutes). Remove from the heat and stir in the vanilla extract.
Pour into a separate container, then set aside to cool to room temperature. If you make this in advance, cover the bowl and store it at room temperature overnight or in the fridge for up to a week.
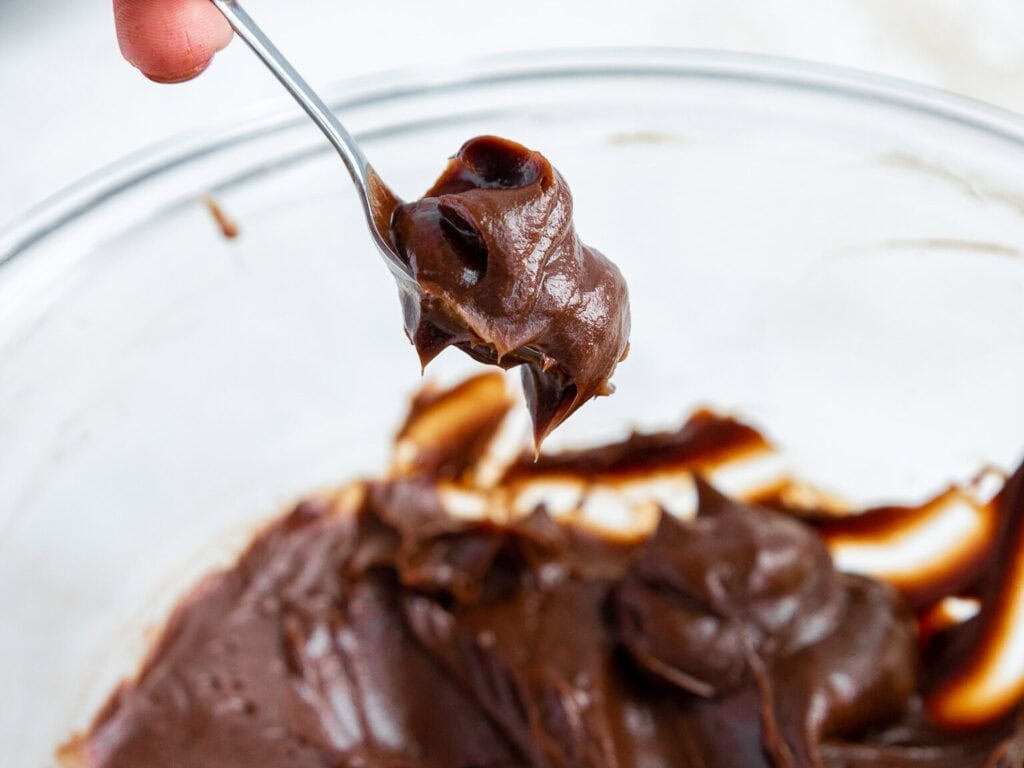
This is what my caramel looks like once it cools to room temperature.

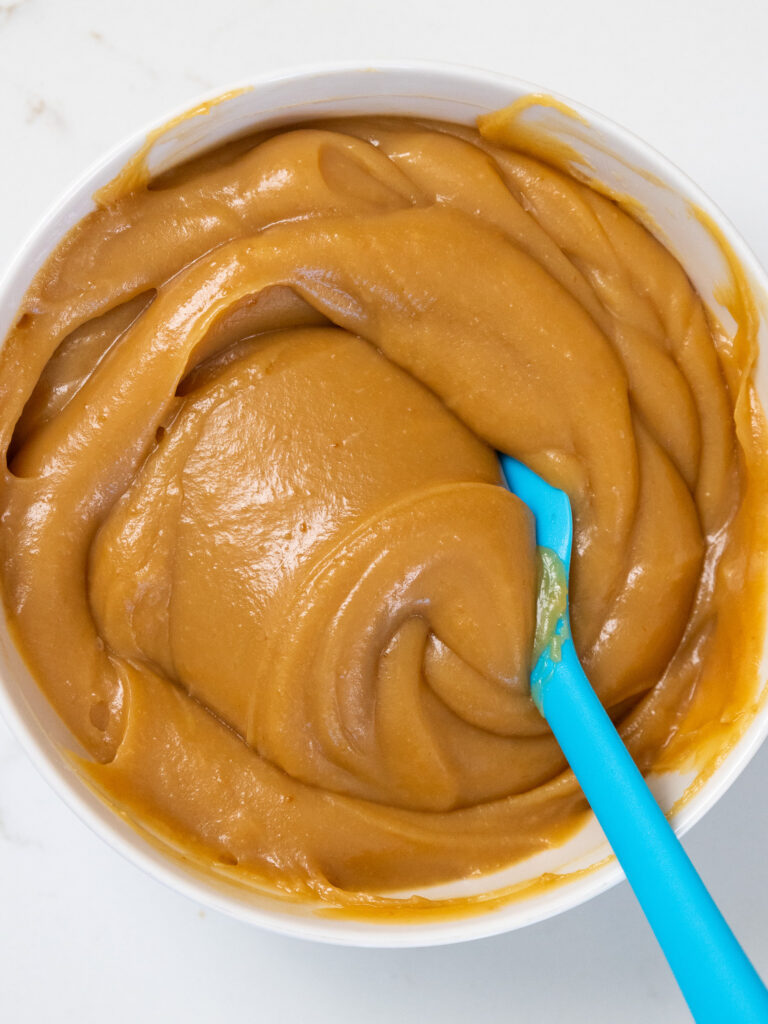
If you refrigerate the caramel, heat it in the microwave in short 15-second intervals until it reaches room temperature and is a more workable consistency.
Step 2: Make the Shortbread Crust
Next, work on the shortbread crust. Preheat the oven to 350°F/175°C.
Spray an 8-inch or 9-inch springform pan or cheesecake pan with non-stick baking spray, then place a parchment round on the bottom of the pan.
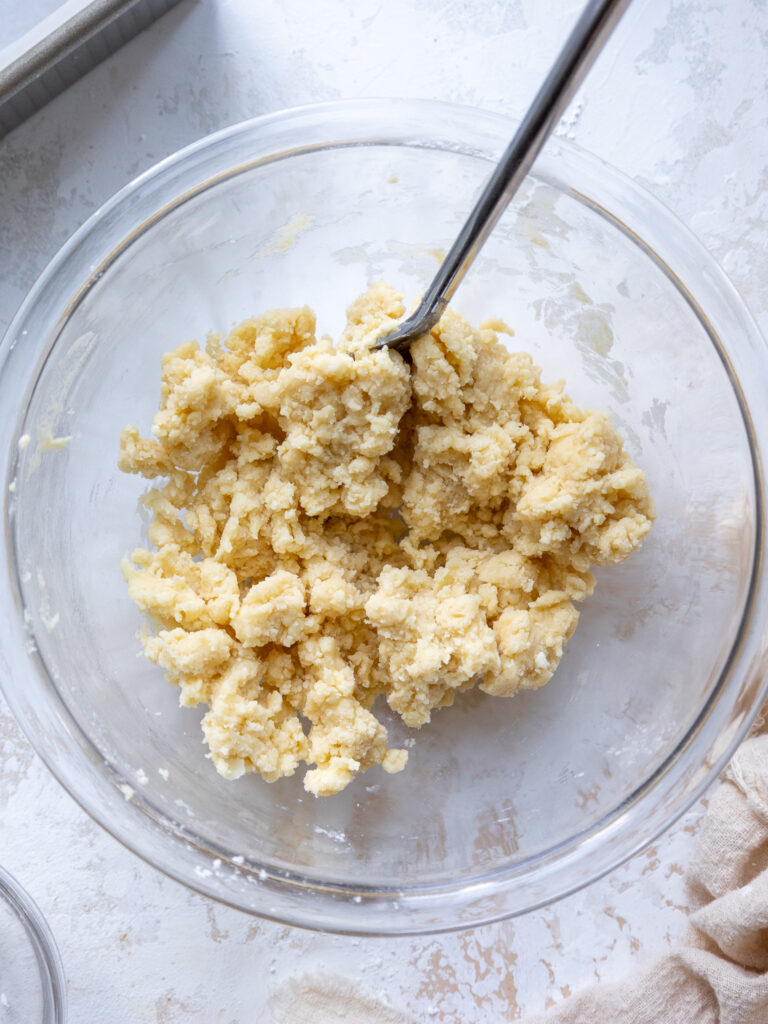
Use a fork or pastry cutter to combine the butter, flour, powdered sugar, and fine salt.
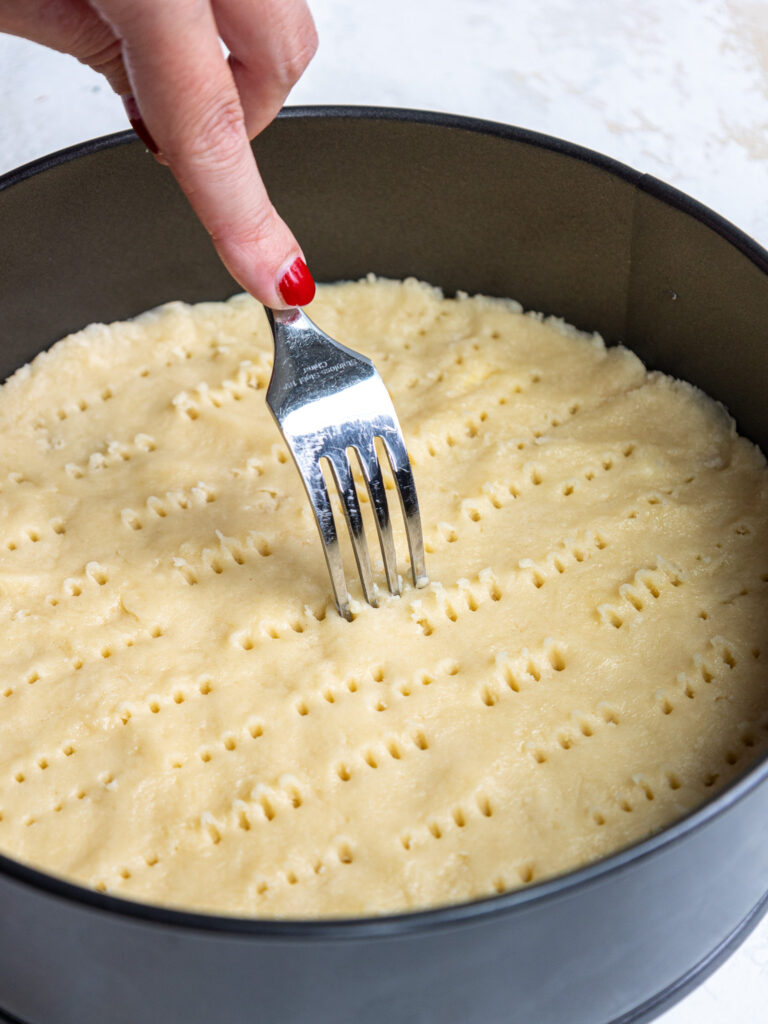
Press into the bottom of the prepared pan with your fingers. Prick the crust thoroughly with a fork.
Prick the crust thoroughly with a fork, then bake for 22-25 minutes, or until the edges are just starting to brown.

Place the pan on a wire rack to cool. Keep the oven on but lower the temperature to 300°F/150°C and place a baking tray filled with about 1 inch of water on the bottom rack.
Step 3: Make the Caramel Cheesecake Filling
While the shortbread crust bakes and cools, make the caramel cheesecake batter.
In a small bowl, whisk together the sugar and cornstarch. This helps prevent the cornstarch from clumping.
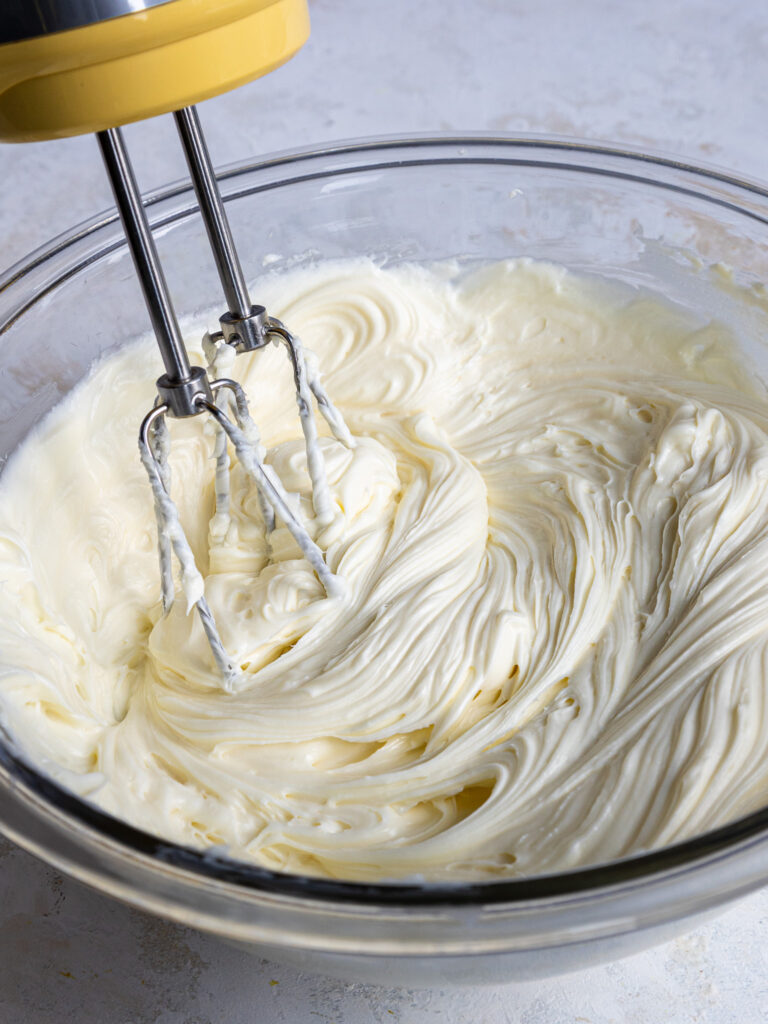
In a large mixing bowl or the bowl of a stand mixer fitted with a paddle attachment, beat the room-temperature cream cheese and the sugar/cornstarch mixture on a low speed until the mixture is completely smooth.
Crack the eggs in a bowl and whisk them together.
Gradually pour the eggs into the cheesecake batter in a few installments while mixing on a low speed.
Scrape the sides and bottom of the bowl with a rubber spatula as needed.
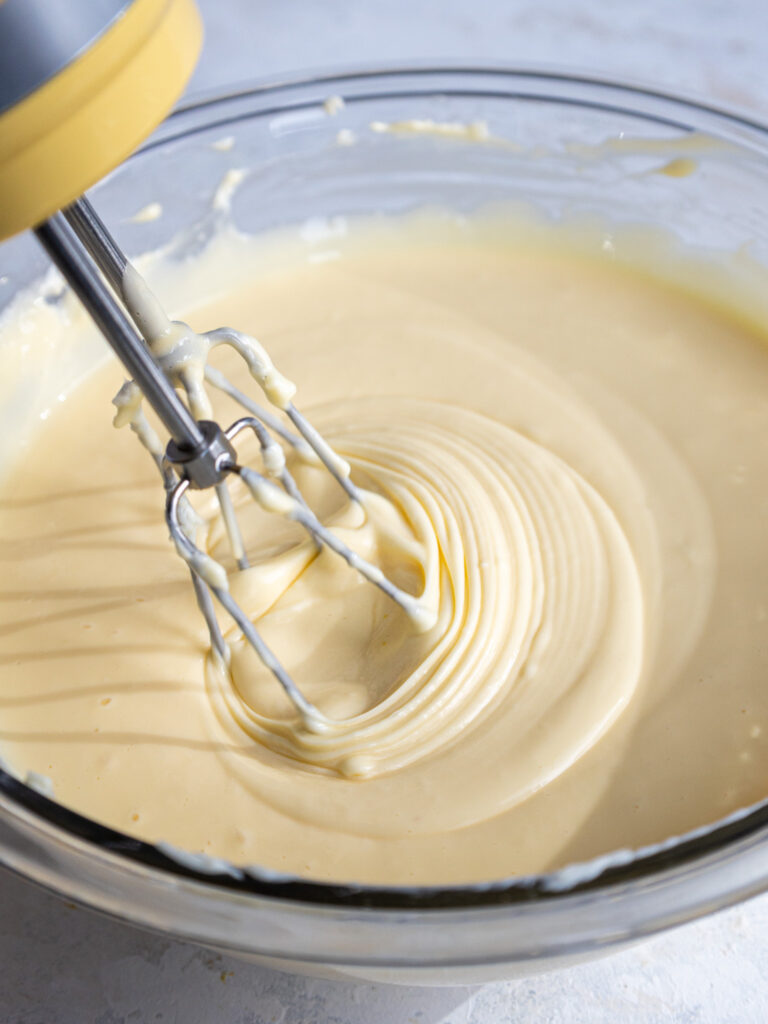
Then mix in the sour cream, room temperature caramel, and vanilla extract until just combined.
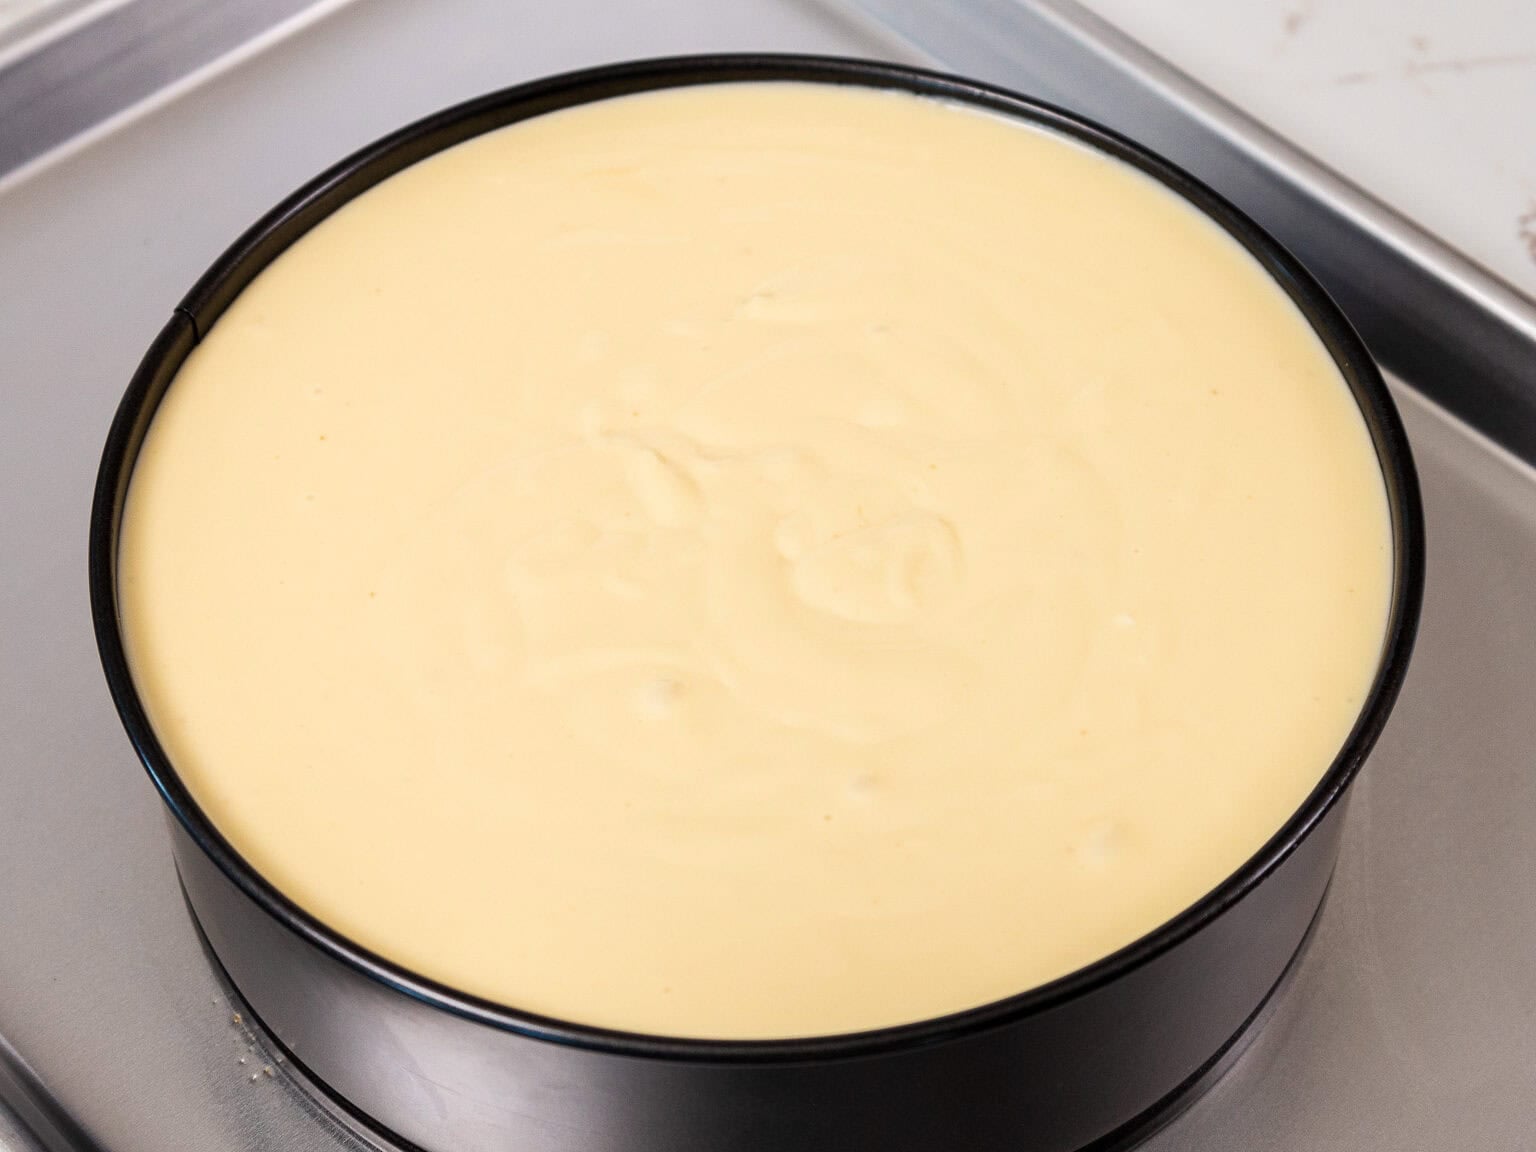
Pour the caramel cheesecake batter into the prepared pan.
NOTE: If you use an 8-inch pan, it will be filled close to the top of the pan! But don’t worry, cheesecake doesn’t really rise as it bakes, so it shouldn’t overflow in the oven.
Step 4: Bake the Cheesecake
Double-check that the oven temperature has been lowered to 300°F/150°C, then place the cheesecake pan on a large cookie sheet and bake the cheesecake for 20 minutes.
This makes it easier to put the cheesecake in the oven and will catch any melted butter that seeps out from the crust.
Without opening the oven door, reduce the oven temperature to 225°F/110°C and bake for an additional 2 hours.
It sounds crazy, but low and slow is the best way to bake up a perfect, crack-free cheesecake that doesn’t sink.
Step 5: Cool the Caramel Cheesecake Gradually
Once the cheesecake is fully baked, turn the oven off and let the cheesecake sit in the oven for 1 hour without opening the door.
Next, remove the cheesecake from the oven and let it continue to cool at room temperature for a few hours.
Once it’s reached room temperature, cover the top of the cheesecake with plastic wrap and refrigerate the cheesecake for an additional 3-4 hours or overnight (preferred).
Store the cheesecake in the fridge until you’re ready to serve it.

Step 6: Make the Chocolate Ganache
Make the chocolate ganache as the cheesecake bakes and cools, because it needs time to cool to room temperature.
Add the heavy cream into a medium-sized bowl and heat it until it just begins to bubble. This can be done in either the microwave (takes me about 45-60 seconds in my microwave) or a double boiler.
Then pour in the dark chocolate and let the mixture sit for a minute.
After a minute, the chocolate should be softened.
Stir the mixture until the cream and chocolate are combined and the mixture is smooth. If any bits of chocolate aren’t fully melted, heat the mixture again for 15 seconds and stir until smooth.
Then mix in the unsalted butter, corn syrup, and fine salt.
Cover with plastic wrap placed flush against the top of the ganache to prevent it from forming a skin, then set aside to cool to room temperature.

If you need to make this topping in advance, it can be covered and stored in the fridge for up to a month.
The ganache should thicken and be scoopable once it reaches room temperature. If you want to accelerate the cooling process, place the bowl in the fridge.
Step 7: Decorate the Cheesecake
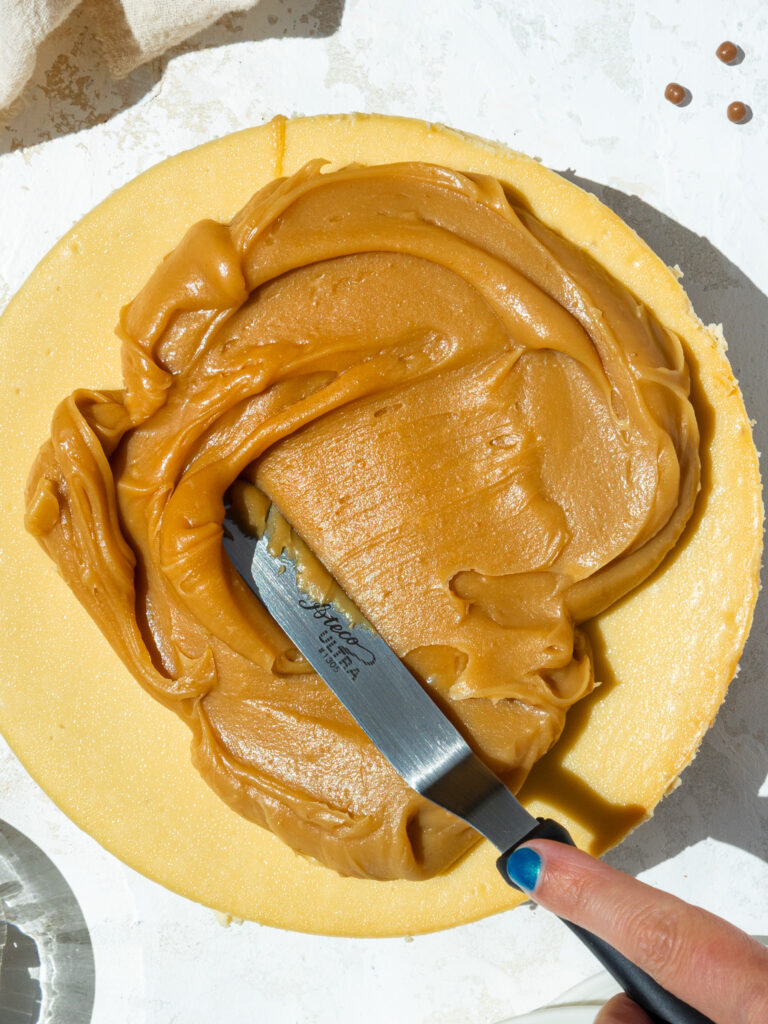
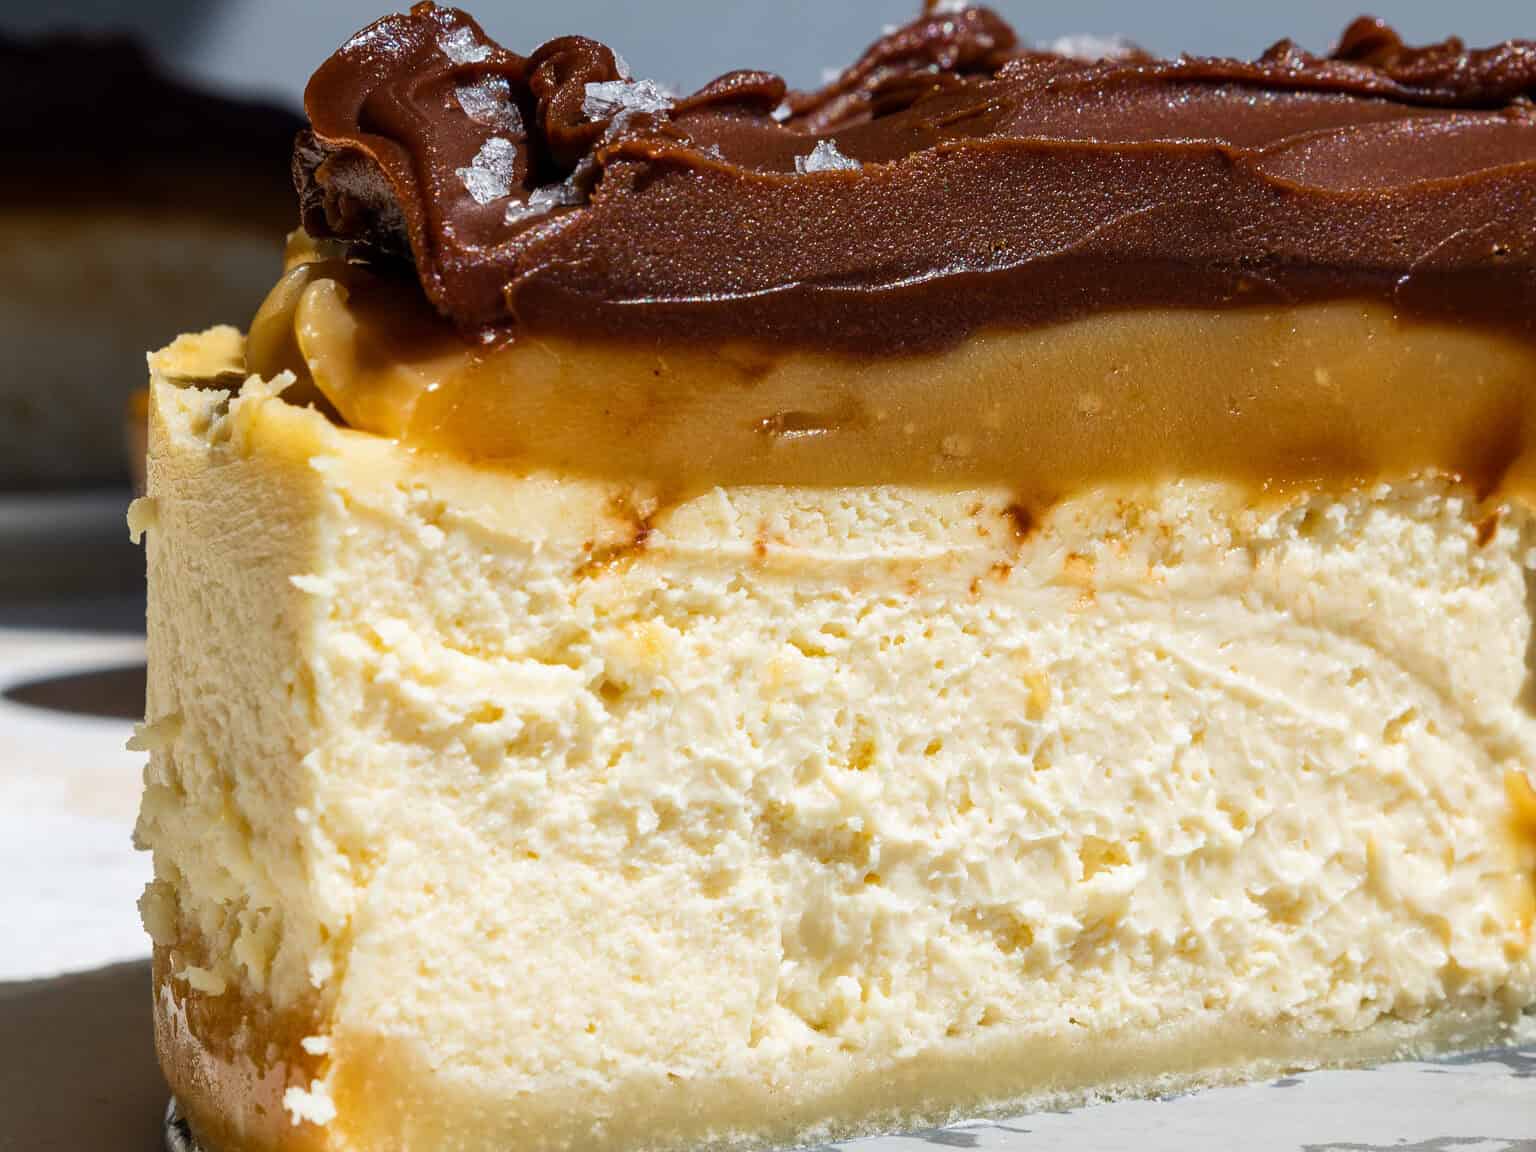
Once the cheesecake is fully cooled, carefully release it from the pan and scoop the room-temperature caramel on top of the cheesecake. Spread it into an even layer.
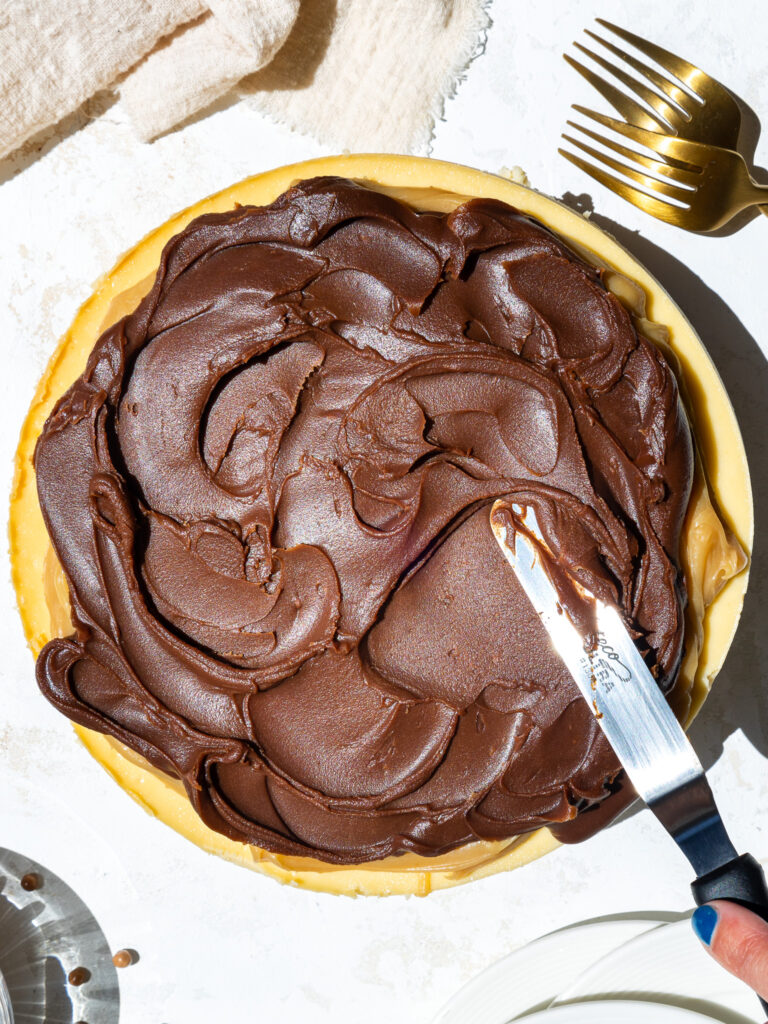
Chill in the fridge for 10 minutes to let the caramel firm up, then spread the room-temperature chocolate ganache on top of the caramel.
Top the cheesecake with a sprinkle of flaky sea salt, then use a sharp, warm knife to cut into the chilled cheesecake.
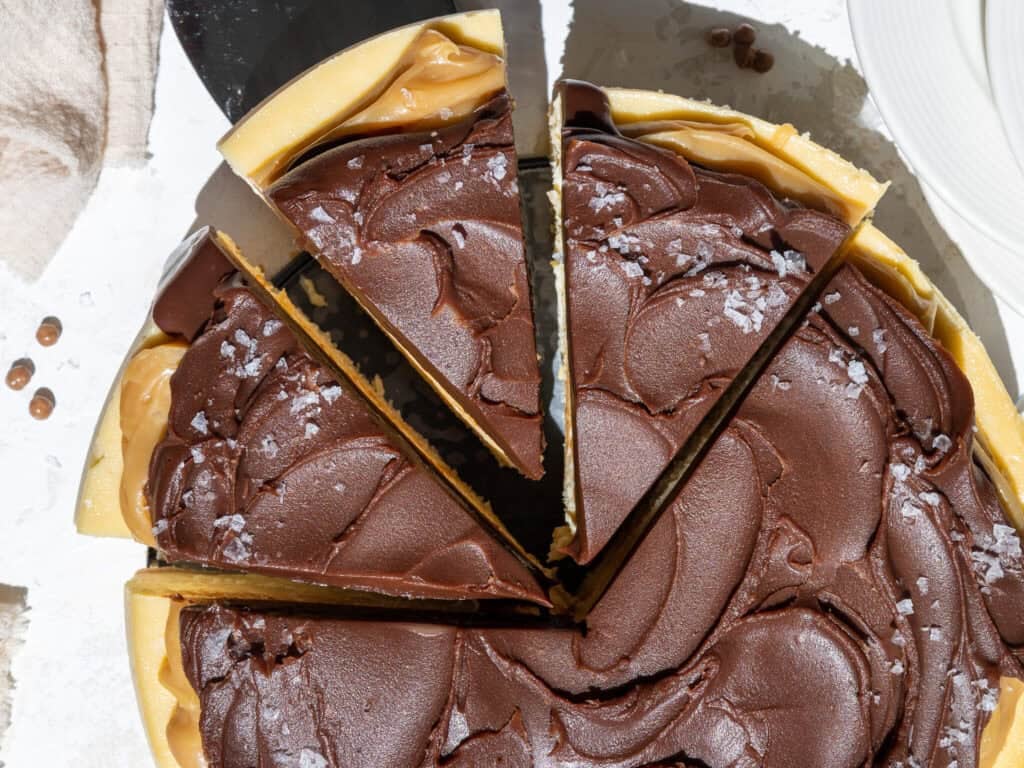
Clean the knife after each cut to get perfect slices. Leftover cheesecake can be kept in the fridge for up to a week in an airtight container.
Substitutions & Swaps – Shortbread Cheesecake Crust
This recipe uses quite a few ingredients, and I know you might not have all of them on hand.
Below are some swaps and substitutions that can be made in this recipe.
- Unsalted Butter – Salted butter can be used in place of unsalted butter, just omit the salt that the shortbread crust recipe calls for.
- Powdered Sugar – Adding powdered sugar to the crust helps solidify the crust once it’s baked and gives it the perfect hint of sweetness.
- AP Flour – A good baking gluten-free flour blend can be used in place of the AP flour in the crust.
Substitutions & Swaps – Caramel Cheesecake & Topping
- Cream Cheese – This recipe tastes best with full-fat cream cheese. I find using cream cheese that comes in brick form works best. I highly recommend using the Philadelphia brand (not sponsored – it just works best!). Avoid organic cream cheese if possible; it’s creamier and will make the cheesecake denser and less fluffy.
- Granulated Sugar – You can increase or decrease the amount of sugar by a few Tablespoons based on your preferences.
- Cornstarch – Cornstarch helps prevent cracking and makes the cheesecake easier to cut into clean slices. You can use all-purpose flour in its place if needed.
- Eggs – Sadly, this recipe does not turn out with egg alternatives like applesauce or flaxseed eggs. I highly recommend using regular large eggs.
- Light Brown Sugar – I prefer using light brown sugar to make the caramel, but you can also use dark brown sugar.
- Light Corn Syrup – Using a bit of corn syrup in the caramel and ganache gives them a glossy, silky smooth consistency. However, it can be omitted from both recipes if needed.
- Dark Chocolate – I love using dark or semi-sweet chocolate to make the ganache topping. However, you can also use 2 cups (360g) of good-quality milk chocolate chips in place of the dark chocolate.
Millionaire Cheesecake Troubleshooting and FAQs
While I’d love to think everyone’s cheesecake will turn out perfectly every time, I know that sometimes things don’t go that smoothly. Below are some tips and advice to help!
Do I Have to Use a Water Bath?
This recipe uses a kind of pseudo water bath. Rather than baking the cheesecake directly in a giant pan filled with water, I like to place a tray filled with water on the bottom rack of the oven as the cheesecake bakes.
This helps the cheesecake bake up tall and fluffy. It also prevents the center from sinking. I highly recommend baking the cheesecake this way, but it can be baked without the water tray.
However, the texture will be slightly denser, and the cheesecake will sink in the middle as it cools if you don’t use one.
Why Did My Cheesecake Crack?
There can be a few different culprits for cracked cheesecake. The most common are the cheesecake was over-baked, it was cooled too quickly, or the batter was over-mixed.
When a cheesecake is over-baked, the edges stick to the side of the pan. This can be a problem because cheesecake contracts as it cools, and this can lead to cracking.
The center of the cheesecake should still be a little bit jiggly when you turn off the oven.
On a similar note, if a cheesecake is cooled too quickly, the temperature shock can also cause it to crack. Gradually cooling a cheesecake is key!
It’s a slow process, letting it sit in the oven for two hours after baking, then letting it cool at room temperature for a few hours, then chilling it in the fridge overnight. But it’s totally worth it and should prevent any big cracks from forming.
If your cheesecake cracks, there’s also a chance that the batter was over-mixed. If you incorporate too much air into the cheesecake batter, air bubbles can get trapped in the batter and cause cracks.
And while we’d all love our cheesecake to turn out with a perfect, smooth top, it’s also ok if it doesn’t! You can always decorate the top of the cheesecake to cover any cracks.
How Can I Tell If My Cheesecake Is Done?
If you don’t make cheesecake very often, it can be hard to know when the cheesecake is done!
While we know the center is supposed to still be jiggly when we turn off the oven, I always think to myself, HOW JIGGLY?? I’ve gotten better at trusting the process over time, and baking this cheesecake with the low and slow method really helps it cook through properly.
However, if you’re still nervous, there is an easy test you can do to make sure your cheesecake is properly baked.
I like to call it the toothpick test. Once you remove the cheesecake from the oven (after the 2-hour cooling process in the oven), insert a toothpick into the cheesecake 1 inch from the edge of the pan.
If it comes out clean, your cheesecake is properly baked.
Can I Bake This Cheesecake Without a Springform Pan?
This recipe bakes up best in an 8-inch springform pan or cheesecake pan.
It can also be baked in a 9-inch springform pan if needed. However, it will be a bit shorter.
You can also use a square or quarter sheet pan to make millionaire cheesecake bars! More on that in the section below.
Can I Use This Recipe to Make Millionaire Cheesecake Bars?
Yes! You can use either an 8×8-inch pan or a 9×13-inch (quarter sheet pan) to make millionaire cheesecake bars with this recipe.
Whichever size pan you use, be sure to line the pan with parchment paper and spray it with non-stick spray to make it easier to cut the bars and remove slices.
You can make these in an 8×8-inch pan following the recipe below, but I recommend making a 1/2 batch of the cheesecake batter and the caramel.
Bake them at 325°F/162°C for 42-47 minutes with a water tray on the bottom rack. The edges should look set, and the center will still be a bit jiggly when they’re done.
You can make these in a 9×13-inch pan by using one batch of the cheesecake and caramel recipe, but doubling the crust recipe and chocolate ganache recipe.
Bake them at 325°F/162°C for 40-45 minutes with a water tray on the bottom rack. The edges should look set, and the center will still be a bit jiggly when they’re done.
Making This Millionaire Cheesecake in Advance & Storage Tips
This cheesecake can be stored in the fridge for up to a week. Store slices in an airtight container or cover the springform pan tightly with plastic wrap to keep it fresh.
You can also freeze this cheesecake for up to 3 months! After it’s baked and cooled, release it from the pan, then freeze the entire cheesecake until it’s firm to the touch (about 3 hours).
Carefully lift the cheesecake off the bottom of the springform pan and slide it onto a cardboard cake round or plate.
Wrap the entire cheesecake in a couple of layers of plastic wrap and then foil.
When you’re ready to enjoy the frozen cheesecake, place it in the fridge overnight, then unwrap and enjoy it the following day.
Whether you’re freezing or refrigerating this cheesecake, wait to add the caramel and ganache topping until you’re ready to serve it.
How To Make the Best Millionaire Cheesecake
- Make sure the ingredients are at room temperature. It helps them mix together better and will give the cheesecake a smoother texture.
- Use full-fat cream cheese that comes in brick form. I highly recommend using the Philadelphia brand (not sponsored – it just works best!). Avoid organic cream cheese if possible; it’s creamier and will make the cheesecake denser and less fluffy.
- Mix the batter on a low speed as you make it. You want to incorporate as little air as possible into the batter. Excess air in your batter can cause your cheesecake to crack.
- Make this cheesecake early in the day. The baking and cooling process takes about 6 hours before you can place the cheesecake in the fridge.
- Follow the cooling instructions to a T! I know it’s a slow process, but it’s worth it. It helps ensure the cheesecake has the perfect consistency once it’s cooled.
- Use a warm, sharp knife to get clean slices. Fill a tall cup with hot water and dip a sharp knife into it. Dry the knife fully, then cut into the cheesecake. Repeat with each cut, being sure to wipe the blade completely clean after each cut.
- If your cheesecake cracks while baking or cooling, don’t fret! You can easily cover it with the caramel and ganache topping, and no one will know.
- Make room in your fridge ahead of time so you can easily chill the cheesecake once it reaches room temperature.
Let Me Know What You Think!
If you try this millionaire cheesecake recipe, I’d love to hear what you think of it! Please leave a rating and comment below.
Don’t forget to tag me @chelsweets and #chelsweets if you share on social media! I love seeing your delicious creations.
Millionaire Cheesecake
Equipment
Ingredients
Caramel Topping
- 14 oz. can sweetened condensed milk 396g
- 1/2 cup unsalted butter, cut into chunks 113g
- 1/2 cup packed light brown sugar 100g
- 1/4 cup light corn syrup 60g
- 1/2 tsp fine salt 3g
- 1 tsp vanilla extract or vanilla bean paste 4g
Shortbread Crust
- 1/2 cup unsalted butter, room temperature 113g
- 1 cups all-purpose flour 125g
- 1/4 cup powdered sugar 27g
- 1/4 tsp fine salt 1g
Caramel Cheesecake
- 1 1/3 cups granulated sugar 266g
- 2 Tbsp cornstarch 18g
- 4 8 oz. packages full-fat cream cheese, room temperature 904g
- 4 large eggs, room temperature 224g
- 2/3 cup full-fat sour cream, room temperature 170g
- 1/2 cup caramel topping, room temperature – recipe above 150g
- 1 tsp vanilla extract or vanilla bean paste 4g
Chocolate Ganache Topping
- 1/2 cup heavy whipping cream, room temperature 120g
- 2/3 cup dark or semi-sweet chocolate chips 120g
- 2 Tbsp unsalted butter, room temperature 30g
- 1 Tbsp light corn syrup – optional 20g
- 1/4 tsp fine salt 2g
Garnish – Optional
Instructions
Caramel Topping
- Make the caramel filling first so that it can thicken up before being added to the cheesecake batter.
- Heat 1 can of sweetened condensed milk, 1/2 cup butter, 1/2 cup packed brown sugar, 1/4 cup light corn syrup, and 1/2 tsp fine salt over medium heat in a heavy saucepan. Stir frequently and let the mixture just begin to bubble (if you have and are using a candy thermometer, cook until the mixture hits 212°F/ 100°C). It will start bubbling up on the sides of the pan first. Once this happens, turn the heat down to low to let the caramel simmer.
- Continue to stir frequently until the mixture thickens and becomes a medium caramel color (about 10 minutes). You should be able to drag a spatula through the mixture and see the bottom of the pan for a second once it's ready. Remove from the heat and stir in 1 tsp vanilla extract.
- Pour into a separate container, then set aside to cool to room temperature. If you make this in advance, cover the bowl and store it at room temperature overnight or in the fridge for up to a week. If you refrigerate the caramel, heat it in the microwave in short 15-second intervals until it reaches room temperature and is a more workable consistency.
Shortbread Crust
- Next, work on the shortbread crust. Preheat the oven to 350°F/175°C. Spray an 8- or 9-inch springform or cheesecake pan with non-stick baking spray, then place a parchment round on the bottom of the pan.
- Use a fork or pastry cutter to combine 1/2 cup butter, 1 cup flour, 1/4 cup powdered sugar, and 1/4 tsp fine salt. It should form a soft dough once combined.
- Press into the bottom of the prepared pan with your fingers to create an even layer.
- Prick the crust thoroughly with a fork, then bake for 22-25 minutes, or until the edges are just starting to brown.
- Place the pan on a wire rack to cool. Keep the oven on but lower the temperature to 300°F/150°C and place a baking tray filled with about 1 inch of water on the bottom rack.
Caramel Cheesecake
- While the cookie crust bakes and cools, make the cheesecake filling.
- Whisk together 1 1/3 cups of sugar and 2 Tbsp of cornstarch in a small bowl. This helps prevent the cornstarch from clumping.
- In a large mixing bowl or the bowl of a stand mixer fitted with a paddle attachment, beat 4, 8-oz packages of room temperature cream cheese and the sugar/cornstarch mixture on a low speed until the mixture is completely smooth. Scrape the sides and bottom of the bowl with a rubber spatula to make sure everything is properly combined.
- Crack 4 eggs in a bowl and whisk them together. Gradually mix the eggs into the cheesecake batter in a few installments while mixing on a low speed. Then mix in 2/3 cup sour cream, 1/2 cup caramel (recipe above), and 1 tsp vanilla extract until just combined.
- Pour the caramel cheesecake batter into the prepared pan. NOTE: If you use an 8-inch pan, it will be filled close to the top of the pan! But don't worry, cheesecake doesn't really rise as it bakes, so it shouldn't overflow in the oven.
- Double-check that the oven temperature has been lowered to 300°F/150°C, then place the cheesecake pan on a large cookie sheet and bake the cheesecake for 20 minutes.
- Without opening the oven door, reduce the oven temperature to 225 F / 110 C and bake for an additional 2 hours. It sounds crazy, but low and slow is the best way to bake up a perfect, crack-free cheesecake that doesn't sink.
- Once the cheesecake is done baking, turn the oven off and let the cheesecake sit in the oven for 1 hour without opening the door.
- Next, remove the cheesecake from the oven and let it continue to cool at room temperature for a few hours. Once it reaches room temperature, cover the top of the cheesecake with plastic wrap and refrigerate the cheesecake for an additional 3-4 hours or overnight (preferred).
Chocolate Ganache Topping
- Make the chocolate ganache as the cheesecake bakes and cools, because it needs time to cool and thicken before we top the cheesecake with it.
- Heat 1/2 cup of heavy cream in a heatproof bowl in the microwave for 45 seconds, until it's just beginning to bubble.
- Gently pour 2/3 cup of dark chocolate chips into the heavy cream. Make sure the chips are fully covered with cream. Let the mixture sit for 1 minute. If you want to use milk chocolate to make the ganache, use 2 cups (360g) of good-quality milk chocolate chips.
- Stir slowly until the cream and chocolate are combined and the mixture is smooth. If any bits of chocolate aren't fully melted, heat the mixture again for 15 seconds and stir until smooth.
- Mix in 2 Tbsp of unsalted butter, 1 Tbsp of corn syrup, and 1/4 tsp fine salt until combined.
- Cover with plastic wrap to prevent the ganache from forming a skin, then set aside to cool to room temperature. If you want to accelerate the cooling process, place the bowl in the fridge. If you need to make this in advance, it can be covered and stored in the fridge for up to a month.
Decorating This Millionaire Cheesecake
- Once the cheesecake is fully cooled, carefully release it from the pan and scoop the room-temperature caramel on top of the cheesecake. Spread it into an even layer.
- Chill in the fridge for 10 minutes to let the caramel firm up, then spread the room-temperature chocolate ganache on top of the caramel.
- Add a sprinkle of flaky sea salt, then use a sharp, warm knife to cut into the chilled cheesecake. Clean the knife after each cut to get perfect slices. Leftover cheesecake can be kept in the fridge for up to a week in an airtight container.
Video
Notes
Using This Recipe to Make Millionaire Cheesecake Bars
You can use either an 8×8-inch pan or a 9×13-inch (quarter sheet pan) to make millionaire cheesecake bars with this recipe. Whichever size pan you use, be sure to line the pan with parchment paper and spray it with non-stick spray to make it easier to cut the bars and remove slices. You can make these in an 8×8-inch pan following the recipe below, but I recommend making a 1/2 batch of the cheesecake batter and the caramel. Bake them at 325°F/162°C for 42-47 minutes with a water tray on the bottom rack. The edges should look set, and the center will still be a bit jiggly when they’re done. You can make these in a 9×13-inch pan by using one batch of the cheesecake and caramel recipe, but doubling the crust recipe and chocolate ganache recipe. Bake them at 325°F/162°C for 40-45 minutes with a water tray on the bottom rack. The edges should look set, and the center will still be a bit jiggly when they’re done.Making This Millionaire Cheesecake in Advance
This cheesecake can be stored in the fridge for up to a week. Store slices in an airtight container or cover the springform pan tightly with plastic wrap and foil to keep it fresh. If you’re making this cheesecake in advance, wait to top it with the caramel and chocolate ganache until you plan to serve it. You can also freeze this cheesecake for up to 3 months! After it’s baked and cooled, release it from your pan, then freeze the entire cheesecake until it’s firm to the touch (about 3 hours). Carefully lift the cheesecake off the bottom of the springform pan and slide it onto a cardboard cake round or plate. Wrap the entire cheesecake in a couple of layers of plastic wrap and then foil. When you’re ready to enjoy the frozen cheesecake, place it in the fridge overnight, then unwrap and enjoy it the following day. Wait to add the caramel and ganache topping until you’re ready to cut into it.How To Make the Best Millionaire Cheesecake
- Make sure the ingredients are at room temperature. It helps them mix together better and will give the cheesecake a smoother texture.
- Use full-fat cream cheese that comes in brick form. I highly recommend using the Philadelphia brand (not sponsored – it just works best!). Avoid organic cream cheese if possible; it’s creamier and will make the cheesecake denser and less fluffy.
- Mix the batter on a low speed once you start mixing ingredients into the cream cheese/sugar mixture. You want to incorporate as little air as possible into the batter. Excess air in your batter can cause your cheesecake to crack.
- Make this cheesecake early in the day. The baking and cooling process takes about 6 hours before you can place the cheesecake in the fridge.
- Follow the cooling instructions to a T! I know it’s a slow process, but it’s worth it. It helps ensure the cheesecake has the perfect consistency once it’s cooled.
- Use a warm, sharp knife to get clean slices. Fill a tall cup with hot water and dip a sharp knife into it. Dry the knife fully, then cut into the cheesecake. Repeat with each cut, being sure to wipe the blade completely clean after each cut.
- If the butter doesn’t get fully incorporated into the caramel (this can happen if the caramel gets cooked at slightly too high a temperature), don’t worry! You can gradually stir the butter into the caramel as it cools, and it will come together once it reaches room temperature. It won’t be quite as smooth as normal, but it will still taste great!
- If your cheesecake cracks while baking or cooling, don’t fret! You can easily cover it with caramel and ganache while decorating this cheesecake, and no one will know.
- Make room in your fridge ahead of time so you can easily chill the cheesecake once it reaches room temperature.
Nutrition
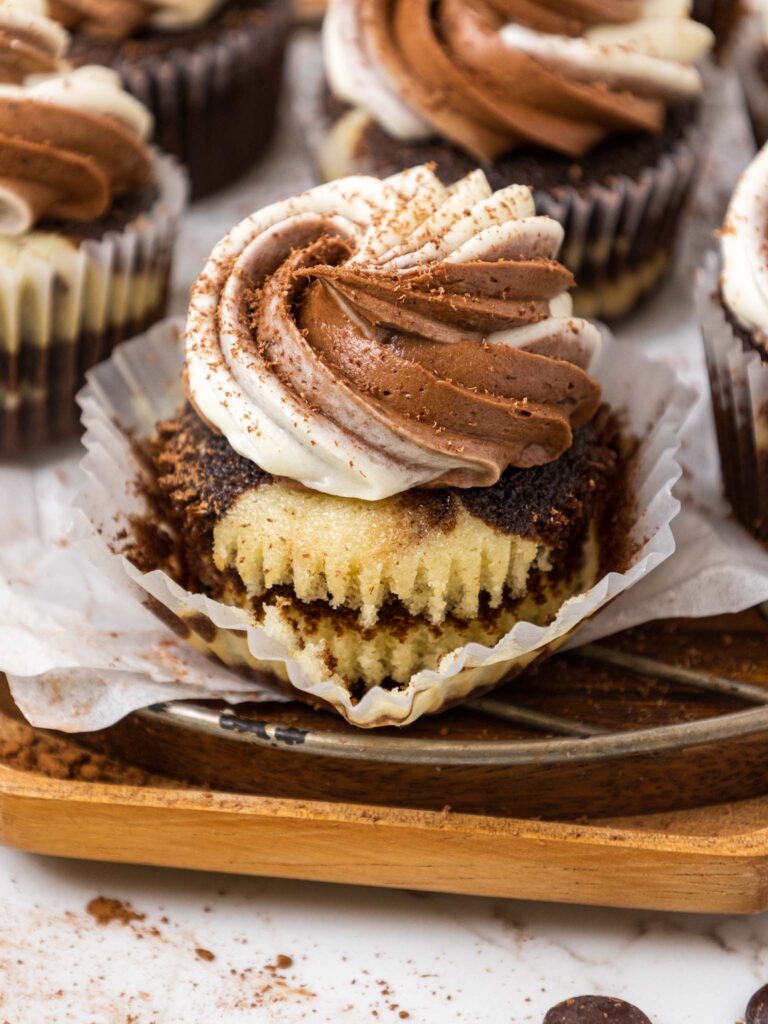
Other Posts You Might Like:

Hi Chels this recipe looks awesome. I tried your oreo nutella cheesecake and it blew my mind. Please consider doing a coconut cheesecake next plz ty!
Hi Ren,
Haha you are on a coconut kick!! I’ll have to add that flavor idea to my list too!
Hi! Can’t wait to try this recipe. When baking in an 8×8, the entire cheesecake is at 325F for 42-47 minutes?
Instead of the longer process with the standard cheesecake pan?
Thank you!
Hi Dev,
Yup, I bake the bar version of these at 325F for 42-47 minutes with a pan of water on the rack below. Hope that helps and that your bars turn out great!! 🙂
@Chelsweets, Hi, amped to make the bar version! if you do this, is the cooling process the same length of time too? meaning 2 hours in the oven off, or a short time since it’s less filling? thanks!!
Hi Paige,
Great question! Because the bars only have half the amount of cheesecake, it’s a normal cool down process / you can just remove the pan from the oven and let them cool 🙂 Hope that helps, happy baking!
@Chelsweets, BEST RECIPE EVER! I’m making them again for my co-workers because they loved them! 4 days later and I’m back in the kitchen! You’re the best. They turned out beautifully and delicious!
YAY!!!! I love to hear that Dev 🙂 Keep up the amazing baking!!!
I made the cheesecake for my husband’s birthday. It was a big hit! The slight change I would make is to blend the caramel into the cream cheese before adding the eggs. I may have just been my caramel but it didn’t blend into the mixture well when I added it at the end and I didn’t want to beat to too vigorously after I added the egg. It was still delicious the cake just ended up with flecks of caramel it didn’t effect the texture at all. Thank you for the recipe Chelsey!
So happy to hear that Jennifer! Thank you for sharing 🙂
Hi! Does the 9×13 bar recipe also require a water bath and the same cooling process?
Hi Nina,
Great question! It’s optional when making bars, but I usually include it because I think it helps the bars bake more evenly! Hope that helps, happy baking!
Tried this and everyone loved it! I love this recipe so much.
I am not sure if I did something wrong but the caramel did not remain soft it got hard and really chewy…
Hi Adara,
So happy to hear that!! If the caramel is hard / really firm at room temperature, it might just mean it was a little bit overcooked! I’d recommend either lowering the cooking temp a bit or cooking it a little less long next time. Hope that helps for the future, happy baking!
8″ pan is too small for this recipe. I’d use 10″
The cake did not set firm, it’s runny. The oven may need to be hotter.
The ganache is too thin. Needs to be thicker.
When I cut the cake, it “poured” into the cut section.
Hi there,
Did you follow the baking and cooling instructions fully? I have never run into this cheesecake being runny and I’ve made it 5 times! You can make them in a larger pan if you want to or need to, but they should bake through fully in an 8 inch pan as well. Did you do anything differently than the recipe calls for? Did you use full fat cream cheese that comes in a block? Hopefully we’ll be able to figure out what happened together!
For the ganache – did you use dark chocolate? What brand of chocolate did you use? If you used a chocolate with a higher cocoa butter percentage like milk chocolate it will make the ganache thinner. Higher quality chocolate also melts down best, some brands of chocolate chips can be finicky well when making ganache like toll house.
I am concerned my caramel is lumpier than yours.. I do see yours has some small granules but mine seems more grainy- oddly enough when I eat it it isn’t very grainy but does have an odd texture (might be the condensed milk I am used to that. I already used it in my cheesecake and it did have some small flecks of caramel which I’m not mad about but don’t seem to match yours. Considering making another batch of caramel for the top- but idk what to do differently? I feel it did get hot enough as it was almost exact to your video. Let me know if you have any suggestions ??
Hi Kirsten,
Caramel can definitely be finicky!! Glad it still tasted great though!
This is going to sound crazy, but if your caramel started to caramelize you can always add in a bit of fresh lemon juice! It won’t make the caramel taste like lemon, but it will stop the caramelization and bring the caramel back to a smooth consistency.
For next time you might want to play around with the temperature a bit (I’d try lowering it just slightly) or use a different, heavier-bottomed pot. Hopefully your next batch will be smoother! Let me know how it goes!!
I have a suggestion for making the caramel sauce. I think it would be helpful if you used a candy thermometer to gauge when it’s done. I made it yesterday according to the directions, but I wasn’t happy with the texture. I put it back on the stove and cooked it to the soft ball stage and then added a tablespoon or so of heavy cream. The texture was better, but still not great. I will probably end up adding more cream to get the consistency right. BTW, the flavor is AMAZING!
Hi Donna,
I appreciate your feedback! Was the caramel too soft the first time you cooked it? Cook time can vary a lot based on the type of stovetop you have and the pan you use, so using a candy thermometer would definitely be more precise.
The next I make this I will use a thermometer to test it out and share what temperature is best to cook it to. Stay tuned!
Hi to tried your recipe to a tee and it came out bomb !! Wish I could send you a picture…thank you so much for all your recipes
I am so happy to hear that Rebecca!!! I wish we could share pics on here too, I’d love to see it 🙂
How would you adjust baking time for a 10” pan?
Hi Amanda,
I haven’t tested this recipe in a 10-inch pan, but based on baking it in a 9-inch pan, the bake time should be quite similar because it’s baked low and slow! I’d lower the initial bake time to 12 minutes at 300F, then follow the rest of the bake time instructions in the recipe card. Hope that helps, happy baking!
In the substitutions section it says if using milk chocolate in place of dark chocolate use 1 cup, but down in the instructions it says if using milk chocolate in place of dark chocolate use 2 cups. Can you clarify whether you should use 1 or 2 cups of milk chocolate in the ganache?
So sorry about the confusion Natalie!! It should be 2 cups (360g) of good-quality milk chocolate chips. I’ve updated the substitutions section to reflect that. Thank you for letting me know, happy baking!!
@Chelsweets, thank you so much!
Hi Chels do you have any tips on making mini millionaire cheesecakes on baking time and temp using a cupcake tin? Thanks in advance
Hi Gaby,
Unfortunately I’ve never made these as mini cheesecakes, but I feel like it would make a TON of them!! Bake time will vary based on how full you fill the liners (and def use cupcake liners, otherwise it’s really hard to get them out), but I’d say check them around 18-22 minutes?! Hope that helps, happy baking! Let me know how they turn out 🙂
Hi! Are you using any sort of water bath when baking the cheesecake?
Hi Schyler,
This recipe uses kind of a pseudo water bath. Rather than baking the cheesecake directly in a giant pan filled with water, I like to place a tray filled with water on the bottom rack of the oven as the cheesecake bakes.
This helps the cheesecake bake up tall and fluffy. It also prevents the center from sinking. I highly recommend baking the cheesecake this way, but it can be baked without the water tray.
However, the texture will be slightly denser, and the cheesecake will sink in the middle as it cools if you don’t use one.
I share this step in the recipe card (step 5 of the shortbread crust section). Hope that helps, happy baking!
4th Time making this gem! She blows people away and is unforgettable. It’s my most requested cheesecake out of a roster of 10 fan faves! Candy thermometer is helpful and so is using a cast iron enameled pot/small Dutch oven vs. a stainless steel pot for the caramel. If gives the most precision with the heat distribution. I use a beautiful French Malden salt to finish it off, but sprinkle it lightly over the entire top (instead of concentrating it around the perimeter) so it makes each bite of the cheesecake pop with the ganache with the slightly salted flavor. This cheesecake is an absolute slam dunk! Prepping the base, caramel and ganache the day before makes the prep much faster. I measure everything out for the actual cheesecake filling the night before I’m actually making it so I can pull it out of the fridge super early in the morning to let the specific ingredients come to room temp before I make the cheesecake. It really is a six hour process from start to finish with just the filling. If I’m traveling with the cheesecake, I won’t release it from the springform pan. I will add the toppings and release it when it’s ready to serve at the event. It makes transporting it a hell of a lot easier! The recipe is time consuming, but OH SO worth it!!!
Is there a substitute option for the corn syrup?
Hi J,
Yes! The easiest swap is honey or maple syrup. Both help prevent the caramel from crystallizing the same way corn syrup does. Honey will give the most similar texture, while maple syrup adds a little extra flavor. Just keep in mind the caramel might turn out slightly softer, but it’ll still set beautifully for millionaire bars. Hope that helps, happy baking!!
I am planning on making this for Christmas this year. I like to change desserts each year. But I have a question on the crust. Would it not work or taste bad to do a traditional graham cracker crust? I’m just worried about it having to bake for 20 minutes and then another 2 hours with the cheesecake. I don’t want it getting too hard. But this recipe sounds amazing, and I can’t wait to make it/serve it to our family! Thank you in advance
Hi Maurina,
I promise the crust doesn’t get too hard, the low temperature of the oven and the steam from the tray of water beneath it keeps it from getting crispy! But you can totally make it with a traditional graham cracker crust too, that would work too! Hope that helps, happy baking 🙂
@Chelsey White, okay thank you I decided I’m going to make yours to the exact recipe, so I’ll let you know how it turns out. I’m making it today and our family Christmas dinner is Saturday. I figure it’ll be okay in the fridge until then. I’ll make the ganache and save the caramel sauce in the fridge until Saturday morning. Thank you for responding
Hi Maurina,
I hope it turned out great!!!! Let me know know how it went!!
hi,
I really wanted to try this recipe. But I have a question first, about the caramel for the cheesecake. Do I take the caramel from the prepared caramel topping or do I have to make more of it?
Hi Nika,
Great question! Yes, you do take the caramel for the cheesecake from the caramel topping, which is made first! The total amount of caramel made is enough for both the filling and the toping. Hope that helps, happy baking!