
Chocolate Royal Icing
This easy, 4-ingredient chocolate royal icing is naturally colored and flavored with the perfect amount of cocoa powder to give it a delicious taste!

Let’s Make This Chocolate Royal Icing Together
To make sure this recipe turns out as amazing as possible, let’s walk through each step together.
Recommended Tools and Equipment
- Stand mixer or electric hand mixer
- 1 medium piping bag
- 1 small piping bag
Step 1: Beat the Icing to Stiff Peaks
Whisk together the powdered sugar and meringue powder in a large bowl or the bowl of a stand mixer.
Add the water and vanilla extract. Mix at a low speed with a whisk or paddle attachment first to incorporate the liquid, then increase to a medium speed and mix until stiff peaks form.
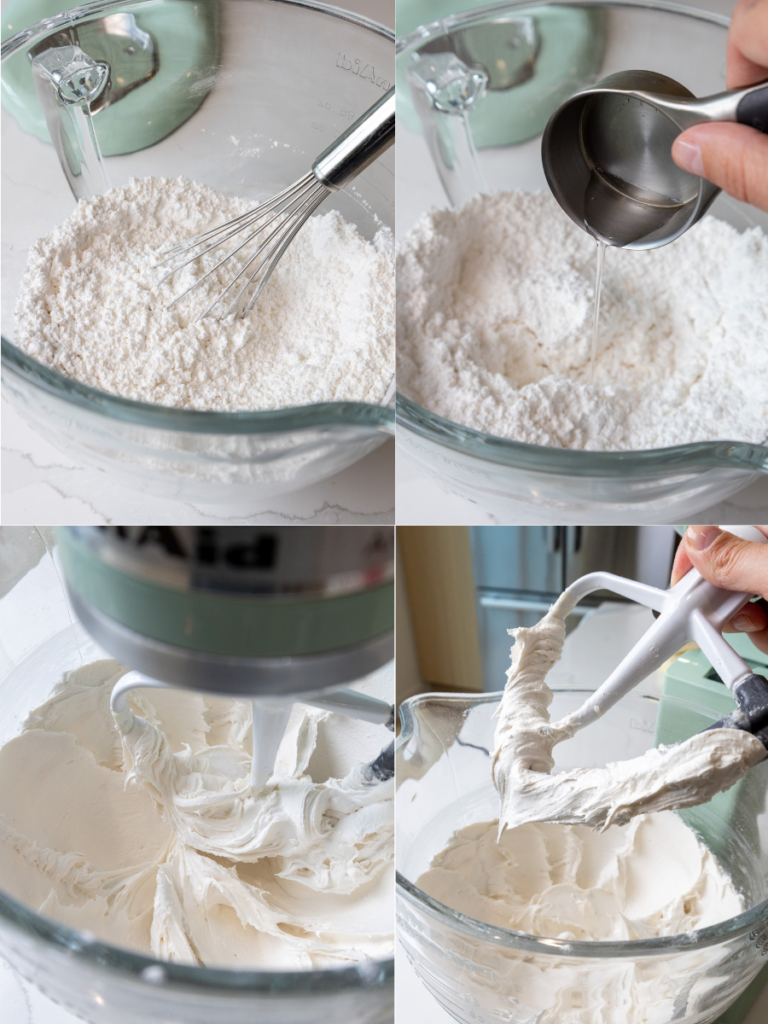
This usually takes me about 3 minutes with a hand mixer or 2 minutes with a stand mixer. Scrape around the sides and bottom of the bowl with a rubber spatula to ensure everything is properly mixed together.
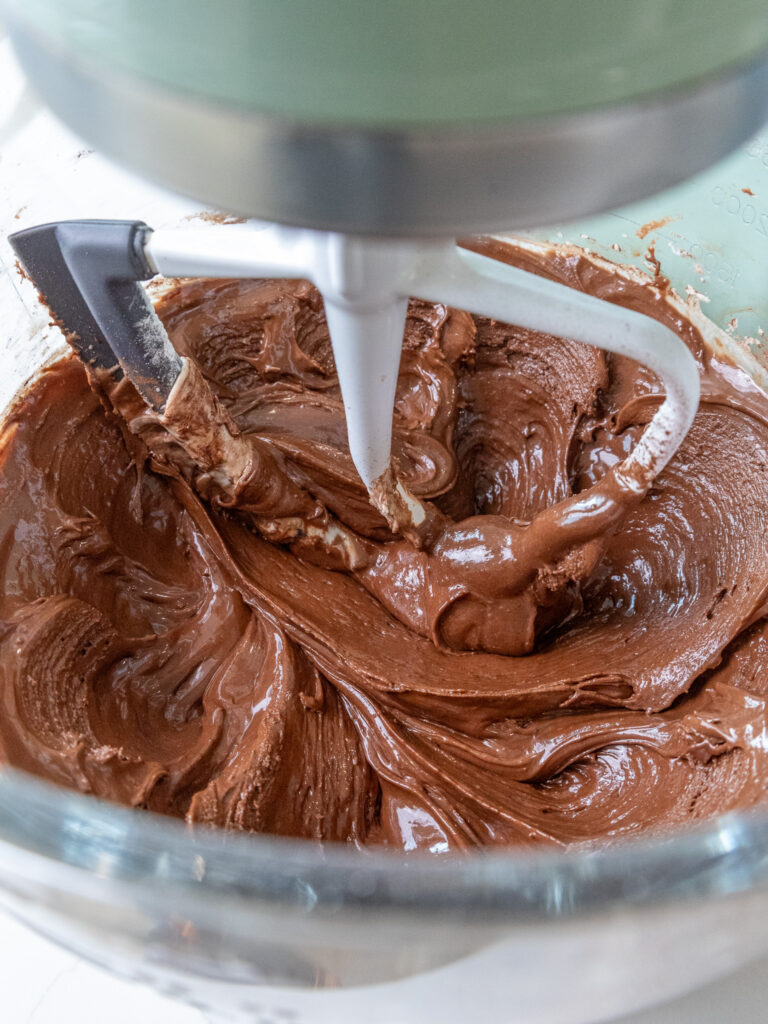
Step 2: Mix in the Cocoa Powder
The fat in the cocoa powder can affect how well the icing whips up, so I like to add it last.
Mix in the cocoa powder on a low speed until fully incorporated – I usually use 2 Tbsp, but you can adjust the color of the icing by using as little as 1 tsp of cocoa powder, all the way up to 3 Tbsp of cocoa powder.
You can also use dark cocoa powder to deepen the color. The icing in these pictures is made with 2 Tbsp dark cocoa powder.

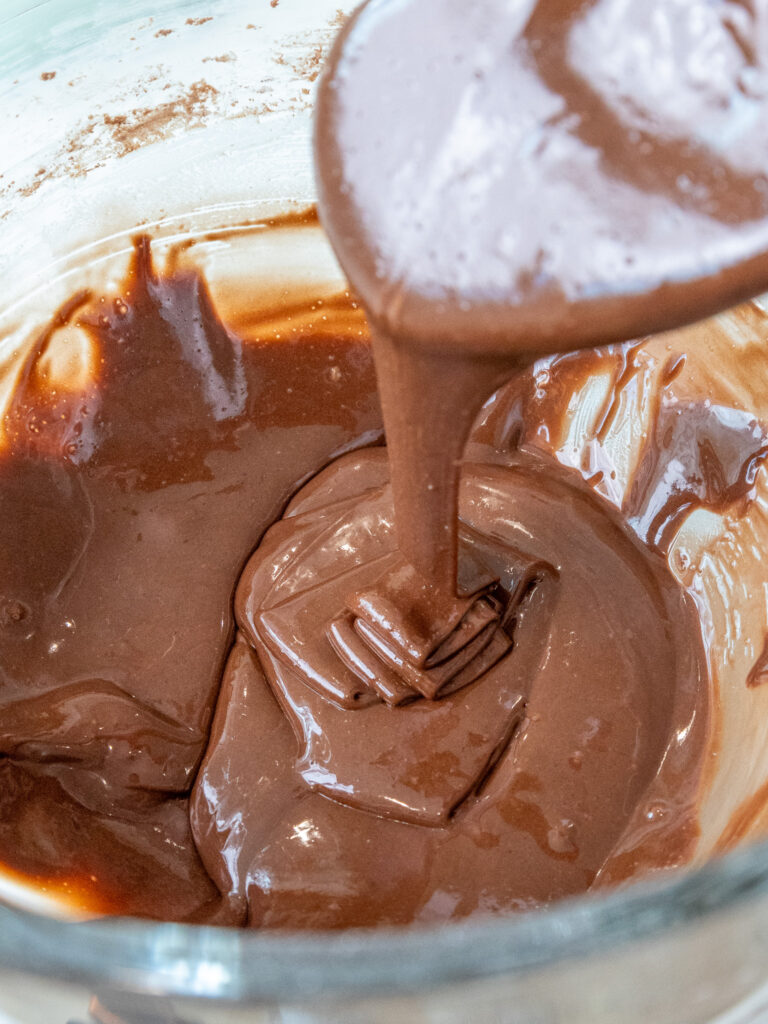
Step 3: Thin the Icing with Water as Needed
Then it’s time to thin the icing to whatever consistencies you need. I usually add additional water 1 Tbsp at a time until a soft peak consistency is reached for outlines and piped details. I use about 2 Tbsp of water, but it can vary from batch to batch.
To test for soft peak consistency, dip the spatula into the icing and focus on the way it curls at the end of the spatula. It should curl back onto itself but still be able to keep its shape.
If it’s too stiff, add a tiny bit more water. If it’s too thin, add a bit more powdered sugar.
For flooding, I add additional water, 1 tsp at a time, to the remaining icing until the icing reaches flood consistency. To test for flood consistency, the icing should be able to run off the spatula in a thick stream, and you should be able to draw a figure 8 with the run-off icing. It should settle back into the bowl of icing within 8 seconds.
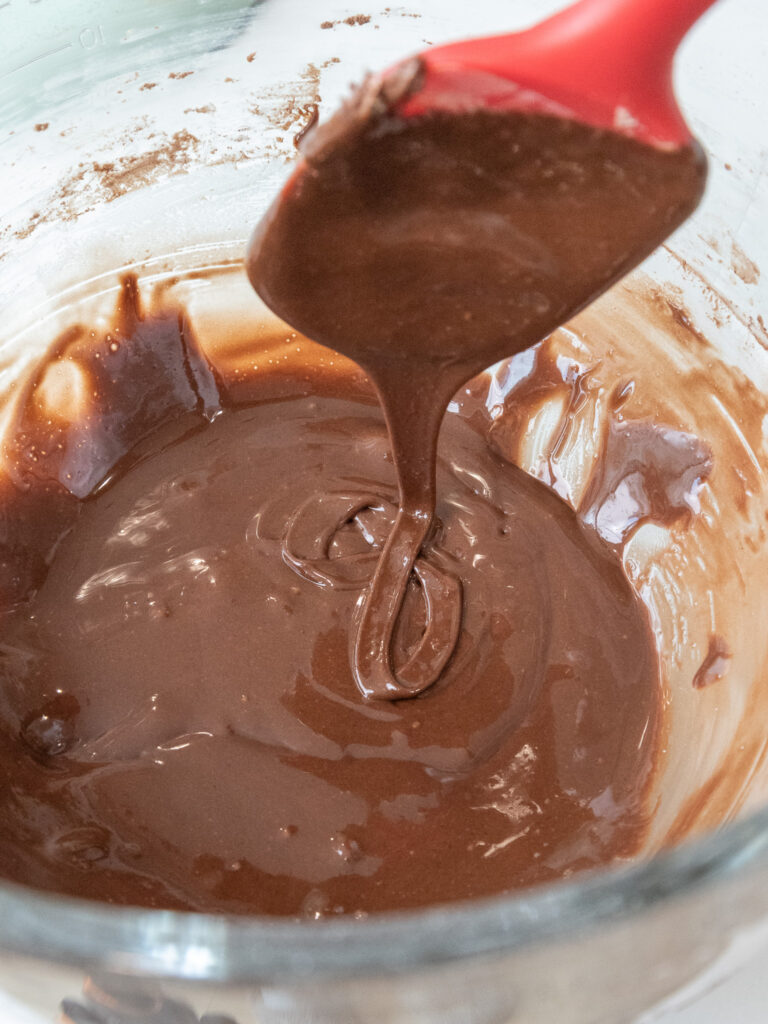
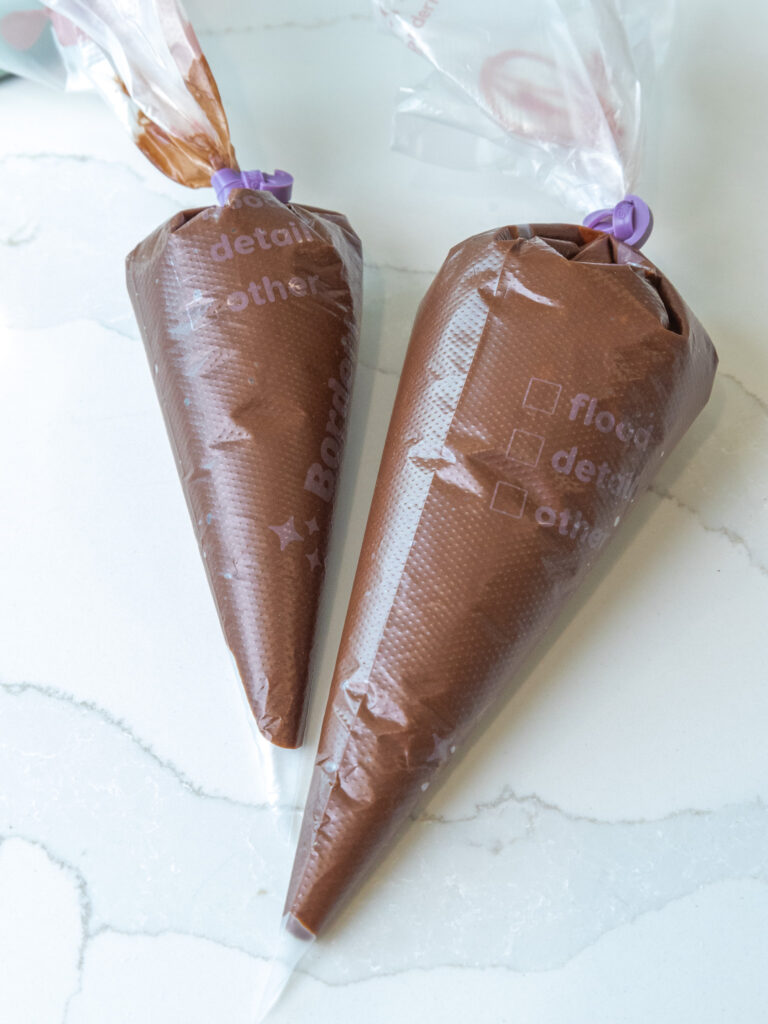
Once the icing is thinned to this stage, pour it into a piping bag, and seal the top. I like to split the icing between a few bags so that it’s easier to pipe with.
If you overfill one giant bag, it can make decorating the cookies a lot harder on your hands. Set aside.
Step 4: Decorating with This Chocolate Icing
When you’re ready to decorate cookies with this icing, cut the tips of the piping bags to create a very small opening (1-2 millimeters). You can always cut the opening wider, but you can’t make it smaller once you cut it. I find it’s a lot easier to control the icing as you decorate the cookies if you have a small opening.
Outline each cookie with the soft peak consistency icing and let them dry for 5-10 minutes.
Then flood the cookies with the flood-consistency icing, one at a time. Then decorate as desired!
For reference, the icing on the left (gingerbread cookies) was made with 2 Tbsp of regular, unsweetened cocoa powder, and the icing on the right (turkey cookies) was made 2 Tbsp of dark cocoa powder.

Let the cookies dry for a few hours or overnight until the icing is firm to the touch. These cookies can be stored in an airtight container for up to two weeks at room temperature or up to 3 months in the freezer.
How Much Icing Does This Recipe Make?
This recipe makes about 20 oz of icing, which can be used to decorate about 24, 3-inch cookies. The yield and bake time will vary based on the size and shape of the cookie cutter(s) you use.
This recipe can be halved or doubled to adjust the yield as needed.
Making This Chocolate Royal Icing in Advance and Storage Tips
This icing can be made a day in advance and stored in piping bags or an airtight container for up to a day. However, I think it turns out best if it’s made right before you plan to ice the cookies!
You can store decorated cookies in an airtight container for up to 2 weeks at room temperature or for up to 3 months in the freezer.
If you want to stack the cookies on top of one another, I recommend adding a layer of parchment paper between them.
Tips for Making the Best Chocolate Icing
- Avoid leaving the icing uncovered for long periods of time or it will crust! Either pour it into a piping bag immediately or cover it with plastic wrap.
- Adjust the amount and type of cocoa powder you use to get the color of the icing just right.
- Make the icing right before you plan to decorate the cookies for best results. Otherwise, the icing can separate, and its consistency can change.
Let Me Know What You Think!
If you make this chocolate royal icing recipe, I’d love to hear your thoughts! Please leave a rating and comment below.
Or if you share on social media, be sure to tag me @chelsweets and use #chelsweets so I can see your delicious creations!

Chocolate Royal Icing
Ingredients
Chocolate Royal Icing
- 3 1/2 cups powdered sugar 454g or a 1 lb. box
- 3 Tbsp meringue powder 28g
- 1/4 cup water, room temp 60g
- 2 Tbsp vanilla extract or vanilla bean paste 24g
- Additional water to bring to a flooding consistency
- 2 Tbsp unsweetened or dark cocoa powder 12g
Additional Supplies
- Electric stand mixer or hand mixer
- small piping bags
Instructions
Chocolate Royal Icing
- Whisk together 3 1/2 cups (454g) of powdered sugar and 3 Tbsp (28g) of meringue powder in a large bowl or the bowl of a stand mixer.
- Add 1/4 cup (60g) water and 2 Tbsp vanilla extract (24g). Mix on a low speed with a whisk or paddle attachment at first to incorporate the liquid, then increase to a medium speed and mix until stiff peaks form. This usually takes me about 3 minutes with a hand mixer or 2 minutes with a stand mixer. Scrape around the sides and bottom of the bowl with a rubber spatula to ensure everything is properly mixed together.
- The fat in the cocoa powder can affect how well the icing whips up, so I like to add it last. Mix in the cocoa powder on a low speed until fully incorporated – I usually use 2 Tbsp, but you can adjust the color of the icing by using as little as 1 tsp of cocoa powder, all the way up to 3 Tbsp of cocoa powder. You can also use dark cocoa powder to deepen the color.
- Then it's time to thin the icing to whatever consistencies you need. I usually add additional water 1 Tbsp at a time until a soft peak consistency is reached for outlines and piped details. I use about 2 Tbsp of water, but it can vary from batch to batch. To test for soft peak consistency, dip the spatula into the icing and focus on the way it curls at the end of the spatula. It should curl back onto itself but still be able to keep its shape. If it's too stiff, add a tiny bit more water. If it's too thin, add a bit more powdered sugar. You should have roughly 20 ounces or 2 1/2 cups of icing.
- For flooding, I add additional water, 1 tsp at a time, to the remaining icing until the icing reaches flood consistency. To test for flood consistency, the icing should be able to run off the spatula in a thick stream, and you should be able to draw a figure 8 with the run-off icing. It should settle back into the bowl of icing within 8 seconds. Once the icing is thinned to this stage, pour it into a piping bag, and seal the top. I like to split the icing between a few bags so that it's easier to pipe with. If you overfill one giant bag, it can make decorating the cookies a lot harder on your hands. Set aside.
Decorating with This Chocolate Icing
- When you're ready to decorate cookies with. this icing, cut the tips of the piping bags to create a very small opening (1-2 millimeters). You can always cut the opening wider, but you can't make it smaller once you cut it. I find it's a lot easier to control the icing as you decorate the cookies if you have a small opening.
- Outline each cookie with the soft peak consistency icing and let them dry for 5-10 minutes.
- Then flood the cookies with the flood-consistency icing, one at a time. Then decorate as desired!
- Let the cookies dry for a few hours or overnight until the icing is firm to the touch. These cookies can be stored in an airtight container for up to two weeks at room temperature or up to 3 months in the freezer.
Notes
Substitutions and Swaps
Please refer to the substitutions and swaps section in the post above for all the ingredient variations that can be used in this recipe.How Much Icing Does This Recipe Make?
This recipe makes about 20 oz. of icing, which can be used to decorate about 24, 3-inch cookies. The yield and bake time will vary based on the size and shape of the cookie cutter(s) you use. This recipe can be halved or doubled to adjust the yield as needed.Making This Chocolate Royal Icing in Advance and Storage Tips
This icing can be made a day in advance and stored in piping bags or an airtight container for up to a day. However, I think it turns out best if it's made right before you plan to ice the cookies! You can store decorated cookies in an airtight container for up to 2 weeks at room temperature or for up to 3 months in the freezer. If you want to stack the cookies on top of one another, I recommend adding a layer of parchment paper between them.Tips for Making the Best Chocolate Icing
- Avoid leaving the icing uncovered for long periods or it will crust! Either pour it into a piping bag immediately or cover it with plastic wrap.
- Adjust the amount and type of cocoa powder you use to get the color of the icing just right.
- Make the icing right before you plan to decorate the cookies for best results. Otherwise, the icing can separate and its consistency can change.
Nutrition
Other Recipes You Might Like:

One Comment