
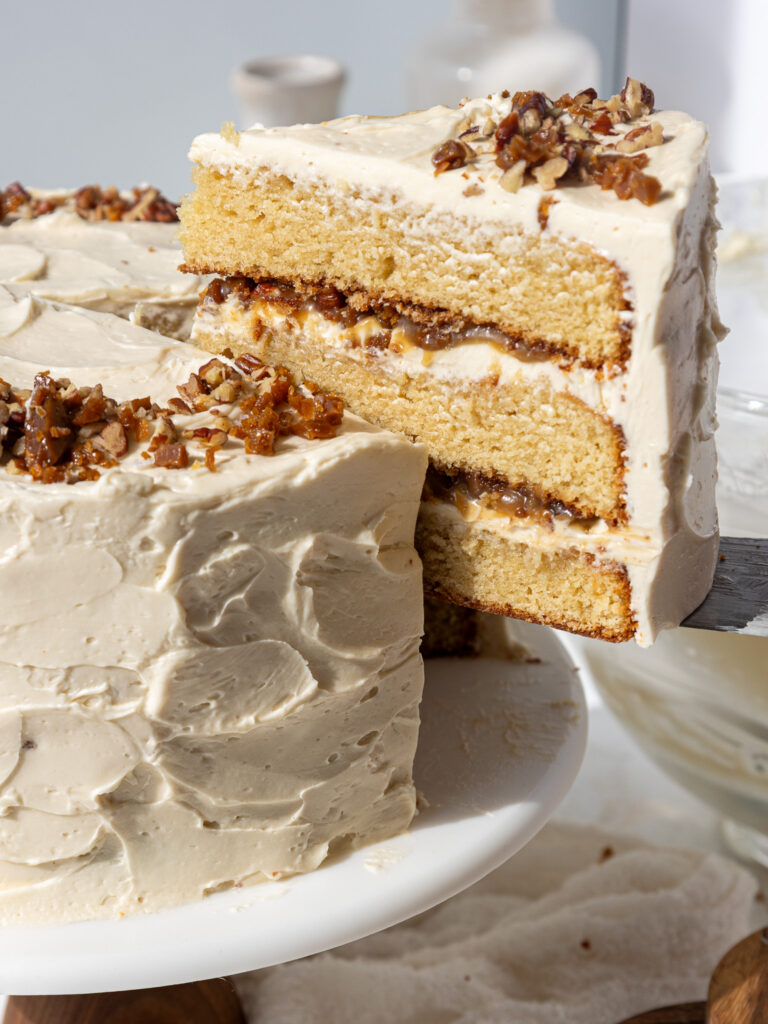
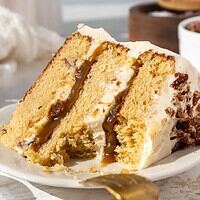
Butterscotch Crunch Cake
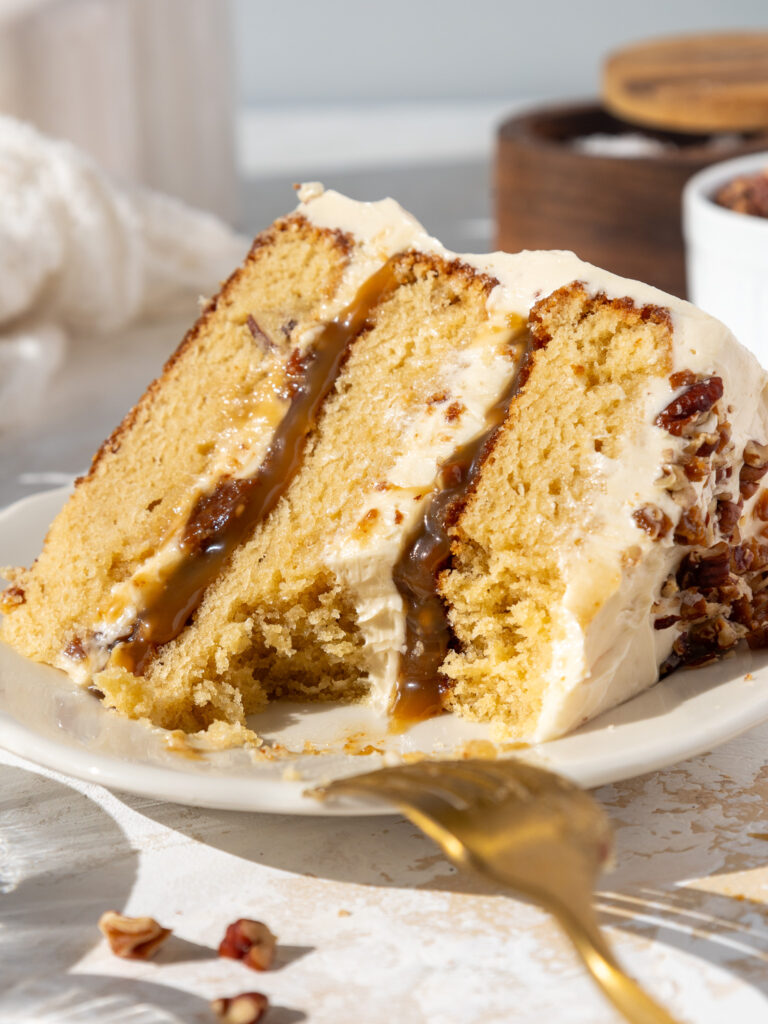
This delicious butterscotch crunch cake is made with tender brown sugar cake layers, crunchy brown sugar toffee bits, fluffy butterscotch Swiss meringue frosting, and generous butterscotch drizzles!
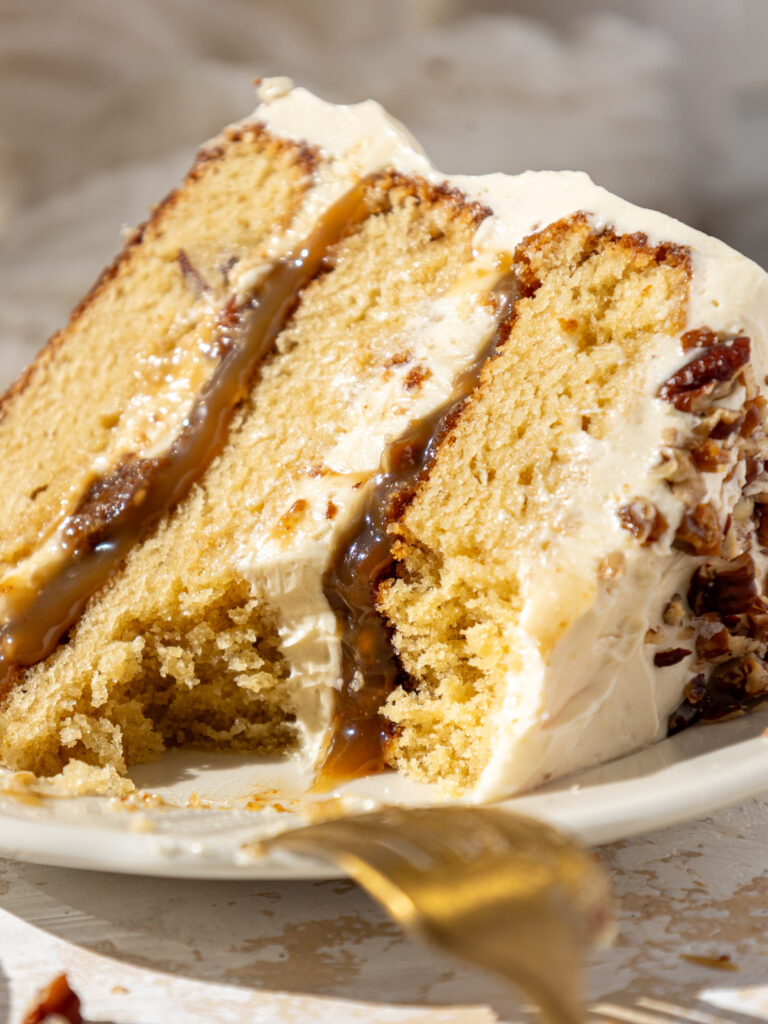
It’s the contrast of textures and flavors that truly makes this cake! Each bite is soft yet crunchy, sweet and a little salty, and full of toasted and caramelized deliciousness.
How to Make This Butterscotch Crunch Cake
Let’s walk through each step of this recipe to make sure it turns out as amazing as possible.
Step 1: Make the Brown Sugar Cake Layers
The first step is to make the brown sugar cake layers following the recipe card at the bottom of this post.
Divide the batter evenly between the prepared pans and bake for 32-35 minutes or until a toothpick comes out with a few moist crumbs.
Let the pans cool for 10 minutes, then run a small offset spatula around the perimeter of the pan to separate the cake from the pan.
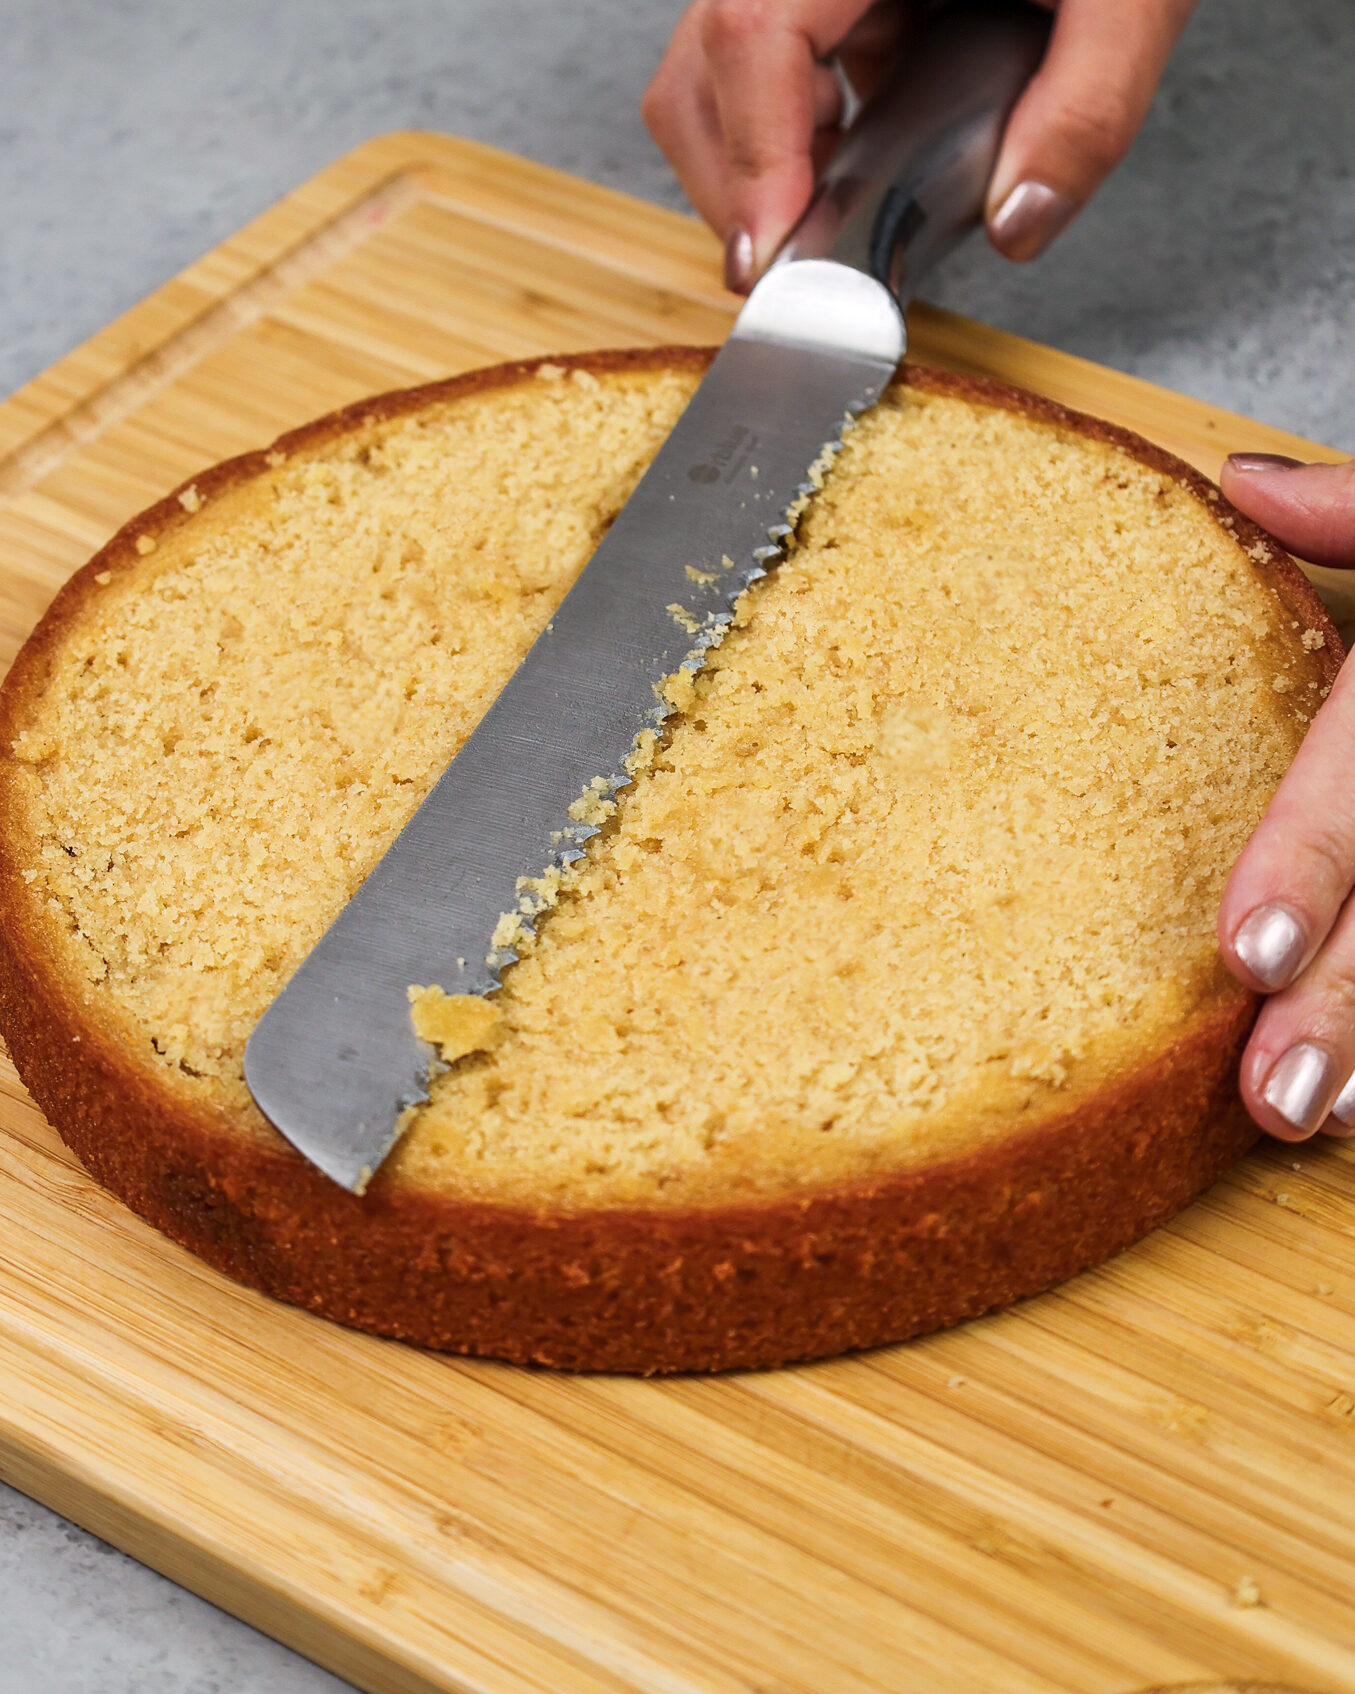
Then flip the cake layers onto a wire rack to finish cooling and use a serrated knife to level the tops of the layers once they’re fully cooled.
If you make these cake layers in advance and freeze them, let them thaw for about 20 minutes before making your cake.
The cake layers should still be slightly cold to the touch, which will make it easier to assemble your cake.
Step 2: Make the Butterscotch Sauce
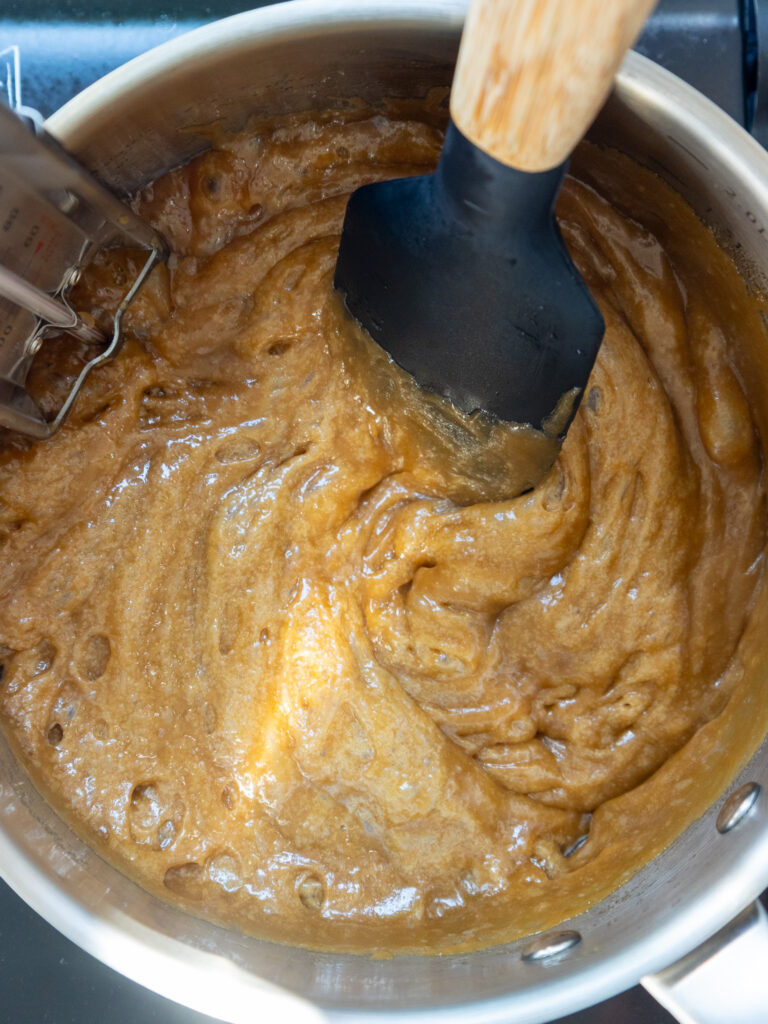
Next, we make the butterscotch sauce. Turn the stove to medium heat, and place a pot over the element.
Melt the butter in a medium-sized, heavy-bottomed saucepan over medium heat. Note: Do NOT use a non-stick pan for this recipe!
Add the dark brown sugar, heavy cream, and salt. Stir the mixture with a rubber spatula until it’s fully combined.
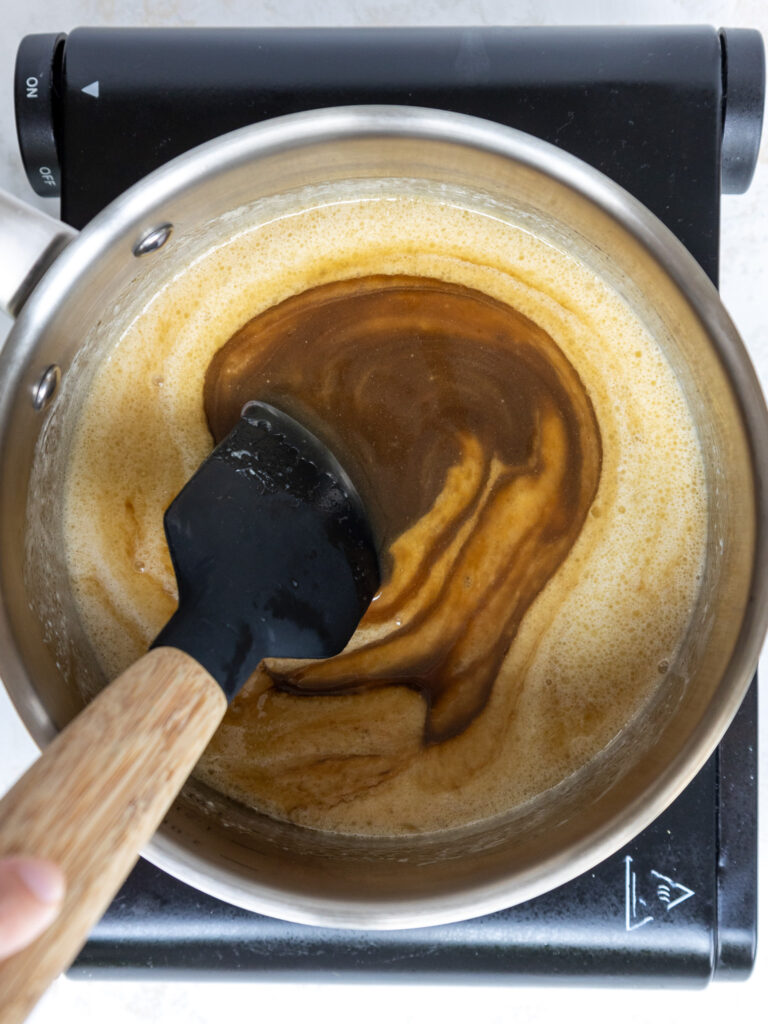
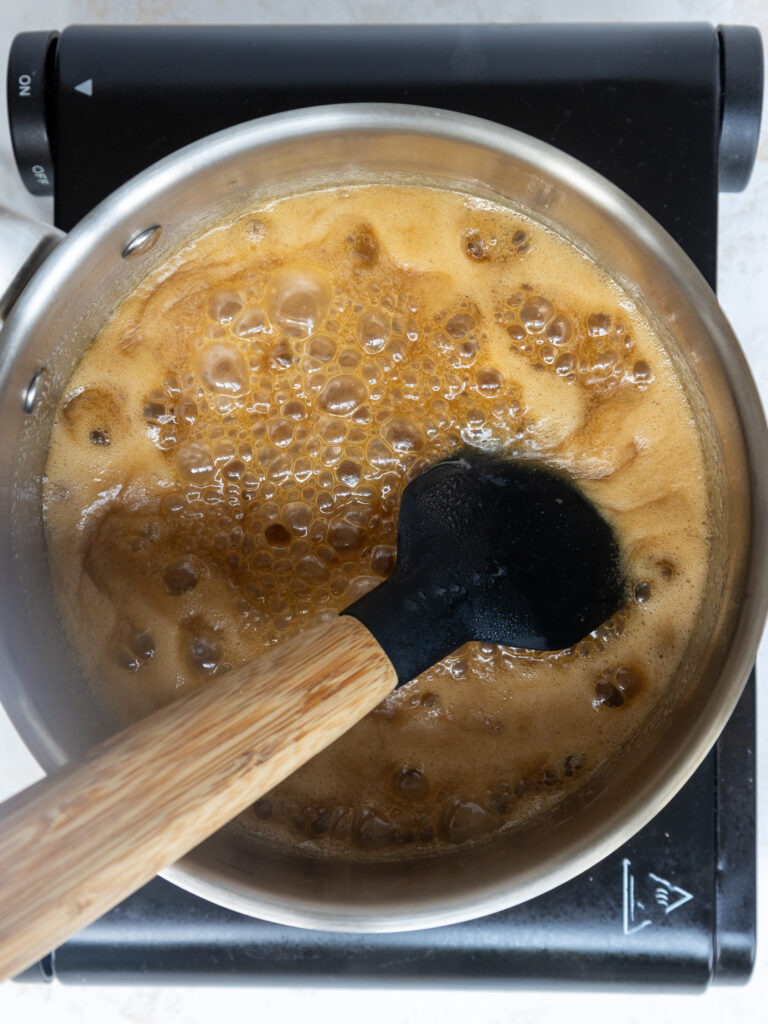
Let the mixture come to a boil, scraping down the sides and bottom of the bowl occasionally with a rubber spatula. Let the mixture boil for 4 to 5 minutes. Then remove it from the heat and stir in the vanilla extract.
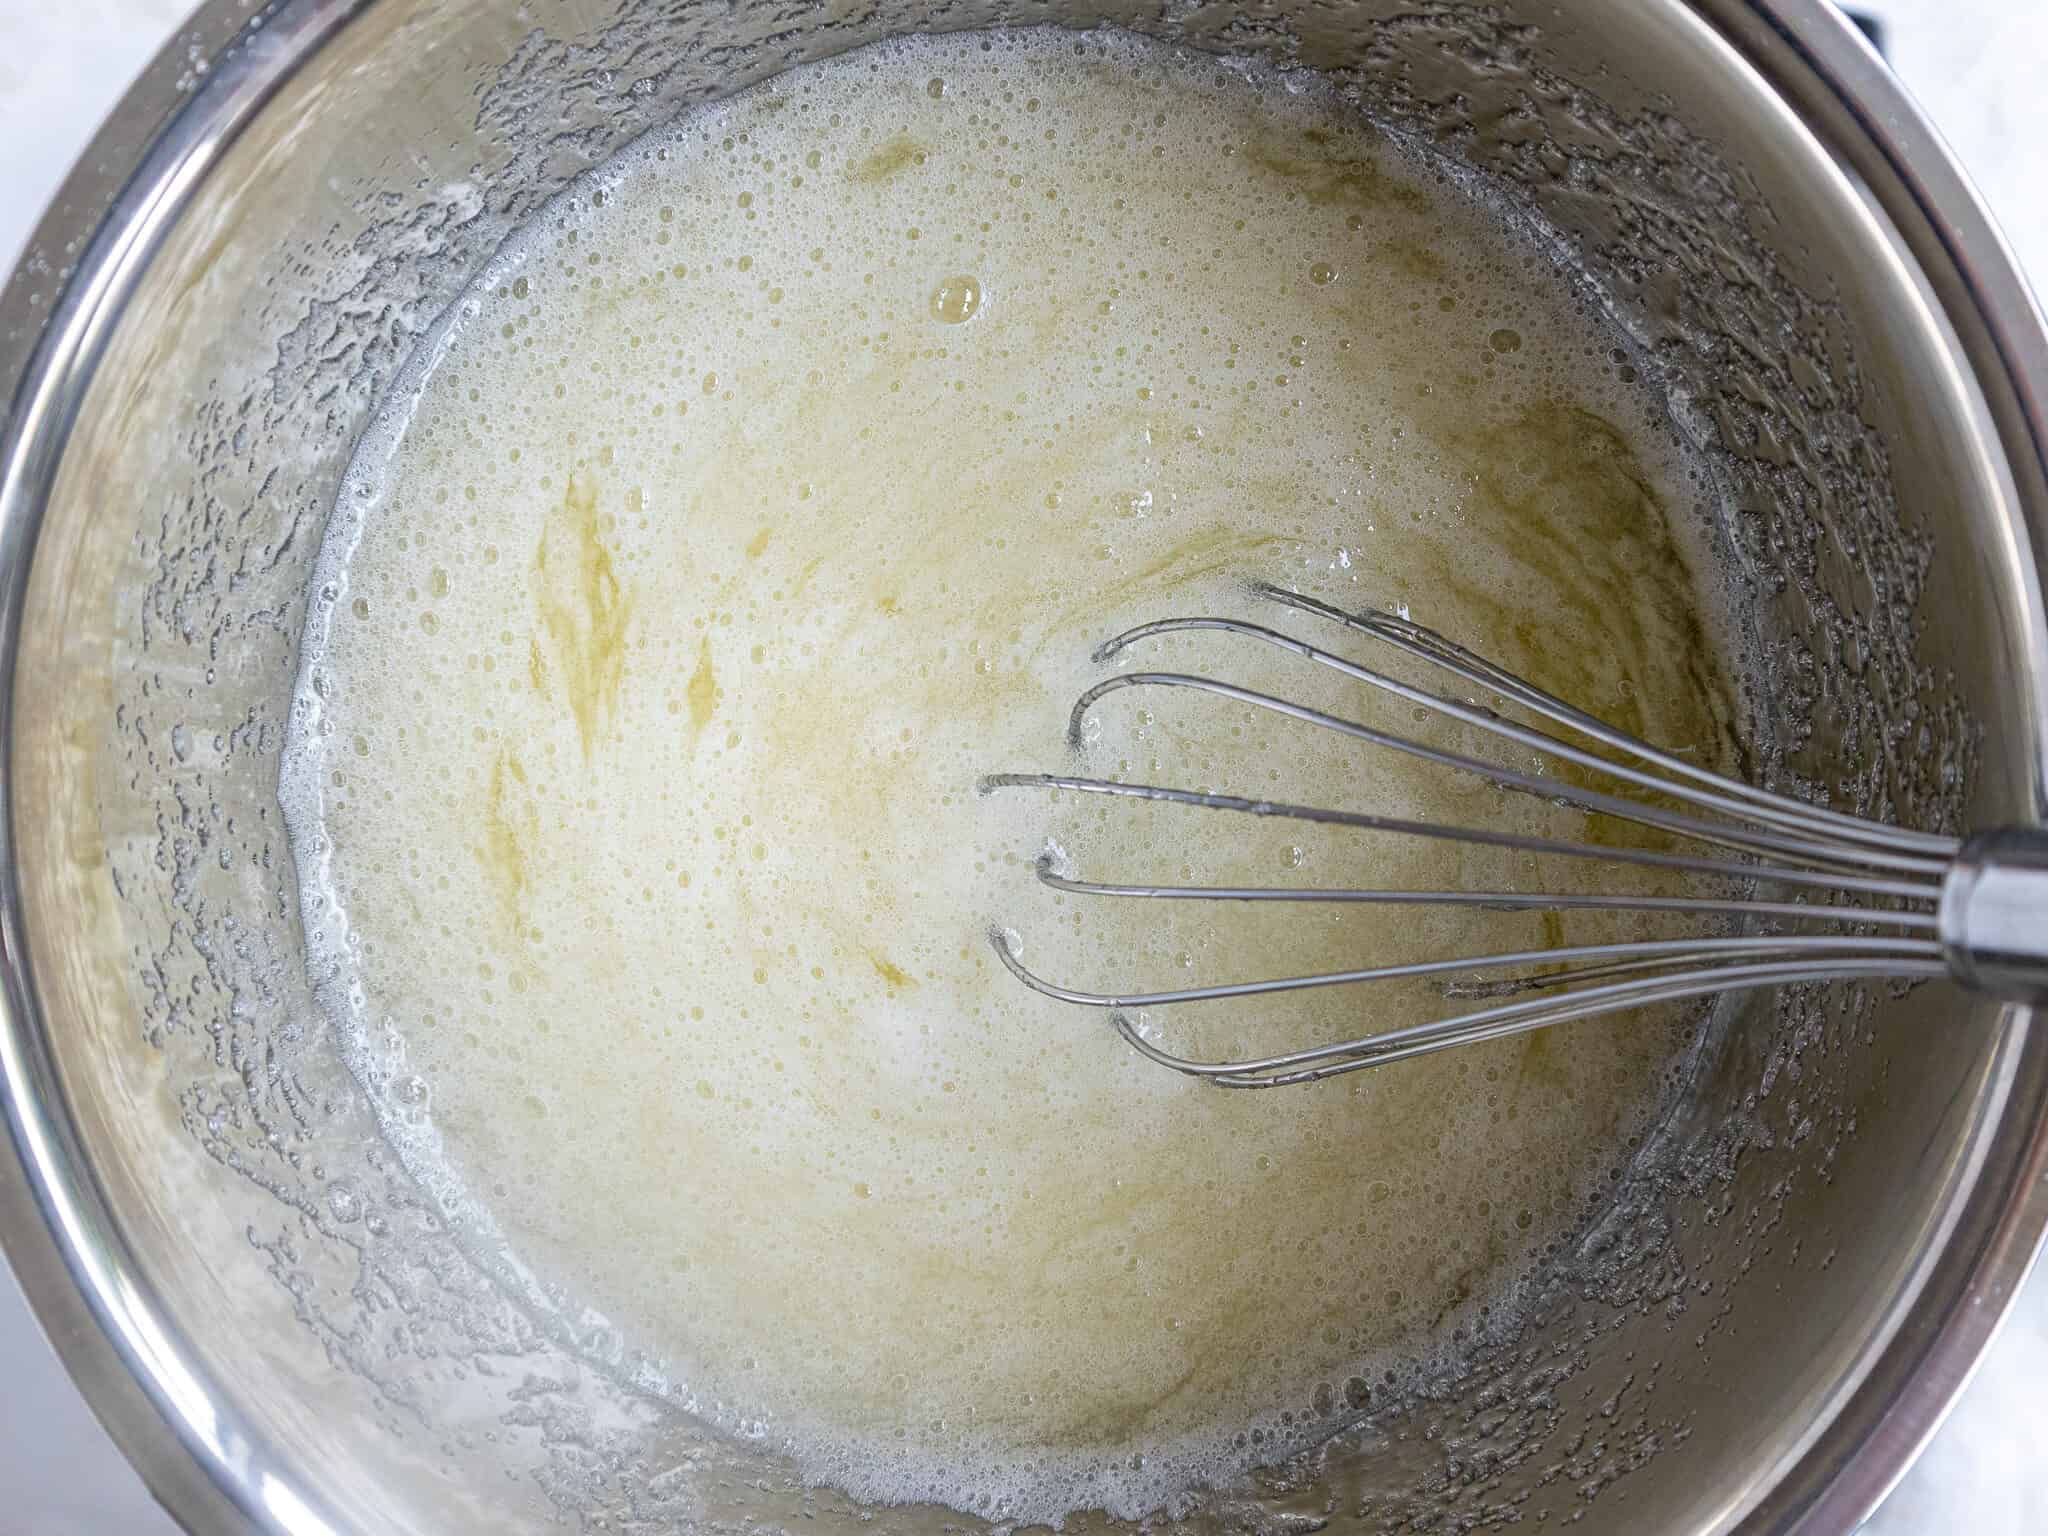
The butterscotch will be thin at this point, but it will thicken as it cools. Pour into a separate container, then set it in the fridge to cool until it reaches room temperature.
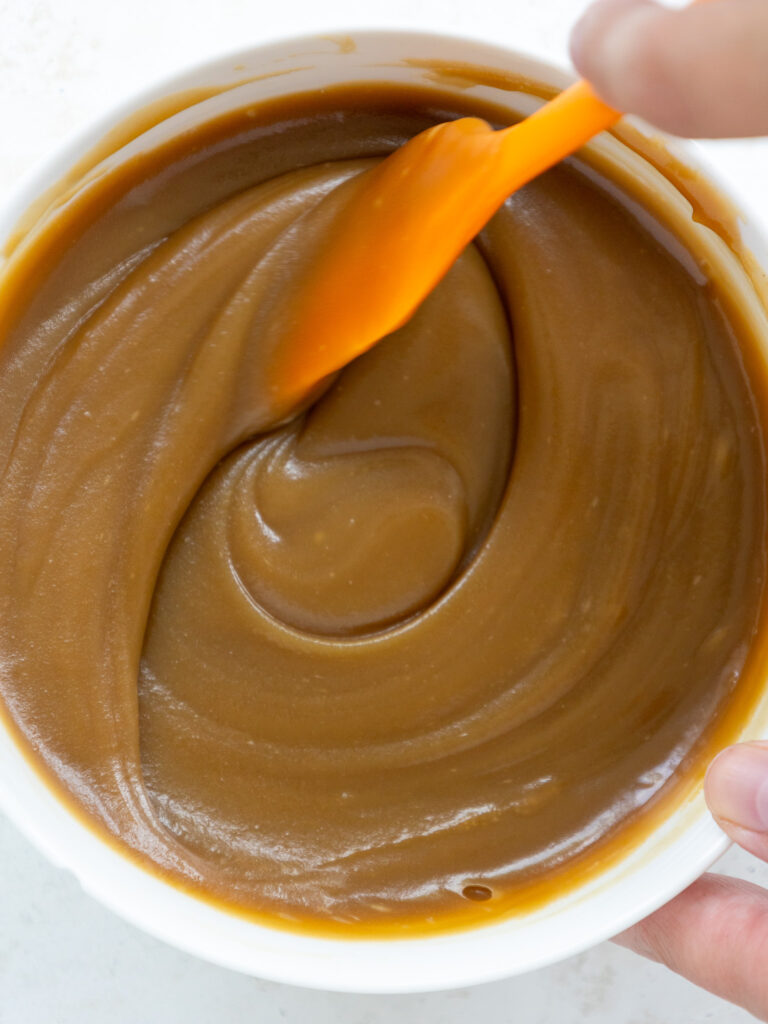
This is what it looks like once it’s reached room temperature. You should end up with about 1 1/2 cups of butterscotch sauce.
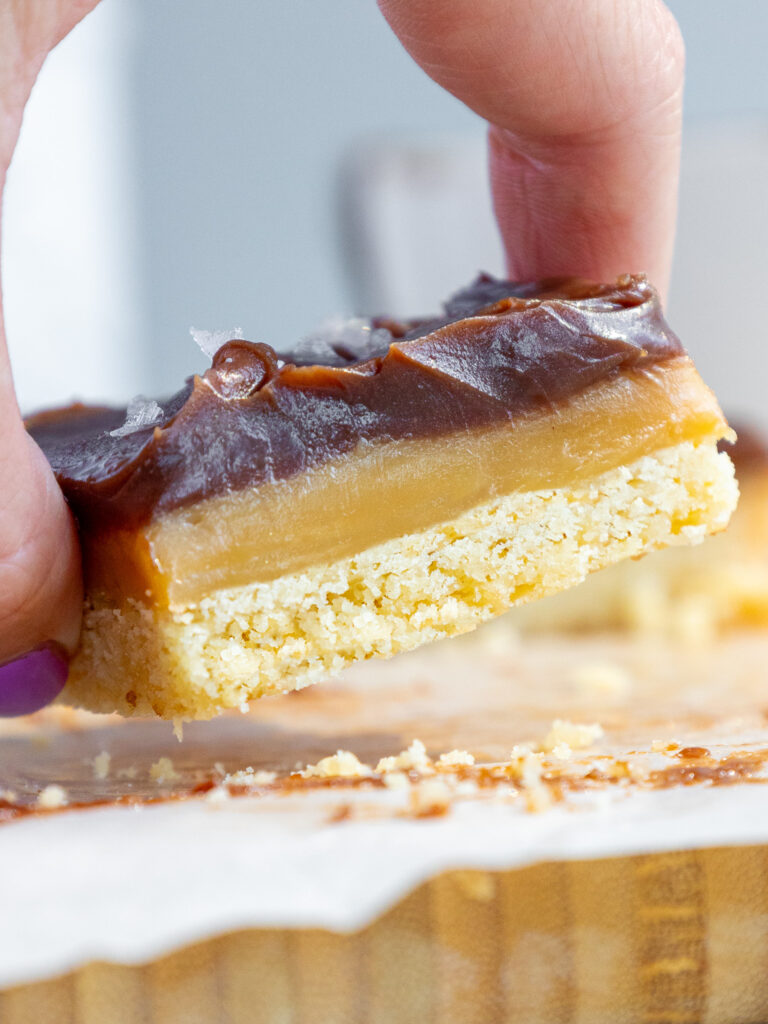
Step 3: Make the Brown Sugar Toffee Bits
While the butterscotch sauce cools, make the brown sugar toffee bits. Line a small rimmed baking sheet with parchment paper or a silicone baking mat and set aside.
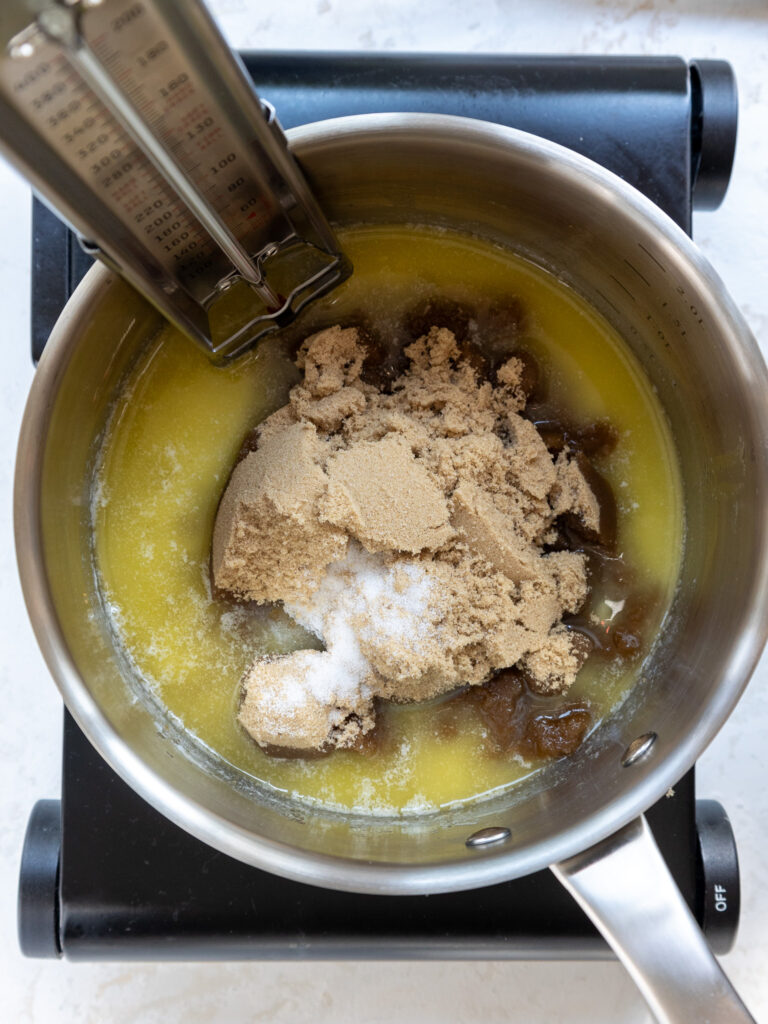
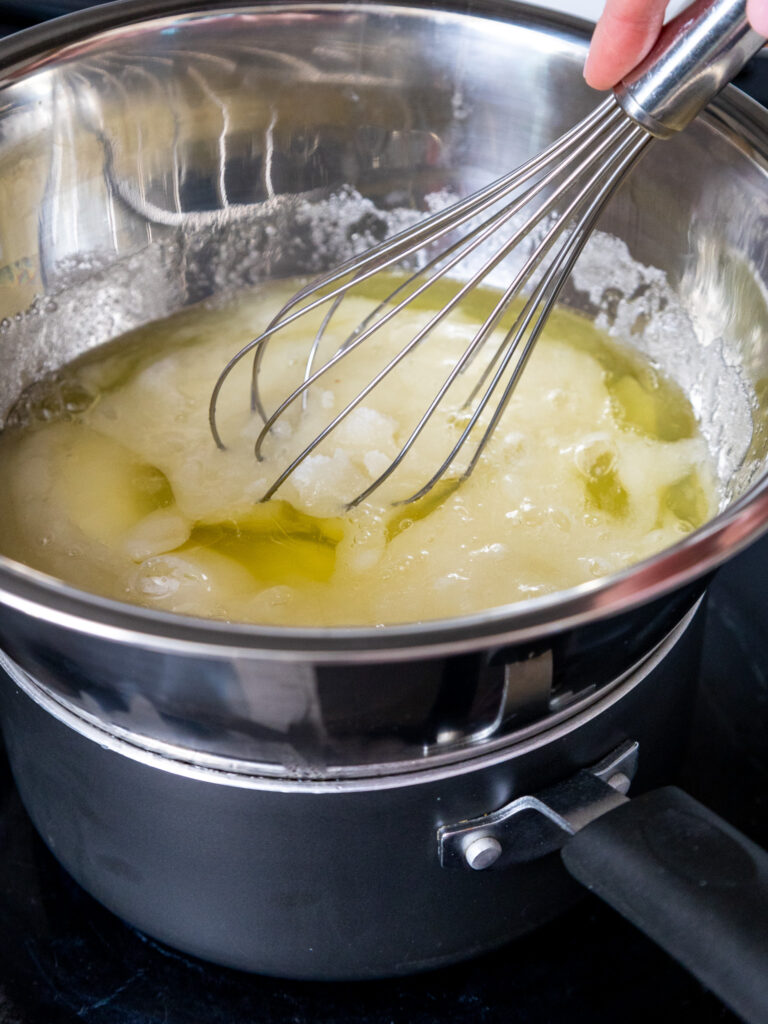
Melt the unsalted butter in a heavy-bottomed, small saucepan over medium heat.
Add the packed light brown sugar and fine salt and whisk vigorously until combined. Continue to stir the mixture constantly as it cooks.
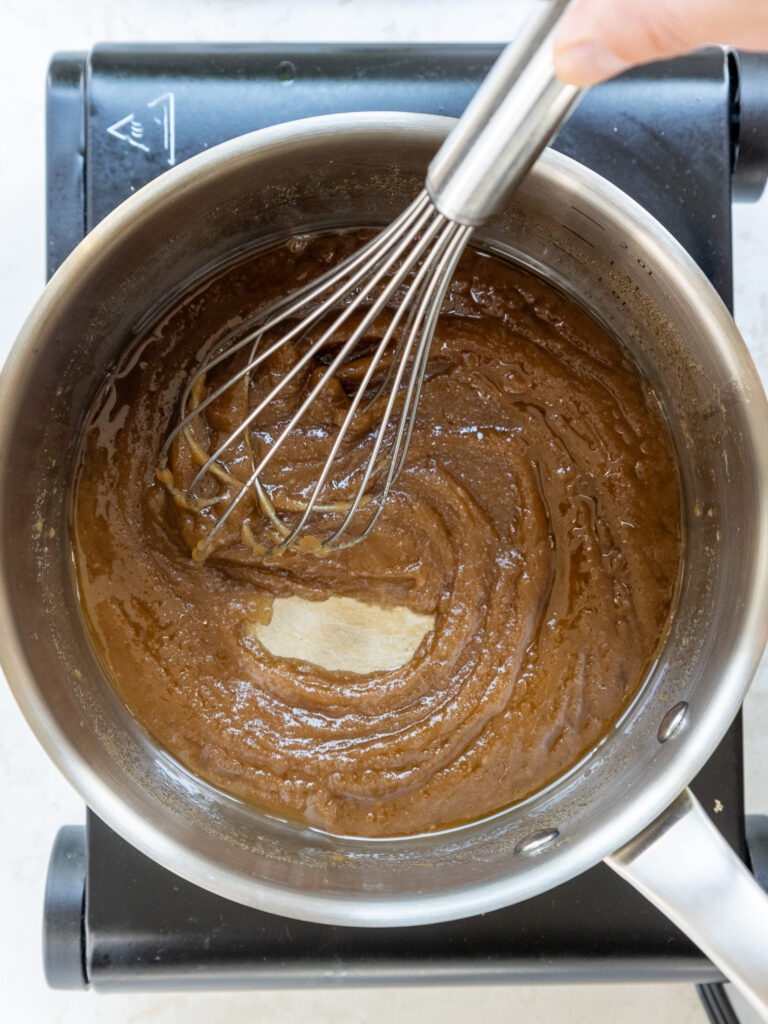
If the mixture separates while it’s cooking, remove it from the stovetop and whisk vigorously until it comes back together.
Then return it to heat and continue cooking it. Cook the mixture for about 7 minutes, or until it reaches 295°F or 146°C.
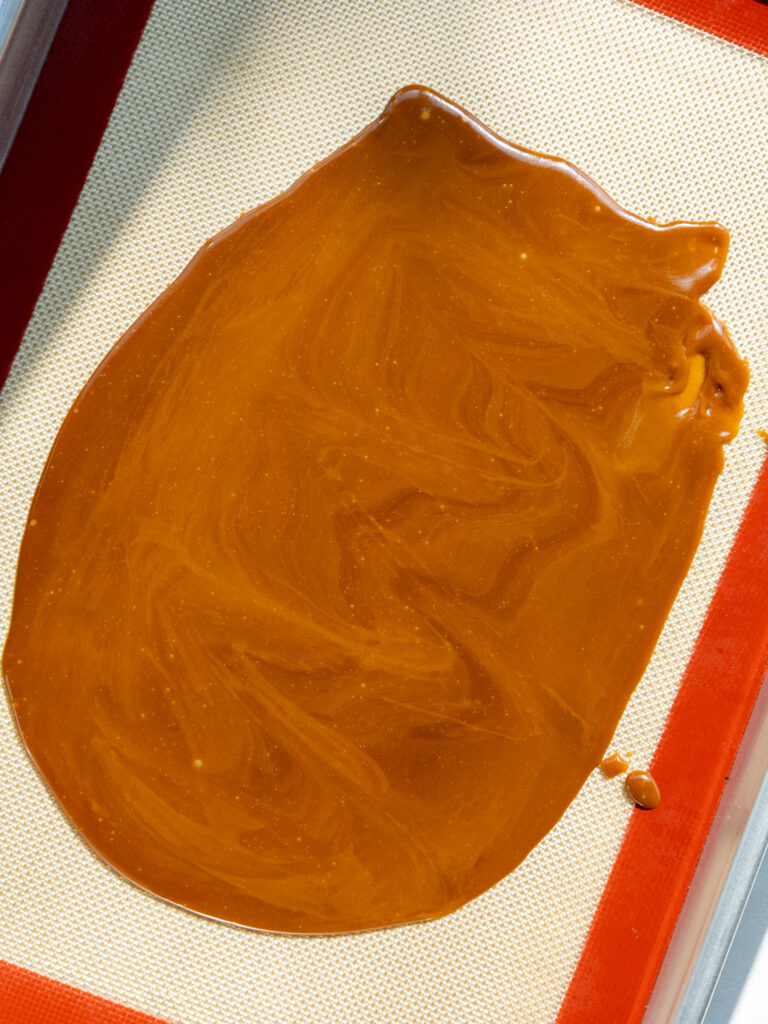
Pour the mixture onto the prepared baking pan as soon as it reaches the right temperature. It should spread out into an even layer. Set aside to cool for about 20 minutes.
At this point, the toffee should be hard to the touch. Place the toffee in a Ziplock bag and use a rolling pin or heavy object to break it into small pieces.
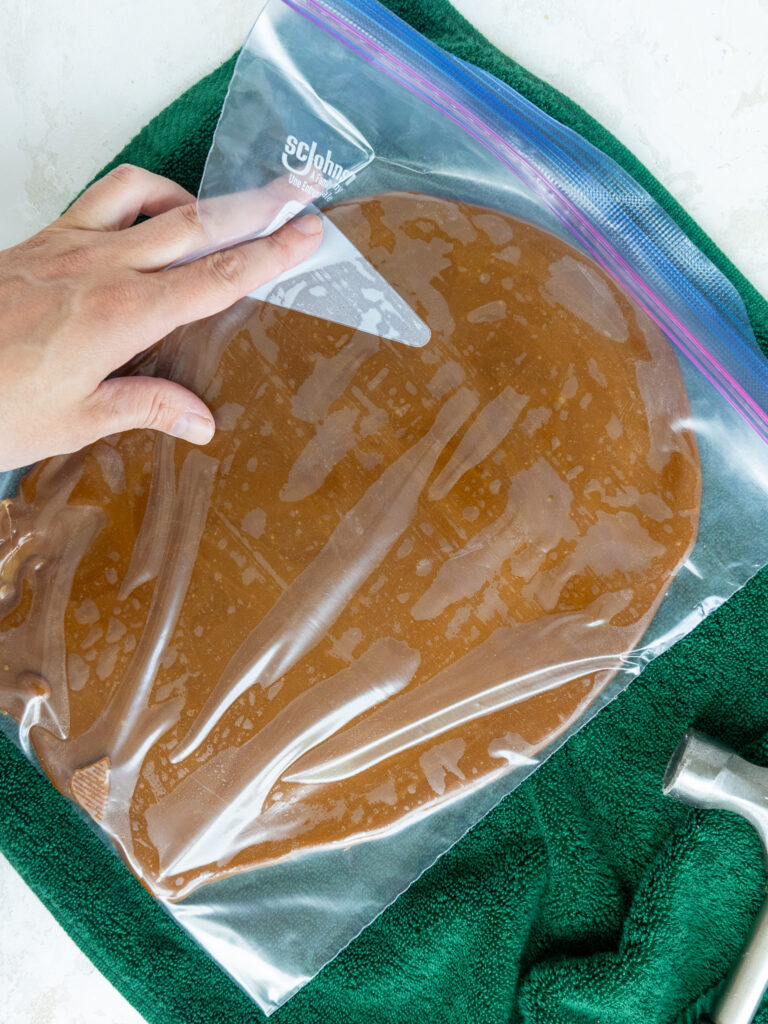
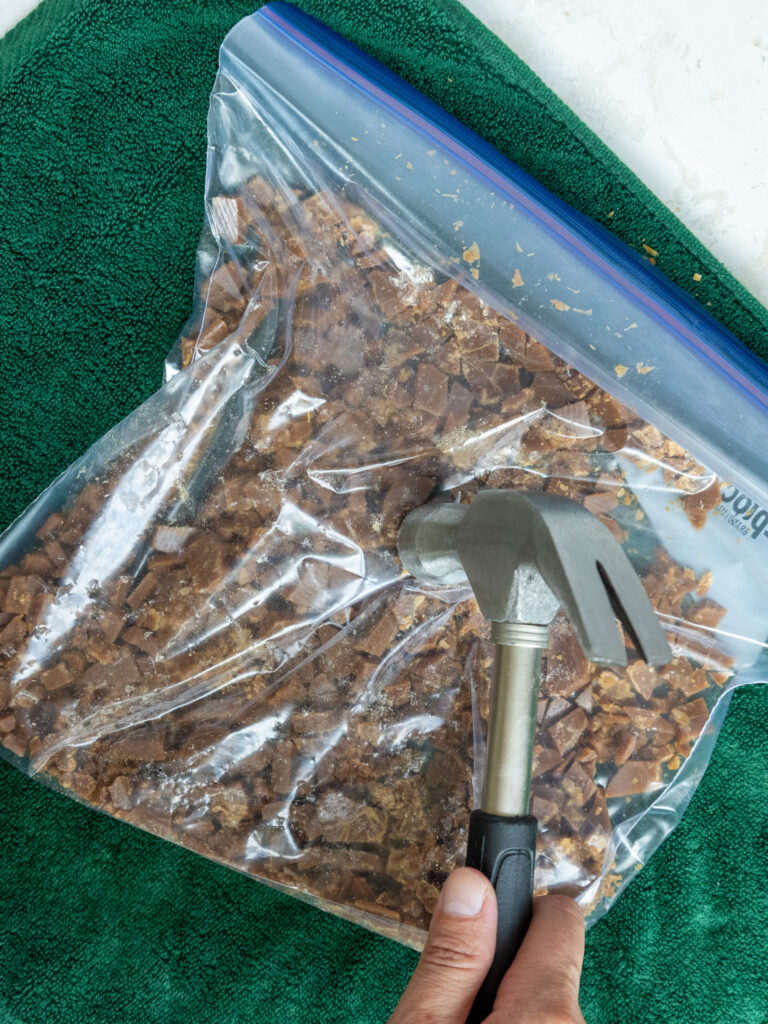
I recommend placing a towel underneath the toffee to protect your counters.
If you make this in advance, store it in an airtight container/bag for up to 1 week.
Step 4: Make the Butterscotch Frosting
Once the butterscotch sauce is at room temperature, make the butterscotch frosting.
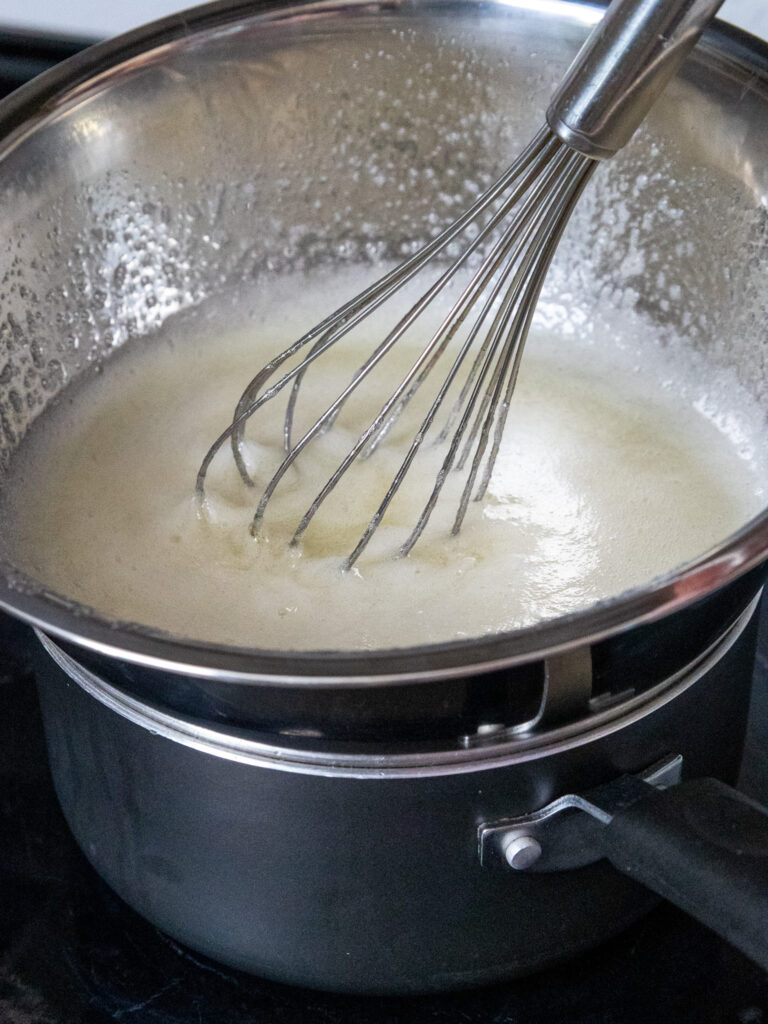
In a medium-sized pot, add about 1 inch of water and bring to a simmer. Then add the egg whites and granulated sugar into a large metal or heat-proof bowl.
Place the bowl on top of the pot filled with simmering water. The bowl should create a seal over the pot. Make sure the water isn’t touching the bottom of the bowl, or it can cook the egg whites.
Whisk the mixture constantly for about 3 minutes, until it reaches 160°F / 71°C. You can test the mixture to see if it’s ready by rubbing a tiny bit between your fingertips.
The sugar should be fully dissolved, and it should feel super smooth and hot to the touch.
Once it reaches this stage, lift the bowl away from the pot and dry the bottom with a towel.
Pour the mixture into the bowl of a stand mixer and beat on a medium-high speed with a whisk attachment.
Mix for about 10 minutes, or until you have stiff, glossy peaks that stick straight up. While the meringue whips, I like to add something cold around the base of my bowl. I
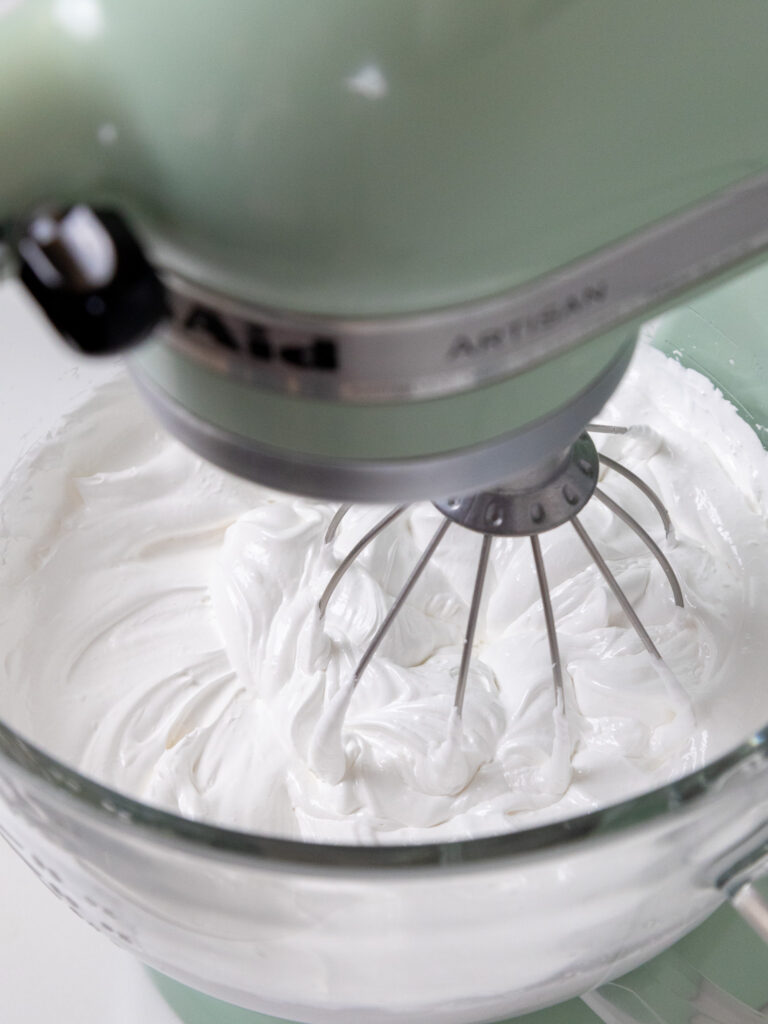
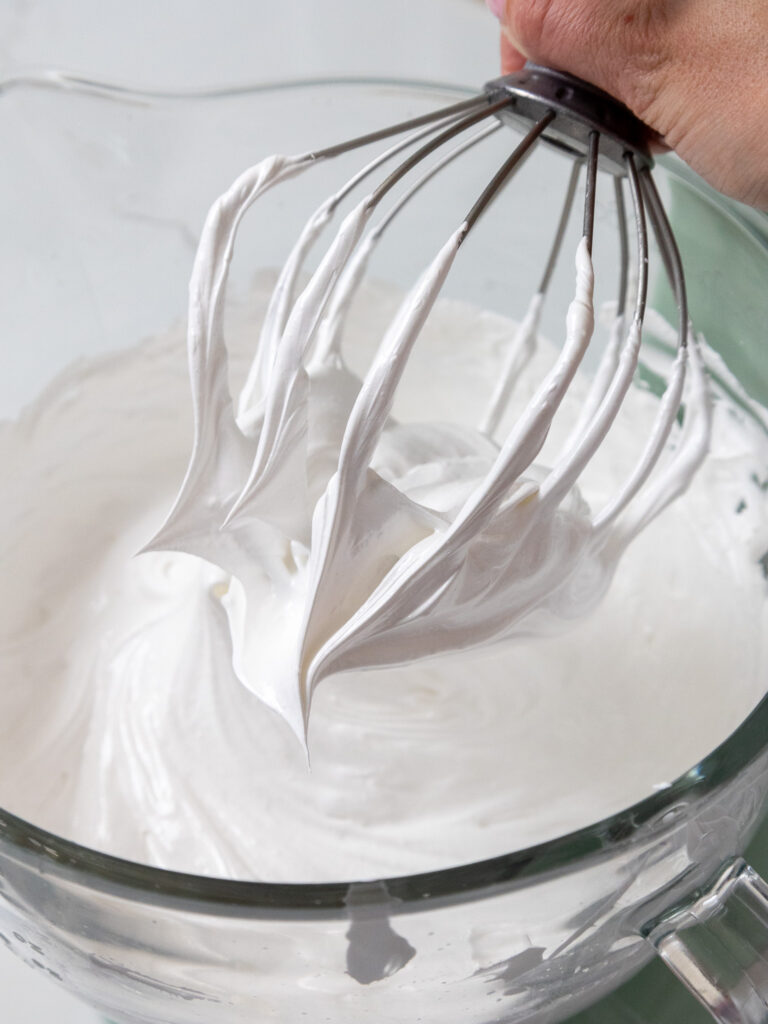
find the meringue stays quite warm while it whips up, and placing a bag of frozen veggies around the base of the bowl helps cool it back to room temperature.
This can prevent your buttercream from becoming soupy in the next step.
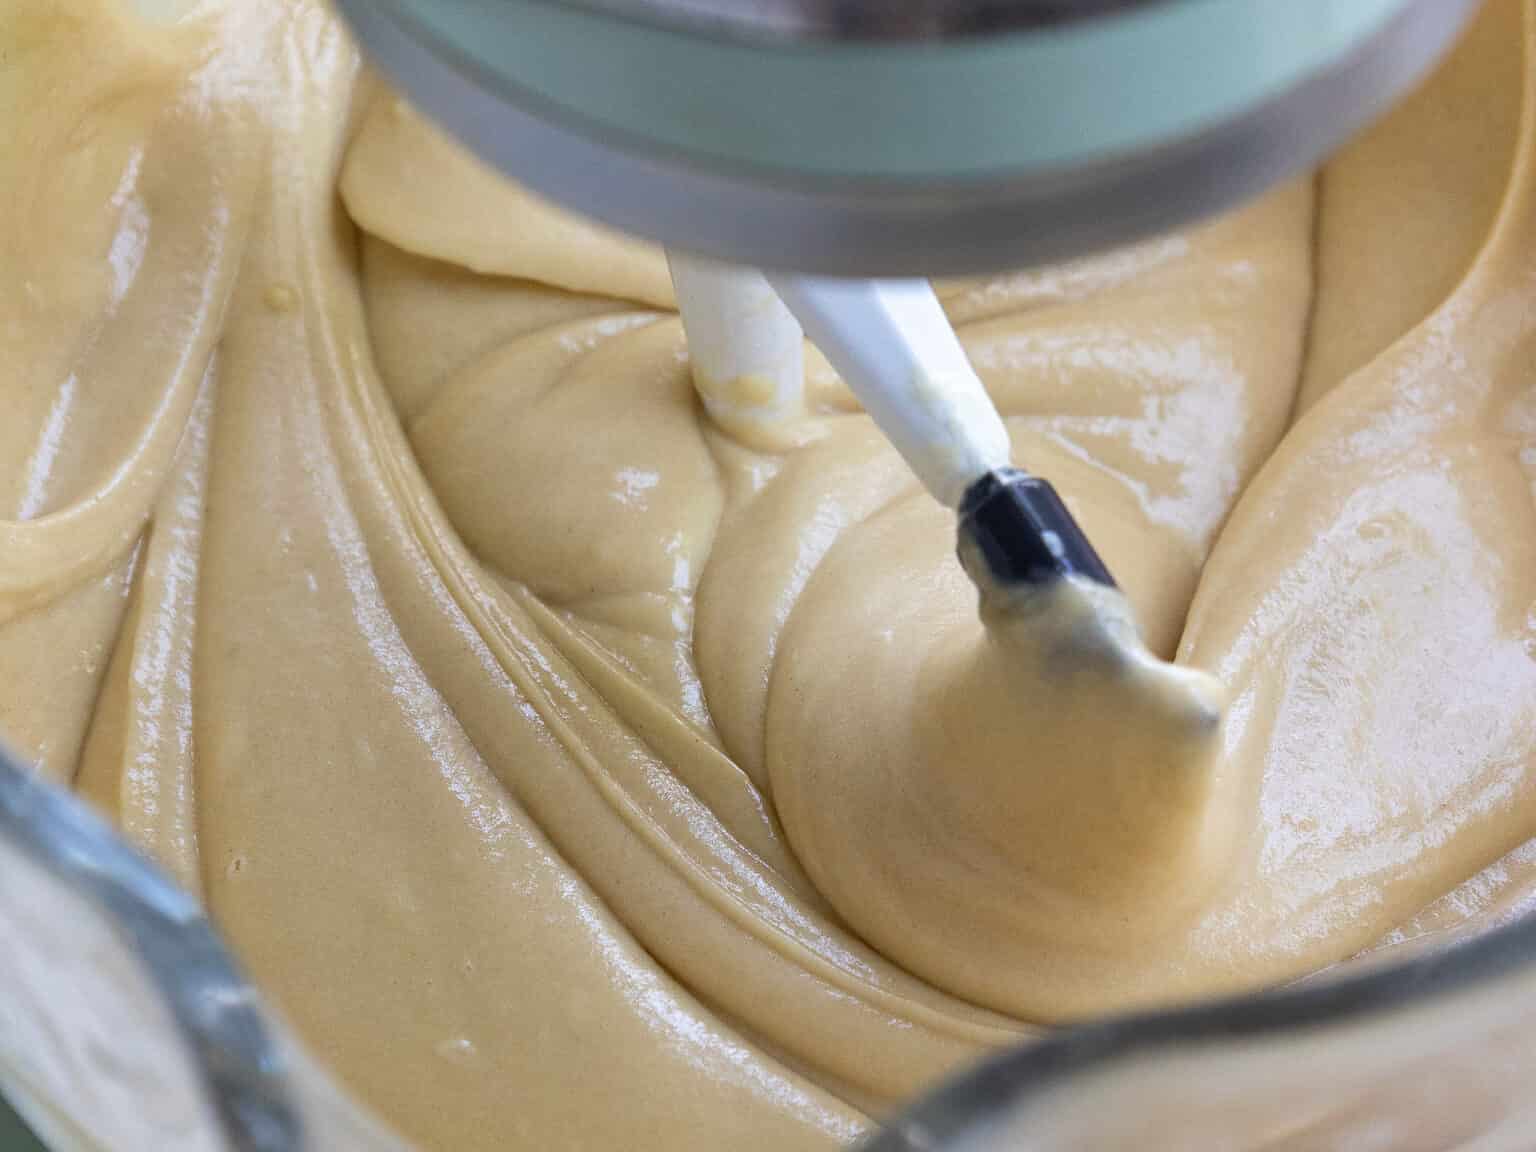
Mix in the unsalted butter at a medium speed, one stick at a time. Scrape the sides and bottom of the bowl with a rubber spatula as needed.
The frosting should have a thick, whipped consistency once all the butter is mixed in.

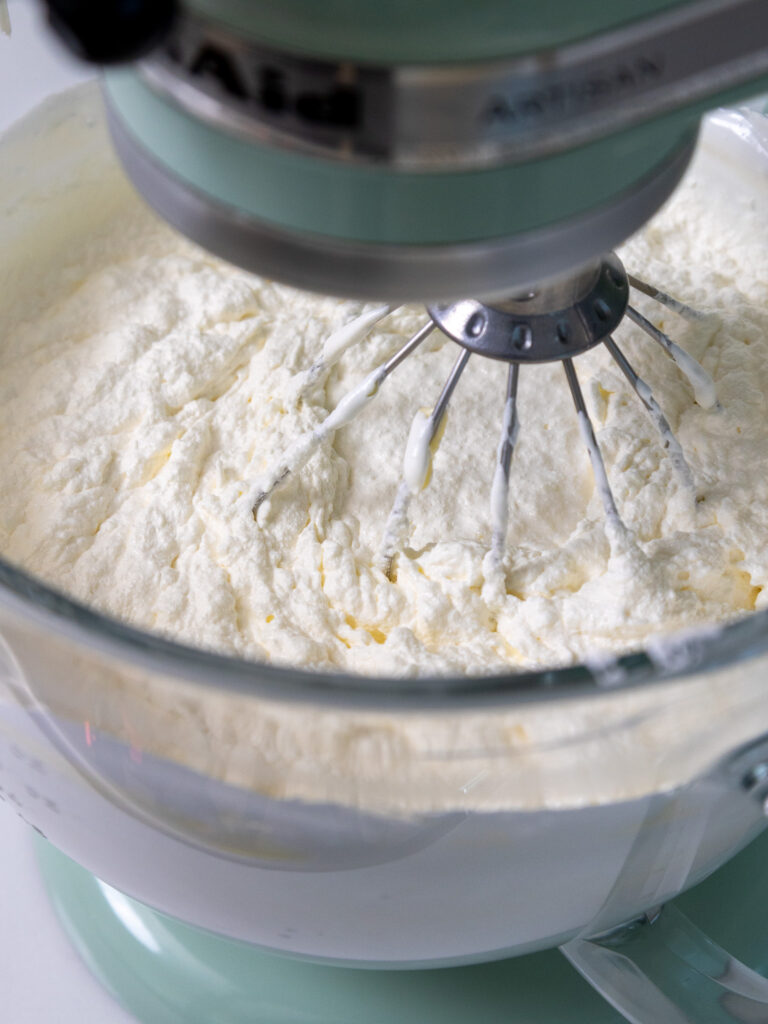
If it looks lumpy or broken, keep mixing until it looks fluffy and thick. If it doesn’t seem to come together after an additional 10 minutes of mixing, check out the troubleshooting guide in this post.
Once the consistency is right, swap out the whisk attachment for a paddle attachment and add the butterscotch sauce, vanilla extract, and fine salt.
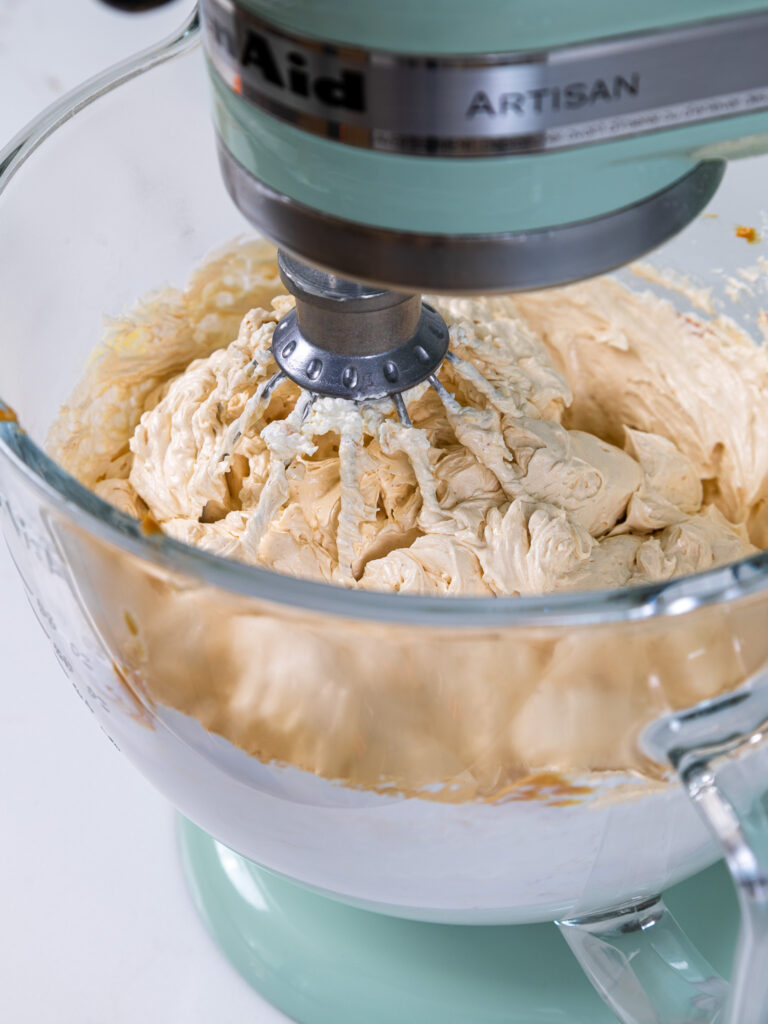
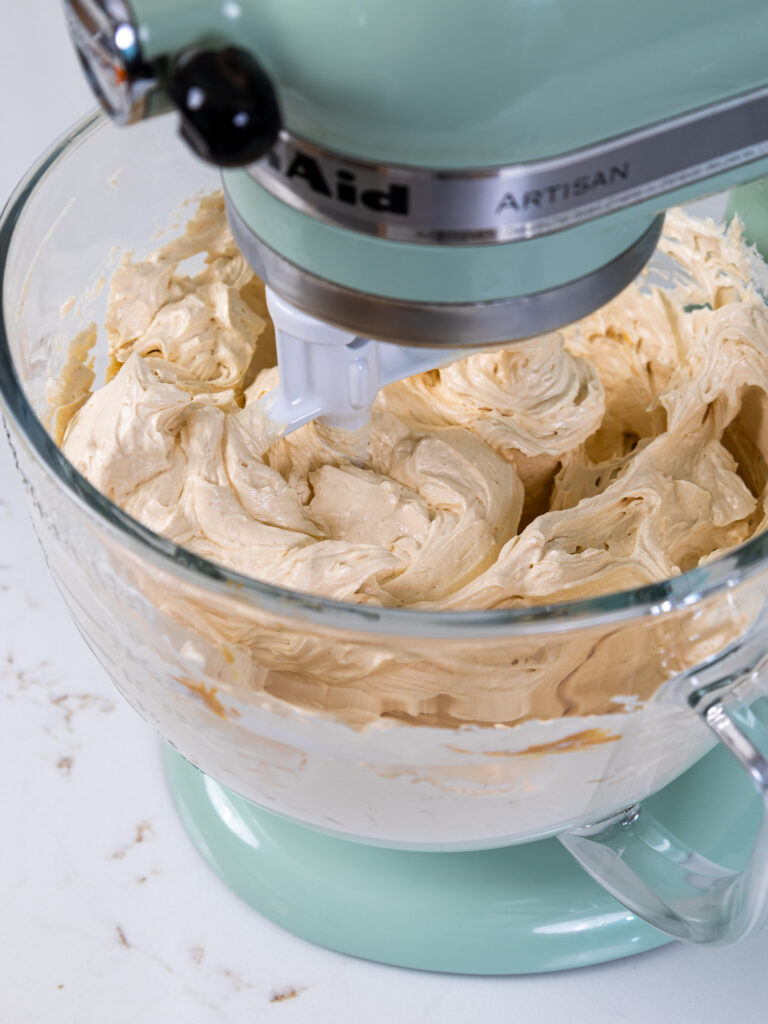
Continue mixing on a low speed for a couple of minutes to make the frosting extra smooth.
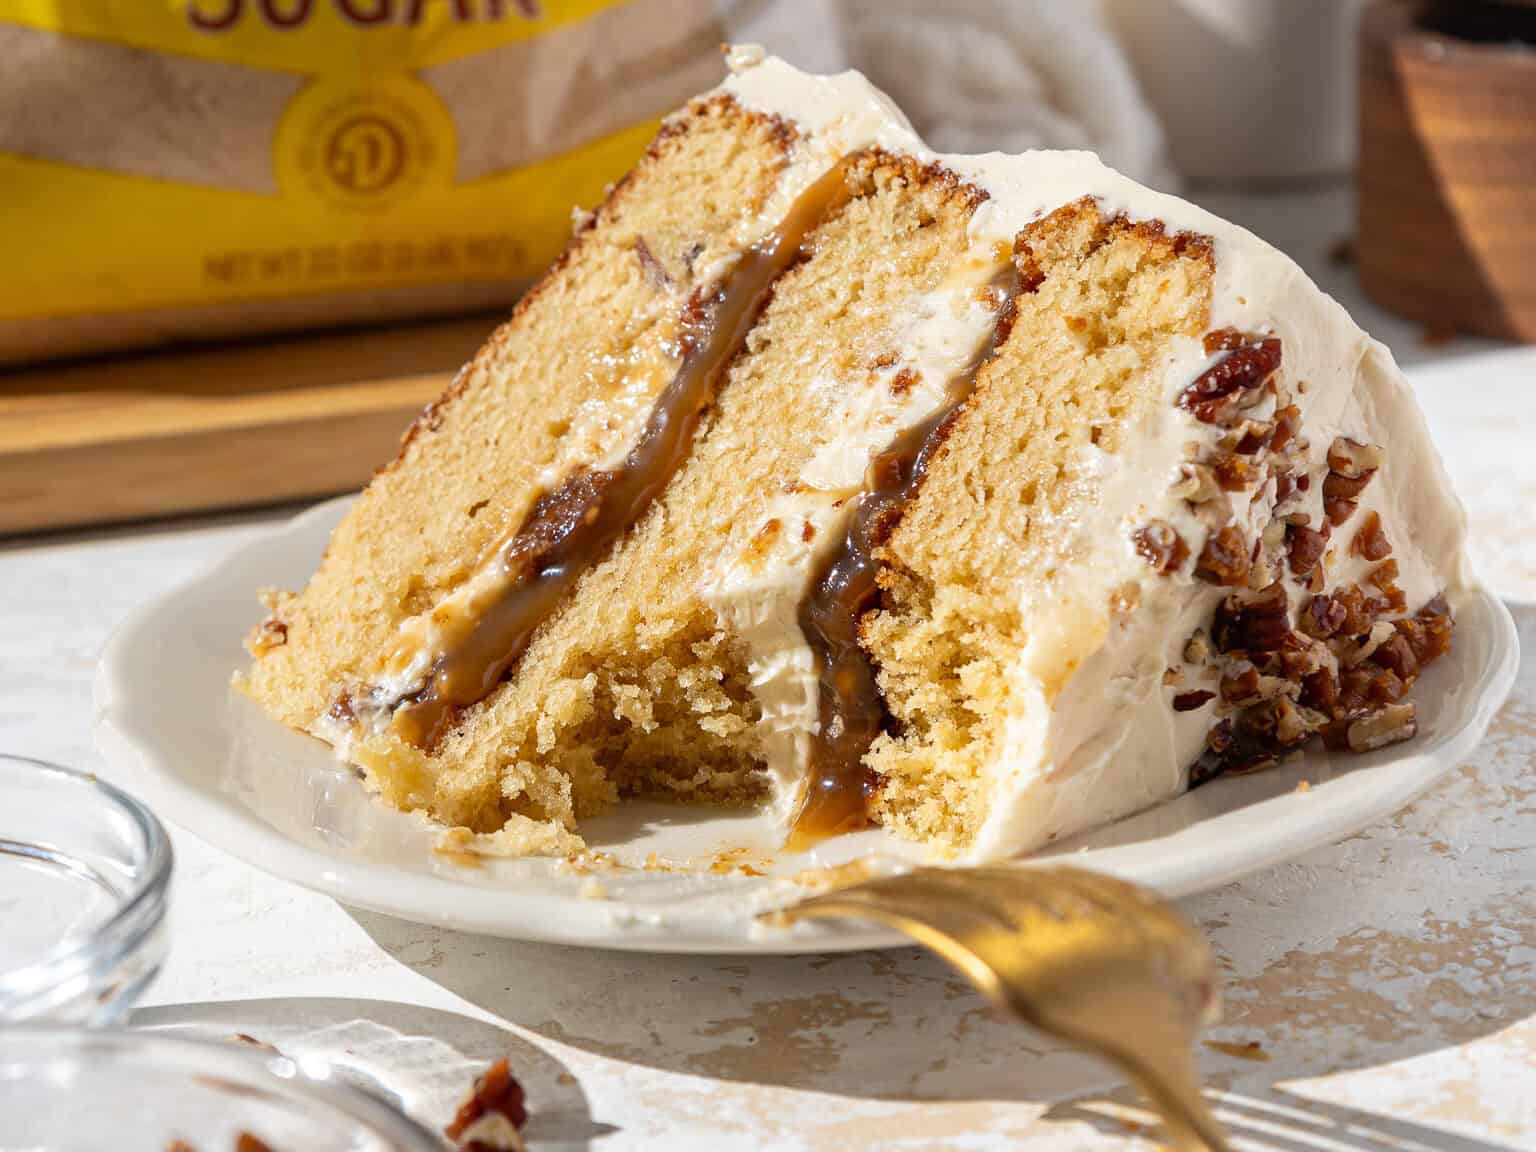
Step 5: Assemble the Cake
Then it’s finally time to assemble the cake! Stack and frost the brown sugar cake layers on a greaseproof cake board or flat plate using a dab of frosting to help stick the first cake layer to the board.
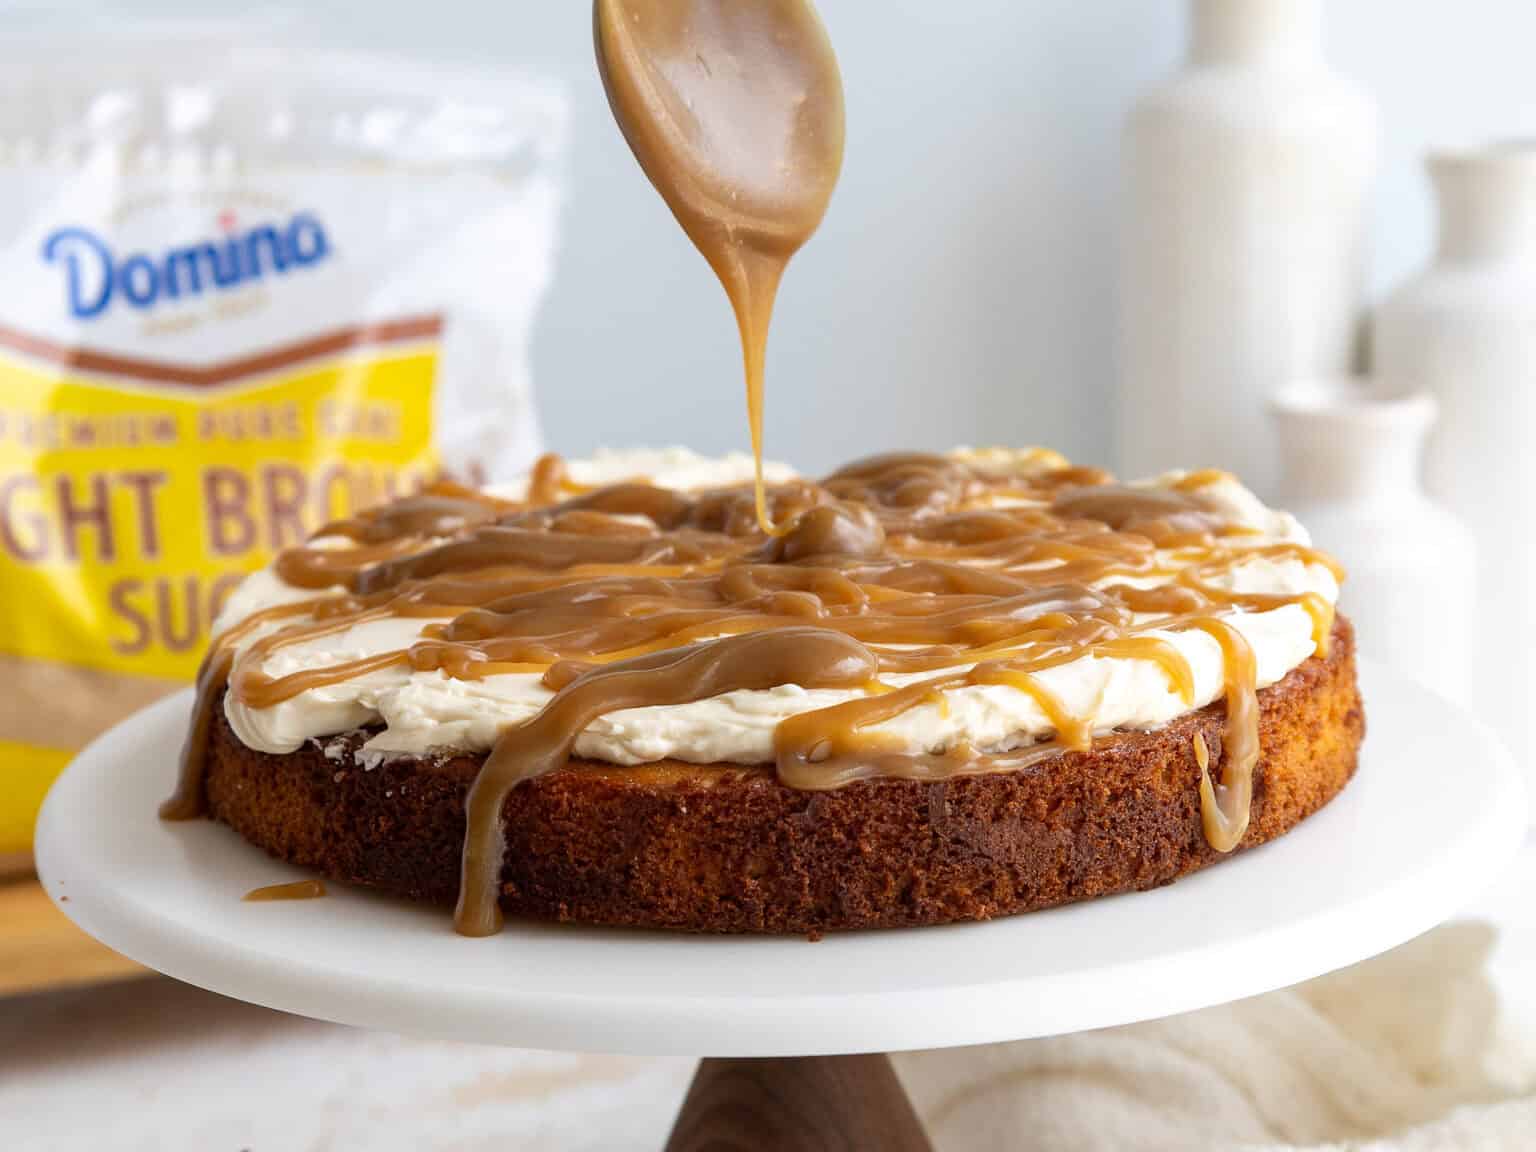
Spread an even layer of butterscotch frosting on top of the first cake layer.
Drizzle about 1/2 cup of the butterscotch sauce on top of the frosting, then sprinkle on a few spoonfuls of the toffee bits and toasted pecans. Repeat this process with the remaining cake layers.

Chill the cake in the freezer for 10 minutes once the cake layers are stacked to help lock the filling in place and make it easier to frost the cake.
Then spread a thick coat of butterscotch frosting around the cake using a large offset spatula to give it a beautiful textured finish. Sprinkle some of the toffee bits and pecans in a ring around the top of the cake, then enjoy!
Substitutions & Swaps – Butterscotch Sauce and Toffee
This recipe uses quite a few ingredients, and I know you might not have all of them on hand.
Below are some swaps and substitutions that can be made in this recipe.
- Unsalted Butter – Salted butter can be used in place of unsalted butter; just omit the salt that the recipe calls for.
- Light and Dark Brown Sugar – Light or dark brown sugar can be used to make the butterscotch sauce and toffee bits, but I prefer using dark brown sugar to make the butterscotch sauce and light brown sugar to make the toffee bits.
- Heavy Cream – If needed, full-fat coconut milk can be used in place of heavy cream in the butterscotch sauce recipe.
Substitutions & Swaps – Brown Sugar Cake Layers & Butterscotch Frosting
- All-Purpose Flour – A good baking gluten-free flour blend can be used in place of the AP flour in the cake batter.
- Granulated Sugar – You can decrease the amount of granulated sugar by 1/4 cup based on your preferences.
- Light Brown Sugar – This cake recipe turns out best using light brown sugar, but dark brown sugar can be used if needed.
- Unsalted Butter – Salted butter can be used in place of unsalted butter, just omit the salt that the recipe calls for.
- Buttermilk – Whole milk, alternative milk, or additional sour cream can be used in place of the buttermilk.
- Sour Cream – Full-fat yogurt, alternative yogurt, or additional buttermilk can be used in place of the sour cream.
- Vegetable Oil – Any flavorless or neutral oil can be used in place of vegetable oil. Canola or sunflower oil would work great!
Making This Butterscotch Crunch Cake in Advance & Storage Tips
I highly recommend making the cake layers in advance and freezing them. It breaks the process up and makes it more approachable.
You can also make the frosting ahead of time or save any leftover frosting! It can be stored in an airtight container in the fridge for up to a month, or in the freezer for up to 3 months. Be sure to give it a good stir once it thaws to get the consistency nice and smooth again.
The butterscotch toffee can be stored in an airtight container or Ziplock bag at room temperature for up to a week. If any of the bits stick together, they can be broken up with a fork.
The butterscotch sauce can be made up to 2 weeks in advance and stored in an airtight container in the fridge.
A frosted cake can last in the fridge for up to a week, or in the freezer for up to a month. The buttercream locks in all the moisture, keeping the cake fresh and delicious!
If you cut into the cake and have leftovers, use any remaining frosting to cover the cut section to keep it moist and store it in the fridge for up to a week.
How Many People Does This Cake Feed?
If you make this cake with 3, 8-inch cake layers or 4, 7-inch cake layers, it will feed about 24 people. For more information on cake sizes and servings, check out my cake portion guide.
Recipe Variations – Making This Cake in Different Sizes
One batch of this recipe makes about 10 cups of batter or about 1800 grams. If you plan to use three circular cake pans, add 600 grams of batter into each pan.
If you want to make a tiered cake or different-sized cake with this recipe, check out my cake batter calculator to see how many batches of batter you’ll need.
This recipe can also be used to make a sheet cake! One batch will make a 1, 9 x 13-inch cake layer that’s about 1.5 inches tall once leveled.
Bake for 45-55 mins at 350°F/175°C, or until a toothpick inserted in the center comes out with a few moist crumbs. Bake time can vary a lot based on the type of pan you use, if you use heating cores, and your oven. I recommend using heating cores if you have them, they help sheet cake layers bake more evenly and quickly.
For more details on how to convert this cake recipe and others into sheet cakes, check out my sheet cake guide.
Last but not least, you can also make cupcakes using this recipe. Fill the liners 3/4 full and bake them at 350°F/175°C for 19-21 minutes, or until a toothpick inserted in the center comes out with a few moist crumbs.
How To Make the Best Butterscotch Crunch Cake
- Be sure the ingredients are at room temperature. It helps them mix together better.
- Properly measure the flour! I like to use a scale, but the fluff and level method works great too.
- Cool the cake layers fully before assembling the cake. It will make it much easier to fill and frost.
- Use a warm, sharp knife to get clean slices. Fill a tall cup with hot water and dip a sharp knife into it. Dry the knife fully, then make a slice. Repeat with each cut and wipe the blade clean after each cut.
Let Me Know What You Think!
If you make this butterscotch crunch cake, we’d love to hear what you think of it! Please leave a rating and comment below.
Don’t forget to tag me @chelsweets if you share on social media! I love seeing your delicious creations.
Butterscotch Crunch Cake
Ingredients
Brown Sugar Cake Layers
- 3 cups all-purpose flour 390g
- 1 1/2 cups granulated sugar 300g
- 1 1/2 cups packed light brown sugar 300g
- 2 1/2 tsp baking powder 10g
- 1 tsp fine salt 6g
- 1/2 cup (1 stick) unsalted butter, room temperature 113g
- 4 large eggs, room temperature 224g
- 1 cup full-fat sour cream, room temperature 240g
- 1/2 cup buttermilk, room temperature 120g
- 1/2 cup vegetable or canola oil 110g
- 1 tsp vanilla extract or vanilla bean paste 4g
Butterscotch Sauce
- 1/2 cup unsalted butter 113g
- 1 cup packed dark brown sugar 200g
- 1 cup heavy whipping cream, room temperature 240g
- 1 tsp fine salt 6g
- 1 tsp vanilla extract or vanilla bean paste 5g
Butterscotch Toffee Crunch
- 1/2 cup (1 stick) unsalted butter, room temperature 113g
- 1 cup packed light brown sugar 200g
- 1 tsp fine salt 6g
Butterscotch Frosting
- 8 large egg whites, room temperature 240g
- 2 1/2 cups granulated sugar 500g
- 2 cups unsalted butter, room temperature 452g; 1 lb. box
- 1/2 cup butterscotch sauce – recipe above 140g
- 2 tsp vanilla extract or vanilla bean paste 8g
- 1/2 tsp fine salt 3g
Optional Filling
- 1 cup toasted pecans, finely chopped 120g
Instructions
Brown Sugar Layers
- Start by preheating the oven to 350°F / 175°C and lining three 8" pans with parchment rounds and grease with non-stick baking spray. Set aside.
- Whisk 3 cups flour, 1 1/2 cups packed light brown sugar, 1 1/2 cups granulated sugar, 2 1/2 tsp baking powder, and 1 tsp salt in a large bowl or the bowl of a stand mixer.
- Mix 1/2 cup of unsalted butter slowly into the dry ingredients on a low speed. Continue to mix until no large chunks of butter remain.
- In a separate bowl, whisk together 4 large eggs, 1 cup sour cream, 1/2 cup buttermilk, 1/2 cup vegetable oil, and 1 tsp of vanilla extract.
- Slowly pour the wet ingredients into the dry ingredients and mix on a low speed until incorporated.
- Scrape down the sides of the bowl with a rubber spatula, then beat on a medium speed for 30 more seconds to make sure everything is properly mixed together.
- Divide the batter evenly between the prepared pans (600g per pan if you're making 3 layers). Bake for 32-35 minutes or until a toothpick comes out with a few moist crumbs. Let the pans cool for 10 minutes, then run a small offset spatula around the perimeter of the pan to separate the cake from the pan.
- Then flip the cake layers onto a wire rack to finish cooling. Use a serrated knife to level the tops of the layers once they're fully cooled.
- If you make these cake layers in advance and freeze them, let them thaw for about 20 minutes before making your cake. The cake layers should still be slightly cold to the touch, which will make it easier to assemble your cake.
Butterscotch Sauce
- Next, make the butterscotch sauce. Turn the stove to medium heat, and place a pot over the element.
- Melt 1/2 cup of butter in a medium-sized, heavy-bottomed saucepan over medium heat. Note: Do NOT use a non-stick pan for this recipe!
- Add 1 cup packed dark brown sugar, 1 cup of heavy cream, and 1 tsp salt. Stir the mixture with a rubber spatula until it's fully combined. Let the mixture come to a boil, scraping down the sides and bottom of the bowl occasionally with a rubber spatula. Let the mixture boil for 4 to 5 minutes.
- Then remove it from heat and stir in 1 tsp vanilla extract. The butterscotch will be thin at this point, but it will thicken as it cools. Pour into a separate container, then set it in the fridge to cool until it reaches room temperature. You should end up with about 1 1/2 cups of butterscotch sauce.
Butterscotch Toffee Crunch
- While the butterscotch sauce cools, make the brown sugar toffee bits. Line a small rimmed baking sheet with parchment paper or a silicone baking mat and set aside.
- Melt 1/2 cup of unsalted butter in a heavy-bottomed, small saucepan over medium heat. Add 1 cup of packed light brown sugar and 1 tsp fine salt, and whisk vigorously until combined. Continue to stir the mixture constantly as it cooks. If the mixture separates while it's cooking, remove it from the stovetop and whisk vigorously until it comes back together. Then return it to heat and continue cooking it.
- Cook the mixture for about 7 minutes, until it reaches 295°F or 146°C.
- Pour the mixture onto the prepared baking pan as soon as it reaches the right temperature. It should spread out into an even layer. Set aside to cool for about 20 minutes.
- At this point, the toffee should be hard to the touch. Place the toffee in a Ziplock bag and use a rolling pin or heavy object to break it into small pieces. I recommend placing a towel underneath the toffee to protect your counters. If you make this in advance, store it in an airtight container/bag for up to 1 week.
Butterscotch Frosting
- Once the butterscotch sauce is at room temperature, make the butterscotch frosting. In a medium-sized pot, add about 1 inch of water and bring to a simmer. Add 8 egg whites and 2 1/2 cups of granulated sugar into a large metal bowl.
- Place the bowl on top of the pot filled with simmering water. The bowl should create a seal over the pot. Make sure the water isn’t touching the bottom of the bowl, or it can cook the egg whites.
- Whisk the mixture constantly for about 3 minutes, until it reaches 160°F / 71°C. You can test the mixture to see if it’s ready by rubbing a tiny bit between your fingertips. The sugar should be fully dissolved, and it should feel super smooth and hot to the touch.
- Once it reaches this stage, lift the bowl away from the pot and dry the bottom with a towel. Pour the mixture into the bowl of a stand mixer and beat on a medium-high speed with a whisk attachment. Mix for about 10 minutes, or until you have stiff, glossy peaks that stick straight up. While the meringue whips, I like to add something cold around the base of my bowl. I find the meringue stays quite warm while it whips up and placing a bag of frozen veggies around the base of the bowl helps cool it back to room temperature. This can prevent your buttercream from becoming soupy in the next step.
- Mix in 2 cups of unsalted butter at a medium speed, one stick at a time. Scrape the sides and bottom of the bowl with a rubber spatula as needed. The frosting should have a thick, whipped consistency once all the butter is mixed in. If it looks lumpy or broken, keep mixing until it looks fluffy and thick. If it doesn't seem to come together after an additional 10 minutes of mixing, check out the troubleshooting section in this post.
- Once the consistency is right, swap out the whisk attachment for a paddle attachment and add 1/2 cup of room temperature butterscotch sauce, 2 tsp vanilla extract, and 1/2 tsp fine salt. Continue mixing on a low speed for a couple of minutes to make the frosting extra smooth.
Assembling this Butterscotch Crunch Cake
- Then it's finally time to assemble the cake! Stack and frost the brown sugar cake layers on a greaseproof cake board or flat plate using a dab of frosting to help stick the first cake layer to the board.
- Spread an even layer of butterscotch frosting on top of the first cake layer. Drizzle about 1/2 cup of the butterscotch sauce on top of the frosting, then sprinkle on a few spoonfuls of the toffee bits and toasted pecans. Repeat this process with the remaining cake layers.
- Chill the cake in the freezer for 10 minutes once the cake layers are stacked to help lock the filling in place and make it easier to frost the cake.
- Then spread a thick coat of butterscotch frosting around the cake using a large offset spatula to give it a beautiful textured finish. Sprinkle some of the toffee bits and pecans in a ring around the top of the cake, then enjoy!
Video
Notes
How Many People Does This Cake Feed?
If you make this cake with 3, 8-inch cake layers or 4, 7-inch cake layers, it will feed about 24 people. For more information on cake sizes and servings, check out my cake portion guide.Recipe Variations – Making This Cake in Different Sizes
One batch of this recipe makes about 10 cups of batter or about 1800 grams. If you plan to use three circular cake pans, add 600 grams of batter into each pan. If you want to make a tiered cake or different-sized cake with this recipe, check out my cake batter calculator to see how many batches of batter you'll need. This recipe can also be used to make a sheet cake! One batch will make a 1, 9 x13-inch cake layer that's about 1.5 inches tall once leveled. Bake for 45-55 mins at 350 F / 175 C, or until a toothpick inserted in the center comes out with a few moist crumbs. Bake time can vary a lot based on the type of pan you use, if you use heating cores, and your oven. I recommend using heating cores if you have them, they help sheet cake layers bake more evenly and quickly. For more details on how to convert this cake recipe and others into sheet cakes, check out my sheet cake guide. Last but not least, you can also make cupcakes using this recipe. Fill the liners 3/4 full and bake them at 350 F / 175 C for 19-21 minutes, or until a toothpick inserted in the center comes out with a few moist crumbs.Tips for Making the Best Butterscotch Crunch Cake
- Be sure to properly measure the flour (spoon into the cup measure, then level) or use a kitchen scale.
- Make sure the ingredients are at room temperature to help them mix together better.
- If possible, use a candy thermometer to make the butterscotch crunch. You need the sugar to reach the right temperature.
- Don't level and torte the cake layers until they are completely cooled.
- If your cake layers turn out less than perfect, read my cake troubleshooting guide to see where things might've gone awry.
Making This Cake in Advance and Storage Tips
I highly recommend making the cake layers in advance and freezing them. It breaks the process up and makes it more approachable. You can also make the frosting ahead of time or save any leftover frosting! It can be stored in an airtight container in the fridge for up to a month, or in the freezer for up to 3 months. Be sure to give it a good stir once it thaws to get the consistency nice and smooth again. The butterscotch toffee can be stored in an airtight container or ziplock bag at room temperature for up to a week. If any of the bits stick together, they can be broken up with a fork. The butterscotch sauce can be made up to 2 weeks in advance and stored in an airtight container in the fridge. A frosted cake can last in the fridge for up to a week, or in the freezer for up to a month. The buttercream locks in all the moisture, keeping the cake fresh and delicious! If you cut into the cake and have leftovers, use any remaining frosting to cover the cut section to keep it moist and store it in the fridge for up to a week.Nutrition
Other Posts You Might Like:

Do you think that making this cake but with American buttercream would make it too sweet? Thank you!!
@Sarah Pierce, It’s totally a taste preference, so if you’re used to American buttercream I think adding the butterscotch to it would be delicious!!
Happy Baking!!
-Chelsey
Hi! Could you double check if the weighted measurement for egg whites is correct? I used liquid egg whites so measured on a scale but my frosting ended up super thin and soupy. It’s not separated, just very thin. I wondered if it was too much egg white but then again this is my first time making Swiss meringue buttercream. Thanks for any tips!!
Hello, are we looking to bring the Butterscotch sauce to a certain temperature for the right consistency, say about 220 or 225 degrees F?
Haven’t tasted it yet but it looks delicious. My only comment is that the frosting did not make enough to put enough in between the layers and then to frost the top and decorate. Also, it was not a good consistency when first finished. Had to refrigerate then rebeat in mixer.
Hi Cindy,
That’s such helpful feedback, thank you for sharing! The issue you ran into with the frosting isn’t actually the recipe itself but more to do with the temperature of the butter and the meringue. Swiss meringue buttercream can sometimes look a little off at first (too soft, too runny, or even a bit curdled), but that’s completely normal. Giving it a chill and then re-whipping, just like you did, is exactly the right fix. Once everything is at the right temp, it comes together beautifully! Hope that helps for the future, happy baking!!
We loved this! A couple notes: I’d eliminate the toffee crunch – while it is great recipe for toffee, the sweetness overpowers the cake IMO and the crunch makes the texture seem “off.” Could maybe just add it as decoration to the top of the cake, that might be okay? Also, the author of this recipe does a BEAUTIFUL job of adding detailed instructions. There are a couple things I could have used a little more guidance on. First, my butterscotch sauce wasn’t very thick, even after refrigeration. I’m wondering if I didn’t cook it long enough or to the right temperature. A couple of the other instructions included temperatures, but the butterscotch sauce did not. It would help to know better when the sauce is “done.” Unless it’s not supposed to be very thick? But in that event, it seeped out of the cake, even with creating a dam of frosting. Second, I’ve never made this kind of frosting before. It was fun to make! I thought I had made it well, but then realized after I had finished with it and let it refrigerate for a bit, before frosting the cake, that the butter wasn’t incorporated enough. I had thought it was, but I think the color of the butter and the whipped egg whites were too similar in my lighting, and I didn’t realize. I tried rewhipping it after the fact, but then the frosting “fell.” It was pretty soft to begin with, so maybe that’s why, the butter wasn’t fully incorporated? I was afraid of ruining my stiff peaked egg whites by overwhipping the butter in, but maybe that wouldn’t have happened? A little guidance on how long to whip each stick of butter into the whipped egg white mixture would be helpful. That’s all. Overall, a great recipe, very well written and helpful! Fun to try making new things! And my whole family enjoyed it!
Hi Amy,
Thank you so much for such a thoughtful and detailed review, I really appreciate you taking the time to share all of this!
Totally hear you on the toffee crunch, and it can be omitted if needed. It definitely adds extra sweetness and texture, so using it just on top is a great suggestion (that way you still get that flavor and sparkle without overwhelming the cake).
For the butterscotch sauce, it should thicken a bit as it cools, but if it’s still quite runny, it probably just needed to cook a bit longer. It’s hard because the cook time can vary a lot based on the type of heating element you’re using and they type of pan.
And you’re spot-on about the frosting! It can be tricky to tell when the butter is fully incorporated, especially since the colors blend. If it’s too soft or looks separated, continuing to whip usually helps it come together, it won’t hurt the meringue at that stage. I’ve added a link to my original Swiss meringue buttercream post, which has a big section on troubleshooting and shares everything you need to know in that type of situation. Here’s the link for the future: https://chelsweets.com/swiss-meringue-buttercream-frosting/
So glad you and your family enjoyed it overall! Thank you again for the feedback, it’s super helpful for me and other bakers too!
Amazing cake! I will keep this in my rotation. I’m new to layer cake baking and your recipe was accurate and easy to follow step-by-step. I added ground roasted pecans between the layers with the butterscotch. The only change I made was to make your Not Too Sweet Buttercream Frosting which was easy and delicious. I had some extra butterscotch left over and used it to decorate with a drip. My “taste testers” loved this cake and are still raving about it.
So happy to hear that Charlette!! And totally hear you on the frosting, I’m glad you made it with a frosting that suits your palette 🙂 Sounds like it turned out great, thank you so much for sharing 🙂
WOW! This cake is SO good! I finished making it yesterday and today it’s already gone ?. The cake layers themselves were so moist and had a wonderful flavor. The butterscotch sauce and pieces were so quick and easy to make (though difficult to stop eating by the spoonful ?), and the author’s suggestion to make them ahead of time made the process much easier. The icing was DELICIOUS and the not-too-sweet Swiss meringue paired brilliantly with the rich butterscotch. I ended out making a double batch of butterscotch sauce and pieces to give the cake a little extra flavor and allow the the guests to add as much as they wanted. I also used a mix of dark and light brown sugars in both the butterscotch bits and the cake layers because I like a deeper flavor. Thank you, ma’am, for another lovely recipe! This one is for sure a keeper!
Hi Stella,
I LOVE THAT!!! That is so wonderful to hear 🙂 Making some of thecomponents ahead of time really does make the pcoess feel so much more approachable, right?? Thank you for sharing!