
Skull Cookies
These Halloween skull cookies are made with a cream cheese sugar cookie dough that holds its shape well and tastes so delicious!
I roll the dough a little thicker than classic cut-out cookies, then decorate them with sanding sugar and an optional dusting of powdered sugar.

This Recipe at a Glance
- Flavor: Sweet, vanilla-almond sugar cookie
- Texture: Slightly crunchy from the sanding sugar
- Cookie size: Best with a 2- or 3-inch skull cookie cutter
- Yield: About 36 cookies
- Make-ahead friendly: The dough can be chilled overnight or frozen for later
How to Make This Skull Cookie Recipe
To make sure these cookies turn out as amazing as possible, let’s walk through each step together.
Step 1: Make the Cookie Dough
Begin by making the cookie dough, following the recipe card at the bottom of this post.
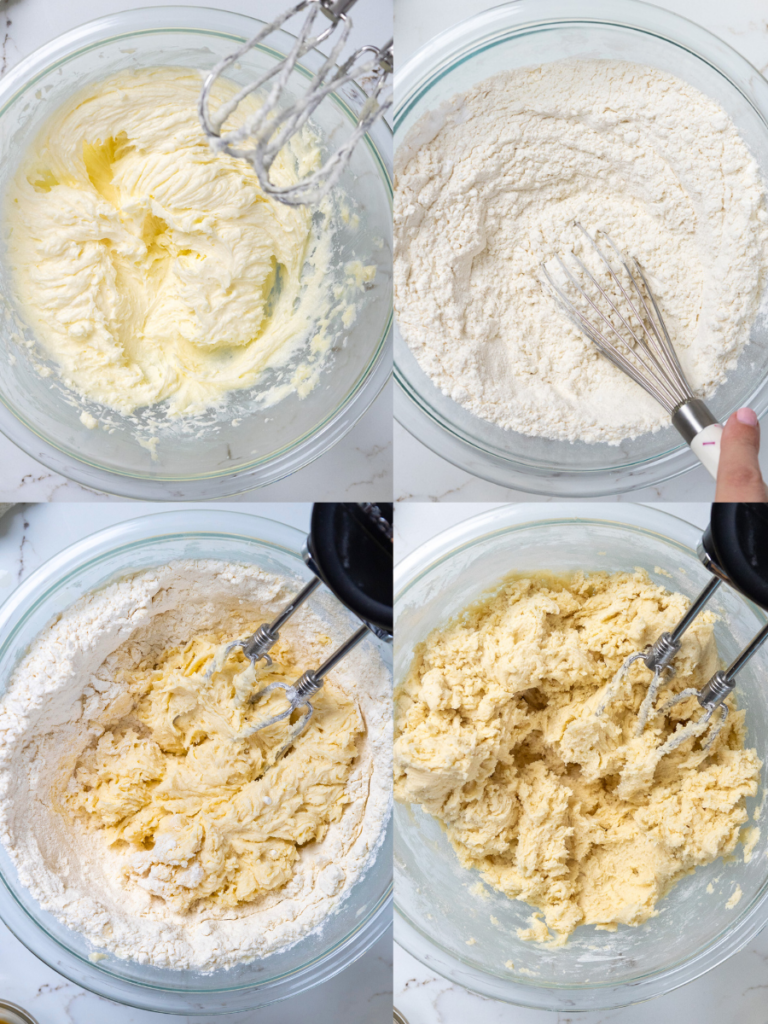
The dough should be pretty thick and sticky. Divide the dough in half and wrap each portion in a piece of plastic wrap.
I like to flatten the dough into a rectangle that’s about 1/2 inch thick to make it easier to roll out once it’s chilled.
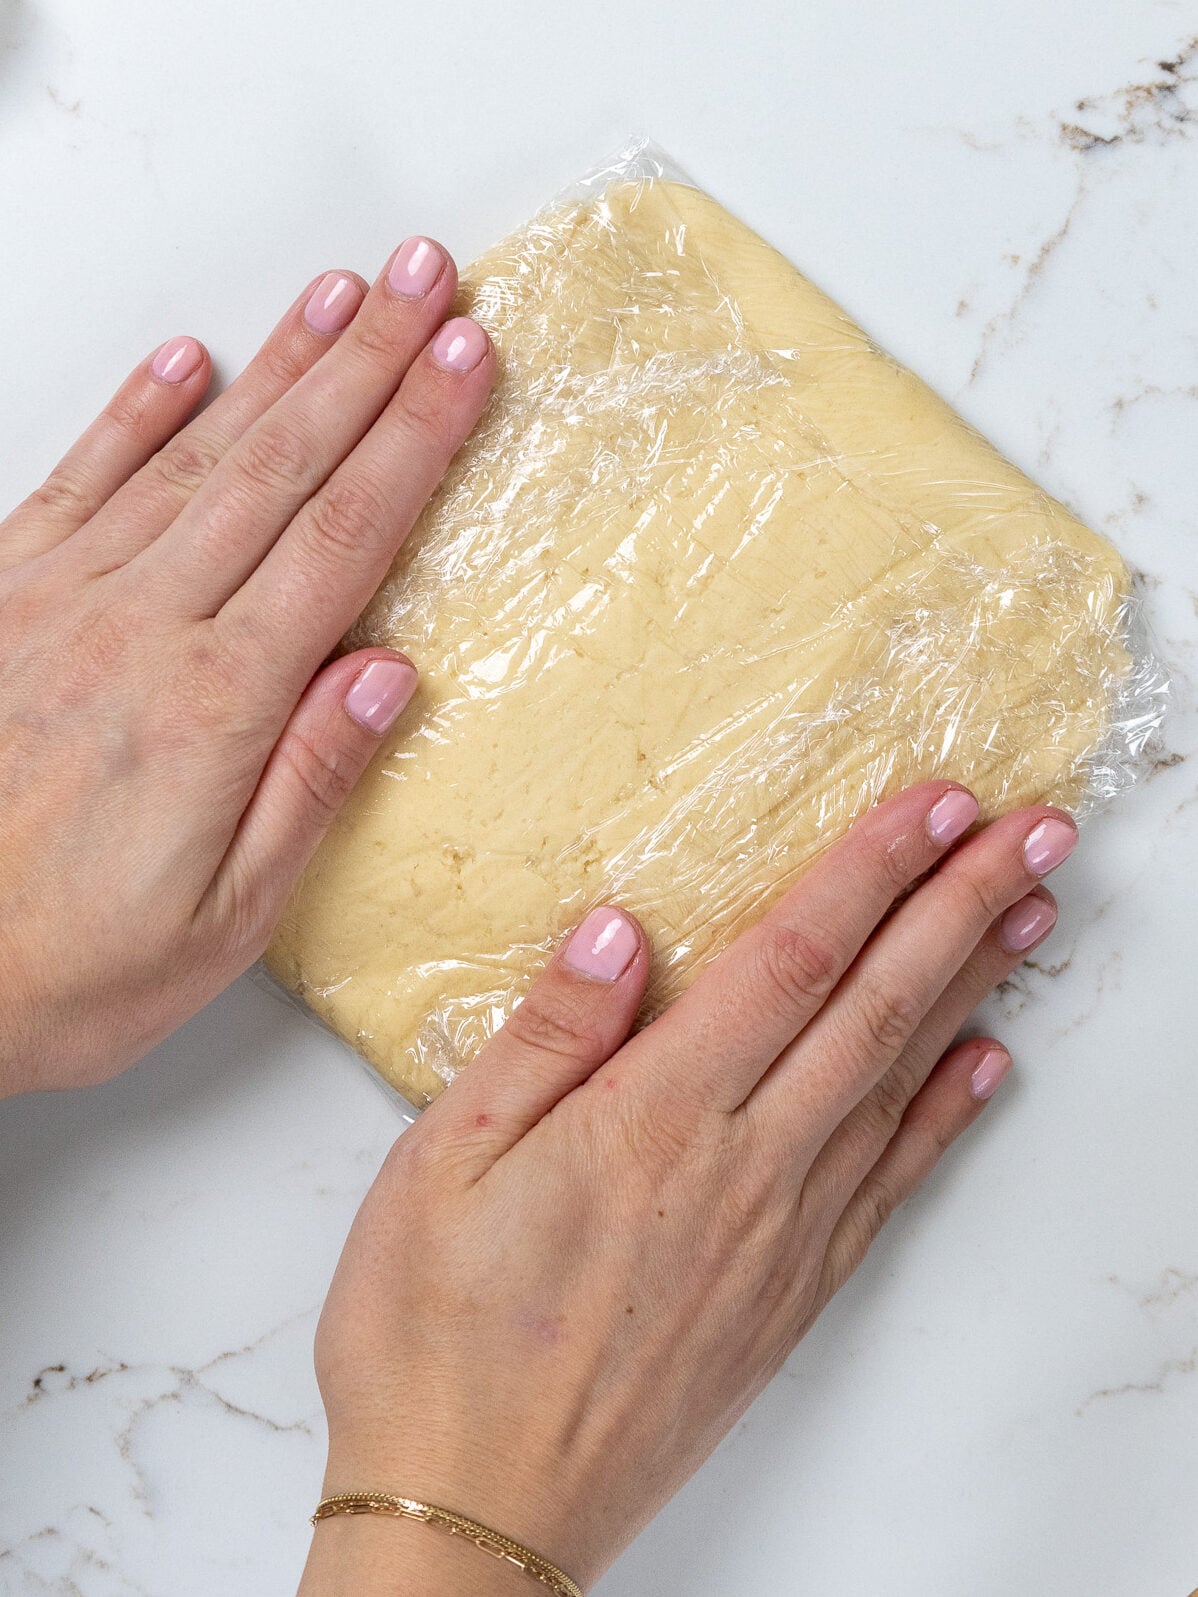
Chill the dough in the fridge for about 1 hour or in the freezer for 30 minutes. It can also be chilled overnight.
Preheat the oven to 350°F/175°C for about 30 minutes before you plan to roll out the dough, and line two large baking sheets with parchment paper. Set aside.
Take one piece of dough out of the fridge, leaving the other in there to continue to chill. If you put the cookie dough in the freezer, let it sit at room temperature for 5-10 minutes to soften up a bit before trying to roll it out.
Step 2: Cut Out the Cookies
Unwrap the cookie dough and lay the plastic wrap out flat on your counter. Dust the cookie dough with flour.
Then roll the chilled dough to be 1/3 inch thick (these rolling pin rings help a ton with getting a consistent thickness) and cut out shapes with a 2- or 3-inch skull-shaped cookie cutter.
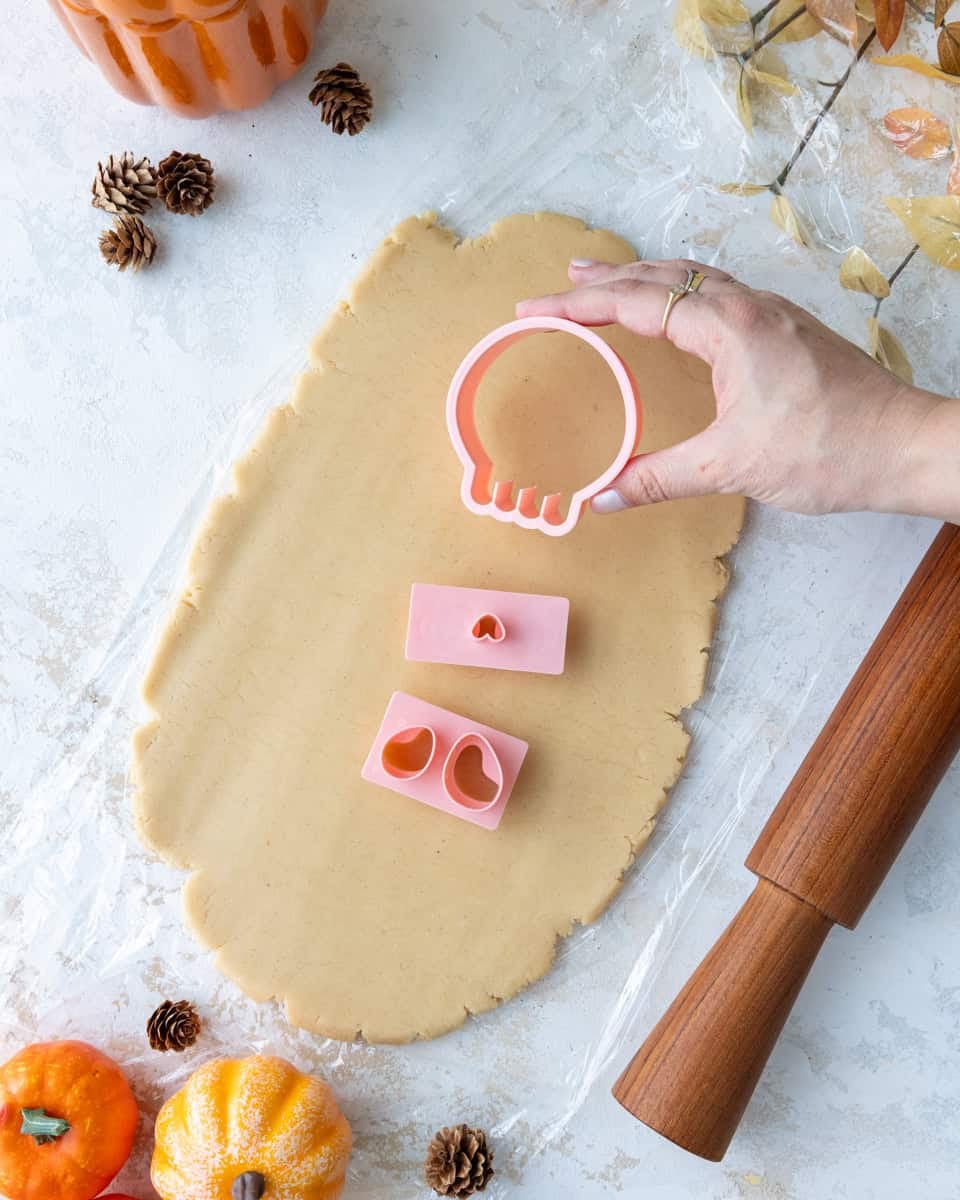

These cookies don’t spread much as they bake, so you can place them about 1 inch apart.
If desired, press the cookies into white sanding sugar to give them a crunchy texture.
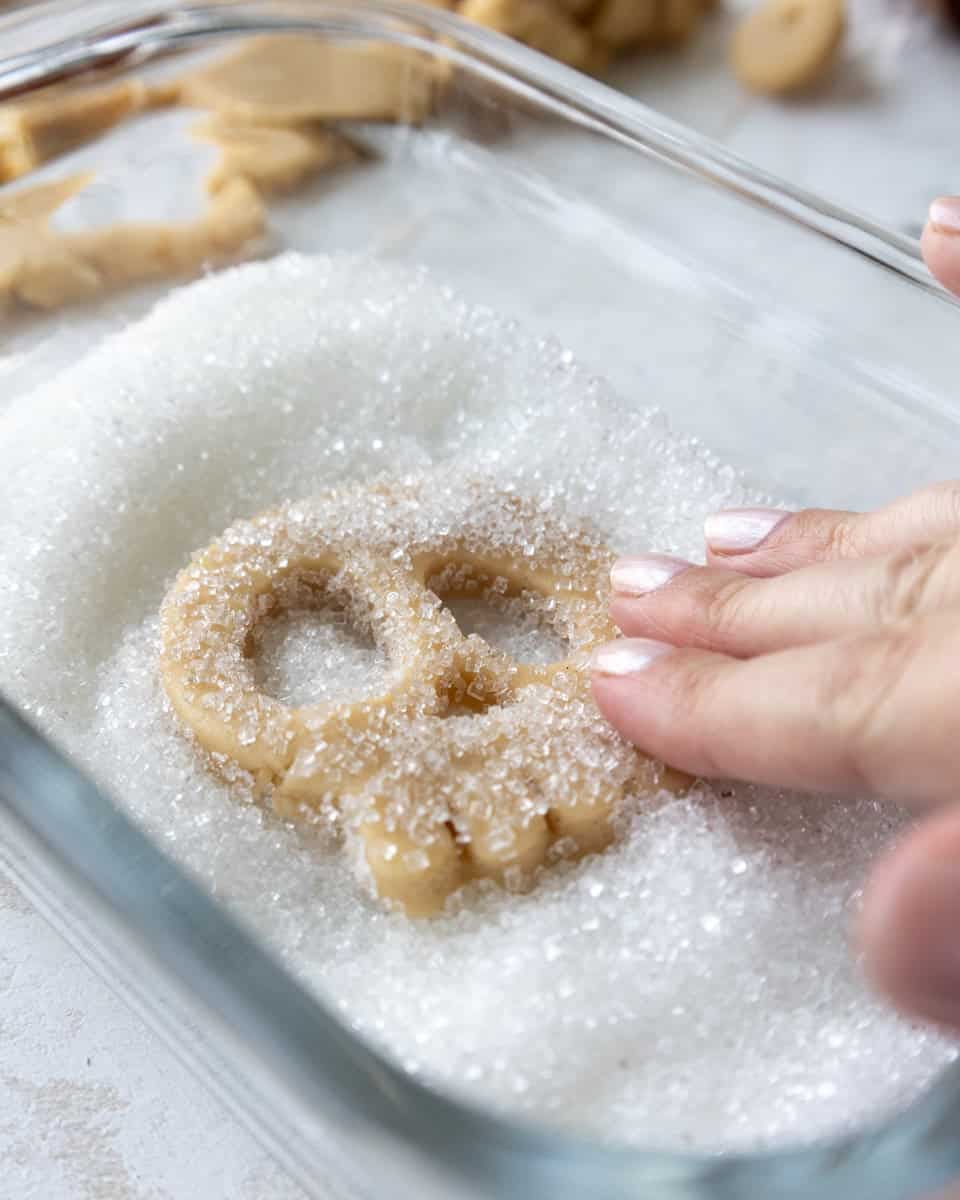
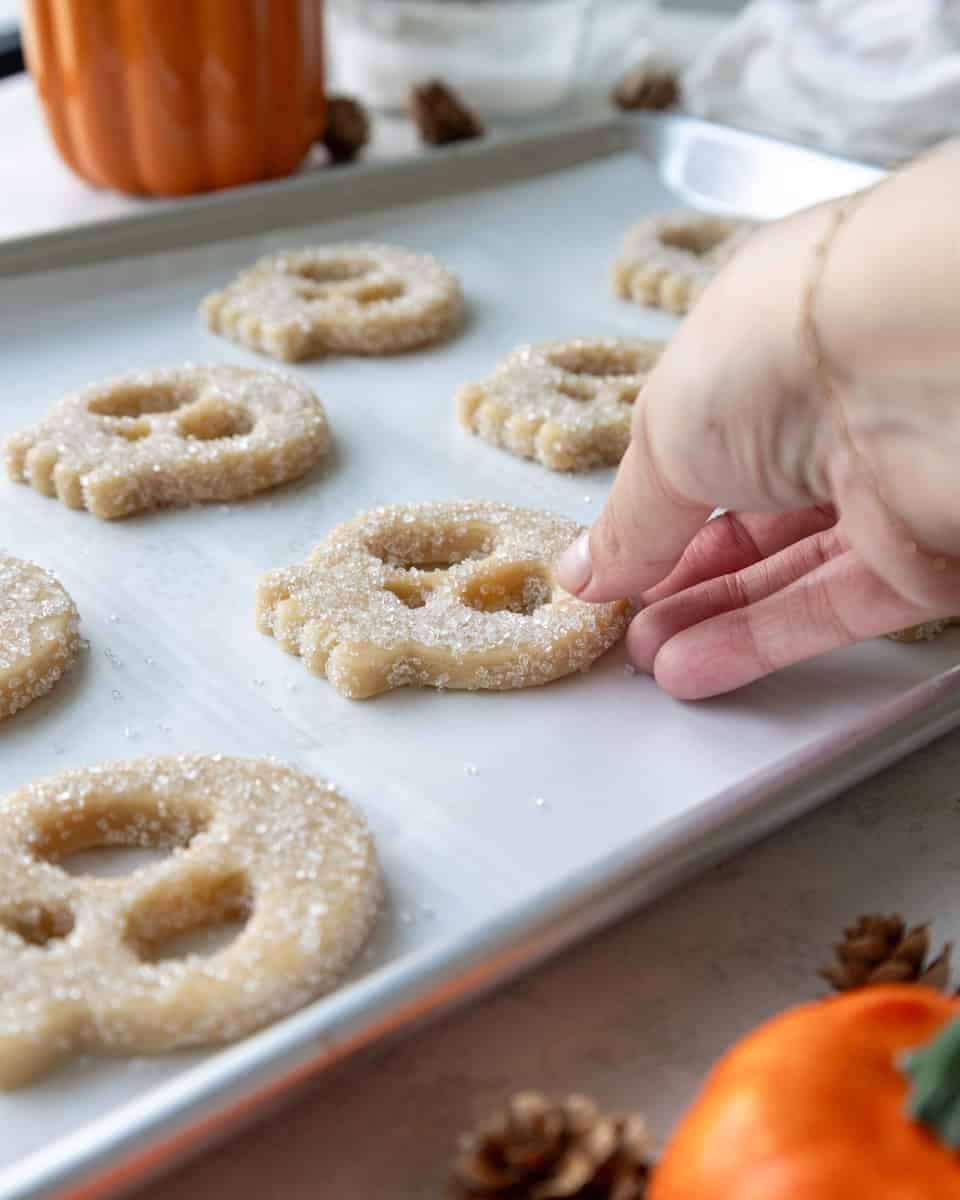
Chill the cut-out cookies one more time in the fridge for 15 minutes or the freezer for 5 minutes to help them keep their shape as they bake.
Step 3: Bake the Cookies
Bake one sheet of cookies at a time. Bake for 14-16 minutes on the middle rack of your oven (bake time will vary based on the size and shape of the cookies and the dough’s thickness).
The edges should be set, but it’s ok if the centers look a little bit soft. The cookies will continue to bake and firm up as they cool on the baking sheets.
Keep a close eye on the cookies and be sure to pull them out before the edges start to brown. Let the baked cookies cool on the pan for about 15 minutes, then transfer to a wire rack to finish cooling.
You can dust them with powdered sugar if you want them to be a brighter white color or to add a little sweetness.
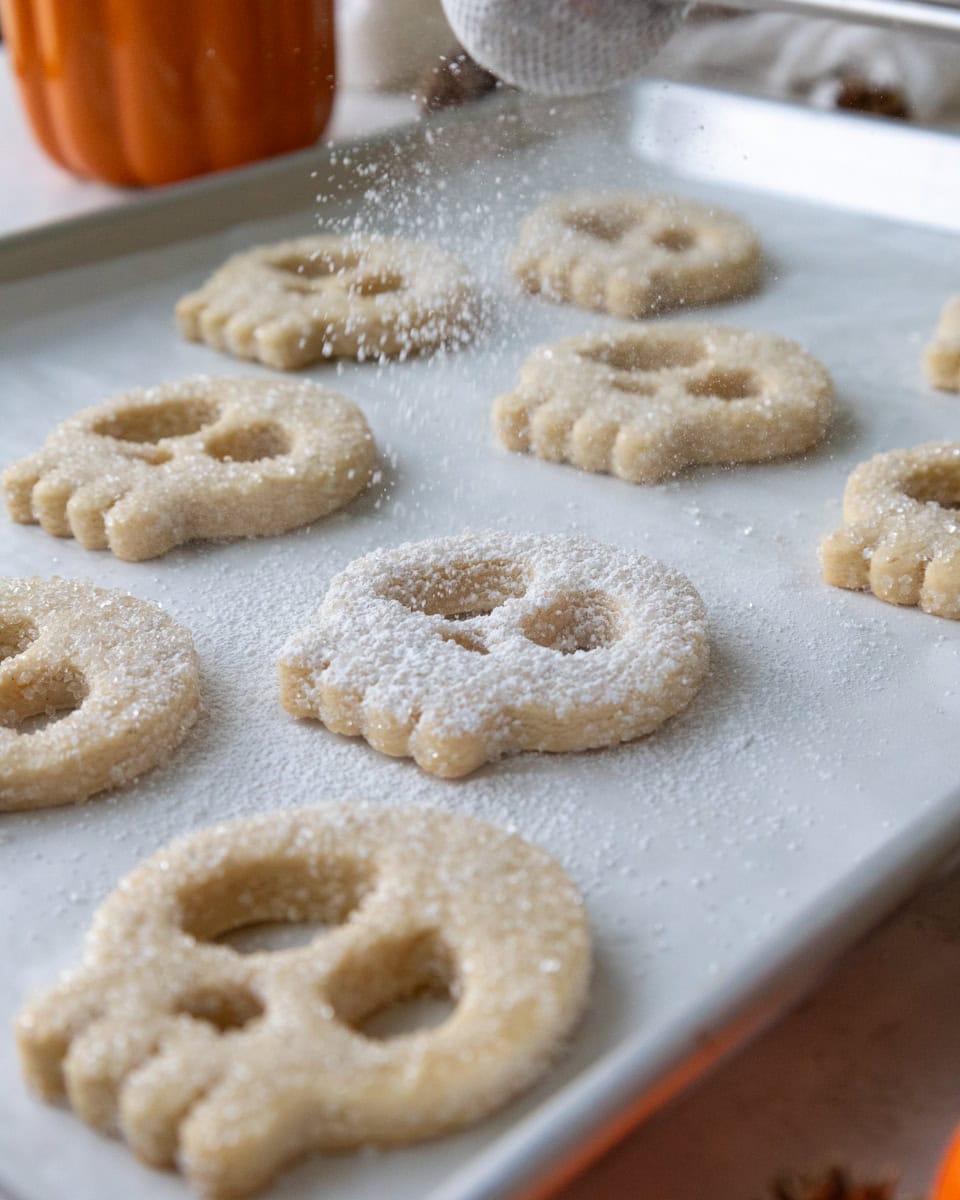
While the first batch bakes and cools, knead together the cookie dough scraps and rewrap them in plastic wrap. Pop them back in the fridge to chill.
Pull out the 2nd chilled portion of dough and repeat the process. Then repeat with the chilled dough scraps.
Substitutions and Swaps – Skull Sugar Cookies
Below are some swaps and variations that can be made to this recipe.
- Unsalted Butter – If you only have salted butter, you can use it and omit the salt that this recipe calls for. You can also use vegan butter.
- Cream Cheese – I recommend using the full-fat cream cheese that comes in a block.
- Granulated Sugar – I do not recommend reducing the amount of sugar or changing the type of sugar. It will change the spread of these cookies.
- All-purpose flour – You can use a gluten-free flour blend in place of the all-purpose flour in this recipe.
- Cornstarch – Cornstarch helps give these cookies a softer texture! If you don’t have any on hand, it can be omitted.
- Almond Extract – If you have a nut allergy, you can use vanilla extract or a different extract in place of the almond extract.
- White Sanding Sugar – This is optional, but I love the crunchy texture it gives these cookies once they’re baked.
How Many Cookies Does This Recipe Make?
This recipe can be used to make about 36 3-inch cookies. The yield and bake time will vary based on the size and shape of the cookie cutter you use and the thickness of your dough.
This recipe can be halved to make fewer cookies (use half a scrambled egg in the dough), but I don’t recommend doubling it unless you have a commercial (8 qt.) stand mixer.
Frequently Asked Questions
Can I make these skull cookies ahead of time?
Yes! The dough can be chilled overnight or frozen for up to 1 month. The baked cookies can also be stored in an airtight container at room temperature for up to a week.
Why did my skull cookies spread?
The dough may have been too warm, the cookies may not have chilled long enough after cutting, or they may have been baked on a silicone mat. Chilling the cut-out cookies helps them keep their shape.
Can I decorate these with royal icing instead?
Definitely. Let the cookies cool completely, then decorate them with royal icing, buttercream, or a light dusting of powdered sugar.
Do I need a skull cookie cutter?
A skull-shaped cookie cutter gives these cookies their cleanest shape, but you can use this same dough with other Halloween cookie cutters, too.
Making This Skull Cookie Recipe in Advance and Storage Tips
You can store decorated cookies in an airtight container for up to a week at room temperature or for up to 3 months in the freezer.
If you want to stack the cookies on top of one another, I recommend adding a layer of parchment paper between them.
This cookie dough can also be frozen for up to 1 month if wrapped tightly in plastic wrap and stored in an airtight container. I like to move the cookie dough to the fridge the night before I plan to roll it out and bake the cookies.

Let Me Know What You Think!
If you make this skull cookie recipe, I’d love to hear how it turns out! Please leave a rating and comment below.
And if you share on social media, tag me @chelsweets and use #chelsweets so I can see your delicious creations!

Skull Cookies
Equipment
- Rolling Pin Bands (optional)
Ingredients
Cream Cheese Sugar Cookies
- 3/4 cup (1 1/2 sticks) unsalted butter, room temperature 170g
- 1/2 cup full-fat cream cheese, room temperature 113g
- 1 1/2 cups granulated sugar 300g
- 1 large egg, room temperature 56g
- 2 tsp almond extract, optional 8g
- 2 tsp vanilla extract or vanilla bean paste 8g
- 3 cups all-purpose flour 390g
- 1 Tbsp cornstarch 8g
- 1 tsp fine salt 6g
- 1/2 tsp baking powder 2g
Decorations (optional)
- 1/2 cup white sanding sugar (for topping) about 100g
- 1/4 cup powdered sugar (for dusting) 30g
Instructions
Cream Cheese Sugar Cookies
- In a large bowl with a hand mixer or in the bowl of a stand mixer fitted with a paddle attachment, beat 3/4 cup of butter and 1/2 cup of cream cheese on medium speed until smooth.
- Next, add 1 1/2 cups granulated sugar and mix on a medium-high speed for a couple of minutes, until the mixture becomes lighter in color.
- Add in 1 egg, 2 tsp almond extract (optional), and 2 tsp vanilla bean paste or vanilla extract. Mix on a medium speed until incorporated.
- In a separate bowl, whisk together 3 cups flour (use a scale or fluff the flour in the bag, then spoon it into the measuring cup and level it), 1 Tbsp cornstarch, 1 tsp fine salt, and 1/2 tsp baking powder.
- Mix the dry ingredients into the butter mixture on a low speed until they are JUST incorporated. Scrape the sides of the bowl with a rubber spatula as needed.
- At this point, the dough should still be pretty thick and sticky. Divide the dough in half and wrap each portion of dough in a piece of plastic wrap. I like to flatten the dough out into a rectangle that's about 1/2 inch thick to make it easier to roll out once it's chilled.
- Chill the dough in the fridge for about 1 hour or in the freezer for 30 minutes. It can also be chilled overnight. Preheat the oven to 350°F / 175°C for about 30 minutes before you plan to roll out the dough, and line two large baking sheets with parchment paper (the cookies will spread more if you bake them on a silicone mat). Set aside.
- Take one piece of dough out of the fridge, leaving the other in there to continue to chill. If you put the cookie dough in the freezer, let it sit at room temperature for 5-10 minutes to soften up a bit before trying to roll it out. Unwrap the cookie dough and lay the plastic wrap out flat on your counter. We will be rolling out the cookie dough on the plastic wrap to make cleanup a breeze and make cutting out the cookies easier. Dust the top of the cookie dough with flour.
- Roll the chilled dough to be 1/3 inch thick (these rolling pin rings help a ton with getting a consistent thickness) and use a 2- or 3-inch skull-shaped cookie cutter to cut out as many cookies as you can. The cookies don't spread much as they bake, so you can place them about 1 inch apart.
- If desired, press the tops of the cookies into white sanding sugar.
- Chill the cut-out cookies one more time in the fridge for 15 minutes or the freezer for 5 minutes to help them keep their shape as they bake.
- Bake one sheet of cookies at a time for about 14-16 minutes on the middle rack of your oven (bake time can vary based on the cookies' size and the dough's thickness). Keep a close eye on the cookies and be sure to pull them out before the edges start to brown.
- Let the baked cookies cool on the pan for about 15 minutes, then transfer to a wire rack to finish cooling. You can dust them with powdered sugar if you want them to be a brighter white color or to add a little sweetness.
- While the first batch bakes and cools, knead together the cookie dough scraps and rewrap them in plastic wrap. Pop them back in the fridge to chill.
- Pull out the second chilled portion of dough and repeat the steps above. Then repeat with the chilled dough scraps.
Video
Notes
Substitutions and Swaps
Please refer to the substitutions and swaps section in the post above for all the ingredient variations that can be used in this recipe.How Many Cookies Does This Recipe Make?
This recipe can be used to make about 36 3-inch cookies. The yield and bake time will vary based on the size of the cookie cutter(s) you use and the thickness of the dough. This recipe can be halved to make fewer cookies (use half a scrambled egg in the dough), but I don’t recommend doubling it unless you have a commercial (8 qt.) stand mixer.Making These Cookies in Advance and Storage Tips
You can store decorated cookies in an airtight container for up to a week at room temperature or for up to 3 months in the freezer. If you want to stack the cookies on top of one another, I recommend adding a layer of parchment paper between them. This cookie dough can also be frozen for up to 1 month if wrapped tightly in plastic wrap and stored in an airtight container. I like to move the cookie dough to the fridge the night before I plan to roll it out and bake the cookies.Tips for Making the Best Skull Cookies
- Really cream together the butter, cream cheese, and granulated sugar in the first step of this recipe. It helps incorporate air into the dough, which gives the cookies a better texture.
- Don’t overwork the cookie dough! It can develop the gluten and result in tough, dense cookies.
- Roll the cookie dough out to a consistent thickness of 1/3 inch. If some are thicker or thinner than others, they may over- or under-bake in the oven.
- Take the time to chill the cookie dough. It helps prevent your cookies from spreading.
- Don’t overbake your cookies. Err on the side of underbaking your cookies, and remember that the cookies continue to bake for a few minutes once they’re out of the oven.
Nutrition
Other Posts You Might Like:


Omg these would be awesome at linzar tarts!!!!
They totally would!!
What did you use to cut out the nose? I got the same cookie cutter but none of the pieces look small enough to do the nose
Hi Christina,
There actually is an additional cutter with the skull cookie cutter I linked in this post that cuts out the nose! Here’s the link, it shows a picture with it which I think will help explain it better! https://amzn.to/4yg2ihN