
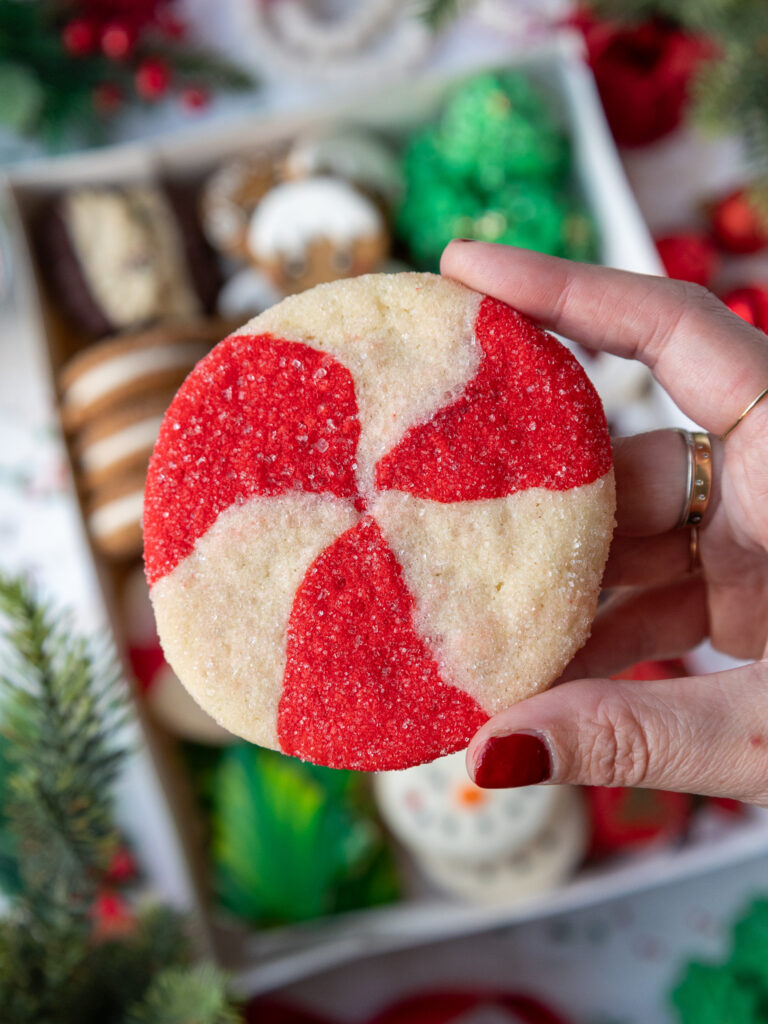
Peppermint Sugar Cookies
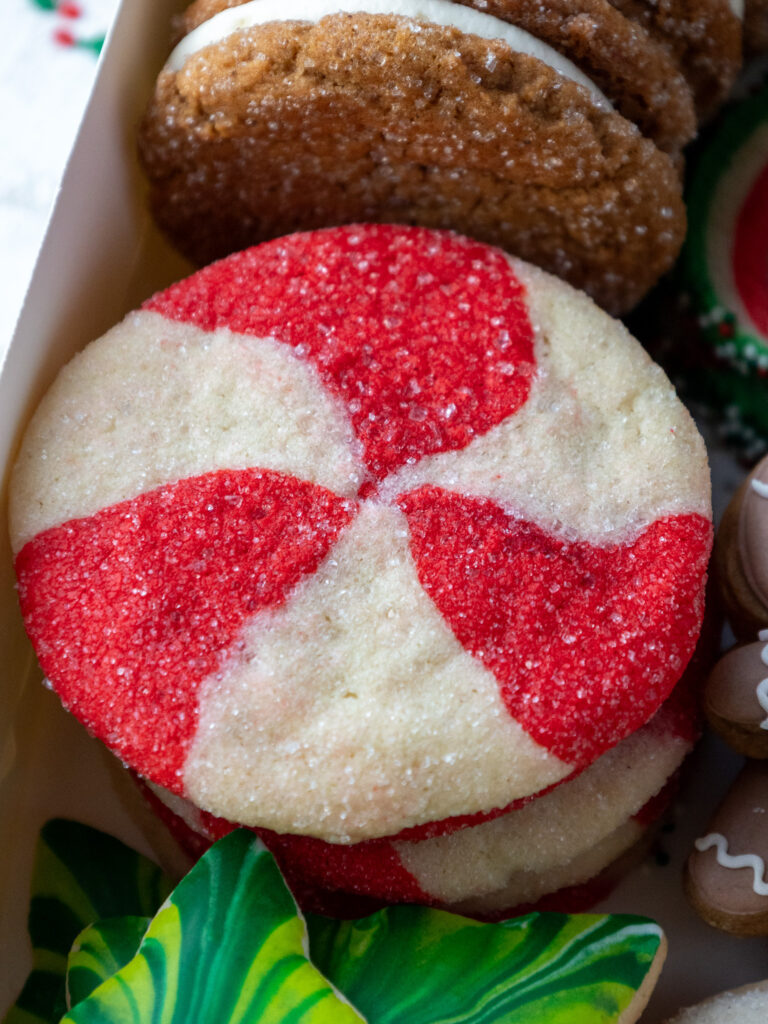
These peppermint swirl sugar cookies are a wonderful spin on a classic! They bake up perfectly crisp edges and soft, chewy centers.
The texture and flavor of these are perfect for the holidays and will have you going back for more.
Let’s Make These Peppermint Sugar Cookies Together!
To make sure these cookies turn out as amazing as possible, let’s walk through each step together.
Below is a list of equipment I used to make these, but feel free to improvise if you don’t have all of these on hand.
Recommended Tools and Equipment
- Stand mixer or electric hand mixer
- 2 large, flat baking sheets
- Parchment paper or silicone baking mat
- Red gel food coloring
Step 1: Make the Dough
Preheat the oven to 350°F/175°C and line two large baking sheets with parchment paper or silicone baking mats. Set aside.
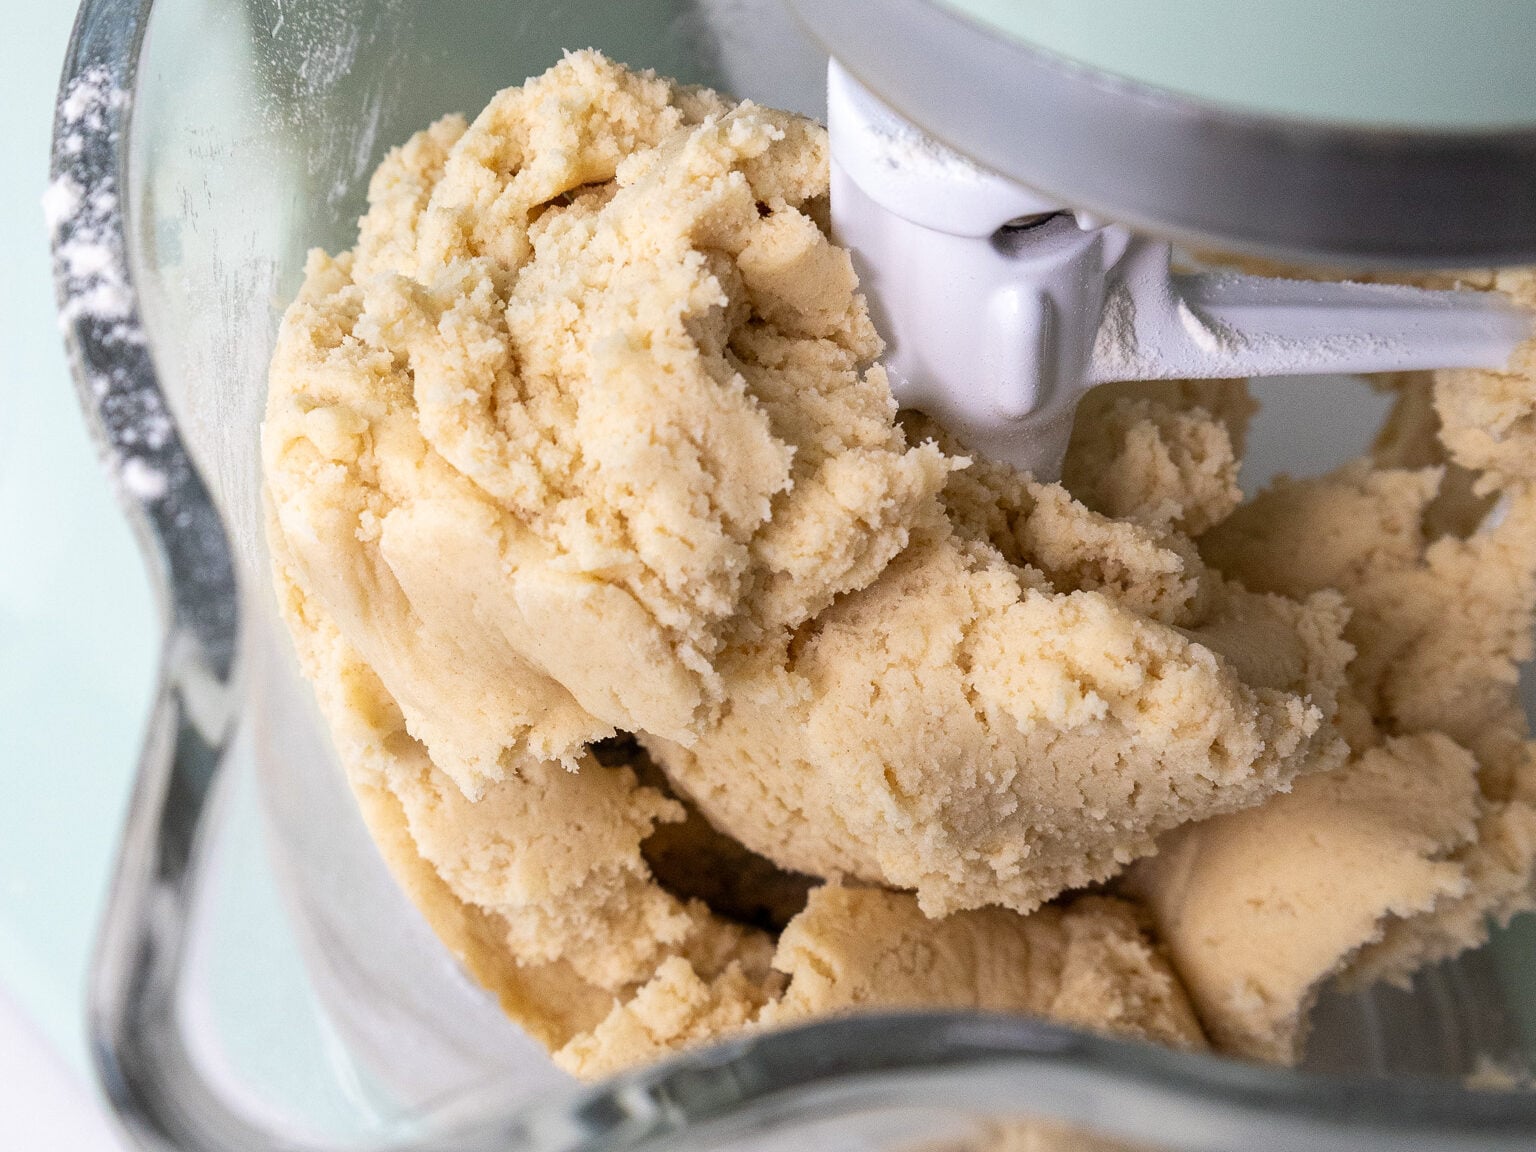
In a large bowl, using a handheld mixer or a stand mixer fitted with a paddle attachment, beat 1 cup of room temperature butter and 1 3/4 cups granulated sugar together on medium-high speed for a couple of minutes until it looks light and fluffy.
Add 1 large egg + 1 large egg yolk, 1 tsp vanilla extract, and 1 1/2 tsp peppermint extract (optional).
Beat at a medium-high speed until combined. Scrape the sides and bottom of the bowl with a rubber spatula as needed.
Mix in 2 1/2 cups of flour, 1 Tbsp cornstarch, 1 tsp fine salt, and 1/2 tsp of baking soda on a low speed until mostly combined.
Scrape the sides and bottom of the bowl with a rubber spatula, then increase the speed to medium and beat for a few more seconds to make sure all the ingredients are fully combined.
Step 2: Color the Dough
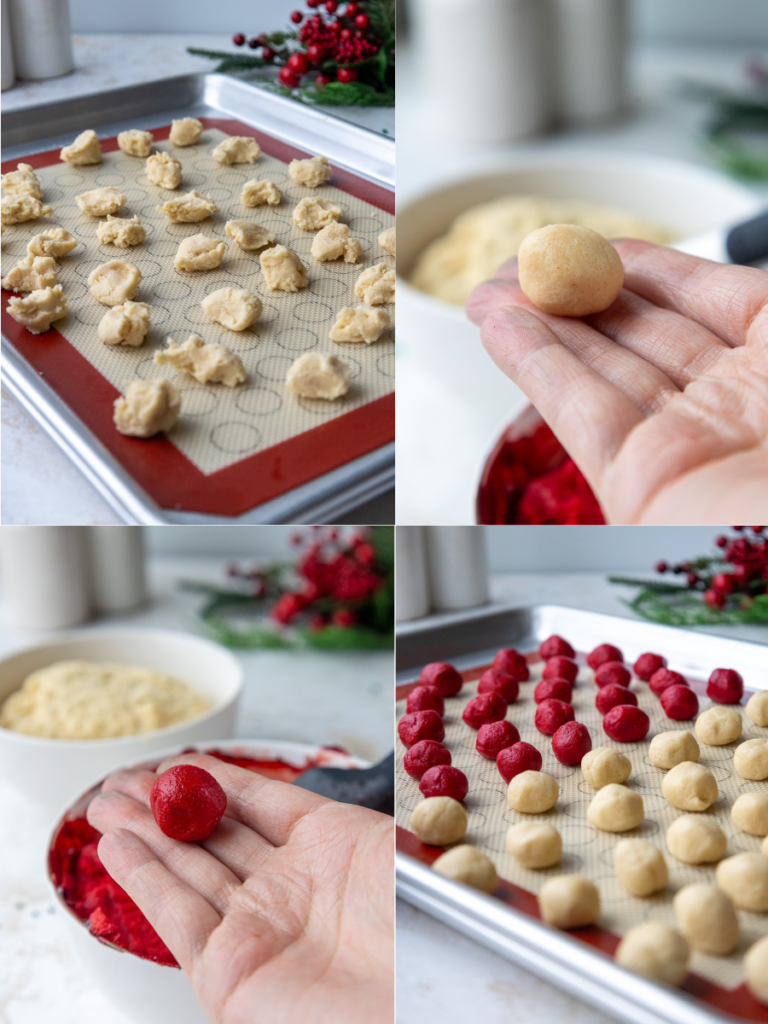
Split the batter into 2 equal portions (should be about 490g per bowl) and move one portion to a large bowl.
Color one portion red with gel food coloring. You can start mixing the dough with a spatula, but eventually, you’ll probably need to get in there and knead the dough with your hands.
If you’re worried about staining your hands, you can wear rubber gloves to do this. Mix until the dough is evenly colored.
Step 3: Portion Out the Dough
Then use a teaspoon to scoop out teaspoon-sized portions of each dough. Roll each portion into a small ball and set aside.
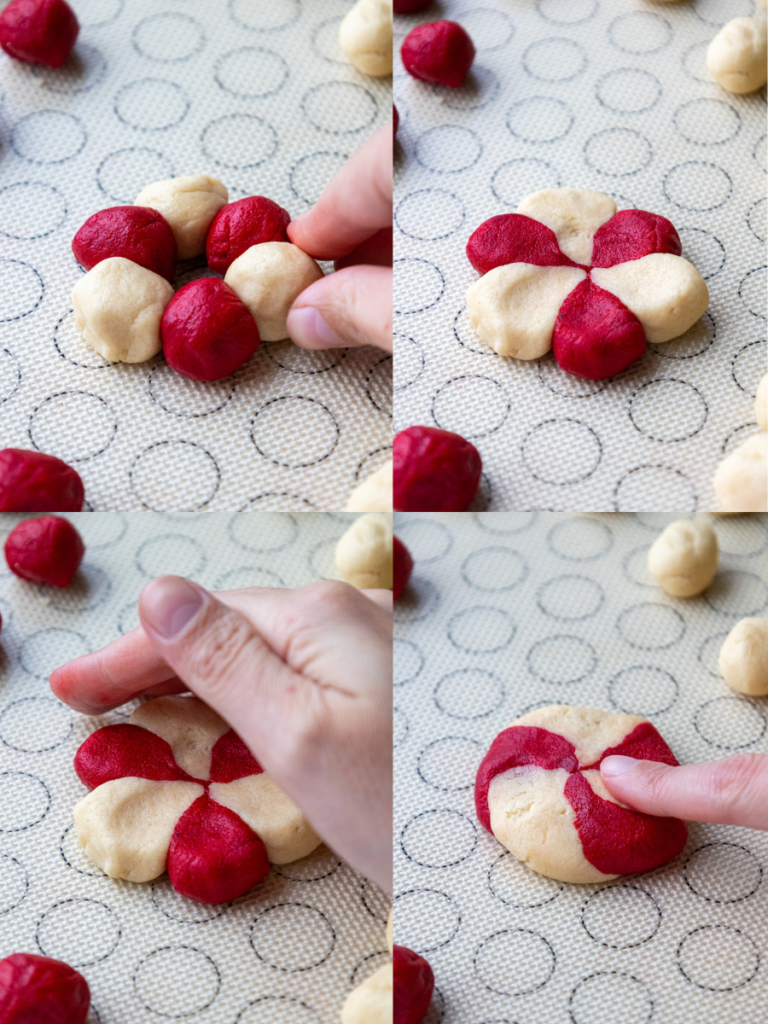
Step 4: Roll the Dough into a Swirl
Next, take three portions of each color (you should have six little teaspoon-sized balls total) and place them in a small circle, alternating colors (red, white, red, white, etc.)
Use your fingers to press the different colors together to close the gap in the middle. Then cup your hand to round out the edges of the cookie.
Gently use your forefinger to push the stripes of color in the same direction to give them a slightly swirled look.
Repeat with the remaining dough. You should end up with about 24 cookies.
If desired, pour some granulated or sanding sugar into a small bowl and toss the cookie dough in the sugar until it’s fully coated. This adds a delicious bit of texture once the cookies are baked.
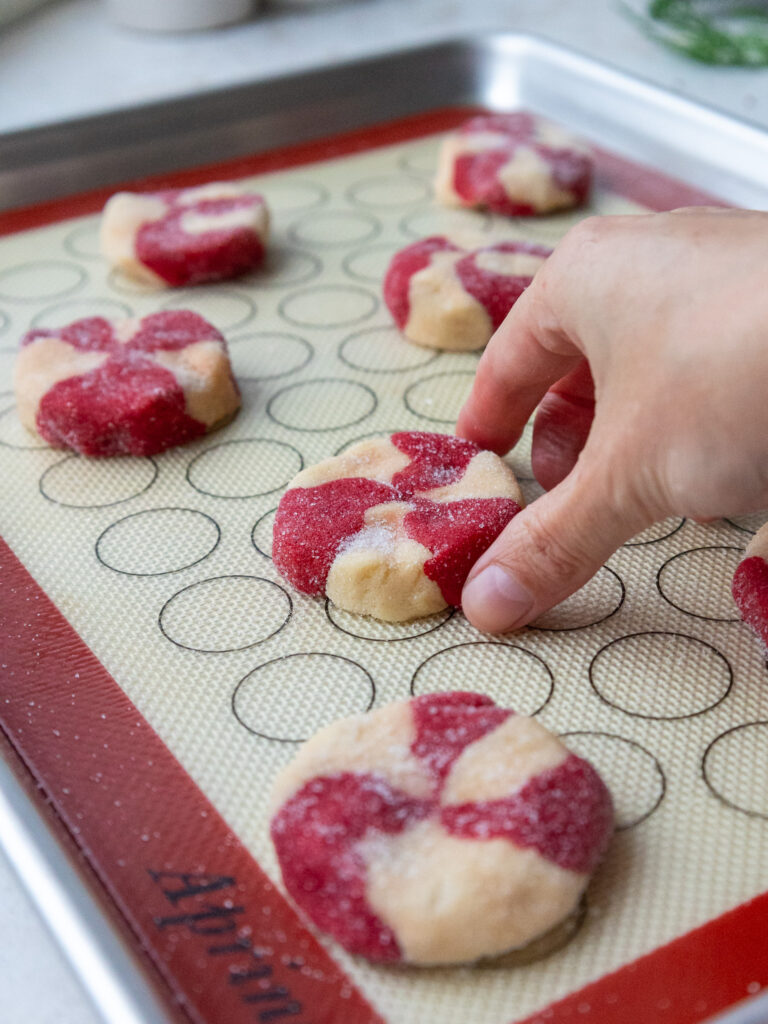
Step 5: Bake the Peppermint Sugar Cookies
Chill the cookies in the fridge for 30 minutes or the freezer for 15 minutes, then place the cookies a few inches apart on the prepared baking sheets (they spread quite a bit!).
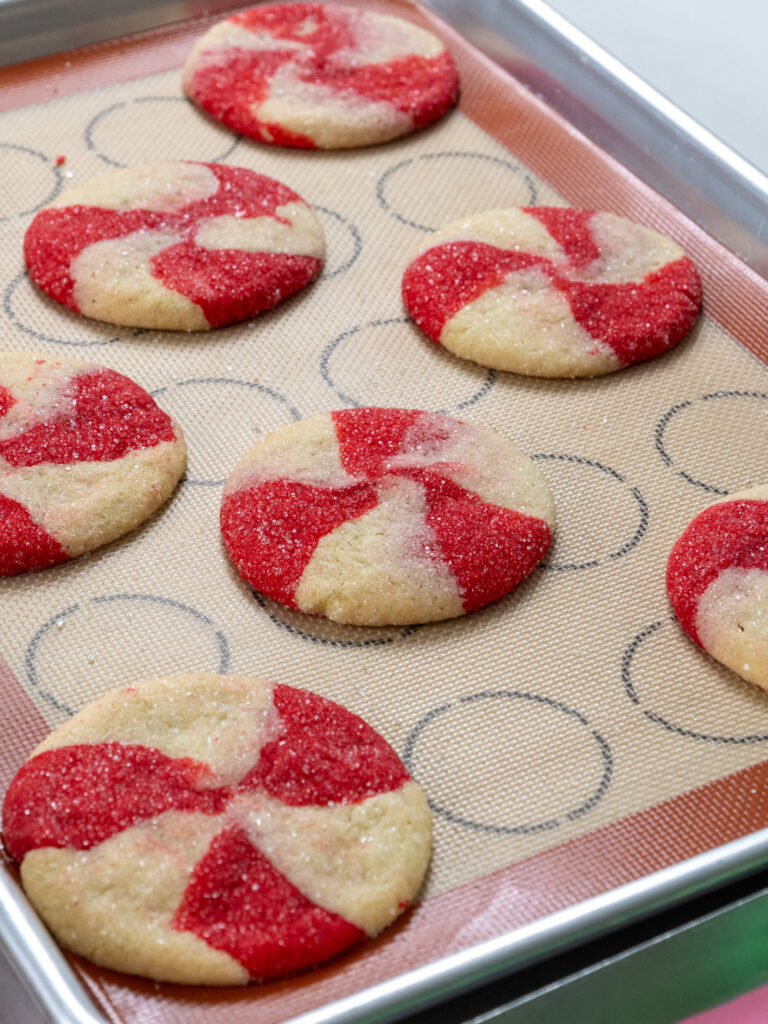
Bake one tray at a time on the middle rack of your oven for 11-13 minutes, or until the edges look set but haven’t started browning yet.
Remove the tray from the oven and let the cookies cool on the tray for 15 minutes, then move them to a wire rack to finish cooling. These can be stored in an airtight container at room temperature for up to 5 days.
Peppermint Sugar Cookie Ingredients & Substitutions
While I love this recipe just the way it is, I know you might not have all these ingredients on hand! Or you might have food restrictions or allergies.
Below are some swaps and variations that can be made in this recipe.
- Unsalted Butter – If you only have salted butter, you can use it and omit the salt that this recipe calls for. You can also use vegan butter.
- Granulated Sugar – This recipe turns out best with granulated sugar. I wouldn’t recommend changing the amount or type of sugar, or it will impact the spread of the cookies.
- All-Purpose Flour – You can use a gluten-free flour blend if needed in place of the AP flour in this recipe.
- Peppermint Extract – I love this recipe with peppermint extract, but you can use vanilla or another extract in its place if needed.
How Many Cookies Does This Recipe Make?
This recipe makes about 24 cookies and can be doubled if needed.
Can I Make These Cookies In Advance?
You absolutely can! The cookie dough can be stored in the refrigerator for up to 2 days before being baked. You can also shape the unbaked cookies and store them in an airtight container for up to 2 days.
Cookie dough balls can also be frozen for up to 2 months. The cookies can be baked straight from the freezer, but will need a couple of extra minutes of bake time.
Baked cookies can also be frozen for up to 2 months.
Tips for Making the Best Peppermint Swirl Sugar Cookies
- Really cream together the butter and sugar at the start of the recipe. It should become lighter in color and look kind of fluffy once it’s properly creamed together. This will give the cookies a nice, chewy texture.
- Space your cookies about 2 inches apart before baking them. They will spread as they bake.
- Don’t over-bake your cookies! The color of the dough makes it hard to tell when they start to brown, so keep an eye on the texture of the top of the cookie. Even if they seem a bit soft coming out of the oven, they will continue to bake and set on the tray once they’re out of the oven.
- Use gel food coloring to color the dough. Liquid food coloring and throw off the consistency of the dough, making it harder to portion and roll out.
Let Me Know What You Think!
If you make these peppermint swirl sugar cookies, I’d love to hear your thoughts! Please leave a rating and comment below.
Or if you share on social media, tag me @chelsweets and use #chelsweets so I can see your delicious creations!

Peppermint Swirl Sugar Cookies
Ingredients
Peppermint Swirl Sugar Cookies
- 1 cup unsalted butter, room temperature 226g
- 1 3/4 cups granulated sugar 350g
- 1 large egg + 1 large egg yolk 80g
- 1 1/2 tsp peppermint or almond extract – optional 8g
- 1 tsp vanilla extract or vanilla bean paste 5g
- 2 1/2 cups all purpose flour 325g
- 1 Tbsp cornstarch 8g
- 1 tsp fine salt 6g
- 1/2 tsp baking soda 3g
- Red gel food coloring
Coating
- 1 cup granulated sugar or white sanding sugar
Instructions
Peppermint Swirl Sugar Cookies
- Preheat the oven to 350°F/175°C and line two large baking sheets with parchment paper or silicone baking mats. They spread less on parchment paper, so I'd recommend using that if you have it! Set aside.
- In a large bowl, using a hand mixer or a stand mixer fitted with a paddle attachment, beat 1 cup of room temperature butter and 1 3/4 cups granulated sugar together at medium-high speed for a couple of minutes until it looks light and fluffy.
- Add 1 large egg + 1 large egg yolk, 1 1/2 tsp peppermint extract (optional), and 1 tsp vanilla extract. Beat at a medium-high speed until combined. Scrape the sides and bottom of the bowl with a rubber spatula as needed.
- Mix in 2 1/2 cups of flour, 1 Tbsp cornstarch, 1 tsp fine salt, and 1/2 tsp of baking soda on a low speed until mostly combined. Scrape the sides and bottom of the bowl with a rubber spatula, then increase the speed to medium and beat for a few more seconds to make sure all the ingredients are fully combined.
- Split the batter into 2 equal portions (about 490g per bowl) and move one portion to a large bowl. Color one portion red with gel food coloring. You can start mixing the dough with a spatula, but eventually, you'll need to get in there and knead the dough with your hands. If you're worried about staining your hands, you can wear rubber gloves to do this. Mix until the dough is evenly colored.
- Then use a teaspoon to scoop out teaspoon-sized portions of each dough. Roll each portion into a ball and set aside.
- Next, take three portions of each color (you should have six little teaspoon-sized balls total) and place them in a small circle, alternating colors (red, white, red, white, etc.)
- Use your fingers to press the different colors together to close the gap in the middle. Then cup your hand to round out the edges of the cookie. Gently use your forefinger to push the stripes of color in the same direction to give them a slightly swirled look.
- Repeat with the remaining dough. You should end up with about 24 cookies. If desired, pour 1 cup of granulated or sanding sugar into a small bowl and toss the cookie dough in the sugar until it's fully coated. This adds a delicious bit of texture once the cookies are baked.
- Chill the cookies in the fridge for 30 minutes or the freezer for 15 minutes, then place the cookies a few inches apart on the prepared baking sheets (they spread quite a bit!). I'd recommend only baking about 6 cookies on a tray at a time. Bake one tray at a time on the middle rack of your oven for 11-13 minutes, or until the edges look set but haven't started browning yet.
- Remove the tray from the oven and let the cookies cool on the tray for 15 minutes, then move them to a wire rack to finish cooling. These can be stored in an airtight container at room temperature for up to 5 days.
Video
Notes
How Many Cookies Does This Recipe Make?
This recipe makes about 24 cookies and can be doubled if needed.Can I Make These Cookies In Advance?
You absolutely can! The cookie dough can be stored in the refrigerator for up to 2 days before being baked. You can also shape the unbaked cookies and store them in an airtight container for up to 2 days. Cookie dough balls can also be frozen for up to 2 months. The cookies can be baked straight from the freezer, but will need a couple of extra minutes of bake time. Baked cookies can also be frozen for up to 2 months.Tips for Making the Best Peppermint Sugar Cookies
- Really cream together the butter and sugar at the start of the recipe. It should become lighter in color and look kind of fluffy once it’s properly creamed together. This will give the cookies a nice, chewy texture.
- Space your cookies about 2 inches apart before baking them. They will spread as they bake.
- Don’t over-bake your cookies! The color of the dough makes it hard to tell when they start to brown, so keep an eye on the texture of the top of the cookie. Even if they seem a bit soft coming out of the oven, they will continue to bake and set on the tray once they’re out of the oven.
- Use gel food coloring to color the dough. Liquid food coloring and throw off the consistency of the dough, making it harder to portion and roll out.
Nutrition
Other Recipes You Might Like:

would love a video/pics on how to swirl these cookies. ?
Made these cookies last night. They are so festive and delicious! They are a little big though. My last two batches I did try to make the balls smaller, which helped, but still a little larger than I’d like. Next time I’ll try to make the balls even smaller. And I couldn’t master the “swirl”, but they look pretty good!
This recipe was so easy and turned out great on the first try! I recommend that you give your cookies a lot of room when baking- they spread like crazy, but the texture was perfect! Thank you for sharing this recipe.
Cute but not worth the effort. These take sooo long to make and the swirl is difficult to make. Lost its fun factor after the second hour of dough shaping. Not even done yet and not even at the refrigeration part yet. 🙁
I made these. Rolled size balls as indicated. Followed the instructions to the letter (am a retired Home Economics teacher). It was a dismal failure. The cookies came out he size of dinner plates! Did I do something wrong?
Hi Karla,
I am so sorry to hear that!! The cookies do spread as they bake, but definitely not to the size of dinner plates! They should be able the size of your palm when using a teaspoon to measure out each little ball of dough. Out of curiosity, did you bake them on parchment paper or silicone mats? I will say cookies spread more on silicone mats! Is there a chance that might be the cause? If not, we can keep troubleshooting and hopefully figure out what happened <3
What red dye do you use? The link just sends me to the Amazon home page.
Ah thank you for letting me know Kelly! I just updated the link, here it is: https://amzn.to/48KS3Hy
I usually use either Americolor or chef master super red gel food coloring, both work great! Hope that helps for the future, happy baking!
I made a quadruple batch of these to go into holiday cookie boxes, and they were SO GOOD, but the swirling method was way too tedious for me. I ended up rolling six logs of dough instead of six balls, pushing down one side of each log to make it more triangular/tear drop shaped, and then rolling them into one big log to chill before slicing, which worked super well! I had to make a few of the monster logs to keep them at a workable size, but got about 20 or 25 cookies from each. It took a bit of adjusting to get the swirl to come out right but ended up being way less effort than rolling six balls for each cookie.
I’d for sure recommend anyone try this recipe, the cookies were easily some of the best peppermint cookies I’ve ever had, but I’d definitely advise you try a different method for shaping them if you’re making any more than one batch.
QUADRUPLE??!?! You go girl!!
Yah I can’t imagine rolling out that many little balls, your system sounds way faster! I’m so happy to found a way to speed up the process 🙂 Thank you so much for sharing, your comment will definitely be helpful for anyone who wants to make multiple batches in the future!
Has anyone had any success in subbing out gluten free flour in these cookies? I made them following this recipe last year and they were amazing, but this year I have a few people with dietary restrictions on my cookie box gift list.
@Ellie,
I always use King Arthur Measure for Measure gluten free flour. My cookies chime out perfect every time and no difference in flavor or textures
Yess that is my go-to for GF flour too!! Works great in just about every recipe I’ve tried it in!!
Hi Ellie,
If you use Bob’s Redmill cup for cup GF baking flour in place of the AP flour, they should turn out great 🙂 Hope that helps, happy baking!
These are delicious and so cute!!
Yes!! So happy to hear you loved this recipe Ella 🙂 Thank you for sharing!
Highly recommend adding a note to bake these on parchment paper vs silicon mat to avoid overspreading. and bake 6 on sheet vs the standard 12 at a time.
@Sarah Cuaresma, they are delicious and take a lot of time but cute!
Totally agree!!
Appreciate the feedback Sarah! I’ve updated the recipe card to reflect that 🙂 Thanks for sharing!