
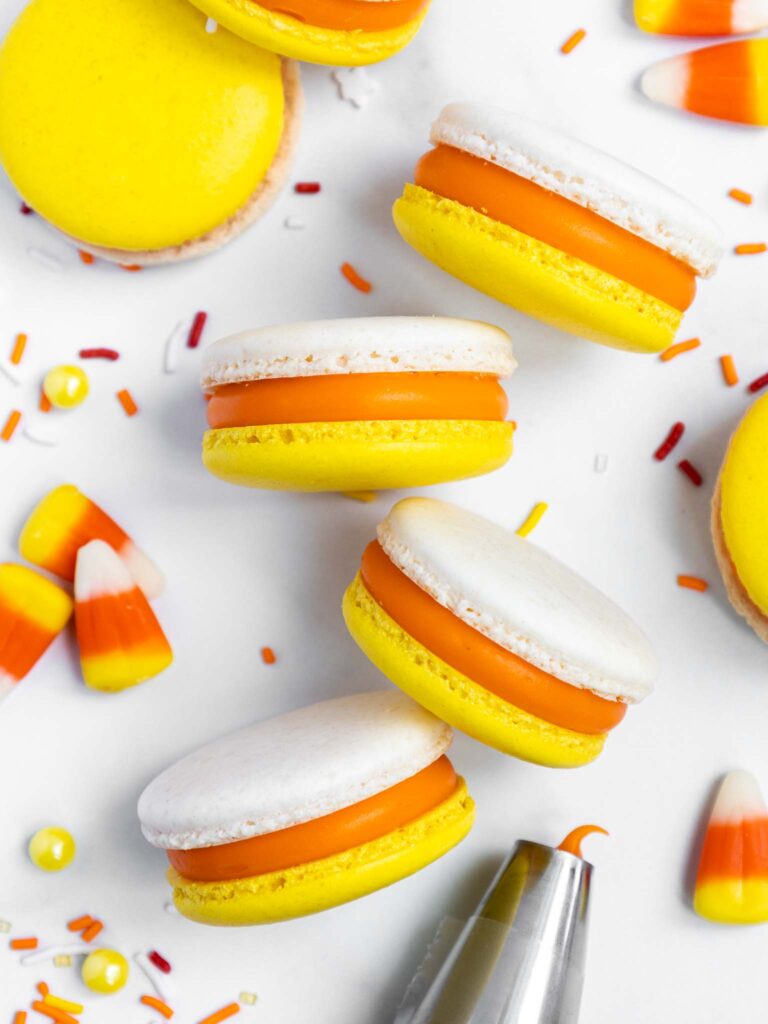
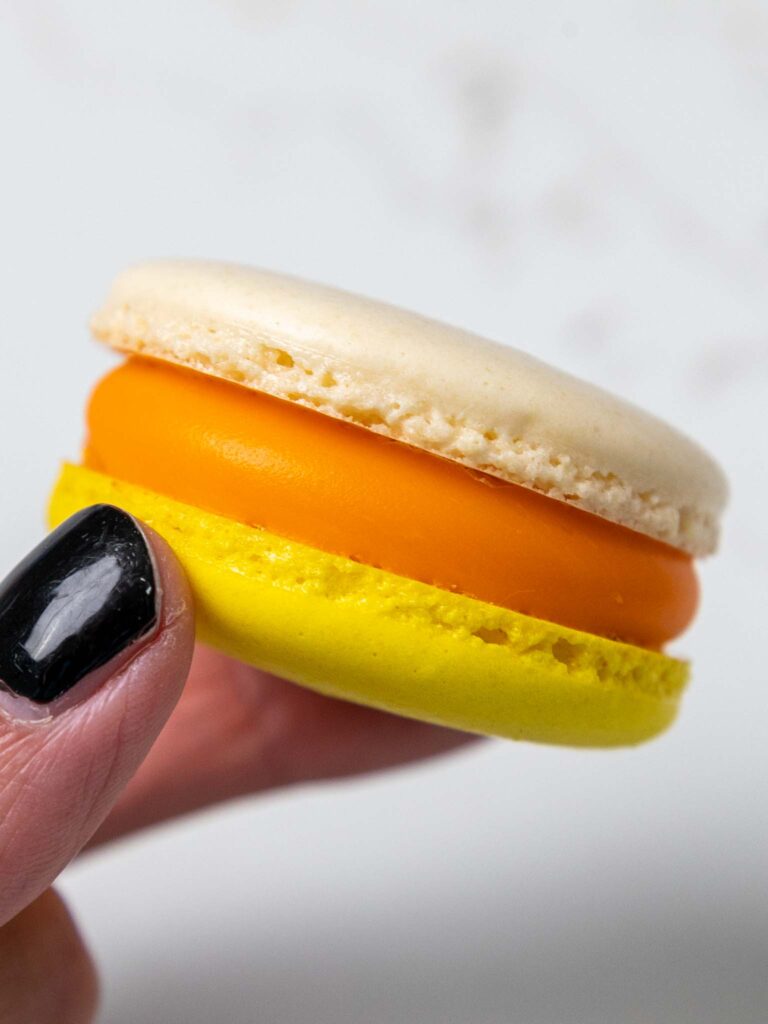
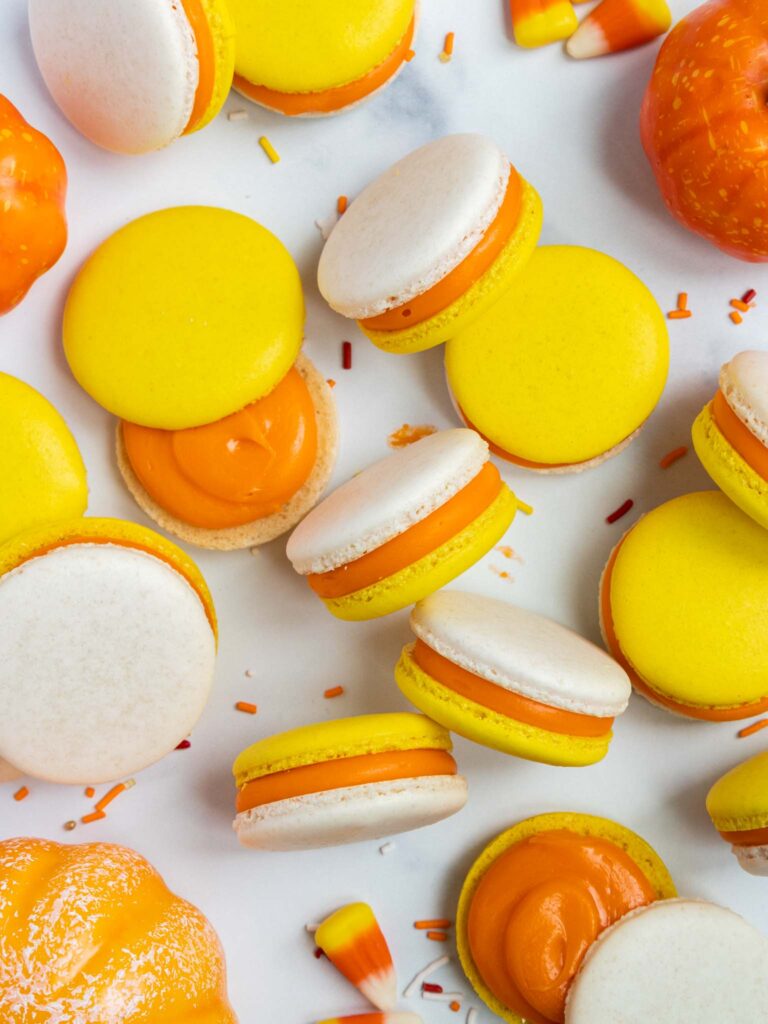
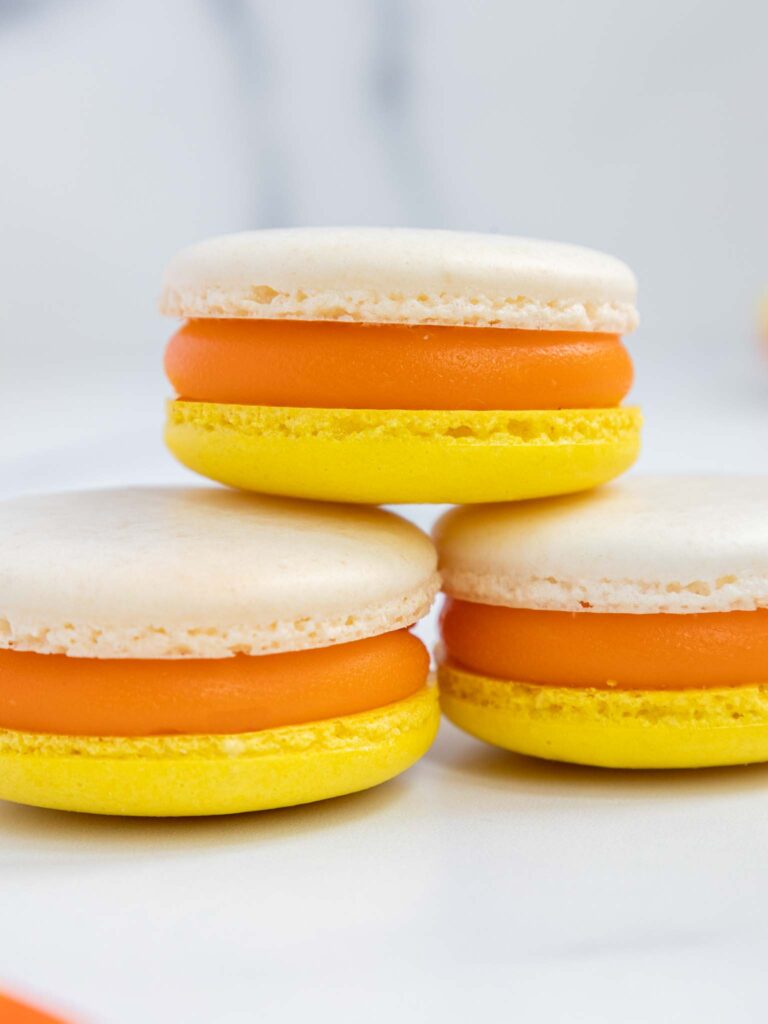
Candy Corn Macarons
These candy corn macarons taste just like our favorite little Halloween candies and are filled with candy corn ganache!!
While candy corn can be a divisive candy, I strongly believe that people who don’t like candy corn or think it tastes waxy just haven’t had good candy corn.
Good candy corn tastes like vanilla and honey and has a chewy texture that is far from waxy!
It’s a delightful Fall treat and these candy corn macarons are full of those same delicious flavors.
Making These Candy Corn Macarons with the French Method
There are a few different ways macarons are made.
French macarons are considered the easiest to make while the Italian and Swiss methods use a few more steps but are more structurally sound.
French macarons also require less equipment. While I love Italian macarons, I like to keep things simple and use the French method for this recipe.
Equipment You’ll Need to Make These Candy Corn Macarons
I’ve made quite a few batches of macarons, and they definitely turn out best when the ingredients are weighed, and the macarons are baked on a silpat mat.
These are the tools I like to use when I make these macarons:
- Kitchen scale
- Fine Mesh Sieve
- Stand Mixer or Electric Mixer
- 1 Small (12″) piping bag (for the filling)
- 1 Large (18″) piping bag (for the batter)
- 2 Round piping tips (for the batter and filling)
- 2 Large, flat baking sheets
- Silpat Mats (or parchment paper)
How to Make These Candy Corn Macarons: Step-by-Step Process
While the recipe below is quite detailed, I find visual cues to be super helpful!
Below are some photos of the process and a video tutorial to help guide you through this recipe.
Step #1: Make the Candy Corn Ganache
The secret to making candy corn ganache is to infuse heavy cream with melted candy corn. It packs these macarons with candy corn flavor and makes them so delicious.
This candy corn ganache filling needs about 3 hours to set, so I recommend making it first. It can also be made up to a week in advance. I usually make it the night before.
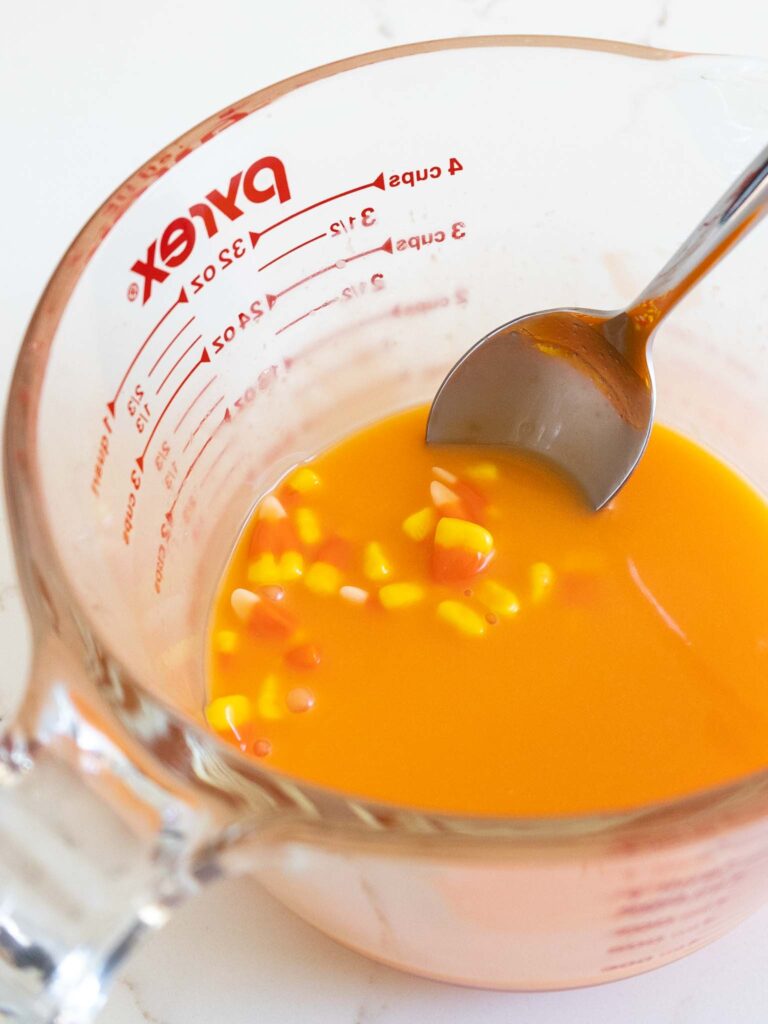
After heating up the cream and pouring it over the candy corn, stir the mixture then let the mixture sit for about 10 minutes.
Once the candy corn seems to have flavored and colored the heavy cream, strain the cream into a heat proof bowl or pot and heat again until it begins to bubble.
Then pour the warm candy corn cream into a separate bowl with the white chocolate, honey, and orange gel food coloring.
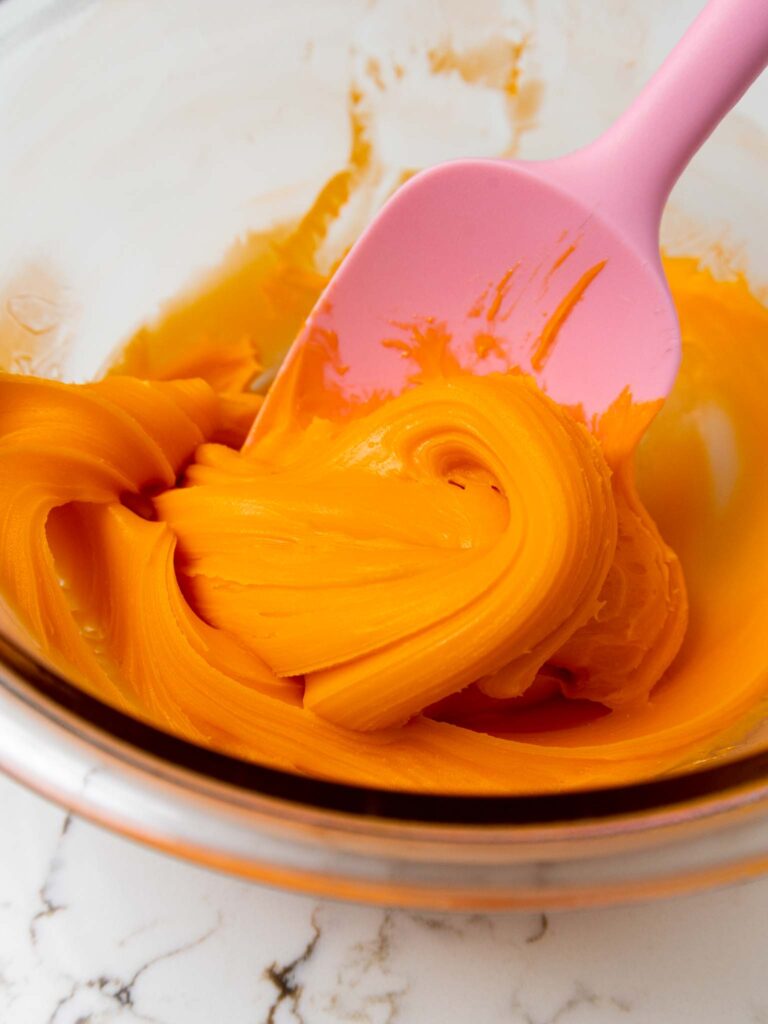
Let the mixture sit for a couple minutes, then mix it together with either an immersion blender or a spatula.
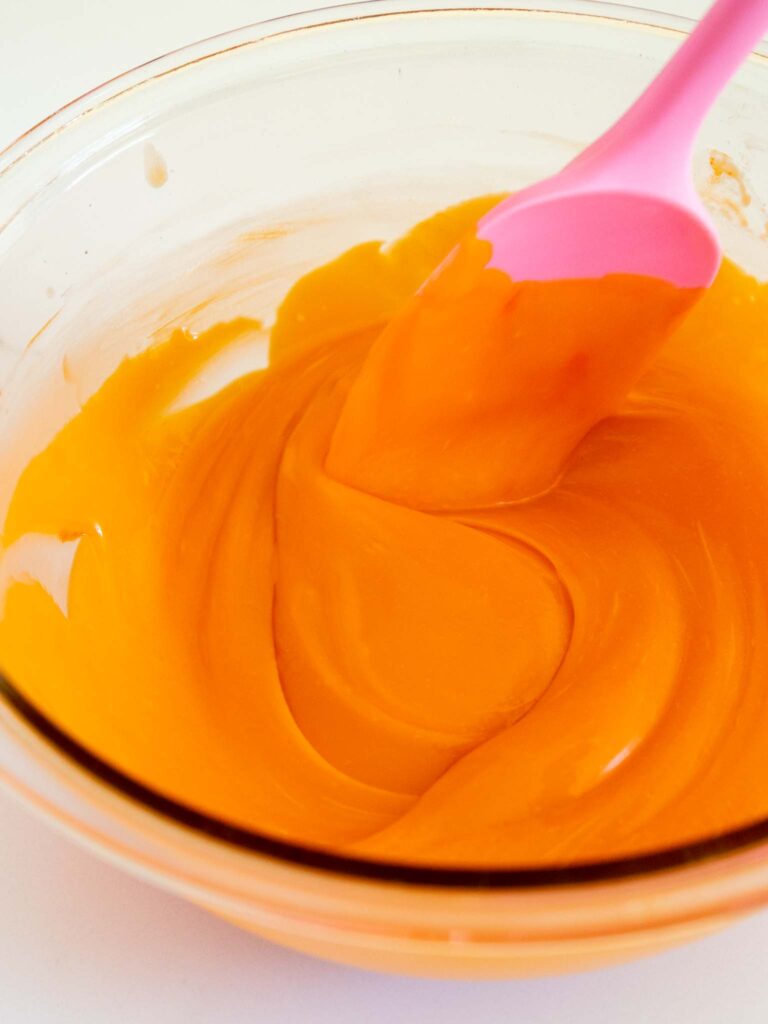
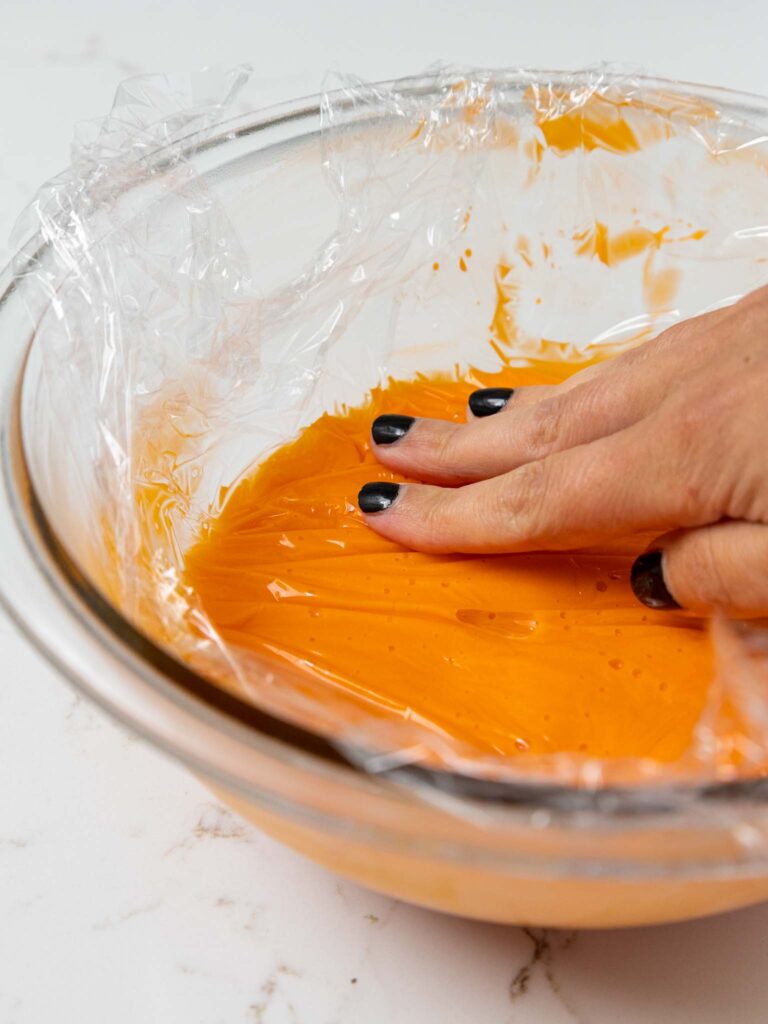
Once the mixture has come together and is smooth, press a piece of plastic wrap flush against the ganache and place the bowl in the fridge to chill.
Step #2: Make the French Meringue
Next, it’s time to make the French meringue!
Whisk the room temperature egg whites on a medium-low speed until the surface is covered in small bubbles.
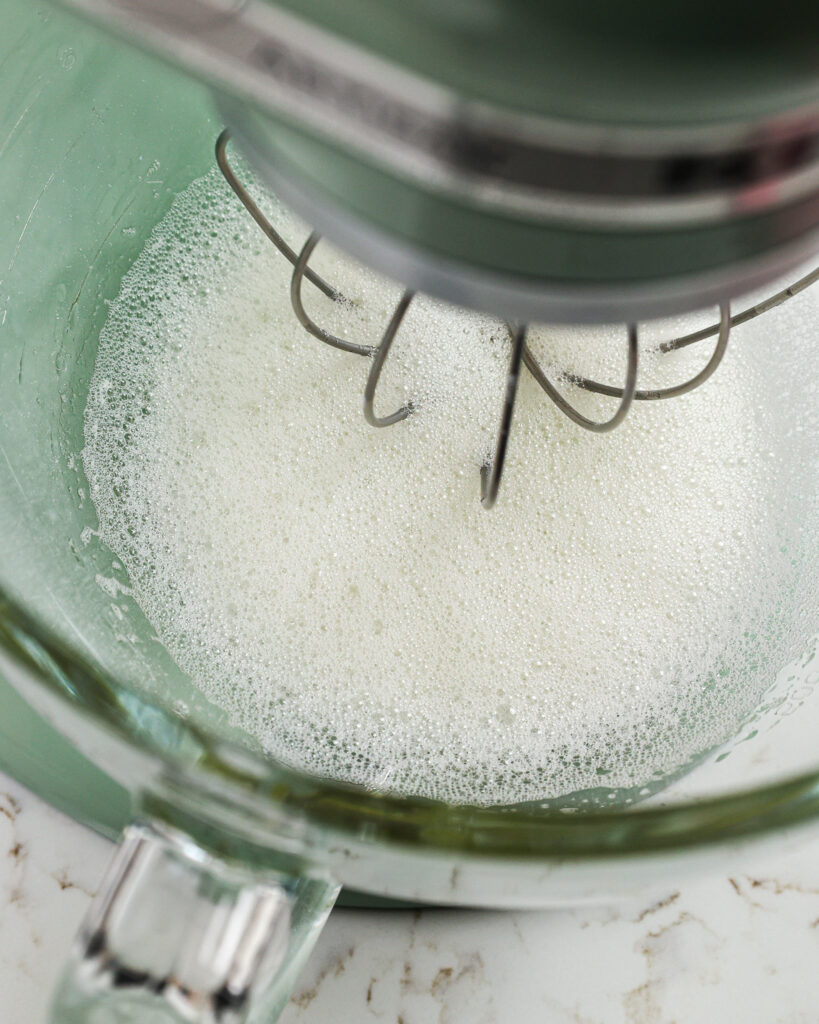
Add in a pinch of cream of tartar and continue to mix until the whisk begins to leave tracks.
Gradually add the granulated sugar and mix on a medium speed for 30 seconds. Then increase the mixing speed to a medium-high speed.
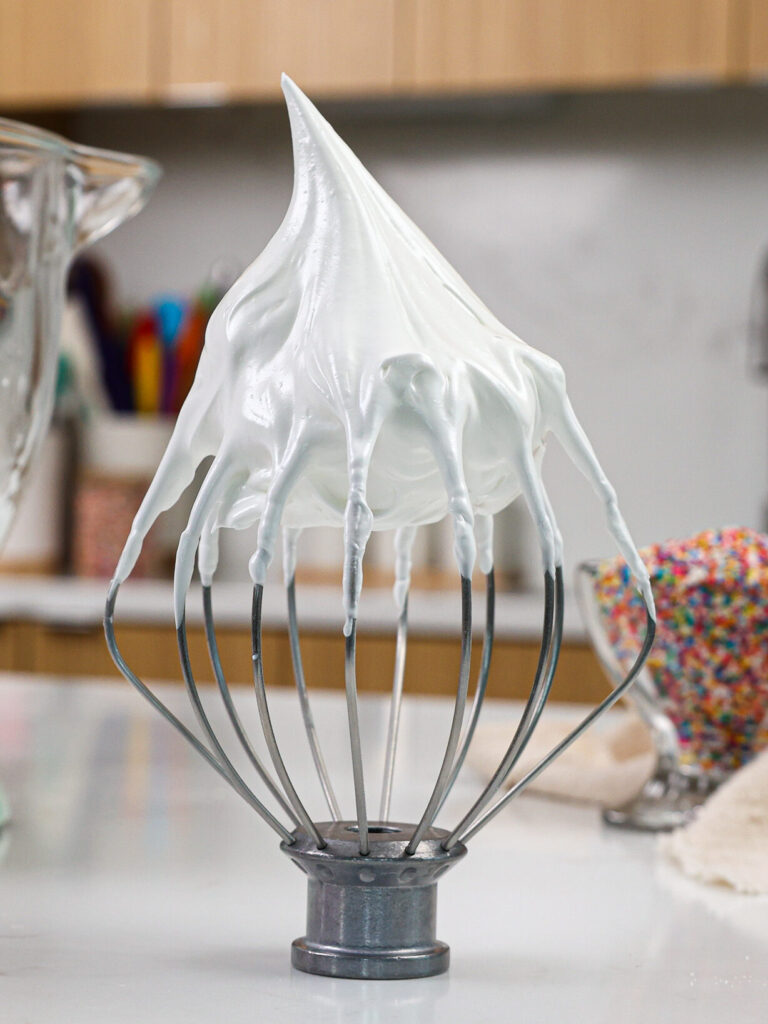
Mix until stiff peaks form like in the photo below. Keep a close eye on your mixer to avoid over mixing the meringue.
Step #3: Sift and Fold the Dry Ingredients into the Meringue
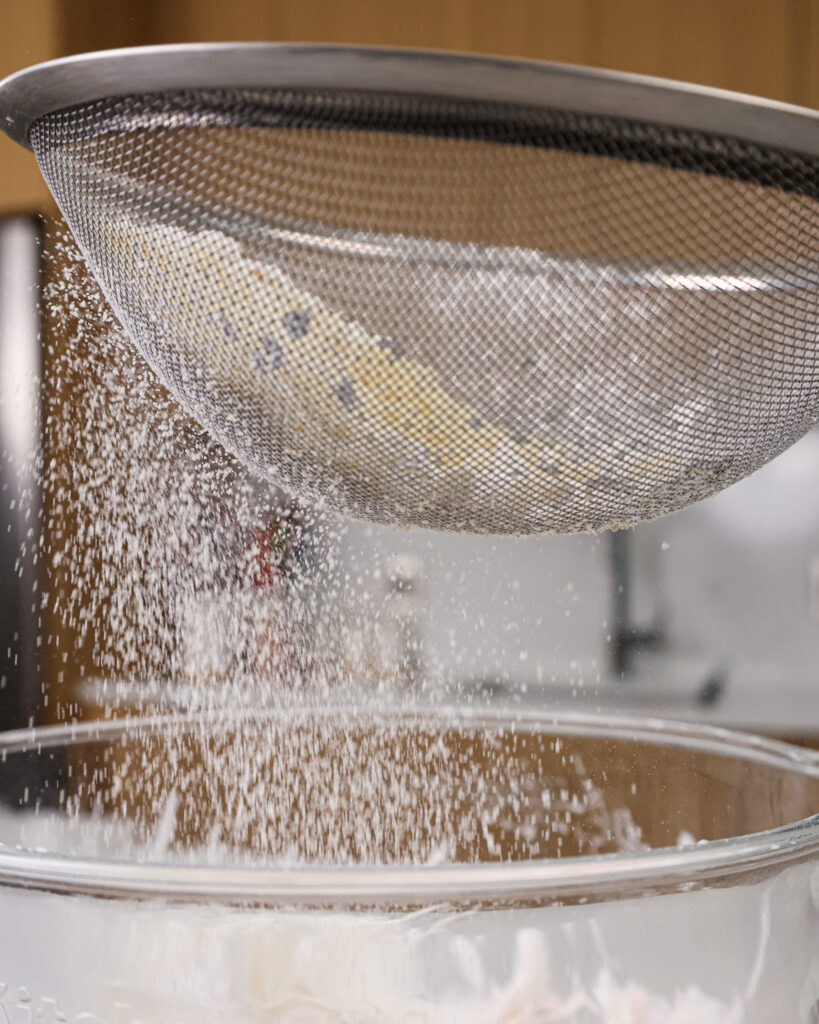
Sift the superfine almond flour and powdered sugar into the meringue, then add in the white gel food coloring. Fold the ingredients together with a rubber spatula.
Use a circular motion that sweeps around the edge of the bowl and then pulls through the bottom of the bowl to make sure everything is getting mixed together.
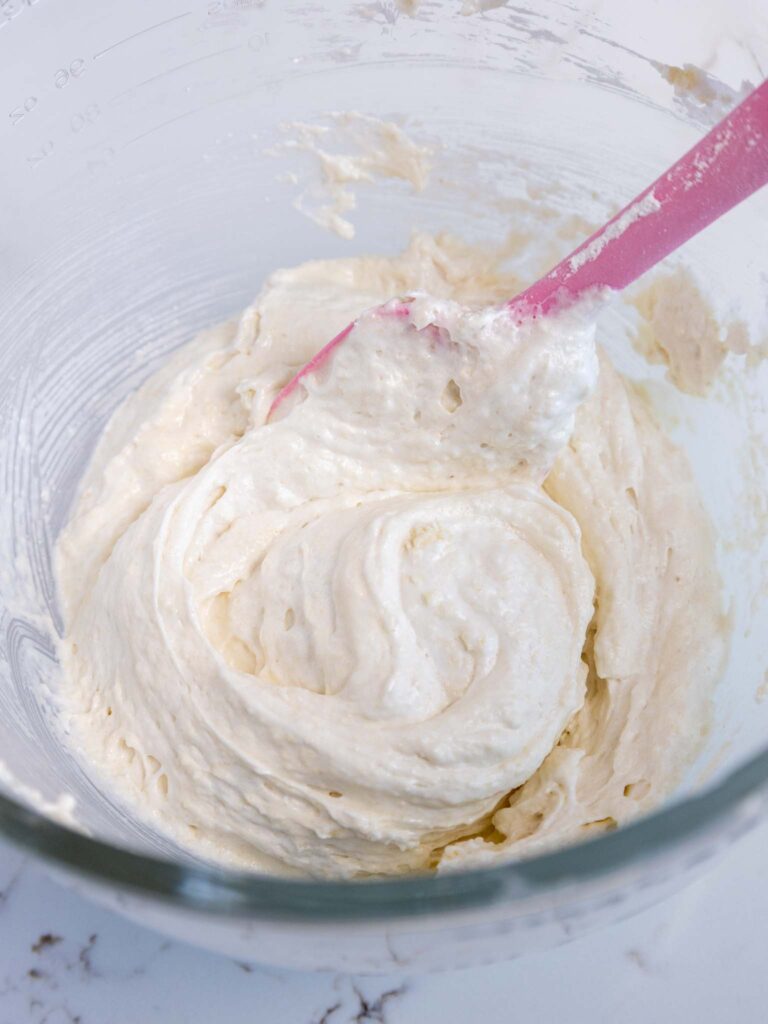
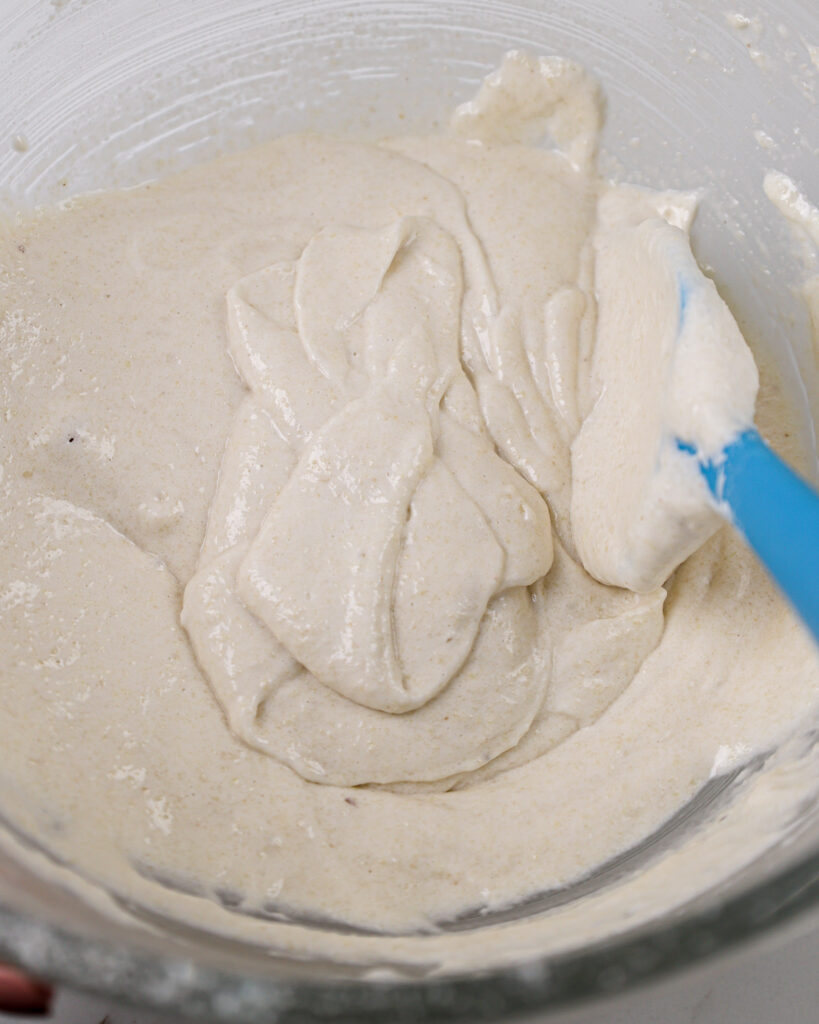
As soon as the dry ingredients seem mostly incorporated (like in the photo below), divide the batter evenly between two bowls (about 235g per bowl).
Add a generous squirt of yellow gel food coloring into one of the bowls.
Fold both bowls until a thick ribbon of batter runs off the spatula when it is lifted.
You should be able to draw a few figure 8’s with the batter running off your spatula in a continuous stream once it is the right consistency.
If the stream of batter breaks before you’re able to do this, you may need to fold it a bit more.
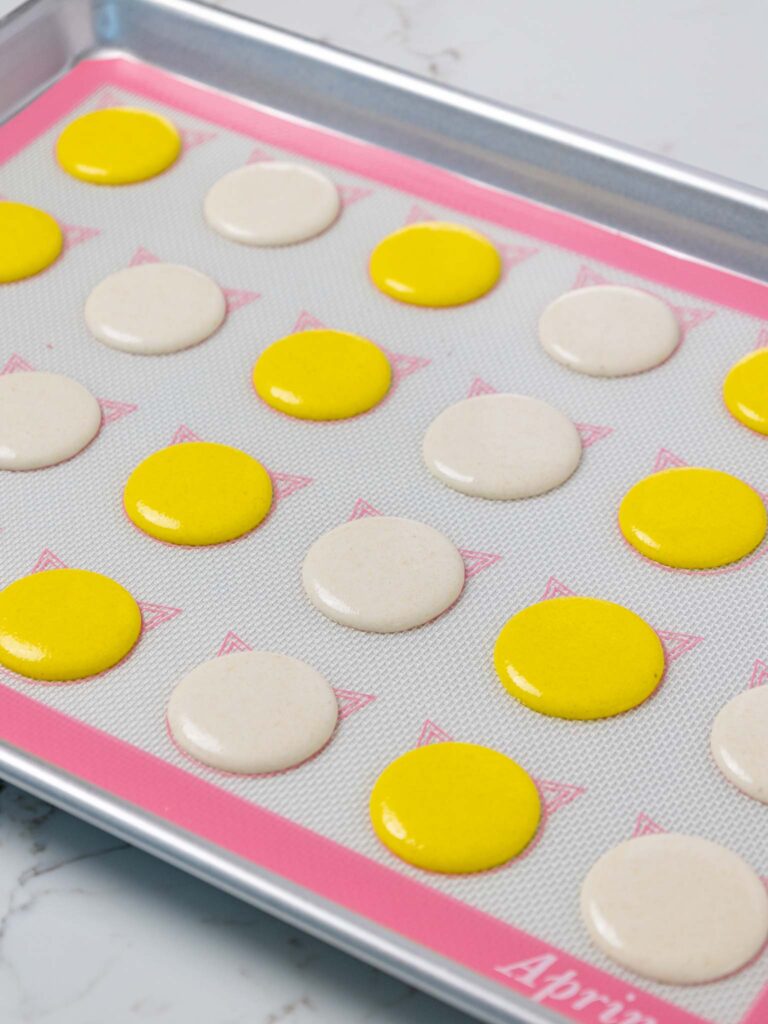
Step #4: Pipe the Macaron Shells
Pour each batter into a small piping bag fit with a medium-sized round piping tip like an Ateco 805 and seal the top of the bag with a rubber band or clip.
Pipe each shell to have a diameter of about 1 3/4-inch and spacing them about 1-inch apart.
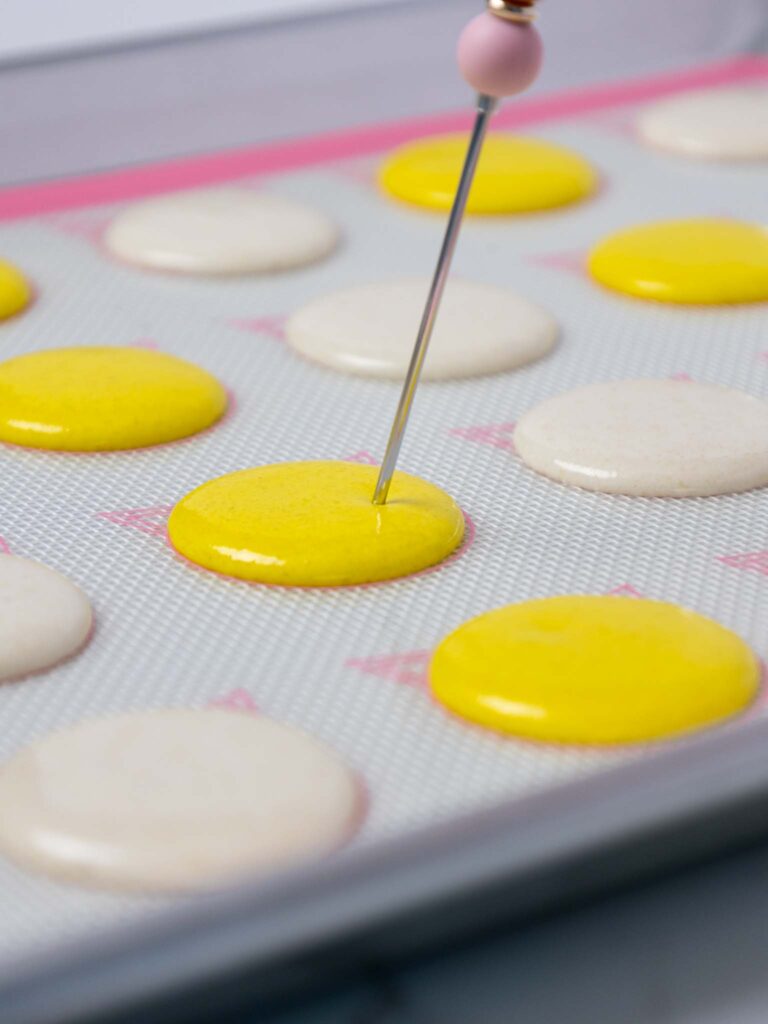
Firmly bang or drop your pans on the counter a few times.
This brings any trapped air bubbles to the surface, which can then be popped with a toothpick or scribe. Popping these little bubbles can help you avoid hollow or cracked shells.
Step #5: Rest the Macaron Shells
Let the macarons rest for about 30 minutes, or until they form a skin. On rainy days this can take up to an hour where I live!
They should be mostly dry to the touch and look matte once they’re ready to be baked. While the shells rest, preheat your oven.
Step #6: Bake the Macaron Shells
Bake one tray of macarons at a time and place the tray in the middle rack of your oven.
Rotate the pan halfway through to help them bake evenly. After you rotate the pan, place a foil tent over the shells to prevent browning as they finish baking.
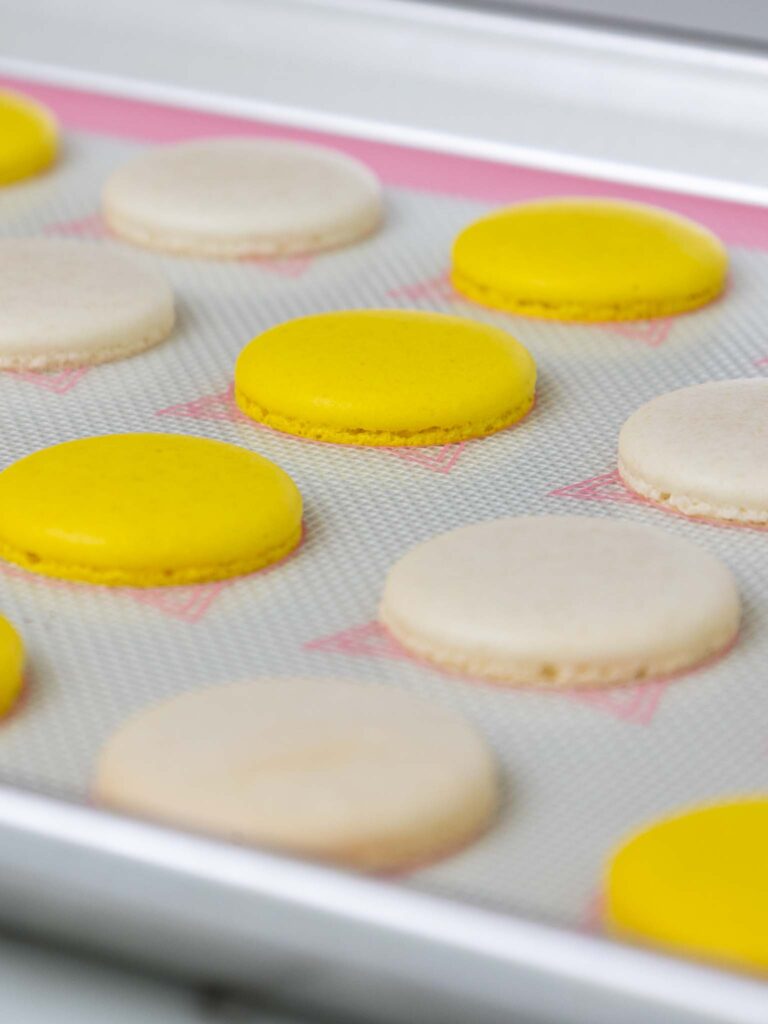
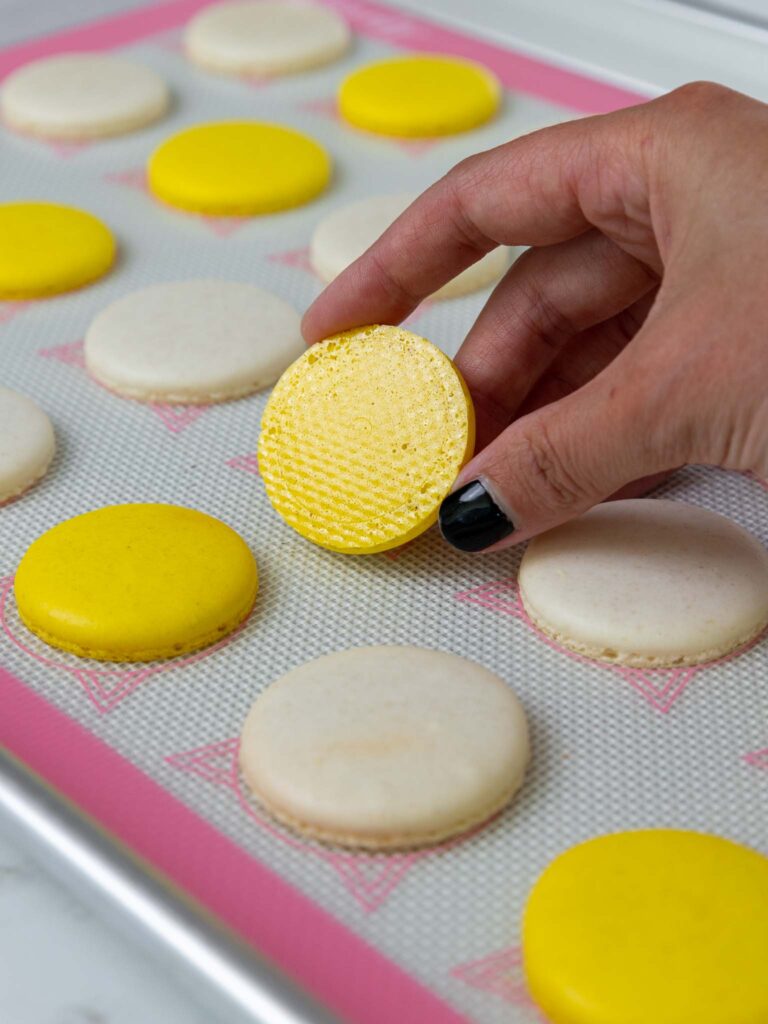
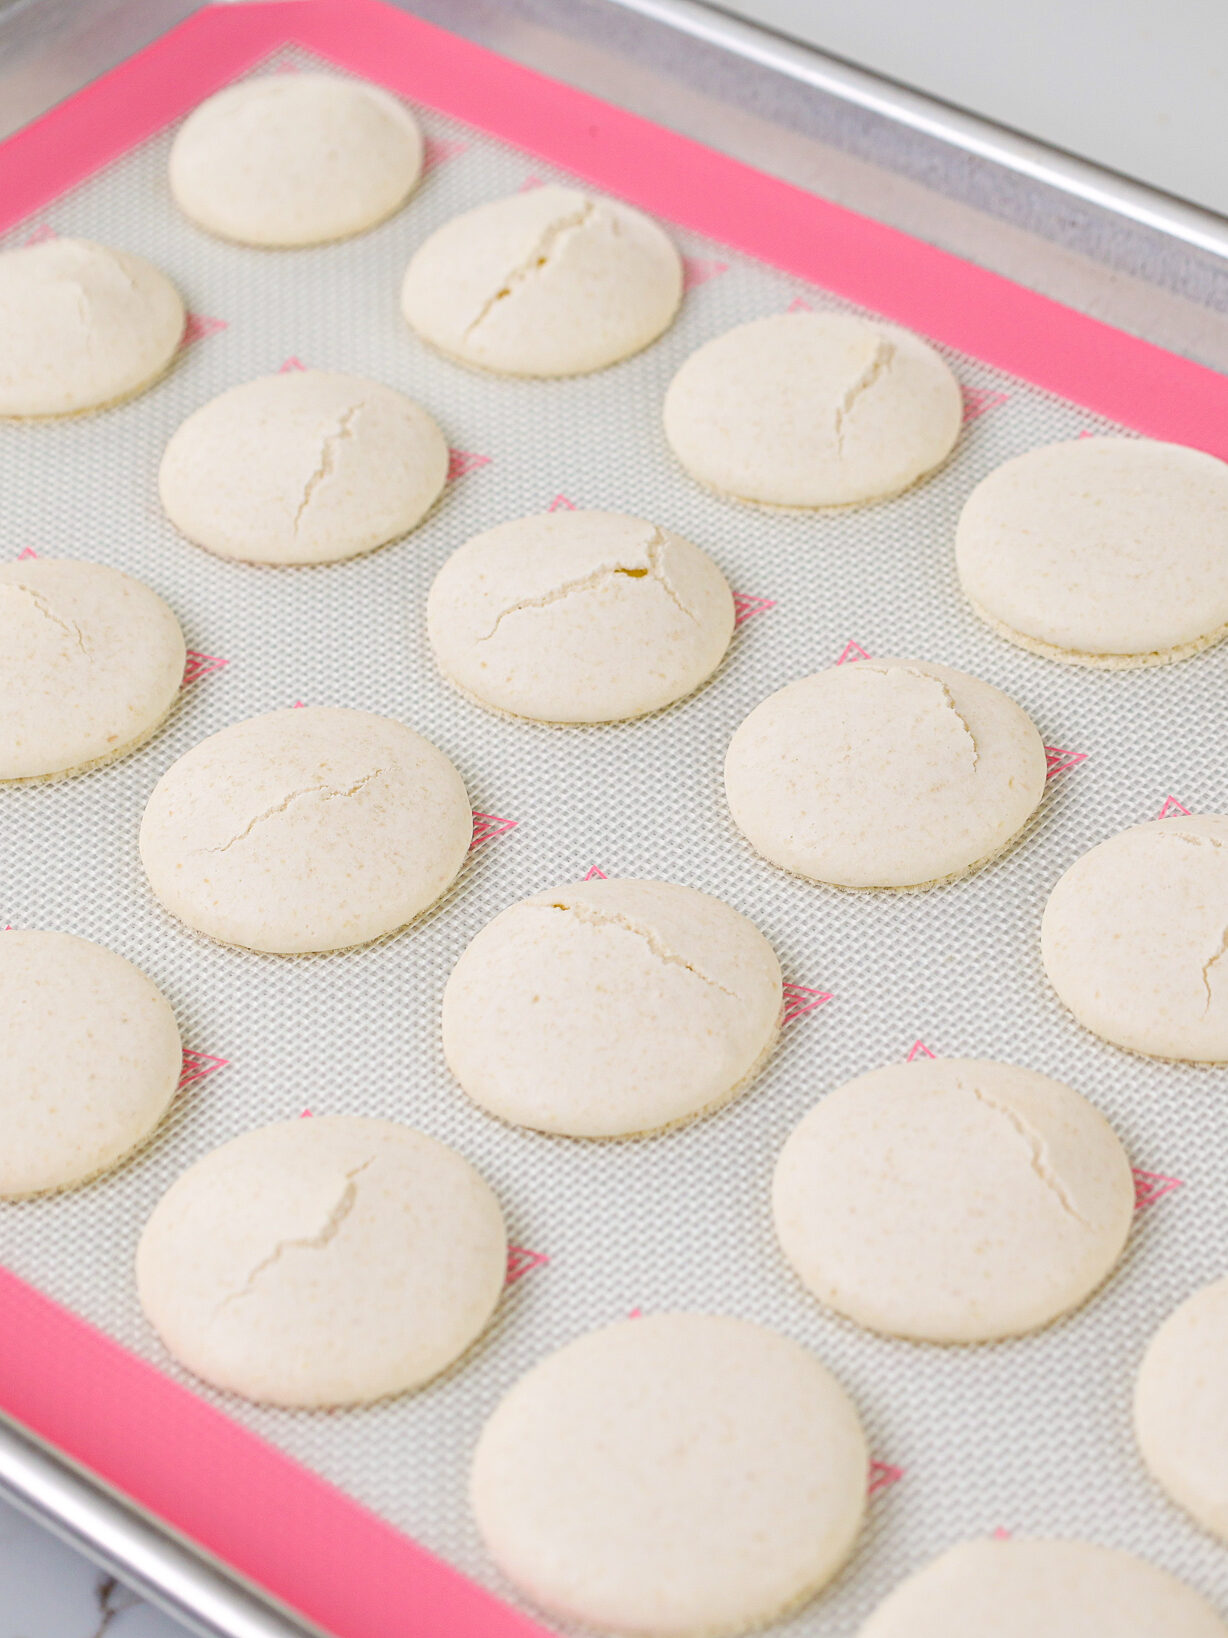
Let the macarons cool fully on the pan, then gently remove them from the silpat mat.
If they’re properly baked, they should peel off the mat cleanly.
Step #7: Assemble the Macarons
While the macaron shells bake and cool, place the ganache in a piping bag fit with a large round piping tip.
It should be quite thick and hold its shape well. Once the ganache is in the piping bag, let it come to room temperature to make it easier to pipe.
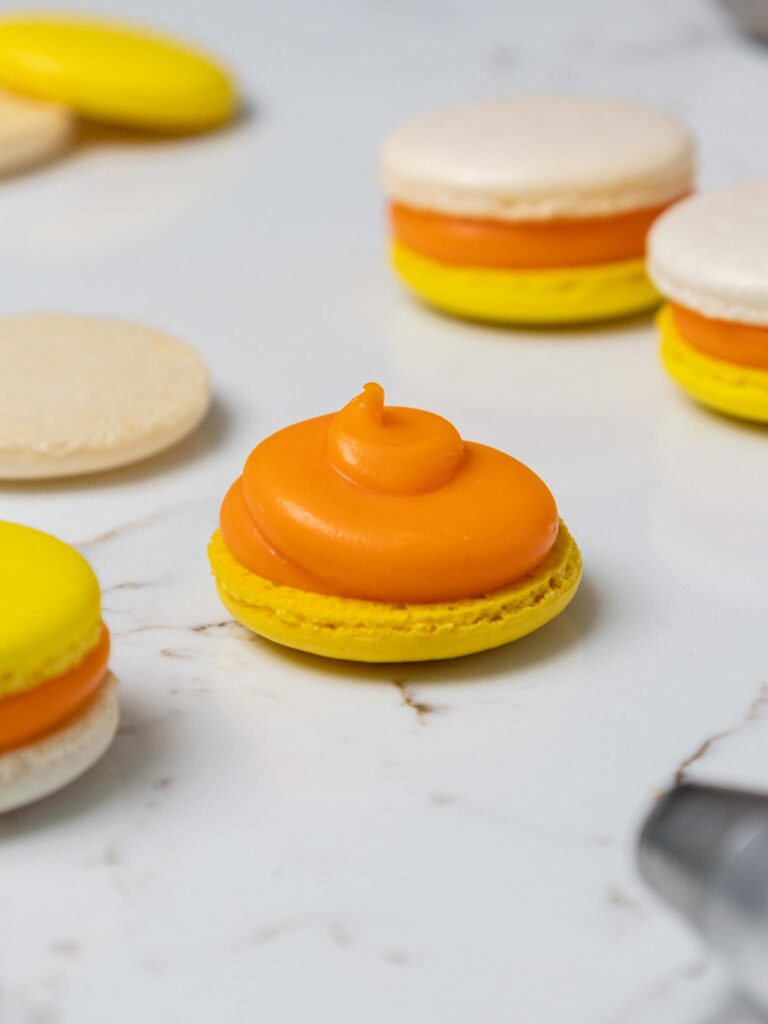
Pair up the macaron shells (one yellow and one white) then pipe a thick dollop of candy corn ganache on one macaron shell.
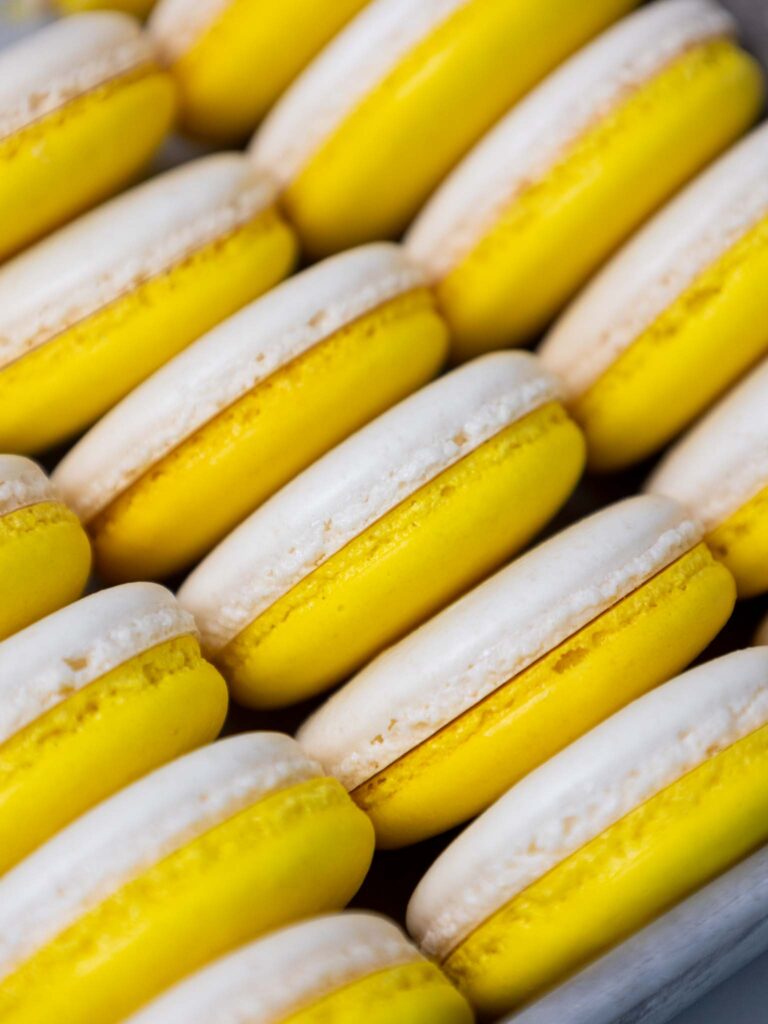
Then gently press a second shell on top of the ganache to create a sandwich.
Place the finished macarons in an airtight container and store them in the fridge to let them mature overnight.
Letting the filled macarons rest overnight softens them (in a good way) and lets the flavor develop.
Troubleshooting These Candy Corn Macarons
While I’d love to think everyone’s first batch of macarons will turn out perfectly, my own experience has taught me that’s not how things usually go.
Macarons are incredibly temperamental, and it might take a few tries to get them just right. If you run into any issues, check out my macaron troubleshooting guide!
Choosing the Right Filling for These Macarons
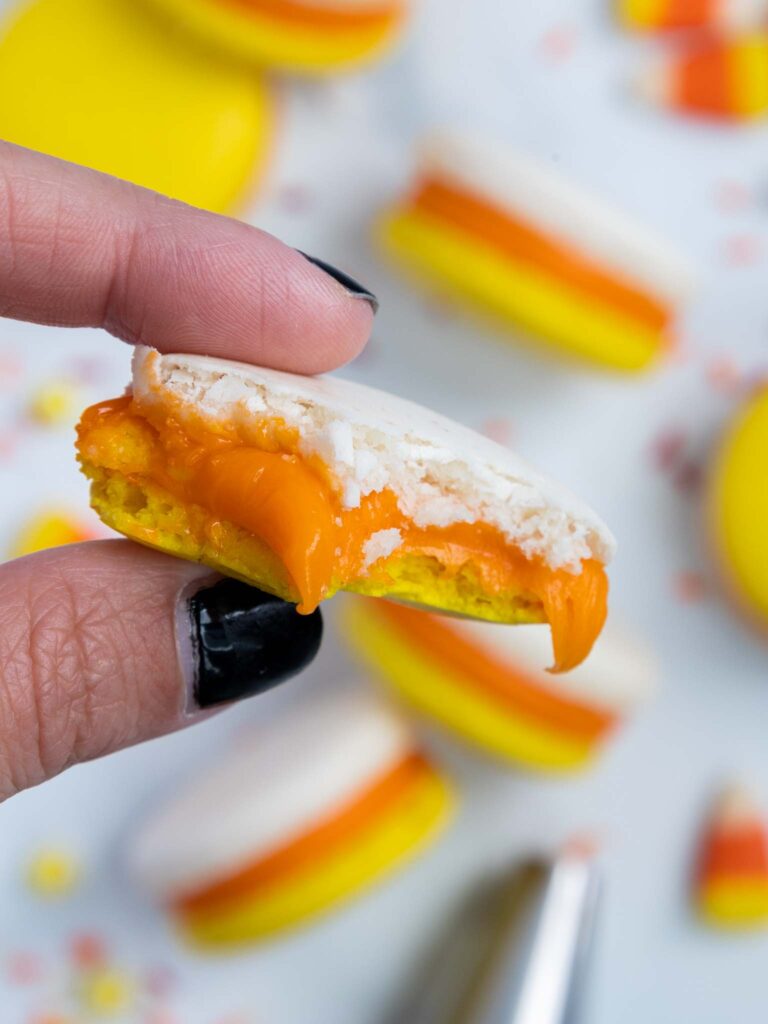
While we put tons of energy into the shell of a macaron, almost all the flavor in a macaron comes from its filling.
The shell gives macarons an incredible texture, but the filling is what determines its flavor.
I think this candy corn ganache is absolutely incredible and makes these taste *exactly like candy corn* but you could also use buttercream if you prefer it!
I’d recommend using a 1/4 batch of my white chocolate buttercream and add a tablespoon of honey.
Recipe Yield
This recipe makes about 40 large macaron shells, which can be used to make 20 macarons.
You can double or halve this recipe as needed.
The yield and bake time will vary based on the size of macarons you pipe. I piped these shells with a diameter of 1 3/4-inches.
Tips for Making the Best Candy Corn Macarons
- Wipe your mixing bowl and whisk with lemon juice or vinegar to remove any traces of grease before making the meringue. It will help your egg whites whip up better!
- Separate your own eggs and age them if possible. Do not use egg whites from a carton.
- Measure your ingredients in grams with a kitchen scale. You really need to be precise with this recipe. Your macarons will turn out best if the ingredients are weighed.
- Use gel food coloring to color these macarons. If you try to use liquid food coloring, it can throw off the consistency of the batter.
- Use a macaron mat or print out a template to help you pipe consistently sized macarons.
- If possible, use an immersion blender to make sure your ganache turns out silky smooth!
- If you’ve never baked macarons before, pipe a small number of macarons on a few sheets to test your oven for hot spots and see if it bakes accurately. This way you won’t waste a whole tray of macs if your oven runs hot or cold.
- Test your oven temperature with an oven thermometer to make sure your macarons are baking at the correct temperature.
- Let your baked and filled macarons mature! This softens them (in a good way) and lets the flavor develop.
- If your macarons don’t turn out, check out my macaron troubleshooting guide!
Making These Candy Corn Macarons in Advance & Storage Tips
These macarons need to mature for a few hours or overnight in the fridge before being eaten. This gives them time to develop the best texture and taste.
Refrigerate macarons for up to 5 days in an airtight container.
Freeze filled macarons for up to a month in an airtight container.
Unfilled macaron shells can be frozen for up to a month in an airtight container.
You can make your filling ahead of time too or save any leftover filling! Store in an airtight container in the fridge for up to a week or in the freezer for up to a month.
Let Me Know What You Think!
If you make these candy corn macarons, I’d love to hear what you think! Please leave a rating and comment below.
Also tag me @chelsweets and use #chelsweets on social media so that I can see your delicious creations!
Other Recipes You Might Like:


Candy Corn Macarons
Ingredients
Candy Corn Ganache Filling
- 95 g candy corn 1/2 cup
- 170 g finely chopped white chocolate or white chocolate chips 1 cup
- 14 g honey 2 tsp honey
- 110 g heavy whipping cream, room temperature 1/3 cup + 2 Tbsp
- orange gel food coloring
White Macaron Shells
- 110 g aged egg whites – about 4 large egg whites
- 1/4 tsp cream of tartar – optional
- 110 g granulated sugar 1/2 cup + 2 tsp
- white gel food coloring – optional
- 140 g superfine almond flour – blanched 1 1/4 cups
- 125 g powdered sugar 1 cup
- White and yellow gel food coloring
Equipment
Instructions
Candy Corn Ganache
- This candy corn ganache filling needs about 3 hours to set, so I recommend making it first! It can also be made up to a week in advance. I usually make it the night before.
- Place 95g of candy corn in a medium-sized bowl and set aside.
- Add 170g of white chocolate and 14g of honey in a separate medium-sized bowl and set aside.
- Pour 110g heavy cream into a heat-proof bowl and heat in 15 second intervals in the microwave until it just begins to bubble (this usually takes me about a minute). If you don't have a microwave, heat the cream over a medium-high heat in a saucepan until it starts to bubble and steam.
- Pour the hot heavy cream over the candy corn. Stir the mixture with a spoon to help infuse the cream with the candy corn, then let it sit for about 10 minutes. The cream should become a light orange color.
- Pour the candy corn cream mixture through a strainer to remove the candy corn, then heat the strained cream up again until it just begins to bubble.
- Then pour the cream into the bowl with the white chocolate and honey. Add in a squirt of orange gel food coloring. Make sure all the white chocolate is submerged beneath the cream. Let the mixture sit for a couple minutes.
- Use an immersion blender or a spoon to mix the ganache until the mixture has come together and is smooth. Press a piece of plastic wrap flush against the ganache and place the bowl in the fridge to chill.
Candy Corn Macaron Shells
- Line two large baking sheets with parchment paper or silicon mats. Set aside.
- Pour 110g of aged egg whites into the bowl of a stand mixer with a whisk and mix on a medium speed until the surface of the egg whites is covered in small bubbles. Add in a pinch of cream of tartar and continue to mix until it reaches the soft peak stage.
- Gradually add 110g of granulated sugar into the eggs and mix on a medium speed for 30 seconds. Increase the mixing speed to a medium high speed. Keep mixing until stiff, glossy peaks form. Add in the white gel food coloring at this point. It will get mixed in as you fold the dry ingredient in during the next step.
- Sift 140g superfine almond flour and 125g powdered sugar into the meringue, then fold the ingredients together with a rubber spatula. Use a circular motion that sweeps around the edge of the bowl and then pull through the bottom of the bowl to make sure everything is getting mixed together. Don't forget to scrape off the inside of the spatula intermittently. Sometimes meringue can get stuck there and not get mixed in properly.
- As soon as the dry ingredients seem mostly incorporated, divide the batter evenly between two bowls (about 235g per bowl). Add a generous squirt of yellow gel food coloring into one of the bowls.
- Fold the batter in both bowls until a thick ribbon of batter runs off the spatula when it's lifted. You should be able to draw a couple figure 8's with the batter running off your spatula in a continuous stream when it's the right consistency. If the stream of batter breaks before you're able to dp this, you may need to stir it a bit more.
- Pour each batter into a small piping bag fit with a medium-sized round piping tip like an Ateco 805 and seal the top of the bag with a rubber band or clip.
- Pipe each shell to have a diameter of about 1 3/4-inch and spacing them about 1-inch apart.
- Bang the pans firmly on the counter a few times to release air bubbles, then pop any remaining air bubbles that come to the surface with a toothpick.
- Let the macarons rest for 30 minutes, or until they develop a skin. The macarons should look matte once the skin has formed. While the macarons rest, preheat the oven to 315 F / 157 C.
- Bake one tray of macarons at a time on the middle rack of your oven for 18-22 minutes and rotate the pan halfway through to help them bake evenly. After you rotate the pan, place a foil tent over the shells to prevent browning as they finish baking.
- Remove from the oven and let the macarons cool on the pan (about 15 minutes), then gently remove them from the silpat mat.
Assembling These Candy Corn Macarons
- While the macaron shells bake and cool, place the ganache in a piping bag fit with a large round piping tip. It should be quite thick and hold its shape well. Once the ganache is in the piping bag, let it come to room temperature to make it easier to pipe.
- Pair up the macaron shells (one yellow and one white) then pipe a thick dollop of candy corn ganache on one macaron shell. Then gently press a second shell on top of the ganache to create a sandwich.
- Place the finished macarons in an airtight container and chill in the fridge overnight, then enjoy! Store any leftover macarons in the fridge.
Video
Notes
Recipe Yield:
This recipe makes about 40 macaron shells, which can be used to make 20 macarons. You can double or triple this recipe to make more macarons if needed. The yield and bake time can vary based on how large you pipe your shells. I piped these shells with a diameter of 1 3/4 inches, so they're about the size of a standard macaron.Tips for Making the Best Candy Corn Macarons
- Measure your ingredients in grams with a kitchen scale! You really need to be precise with this recipe. Your macarons will turn out best if the ingredients are weighed.
- If possible, use an immersion blender to make sure your ganache turns out silky smooth!
- Separate your own eggs and age them if possible! Do not use egg whites from a carton.
- Carefully read through the directions before making these macarons. There are quite a few steps and it's good to know your game plan before you start!
- Use gel food coloring to color these macarons. If you try to use liquid food coloring, it can throw off the consistency of the batter.
- Use a macaron mat or print out a template to help you pipe consistently sized macarons.
- FIRMLY bang your pans on your counter after piping your macarons. This helps release any air bubbles that may be trapped and prevent cracked or hollow shells.
- Rest the macarons for 30 minutes before they're baked to allow them to develop a skin.
- Pipe a small number of macarons on a mat to test your oven for hot spots and see if it bakes accurately. This way you won't waste a whole tray of macs if your oven runs hot or cold.
- Test your oven temperature with an oven thermometer to make sure your macarons are baking at the correct temperature.
- Let your filled macarons mature in the fridge overnight! This softens them (in a good way) and allows the flavors to develop.
- If your macarons don't turn out, please check out my macaron troubleshooting guide for help!
Making These Candy Corn Macarons in Advance & Storage Tips
- French macarons need to mature overnight (or ideally 24 hours) in the fridge before being eaten! They taste best 24 hours after being made.
- Macarons can be refrigerated for up to 5 days in an airtight container.
- Filled macarons can be frozen for up to a month, but the length can vary based on the filling.
- Unfilled macaron shells can be frozen for up to a month in an airtight container.
- Your filling can be made ahead of time too or save any leftover filling! It can be stored in an airtight container in the fridge for up to a week, or in the freezer for up to a month.
I just made these macarons last night and they came out wonderfully! It was the first recipe I’ve used where I actually got “feet” on my macarons — thanks so much! I think I’ll be trying your Cookie Dough Macarons next 🙂
YAY!!! I am so happy to hear that Sarah!!! 🙂 Great job!!!!
@Chelsweets,
I tried these but my macarons came out larger and they started to brown/yellow on the top. Any reason or idea why??? I’ll try to make these again
Hi Deshaundra,
So sorry to hear that! Did you cover the trays with foil like the recipe card calls for? If you covered the trays with foil halfway through and the shells still browned, I’d recommend either lowering the temperature of your oven by 5-10 degrees or covering the tray for the entire time they’re in the oven. You might need to bake them a few minutes longer if you do either of those things, but it should prevent browning.
In terms of the shells being larger than you wanted, you might have slightly over-mixed the batter which can cause spreading, or you might have piped them too large. Next time i’d suggest either mixing the batter a tiny bit less or using a small piping tip and piping the shells a bit smaller. Hope that helps, happy baking!
I could not get the ganache to set. I left it in the fridge for 3 hours & it was still a little runny. I Eve put it in the freezer & it was still runny & dripped right off of the macaron shells. What did I do wrong?
Loved the flavor of the candy corn ganache, but mine turned out so runny. Even after freezing it over night, it melts quickly and makes the shells slide off. Any idea what went wrong? Followed the instructions to the letter. Thanks!
Hi Janet,
So glad you loved the flavor!! For the texture, it sounds like the ganache didn’t fully set — usually that comes down to the candy corn-to-cream ratio, the type of white chocolate used, or the temperature it was heated/cooled at. A couple things to try next time:
Use a little less cream (or a little more white chocolate) so the ganache sets firmer.
The brand/type of white chocolate makes a big difference. Some melt thinner and don’t set as firmly. Which brand did you use? I usually use Ghirardelli or the 365 brand from whole foods! Also – did you measure it with a scale or measuring cup?
Make sure the cream isn’t too hot when poured over the candy corn. Overheating can make it split and stay loose.
After mixing, let it cool at room temp until thickened before chilling. Straight to the freezer can sometimes make it grainy/runny.
If it’s still too soft, you can whip it slightly once it’s cooled for a fluffier, more stable filling. Hope that helps for next time, happy baking!!