

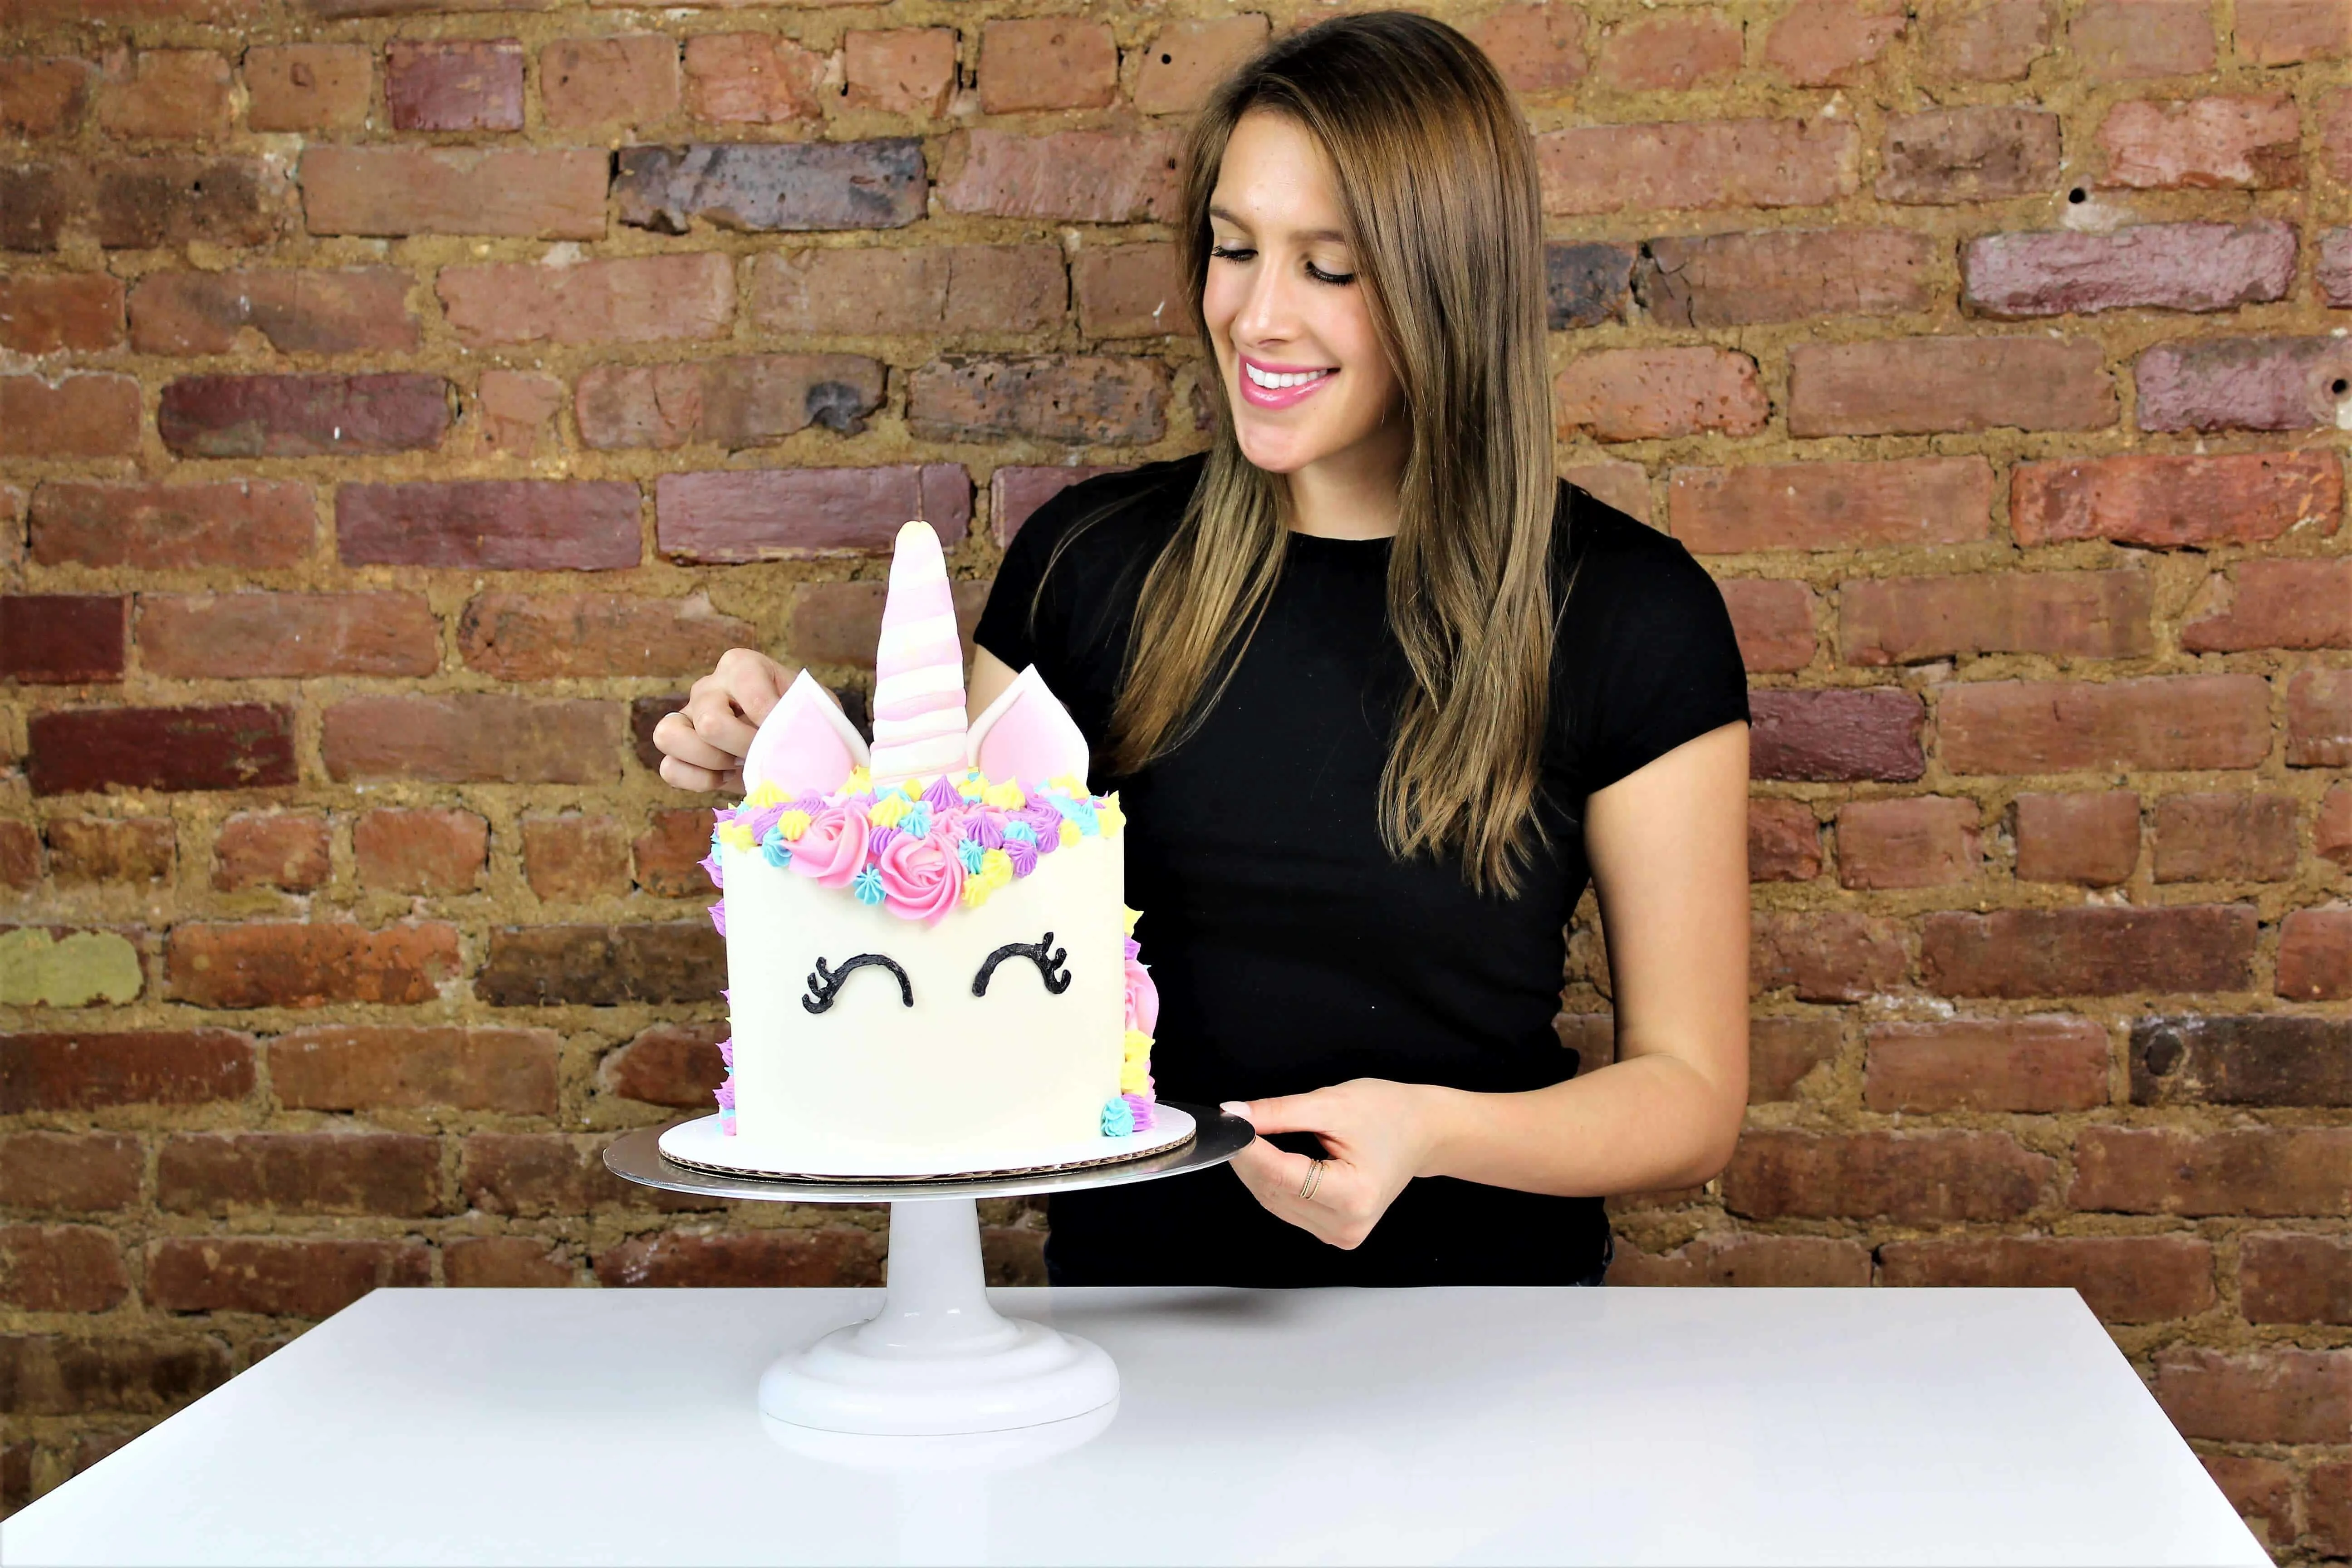
Unicorns have taken the internet by storm! I am a big fan of bright colors and sparkles, and knew this was a trend I wanted to jump on. I decided to make colorful cake layers with a fluffy vanilla buttercream, and decorate it with a swirled pink horn, bright buttercream accents, and some edible gold dust! You can see the full tutorial on my YouTube channel.
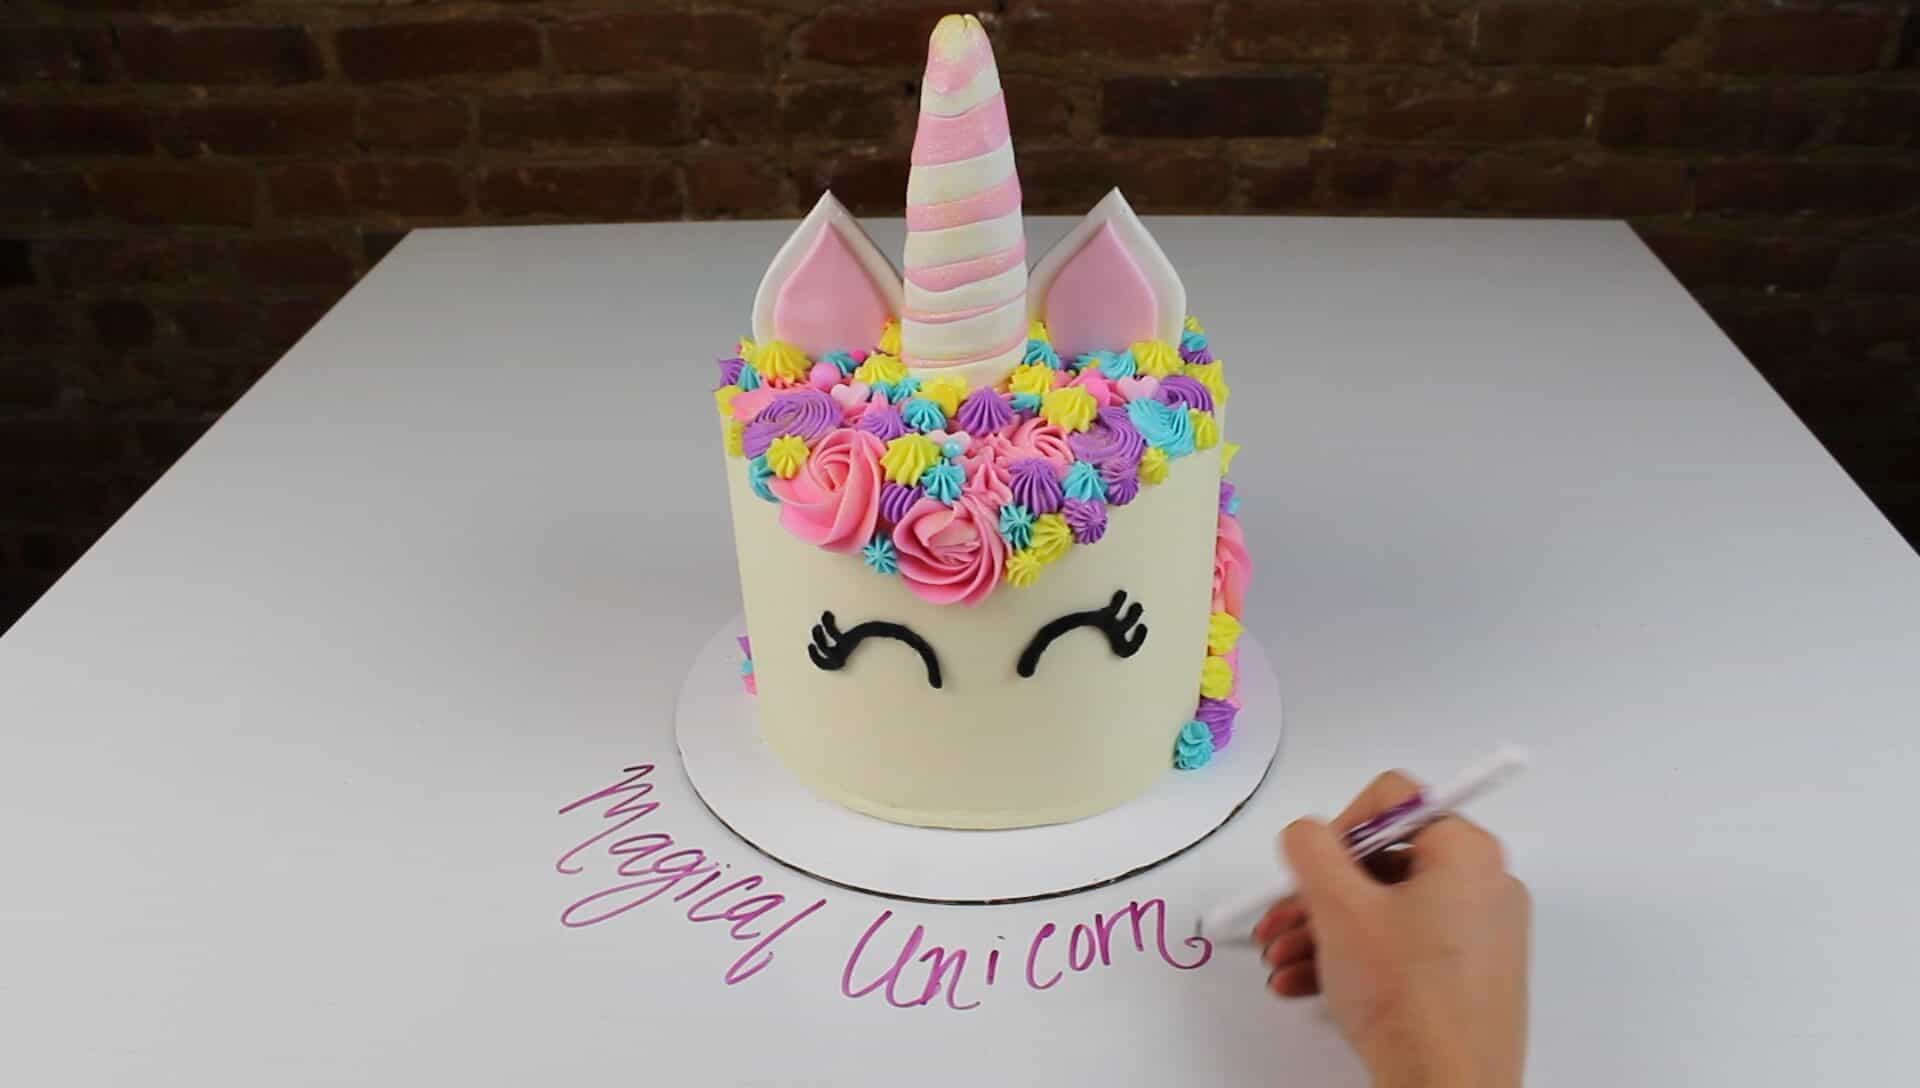
To visualize how I wanted to decorate this cake, I decided to the first step was to sketch out the design on my new baking table made with Formica® Writable Surfaces in the ImagiGrid design!

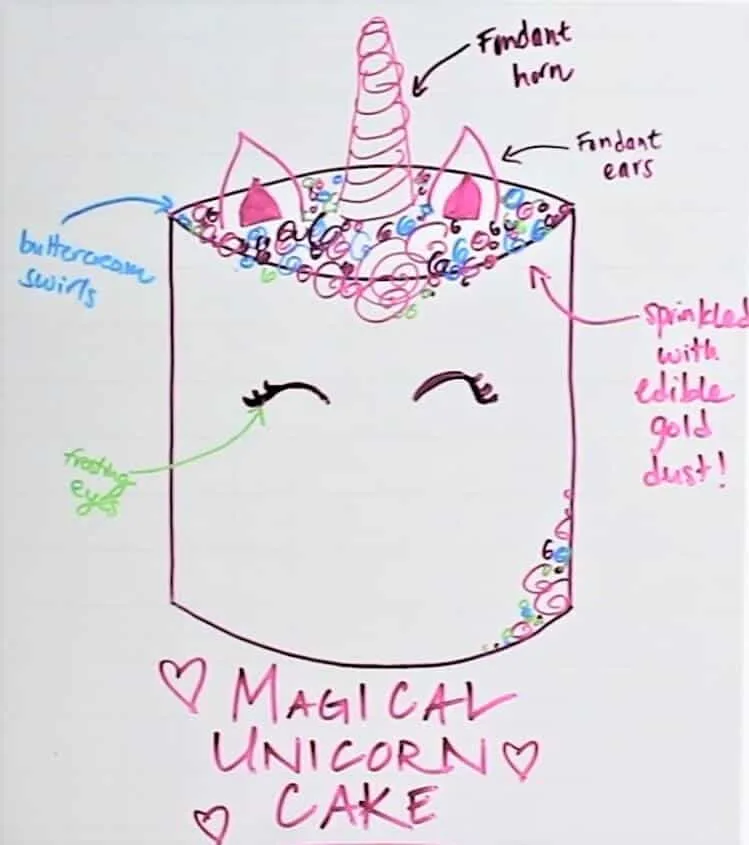 I love this surface, it’s super durable and versatile, and I love being able to sketch on my countertop using the 1” grid as a guide!!! It makes me feel like a kid again 🙂
Using a dry erase marker, I drew the below picture of how I envisioned this cake to turn out. It’s the perfect surface for jotting down quick notes, doodling or in my case, planning my next baking endeavor. It can be used on table like mine or in any room in the home in places like backsplashes, cabinets, doors, walls and more. Check it out here: http://www.formica.com/en/us/landing-pages/residential-launch/2017/new-collection
Once I finished my sketch, I began baking my cake layers! The recipes I used can be found below:
Colorful Vanilla Cake Batter:
- 3 1/4 cup flour
- 3 cups granulated sugar
- 2 1/2 tsp baking powder
- 1 tsp salt
- 1 cup unsalted butter (2 sticks), room temperature
- 3 tsp. vanilla extract
- 1 cup egg whites (about 7 large egg whites)
- 1 1/2 cups buttermilk, room temperature
- 1/8 cup vegetable oil
- blue, yellow, pink, and purple gel food coloring (4 drops each)
Vanilla Buttercream:
- 6 sticks (3 cups) unsalted butter, room temperature
- 12 cups powdered sugar
- 1 tsp salt
- 1/3 cup heavy cream
- 3 tsp vanilla
- blue, yellow, pink, purple,and black gel food coloring (2 drops each)
Additional Decorating Supplies:
- 1 cup pink fondant
- 1 cup white fondant
- 1cm wooden dowel
- 4 toothpicks
- pizza cutter
Instructions:
Preheat oven to 350°F. Grease and line four seven-inch round pans. Mix together all dry ingredients (flour, baking powder, sugar, and salt) in a stand mixer with a paddle attachment until fully combined. Mix chunks of butter slowly on a low speed. Continue to mix until the mixture becomes crumbly, and the butter is well incorporated into the dry ingredients.
In a separate bowl, combine the wet ingredients (vanilla extract, egg whites, buttermilk, and vegetable oil), and whisk to combine. On low speed, add 1/3 of the liquid ingredients to the dry/butter mixture. Mix until fully incorporated, scraping down the sides of the bowl as needed. Mix in the remaining wet ingredients in two installments, on a medium-high speed until fully incorporated.
Divide evenly into four bowls, and color each bowl a different color with 2 drops of gel food coloring. Pour batter into prepared cake pans. Bake for 35-40 minutes, or until a skewer comes out clean. Allow to cool for 10 minutes, then run an offset spatula around perimeter of the pan to separate the cake from the pan. Place cake layers on a rack to finish cooling.
While the cake layers bake, make the unicorn horn and ears. It’s important to prep these a couple hours before you decorate the cake, so that they have time to dry. Roll out 1/2 a cup of fondant into a horn like shape that is about 6 inches long, and insert thick wooden dowel into the horn. On a cutting board, roll out 1/3 cup of fondant into long, thin strips. very lightly wet one side of the strips, and then wrap them around the horn in a swirl pattern. Roll out remaining white and pink fondant 1/4 inch thick, and cut out the ears. I made two cardboard cut-outs, to ensure that my ears were uniformly sized. Set aside on parchment paper to harden.


Next, prepare the vanilla frosting! Beat the butter on high for 30 seconds with a paddle attachment, until smooth. Slowly add in the powdered sugar, 1 cup at a time. Alternate with small splashes of cream. Once fully mixed, add in the vanilla and salt. Beat on medium low until the ingredients are fully incorporated, and the desired consistency is reached. If the frosting is too thick, add in additional cream (1 teaspoon at a time). If the frosting is too thin, add in more powdered sugar (quarter of a cup at a time).
Put 3/4 cup of frosting into four different bowls, and coloring them to match the cake layers (blue, pink, yellow, purple). Place 1/4 cup of frosting into a different bowl, and color black. This frosting will be used for the unicorns eyes, and can be placed into a piping bag with a small round tip. Put the other colored frosting into piping bags with various frosting tips. You can use whatever tips you have on hand! I used a Wilton 1M for the pink, an atecco 22 for the blue, a wilton 4D for the purple, and an atecco 16 for the yellow. Leave the remaining white frosting in your bowl to frost the cake layers.

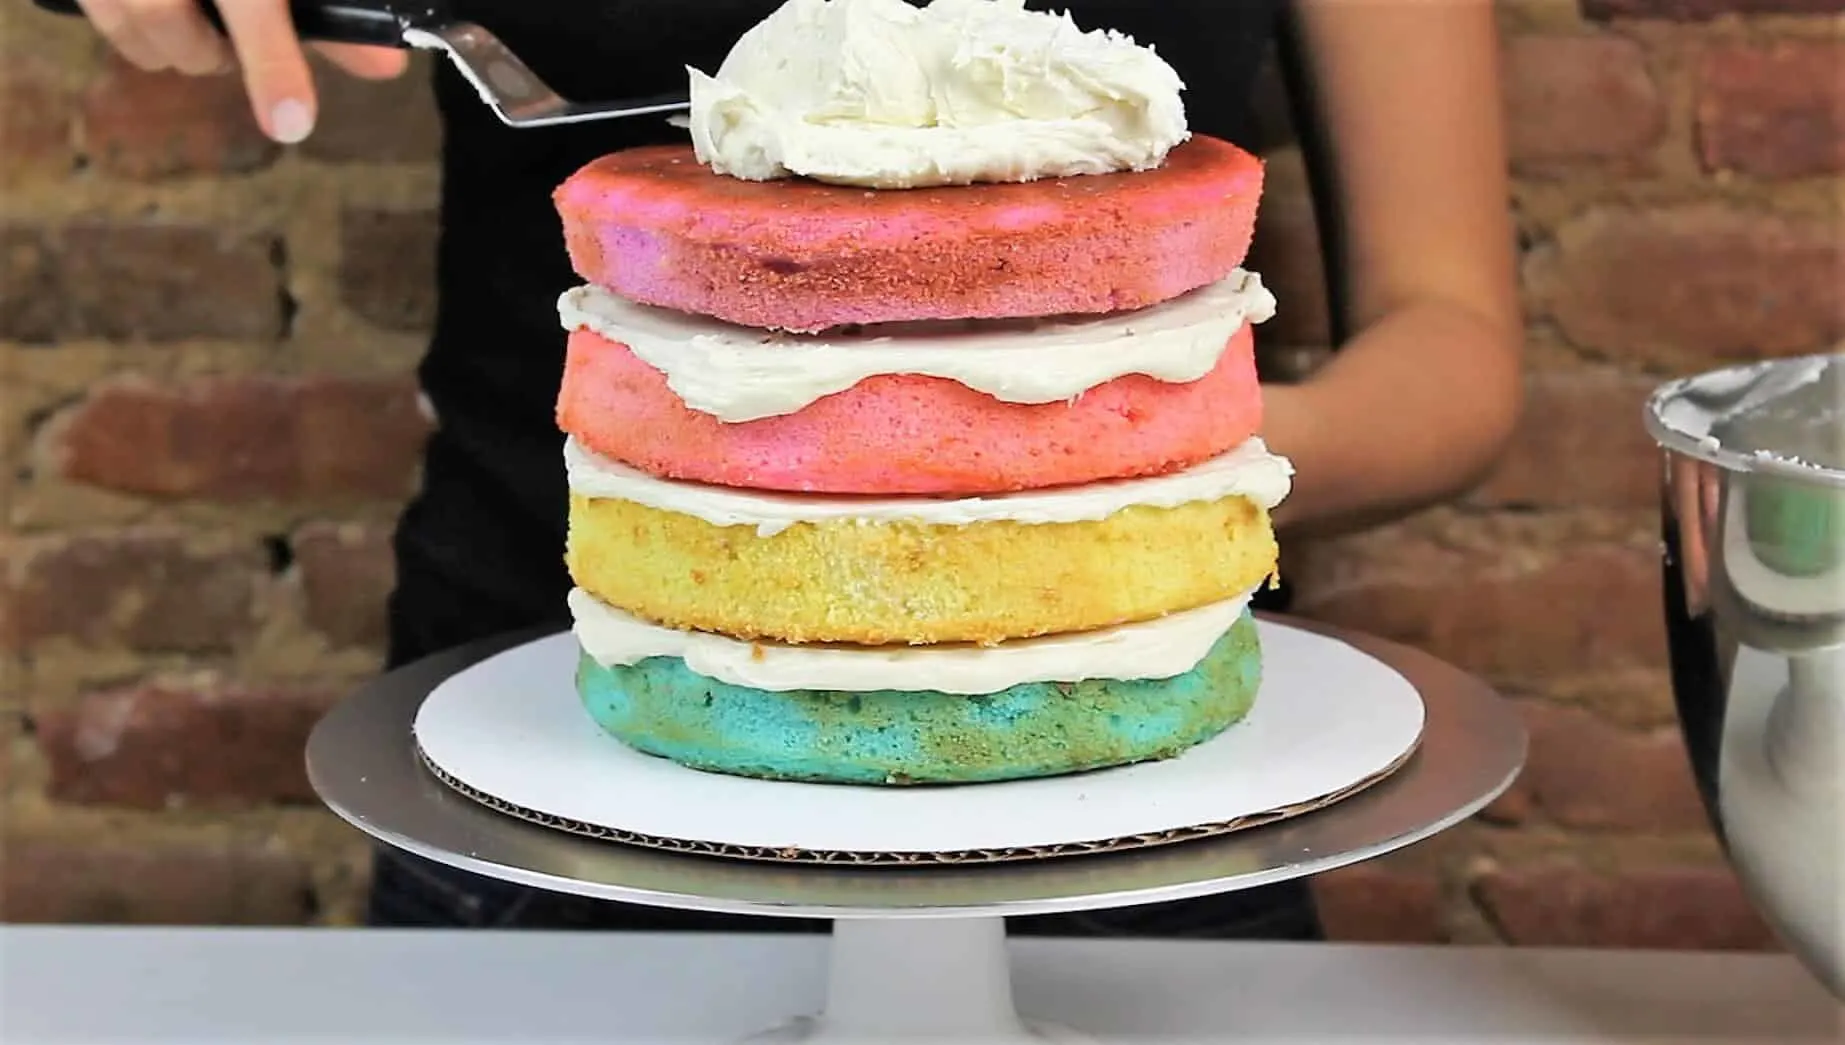
Once your cake layers have fully cooled, it’s time to assemble the cake!! Stack them, and apply a thick, fluffy layer of frosting between each layer. Then apply a crumb coat, and let the cake chill in the freezer for about 10 minutes. Use some of the remaining buttercream to add a second coat of frosting, and smooth with a cake bench. Once the buttercream is smoothed, insert the ears and horn into the cake. Then add on swirls of colorful buttercream, to create the mane of the unicorn. Using the black buttercream, pipe on eyes. I like to use a circle shaped cookie cutter to create an outline before I pipe. The last step is to sprinkle on some edible gold dust.
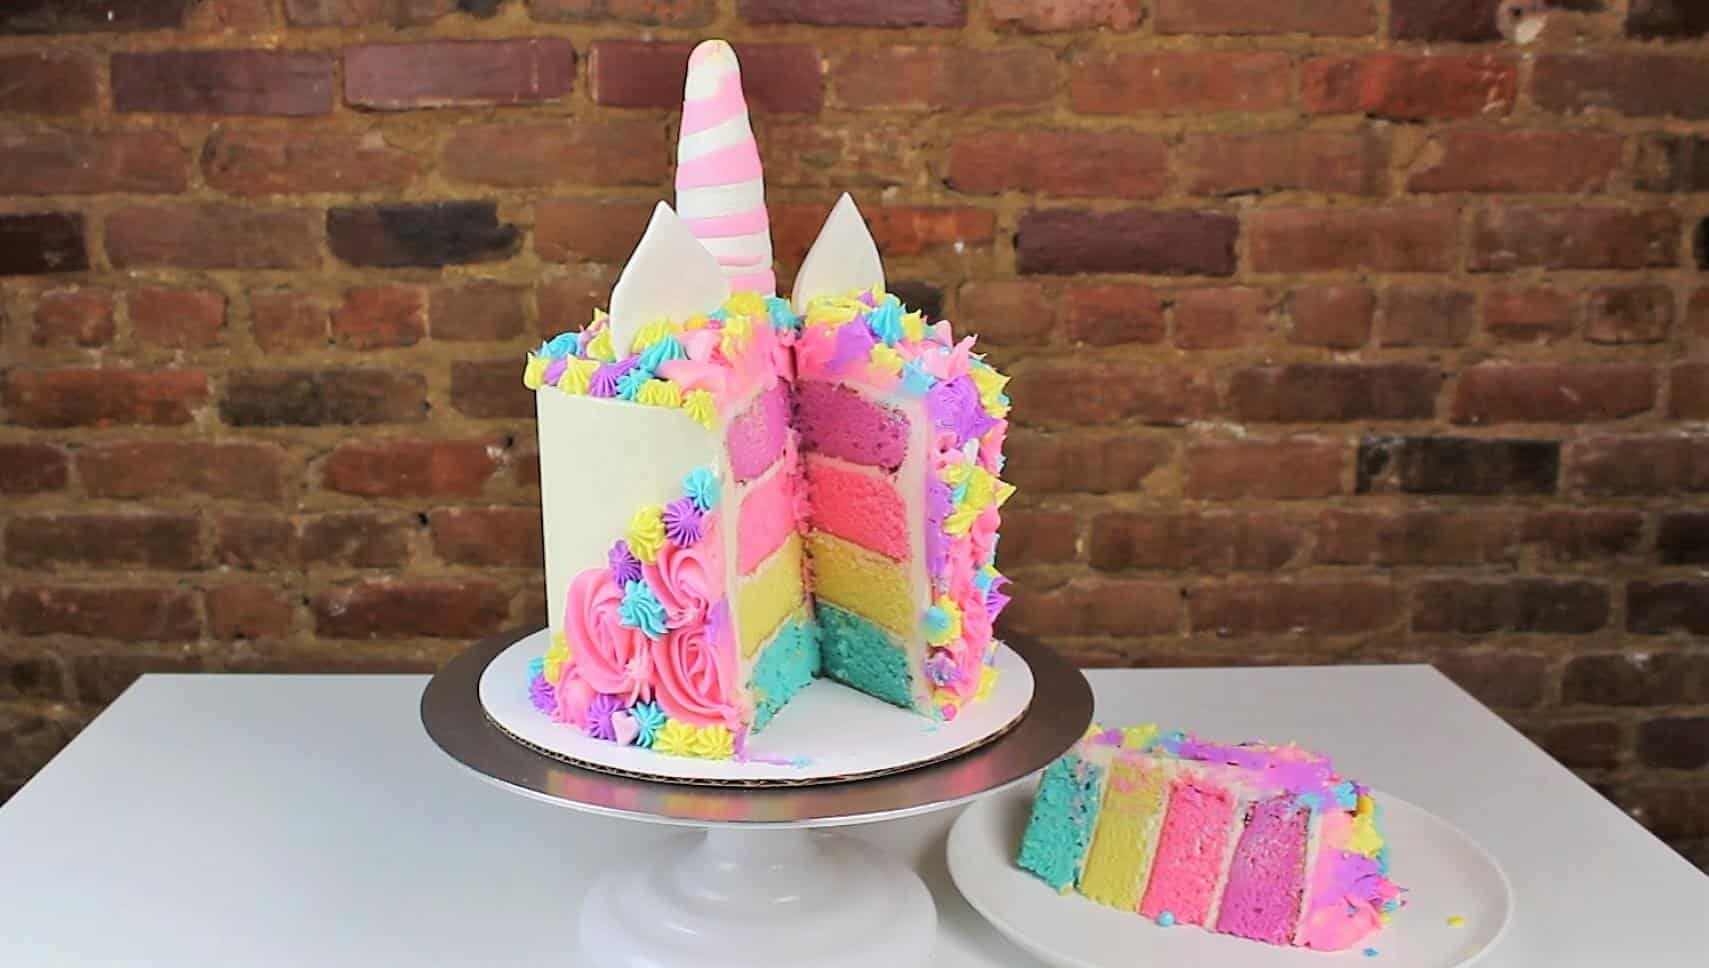
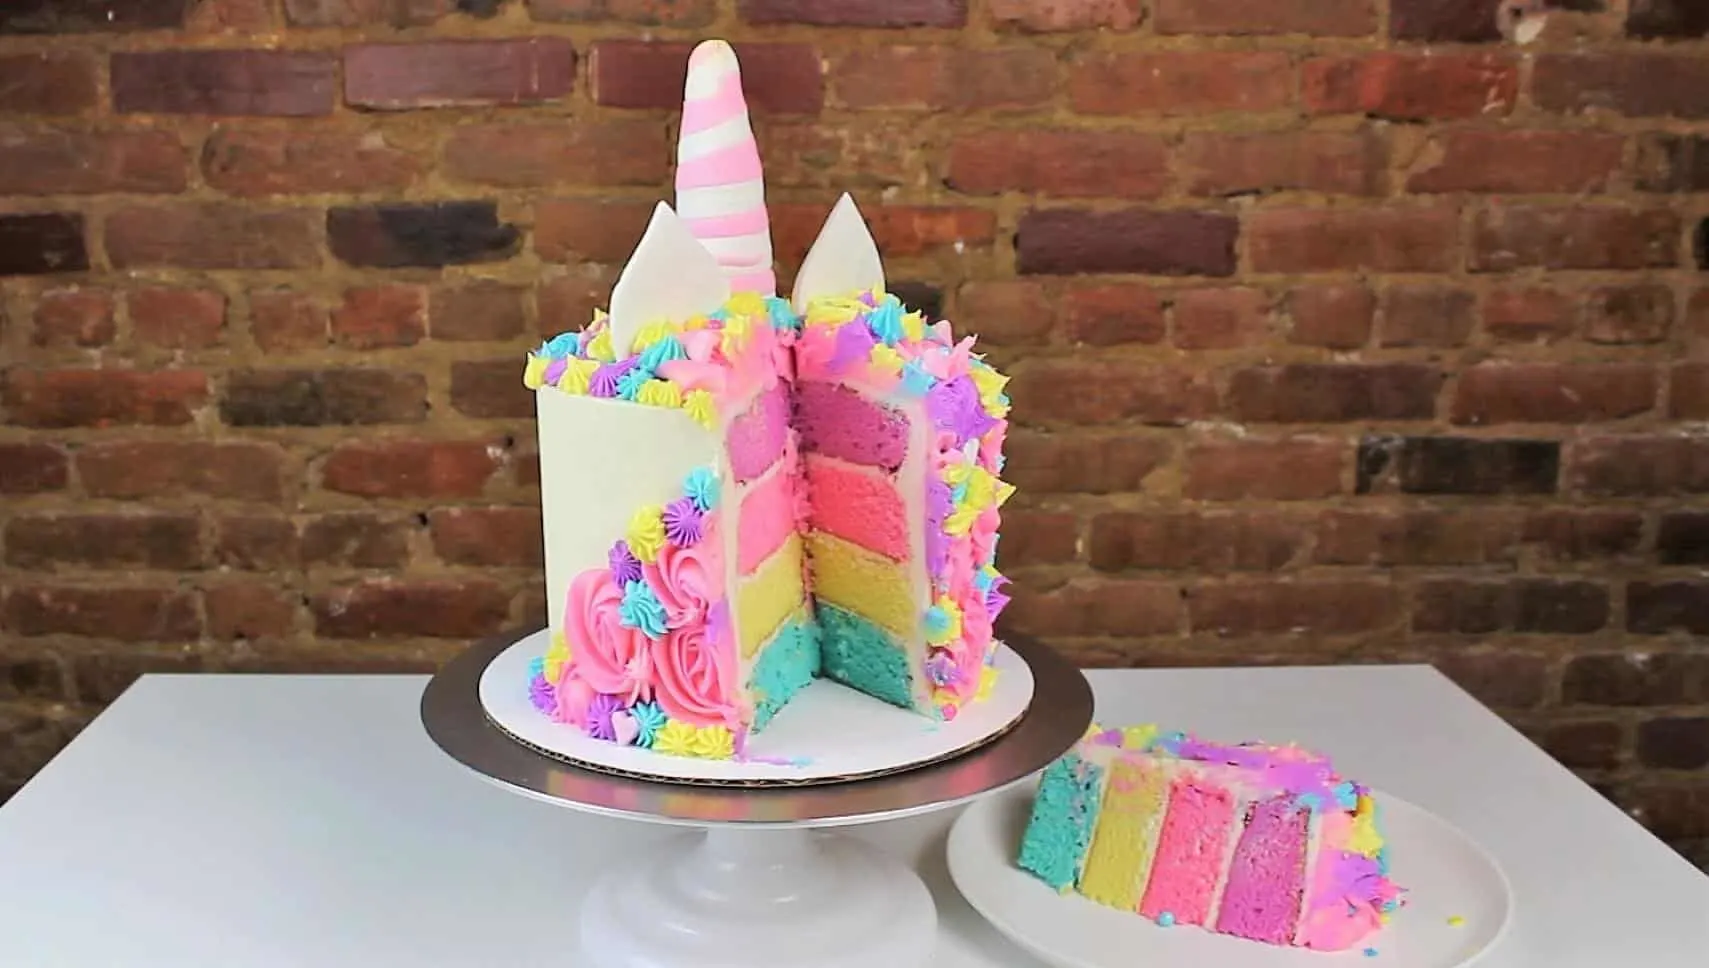
The best part is cutting into this colorful cake! The layers really pop!!
Thank you Formica Group for the baking table made with a Formica® Writable Surface. I can’t wait to sketch out my next project!!


Sophie
Thursday 21st of April 2022
Can you freeze the cake layers a day in advance? If so, do I just wrap them in plastic wrap?
Erin Greene
Thursday 30th of May 2019
Hi, question for you! Do I need to make any adjustments for liquid food coloring? I don’t have gel.
Chelsweets
Monday 3rd of June 2019
I don't think you need to make any adjustments, just be careful how much you add! Maybe for the frosting you add a tiny bit less heavy cream, since you'll be adding in different liquid food colorings <3
Erin Walnut
Friday 17th of May 2019
How do you get your cakes to rise like that? I made three tiers instead of 4 in 8 in rounds and they still didn't rise that high. Is there a trick that I am missing?
Chelsweets
Friday 17th of May 2019
this recipe doesn't rise a ton, because it's a butter cake! But if you didn't see any rise at all, maybe check to see how old your baking powder is! It usually has a shelf life of about 6 months <3
Renee
Saturday 17th of November 2018
How do you get your black frosting so black?
Maureen Rossi
Friday 19th of October 2018
Hi, I'm going to TRY your unicorn cake. My Granddaughter will be 5, so this is the cake she wants Grandma to make. My question is, I'm going to use 4 10 inch pans. Is there a way you can tell me how to do the math to figure out how much batter (I'm using the same that you used) and double the frosting? Every time I try to do the math, it never comes out. I'm going to have to do this 4 times since I only have 1 2.5 high 10 inch round pan. Thank you.
Chelsweets
Wednesday 31st of October 2018
I'd double my batter recipe to make 4, 10-inch layers! For the buttercream, I'd also double it! you'll definitely have leftovers, but better that than run out!!
Hope that helps, happy baking!