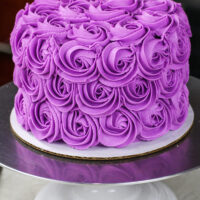
Rosette Cake Recipe
This rosette cake recipe is absolutely stunning & surprisingly easy to make! It's made with tender chocolate cake layers & homemade buttercream frosting.
Servings: 24
Calories: 559kcal
Ingredients
Chocolate Cake Layers:
- 2 cups all-purpose flour 260 grams
- 2 cups granulated sugar 400 grams
- 3/4 cup unsweetened cocoa powder, sifted 75 grams
- 2 tsp baking powder 8 grams
- 1 1/2 tsp baking soda 9 grams
- 1 tsp fine salt 6 grams
- 1 cup very hot water 237 grams
- 2 tsp. instant espresso of coffee 6 grams
- 1 cup buttermilk, room temperature 240 grams
- 1/2 cup vegetable or canola oil 120 grams
- 2 tsp vanilla extract or vanilla bean paste 8 grams
- 1 tsp vinegar 4 grams
- 2 large eggs, room temperature 112 grams
Purple Buttercream Frosting
- 3 cups unsalted butter, room temperature 678 grams
- 1 Tbsp vanilla extract or vanilla bean paste 12 grams
- 1 tsp fine salt 6 grams
- 10 cups powdered sugar 1250 grams
- 1/3 cup heavy whipping cream, room temperature or whipping cream (75 grams)
- purple food coloring
Tools / Equipment Needed
Instructions
Moist Chocolate Cake Layers:
- Preheat oven to 350°F. Line three 8" or four 7" pans with parchment rounds, and grease with non-stick baking spray. If you don't have enough pans, you can bake these layers in batches! The batter will be fine if it sits out at room temperature for an hour or two.
- Combine 2 cups all-purpose flour, 2 cups sugar, 3/4 cup baking cocoa, 2 tsp baking powder, 1 1/2 tsp baking soda, and 1 tsp of salt in a large bowl. Whisk together until combined.
- In a separate, medium-sized bowl, add 2 tsp instant espresso or coffee into 1 cup of hot water, and stir until dissolved.
- Add in 1 cup buttermilk, 1/2 cup oil, 2 tsp vanilla extract and 1 tsp vinegar into the instant espresso mixture. Give the mixture a quick stir to combine the ingredients.
- Pour the wet ingredients into the dry ingredients. Mix by hand until fully incorporated.
- Stir in 2 eggs, one at a time. The batter will be on the thin side, but that’s the consistency you're after!
- Divide the batter evenly between the cake pans, and bake for about 24-27 minutes.
- Remove from the oven, and let the cakes sit for about 5 minutes. Gently run an offset spatula around the rim of the cake pans to loosen them.
- Place cake layers into the freezer for 30 minutes to accelerate the cooling process. Once the layers are fully cooled, carefully flip the pans and remove the layers.
- Use a serrated knife to level the tops of the layers. If you're making them in advance you can wrap and freeze them.
Purple Buttercream Frosting:
- Beat 3 cups of unsalted butter on a medium speed with a stand mixer and paddle attachment or a hand mixer until smooth (1-2 minutes).
- Mix in 1 Tbsp of vanilla extract and 1 tsp salt on a low speed.
- Slowly add in 10 cups of powdered sugar. Half way through add in 1/3 cup of heavy cream to make the frosting easier to mix.
- Continue to mix on low speed for a few minutes, until the desired consistency is reached.
- Color the buttercream with a couple generous squirts of purple food coloring. Be sure to scrape the sides and bottom of the bowl to make sure all the frosting gets evenly colored.
- Cover the frosting with plastic wrap to prevent it from crusting and set aside.
To Assemble and Decorate This Rosette Cake:
- Stack and frost the cake layers on a greaseproof cake board or plate. Use a dab of frosting to help stick the first cake layer to the board.
- Cover each cake layer with an even layer of purple buttercream as you assemble the cake.
- Spread a thin coat of frosting around the cake using the overhanging frosting to fully cover the cake layers.
- Smooth using a bench scraper, then chill the cake in the fridge (30 minutes) or freezer (10 minutes) until the frosting is firm to the touch.
- Place the remaining frosting into a large piping bag fit with a star piping tip. Seal the top of the bag with a rubber band.
- Make two, evenly spaced horizontal lines around the cake with an offset spatula or butter knife. This will allow you to pipe three even rows of rosettes that are all the same size and properly spaced out.
- Then use the bottom line as a guide for the top of each rosette and pipe a row of rosettes around the base of the cake. Make sure you pipe your rosettes in the same direction as you go, and feel free to take breaks if your hand gets tired.
- Repeat this piping process and add two more rows of rosettes around the cake. Cover the top of the cake in rosettes, working from the edge of the cake into the center.
- To give your rosettes a super clean, cohesive look I recommend ending each rosette where you plan to pipe the center of the next rosette. This will allow you to hide the tail of each rosette under the rosette next to it.
- Chill the cake in the fridge for at least 30 minutes once it's decorated to help the rosettes set into place before you cut in.
Video
Notes
Tips for Making the Best Rosette Cake
- Chill your cake layers in the freezer for about 20 minutes before assembling the cake, to make it easier to stack and frost.
- Level your room temperature or thawed cake layers with a serrated knife to make them easier to stack.
- Make sure your buttercream is the right consistency so that you can easily pipe your rosettes and have them keep their shape.
- Crumb coat your cake in the same color you plan to pipe your rosettes! This will help camouflage and gaps between your rosettes.
- Chill your crumb-coated cake to help the rosettes stay in place as you pipe them.
- Make two, evenly spaced lines around the cake with an offset spatula before piping the rosettes. This will allow you to pipe four even rows of rosettes that are all evenly sized and spaced.
- End each rosette where you plan to pipe the center of the next rosette. This will allow you to hide the tail of each rosette under the rosette next to it.
Making This Rosette Cake in Advance and Storage Tips
- Make your cake layers in advance and freeze them. It breaks the process up and make it more approachable.
- Make your frosting ahead of time or save any leftover frosting! It can be stored in an airtight container in the fridge for up to a month.
- This frosting can also be stored in the freezer for up to 3 months! Just be sure to give it a good stir once it thaws to make it nice and smooth again.
- A frosted cake can last in the fridge for a week, or in the freezer for a month. The buttercream locks in the moisture and keeps the cake fresh and delicious!
Nutrition
Serving: 1 | Calories: 559kcal | Carbohydrates: 73g | Protein: 3g | Fat: 30g | Saturated Fat: 16g | Polyunsaturated Fat: 12g | Cholesterol: 81mg | Sodium: 344mg | Fiber: 1g | Sugar: 62g