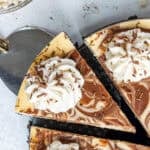
Marbled Cheesecake
This marbled cheesecake is the best of both worlds with its vanilla and chocolate cheesecake filling! It's creamy, rich, and absolutely delicious!!
Servings: 16
Calories: 610kcal
Equipment
- Rimmed Baking Tray for pseudo water bath
Ingredients
Oreo Cookie Crust
- 1 2/3 cups Oreo cookie crumbs - 20 cookies with centers 220g
- 2 Tbsp salted butter, melted 28g
- 2 Tbsp granulated sugar 25g
Marbled Cheesecake
- 3/4 cup semi-sweet or dark chocolate chips 130g
- 1 1/3 cup granulated sugar 266g
- 2 Tbsp cornstarch 18g
- 4, 8 oz. packages full fat cream cheese, room temperature 904g
- 4 large eggs, room temperature 224g
- 2/3 cup full-fat sour cream, room temperature 170g
- 1 tsp vanilla extract or vanilla bean paste 4g
Garnish - Optional
- Whipped cream
- Chocolate Shavings
Instructions
Oreo Cookie Crust
- Preheat the oven to 350°F/175°C. Spray an 8-inch or 9-inch springform pan or cheesecake pan with non-stick baking spray, then place a parchment round on the bottom of the pan.
- Using a food processor, crush 20 Oreo cookies until they have a fine crumb. If you don't have a food processor, crush them in a Ziplock bag with a rolling pin or wine bottle. Mix in 2 Tbsp melted butter and 2 Tbsp granulated sugar. Pulse or stir until combined.
- Pour the cookie mixture into the prepared pan. Use the bottom of a measuring cup or a flat-bottomed glass to press down firmly and create a compact, even crust. The crust should cover the bottom of the pan and reach about halfway up the sides of the pan.
- Bake for 12-14 minutes, then remove from the oven. Place the pan on a wire rack to cool. Keep the oven on but lower the temperature to 300°F/150°C and place a rimmed baking tray filled with about 1 inch of water on the bottom rack.
Marbled Cheesecake
- While the cookie crust bakes and cools, make the cheesecake filling.
- Start by melting 3/4 cup of semi-sweet or dark chocolate chips in the microwave in 15 second intervals, stirring between each, or using a double boiler. Set aside to cool.
- In a separate, small bowl, whisk together 1 1/3 cup of sugar and 2 Tbsp of cornstarch. This helps prevent the cornstarch from clumping.
- In a large mixing bowl or the bowl of a stand mixer fit with a paddle attachment, beat 4, 8-oz. packages of room temperature cream cheese and the sugar/cornstarch mixture on a low speed until the mixture is completely smooth. Scrape the sides and bottom of the bowl with a rubber spatula to make sure everything is properly combined.
- Crack 4 eggs in a bowl and whisk them together. Gradually mix the eggs into the cheesecake batter in a few installments while mixing on a low speed. Then mix in 2/3 cup sour cream and 1 tsp vanilla extract until just combined.
- Scoop 2 cups (420g) of batter into a separate bowl and add in the melted and cooled chocolate to transform some of the vanilla cheesecake batter into chocolate cheesecake batter. The chocolate should still be in a liquid form, but not hot to the touch. Fold it into the batter with a rubber spatula until combined.
- Alternate scoops of chocolate and vanilla cheesecake batter into the prepared pan. You will have more vanilla batter than chocolate batter, so add one scoop of chocolate batter for every 2 scoops of vanilla batter. Use a butter knife or offset spatula to swirl the batter together and create a marbled pattern. NOTE: If you use an 8-inch pan, it will be filled close to the top of the pan! But don't worry, cheesecakes don't really rise as they bake, so it shouldn't overflow in the oven.
- Double check that the oven temperature has been lowered to 300°F/150°C, then place the cheesecake pan on a large cookie sheet and bake the cheesecake for 15 minutes.
- Without opening the oven door, reduce the oven temperature to 225°F/110°C and bake for an additional 2 hours. It sounds crazy, but low and slow is the best way to bake up a perfect, crack-free cheesecake that doesn't sink.
- Once the cheesecake is done baking, turn the oven off and let the cheesecake sit in the oven for 1 hour without opening the door.
- After 1 hour of cooling in the oven, crack the oven door open with a wooden spoon and let the cheesecake cool in the oven for another hour.
- Next, remove the cheesecake from the oven and let it continue to cool at room temperature for 2 hours. Once it reaches room temperature, cover the top of the cheesecake with plastic wrap and refrigerate the cheesecake for an additional 3-4 hours or overnight (preferred). Store the cheesecake in the fridge until you're ready to serve it.
- When you're ready to enjoy this marbled cheesecake, remove it from the fridge and carefully release it from the pan.
- Top the cheesecake with whipped cream swirls and chocolate shavings, then use a sharp, warm knife to cut into the chilled cheesecake. Clean the knife after each cut to get perfect slices. Leftover cheesecake can be kept in the fridge for up to a week in an airtight container.
Video
Notes
For a detailed list of ingredient swaps and substitutions that can be made in each component of this recipe, please refer to the "swaps and substitutions" section above.
Making This Marbled Cheesecake in Advance
This cheesecake can be stored in the fridge for up to a week. Store slices in an airtight container or cover the springform pan tightly with plastic wrap and foil to keep it fresh. If you're making this cheesecake in advance, wait to garnish it with whipped cream until you plan to serve it. You can also freeze this cheesecake for up to 3 months! After it's baked and cooled, release it from your pan, then freeze the entire cheesecake until it's firm to the touch (about 3 hours). Carefully lift the cheesecake off the bottom of the springform pan and slide it onto a cardboard cake round or plate. Wrap the entire cheesecake in a couple of layers of plastic wrap and then foil. When you're ready to enjoy the frozen cheesecake, place it in the fridge overnight, then unwrap and enjoy it the following day. Wait to add the whipped cream and other toppings until you're ready to cut into it.How To Make the Best Marbled Cheesecake
- Make sure the ingredients are at room temperature. It helps them mix together better and will give the cheesecake a smoother texture.
- Use full-fat cream cheese that comes in brick form. I highly recommend using the Philadelphia brand (not sponsored - it just works best!). Avoid organic cream cheese if possible; it's creamier and will make the cheesecake denser and less fluffy.
- Mix the batter on a low speed once you start mixing ingredients into the cream cheese/sugar mixture. You want to incorporate as little air as possible into the batter. Excess air in your batter can cause your cheesecake to crack.
- Make this cheesecake early in the day. The baking and cooling process takes about 6 hours before you can place the cheesecake in the fridge.
- Follow the cooling instructions to a T! I know it's a slow process, but it's worth it. It helps ensure the cheesecake has the perfect consistency once it's cooled.
- Use a warm, sharp knife to get clean slices. Fill a tall cup with hot water and dip a sharp knife into it. Dry the knife fully, then cut into the cheesecake. Repeat with each cut, being sure to wipe the blade completely clean after each cut.
- If your cheesecake cracks while baking or cooling, don't fret! You can easily cover it with a bit of Nutella while decorating this cheesecake, and no one will know.
- Make room in your fridge ahead of time so you can easily chill the cheesecake once it reaches room temperature.
Nutrition
Serving: 1 | Calories: 610kcal | Carbohydrates: 60g | Protein: 8g | Fat: 39g | Saturated Fat: 19g | Polyunsaturated Fat: 15g | Cholesterol: 114mg | Sodium: 365mg | Fiber: 2g | Sugar: 42g