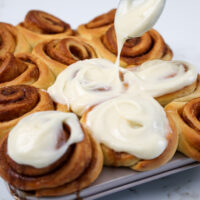
Mini Cinnamon Rolls
These mini cinnamon rolls are made from scratch and bake up soft, fluffy, and perfectly bitesized! They're adorable & delicious!!
Servings: 16
Calories: 139kcal
Ingredients
Cinnamon Roll Filling
- 1/3 cup packed light brown sugar 66g
- 1 1/2 tsp ground cinnamon 3g
- 3 Tbsp unsalted butter, room temperature 45g
Mini Cinnamon Roll Dough
- 2 cups all-purpose flour + about 2 Tbsp 250-280g
- 2 1/4 tsp or 1 packet instant dry yeast 7g, 1/4 oz.
- 1/2 tsp fine salt 3g
- 1/2 cup whole milk 120g
- 1/4 cup unsalted butter 56g
- 1/4 cup granulated sugar 50g
- 1 large egg, room temperature 56g
Mini Cinnamon Roll Glaze
- 1/4 cup cream cheese, room temperature 56g
- 2 Tbsp unsalted butter, room temperature 28g
- 1 tsp vanilla extract or vanilla bean paste 4g
- 1 cup powdered sugar 125g
- 1 Tbsp whole milk 15g
Instructions
Mini Cinnamon Roll Filling
- In a medium-sized bowl, mix 1/3 cup packed brown sugar and 1 1/2 tsp cinnamon together. Cover and set aside.
Mini Cinnamon Roll Dough
- This recipe can be made in a stand mixer or by hand. I recommend making it by hand because it's such a small portion of dough! A stand mixer might struggle to properly mix everything together, especially if you have a large stand mixer.
- In a large bowl or the bowl of a stand mixer, whisk together 2 cups of flour, 1 packet of instant dry yeast and 1/2 tsp salt.
- In a separate bowl, combine 1/2 cup milk, 1/4 cup softened butter and 1/4 cup granulated sugar. Heat for 45 seconds in the microwave and stir to combine the ingredients. The butter should be fully melted, and the liquid should be warm to the touch but not hot. If it's too hot, it will kill the yeast!
- Slowly pour the warm milk mixture into the flour mixture and mix on medium speed with a dough hook or by hand. Scrape around the edges with a rubber spatula to make sure all the flour gets incorporated. Mix until fully combined.
- Add in 1 large egg. Mix together until a sticky dough ball forms. If you're using a stand mixer, you may need to stir the egg and the dough together with a dough whisk or spoon during this stage.
- Mix the dough for another 5 minutes by hand, or mix the dough on a medium-low speed for 2-3 minutes with a mixer. The dough should become elastic and smooth.
- Keep mixing the dough and add additional flour 1 Tbsp at a time until the dough is tacky but no longer sticky (usually takes me anywhere from 1-3 additional Tbsp of flour). It should pull away / no longer stick to the sides of your mixing bowl once it's ready to rest. I like to poke the dough with my finger and see if it leaves any residue. If it's still super sticky, keep adding in additional flour. If it feels tacky but doesn't leave any residue on your finger, it's ready to go!
- Cover your bowl with plastic wrap and set aside to allow the dough to rest for 10-20 minutes to allow the gluten to relax. This will make it easier to roll out.
- Place the dough on a lightly floured surface and roll it into a large rectangle that's about 16 in x 8 in. It should be about 1/2 cm thick.
- Spread 3 Tbsp of room temperature butter on the dough, leaving 1/4 inch of dough on the long side of the rectangle uncovered (this will help you seal off the roll and keep it tight). Spread the filling over the buttered section of the dough in an even layer. Dip your finger in a little bit of water and run it along the uncovered strip.
- Roll the dough horizontally, toward the uncovered strip. Cut 16 equal pieces using dental floss. It sounds weird but it gives you super clean cuts! Each cinnamon roll should be 1 inch tall. Place the mini cinnamon rolls in either a greased 8 in x 8 in pan or in a mini cupcake pan.
- If you make these the morning of, proof them in a warm place for about 20 minutes. I like to preheat my oven to 200 F, turn it off, then place my cinnamon rolls into the oven to proof because my apartment is always cold.
- Or if you are making these cinnamon rolls the night before, cover the cinnamon rolls tightly with plastic wrap and place them in the fridge overnight. Then take them out of the fridge an hour before you want to bake them. Place the rolls in a warm place to thaw and proof.
- Once they have risen, preheat your oven to 350 F / 175 C. If you make these in an 8- x 8-inch pan, bake them for 23-26 minutes. If you bake these in a mini muffin tin, bake them for 18-22 minutes or until rolls are golden brown. Rotate the pan halfway through to help them bake evenly.
Cream Cheese Cinnamon Roll Frosting
- To make the frosting, mix 1/4 cup of cream cheese, 2 Tbsp of unsalted butter, 1 tsp vanilla extract, 1 cup of powdered sugar, and 1 Tbsp of whole milk together with a whisk or hand mixer. Mix until smooth.
- Let the cinnamon rolls cool for about 10-20 minutes, then spoon frosting over the cinnamon rolls and enjoy them warm.
Video
Notes
Using the Right Type of Yeast: Active vs. Instant Yeast
Make sure you're using instant yeast! It comes in small packets that can usually be found in the refrigerated section of your grocery store. You can use active dry yeast in place of the instant yeast in this recipe, just be sure to activate it in a small bowl with 2 Tbsp of warm water and 1 tsp sugar before adding it into the dough and allow the dough to rise for longer (active yeast takes longer to rise than instant).Tips for Making the Best Cinnamon Rolls
- Use a ruler to make sure your dough is rolled out to the right size (16 x 8-in) and cut into even pieces.
- Use dental floss to easily cut each cinnamon roll rather than a knife.
- If you're struggling to cut your cinnamon rolls, place the cinnamon roll log on a baking sheet and chill it in the fridge for 20-30 minutes. It will make it easier to cut.
- Cut equally sized cinnamon rolls from your log to make sure they all bake evenly.
- Try to let the cinnamon rolls cool for about 10-20 minutes, then add the frosting. This will allow it to perfectly melt over your cinnamon rolls!
Making these Cinnamon Rolls in Advance
This recipe can be made the evening before and baked the following morning. You can refrigerate these cinnamon rolls after they have been cut in a greased or lined pan. Cover the cinnamon roll pan tightly with plastic wrap, making sure the seal is airtight. The morning you want to bake them, take them out an hour before you plan to bake them to let them warm up and rise a bit. Then follow the recipe instructions to bake in step 15.Nutrition
Serving: 1 | Calories: 139kcal | Carbohydrates: 15g | Protein: 1g | Fat: 8g | Saturated Fat: 5g | Polyunsaturated Fat: 3g | Cholesterol: 33mg | Sodium: 95mg | Sugar: 14g