Marbled Sugar Cookies
These marbled sugar cookies are incredibly soft and delicious, and are topped with the most beautiful, marbled icing!
Ingredients
Cream Cheese Sugar Cookies
- 3/4 cup or 1 1/2 sticks unsalted butter, room temp (170g)
- 1/2 cup or 4 oz. full fat cream cheese, room temp (113g)
- 1 1/2 cups granulated sugar (300g)
- 1 large egg, room temp (56g)
- 2 tsp vanilla bean paste or vanilla extract (8g)
- 1 tsp almond extract, optional (4g)
- 3 cups all-purpose flour (375g)
- 1 Tbsp cornstarch (8g)
- 1/2 tsp baking powder (2g)
- 1/2 tsp fine salt (3g)
Marbled Royal Icing (adapted from Wilton)
- 3 cups powdered sugar (375g)
- 3 Tbsp meringue powder (30g)
- 1/4 cup water, room temp (60g)
- 2 tsp vanilla or almond extract (8g)
- Additional water to bring to flooding consistency (I used 3 Tbsp, but this can vary!)
Additional Supplies
Instructions
Cream Cheese Sugar Cookies
- In a large bowl or the bowl of a stand mixer, beat 3/4 cup butter and 1/2 cup cream cheese on medium speed with a hand mixer or whisk attachment until smooth.
- Next, add in 1 1/2 cups granulated sugar and mix on a medium-high speed for a couple of minutes, until the mixture becomes lighter in color.
- Add in 1 egg, 2 tsp vanilla bean paste or vanilla extract, and 1 tsp almond extract (optional). Mix on a medium speed until incorporated.
- In a separate bowl, whisk together 3 cups flour, 1 Tbsp cornstarch, 1/2 tsp baking powder, and 1/2 tsp salt.
- Add the flour mixture into the butter mixture in two additions, mixing on a low speed until it is JUST incorporated. Scrape the sides of the bowl with a rubber spatula between additions.
- At this point, the dough should still be pretty sticky. Divide the dough in half and wrap each portion of dough in a piece of plastic wrap. I like to flatten the dough out into a rectangle that's about 1/2 inch tall to make it easier to roll out once it's chilled.
- Chill the dough in the fridge for about 2 hours or the freezer for 30 minutes. Preheat the oven to 350 F / 175 C for about 30 minutes before you plan to roll out the dough, and line two large baking sheets with silicone baking mats or parchment paper. Set aside.
- Generously dust the surface you plan to roll the cookies out on with additional flour. Take one piece of dough out of the fridge or freezer, leaving the other in there to continue to chill.
- Sprinkle additional flour on top of the dough and the rolling pin. Roll the chilled dough to be 1/3 inch thick and cut out shapes with a flour-dusted cookie cutter. Use a kitchen brush to brush any excess flour off the cookies and place them on the prepared baking sheets. The cookies don't spread much as they bake, so you can place them about 1 inch apart.
- Chill the cut-out cookies one more time in the fridge for 15 minutes or the freezer for 5 minutes to help them keep their shape as they bake.
- Bake one sheet of cookies at a time. Bake for 10-12 minutes on the top rack of your oven (bake time will vary based on the size and shape of the cookies). Keep a close eye on the cookies and be sure to pull them out before the edges start to brown.
- Let the baked cookies cool on the pan for about 15 minutes, then transfer to a wire rack to finish cooling.
- While the first batch bakes and cools, knead together the cookie dough scraps and rewrap them in plastic wrap. Pop them back in the fridge to chill.
- Pull out the 2nd chilled portion of dough and repeat steps 9-11. Then repeat with the chilled dough scraps.
Marbled Royal Icing
- While the cookies cool, make the royal icing. Whisk together 3 cups of powdered sugar and 3 Tbsp meringue powder in a large bowl or the bowl of a stand mixer.
- Add 1/4 cup water and 2 tsp vanilla extract. Mix on a low speed at first to incorporate the liquid, then increase to a medium speed and mix until stiff peaks form. This usually takes me about 4 minutes with a hand mixer. Scrape around the sides and bottom of the bowl as needed with a rubber spatula to make sure everything is properly mixed together.
- Next, add in additional water 1 Tbsp at a time until a flooding consistency is reached. I used about 3 Tbsp of water, but it can vary from batch to batch.
- To test the consistency, use the Figure 8 test! Lift a spoon or spatula and create a figure 8 with the runoff icing. If the figure 8 disappears in 8 seconds (I literally use a stopwatch to check!), the icing is ready to use as a cookie glaze. If it melts away faster, thicken the icing by adding 2 Tbsp of powdered sugar. Or if it takes longer than 8 seconds to disappear, thin it by adding 2 additional teaspoons of water.
- Repeat this test and adjust as you go, until the icing passes the figure 8 test.
- To prevent crusting, place saran wrap directly on top of the royal icing. If you leave the icing exposed to air for too long, it will crust and form a chunky top layer! Be sure to keep the icing covered until right before you plan to use it.
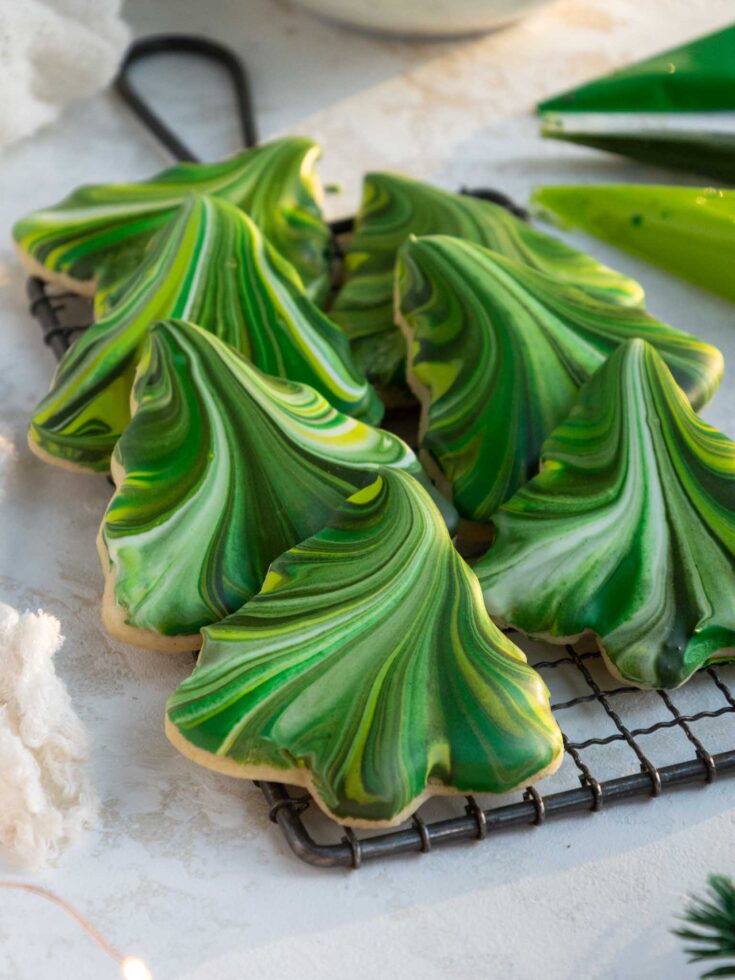
- Once you're ready to decorate the cooled cookies, use 2/3 cup of the royal icing to create each different color of icing for your cookies. I recommend making 3 different shades of the same color. I used lime green, leaf green, and moss green to make these cookies. Use gel food coloring to color each icing and place each color into its own small piping bag. Seal the top of each bag with a rubber band. Set aside.
- Transfer the remaining uncolored royal icing into a smaller bowl to make it easier to dip the cookies.
- Cut the tips of the piping bags to create a small opening (1/4 of an inch). Drizzle the icing colors on top of the uncolored icing. Use a toothpick or scribe to drag lines through the colors to create a swirled pattern like in the pictures above. This pattern is what gives these cookies that beautiful, marbled look!!
- Then dunk the cookies into the glaze one at a time. Be sure to cover the entire surface of the cookie and shake off some of the excess icing before flipping the cookie over and setting it aside to dry. I usually get icing on my fingers each time I dip a cookie, so I recommend having a damp washcloth nearby to wipe your fingers off.
- After dipping each cookie, drizzle and swirl more of the colored icing to ensure every cookie is nice and colorful. If you notice the bowl of icing is starting to crust, use a spoon to carefully scoop off the top layer of icing before dunking the next cookie.
- Let the cookies dry for an hour or until they are firm to the touch, then enjoy! These cookies can be stored at room temperature for up to 2 days in an airtight container.
Notes
Substitutions and Swaps
Please refer to the substitutions and swaps section in the post above for all the ingredient variations that can be used in this recipe.
How Many Cookies Does This Recipe Make?
This recipe can be used to make about 36, 2 1/2-inch cookies. However, the yield and bake time will vary based on the size and shape of the cookie cutter(s) you use.
This recipe can be halved to make fewer cookies (use half a scrambled egg in the dough), but I don't recommend doubling it unless you have a commercial (8 qt.) stand mixer.
Making These Marbled Sugar Cookies in Advance and Storage Tips
You can store decorated cookies in an airtight container for up to 2 weeks at room temperature or for up to 3 months in the freezer.
If you want to stack the cookies on top of one another, I recommend adding a layer of parchment paper between them.
This cookie dough can also be frozen for up to 1 month if wrapped tightly in plastic wrap and stored in an airtight container. I like to move the cookie dough to the fridge the night before I plan to roll it out and bake the cookies.
Baked, un-frosted cookies can also be frozen! These cookies last for up to a month if frozen in an airtight container. I recommend waiting to decorate them until they’ve thawed to room temperature.
Move them to the fridge the day before you plan to eat them, then let them sit out at room temperature for a few hours before icing them.
Tips for Making the Best Marbled Sugar Cookies
- Really cream together the butter, cream cheese, and granulated sugar in the first step of this recipe. It helps incorporate air into the dough which makes fluffy and soft cookies.
- Don’t overwork the cookie dough! It can overwork the gluten and result in tough, dense cookies.
- Roll the cookie dough out to a consistent thickness of 1/3 inch. If some are thicker or thinner than others, they may over- or under-bake in the oven.
- Take the time to chill the cookie dough. It helps prevent your cookies from spreading while they bake and helps them bake up with a soft texture.
- Liberally flour your counter before you roll out the cookie dough and move the dough around while you roll and cut the cookies.
- Also, flour your cookie cutters before each cut! It helps the dough easily pop out of the cutter and helps the cookies keep their shape.
- Don’t overbake your cookies. Err on the side of underbaking your cookies and remember that the cookies continue to bake for a few minutes once they’re out of the oven.
- Avoid leaving the icing uncovered for long periods of time or it will crust! Either use it immediately or cover it with plastic wrap.
Nutrition Information
Yield
36Serving Size
1Amount Per Serving Calories 159Total Fat 5gSaturated Fat 3gTrans Fat 0gUnsaturated Fat 2gCholesterol 18mgSodium 53mgCarbohydrates 27gFiber 0gSugar 18gProtein 2g