
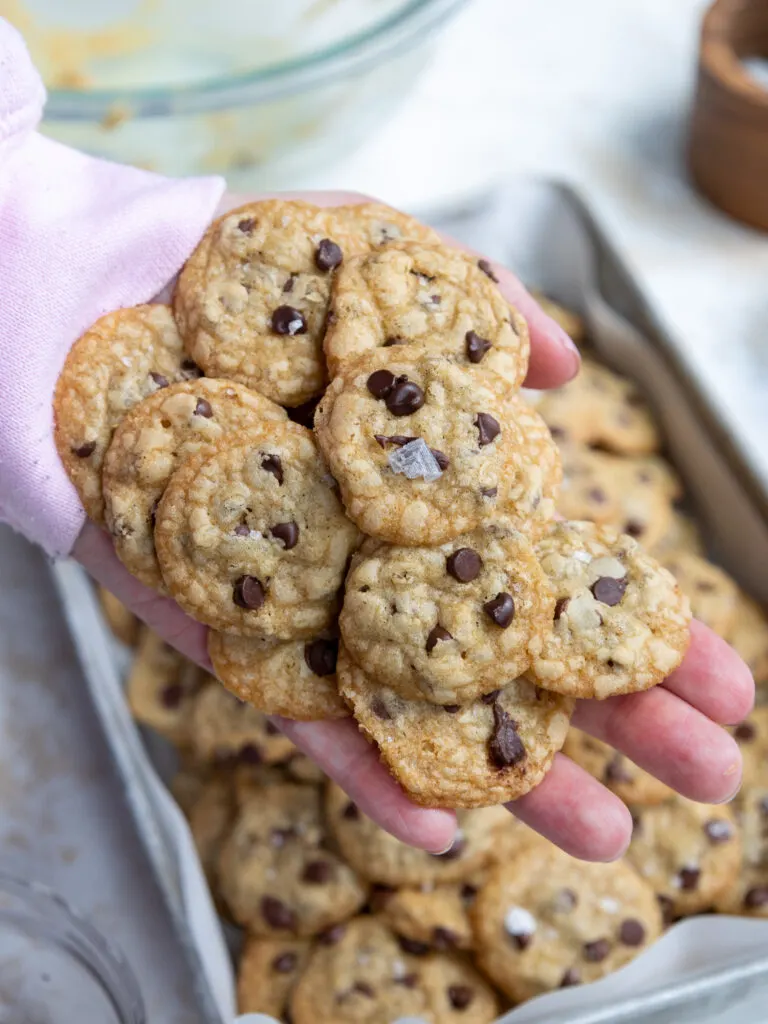
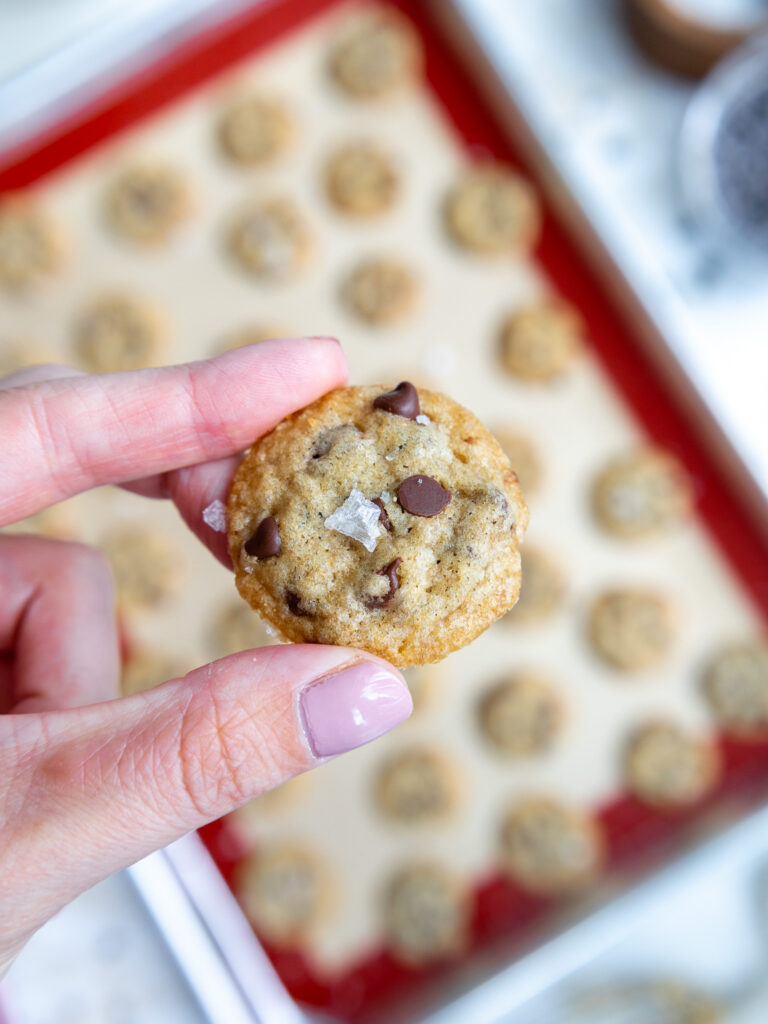
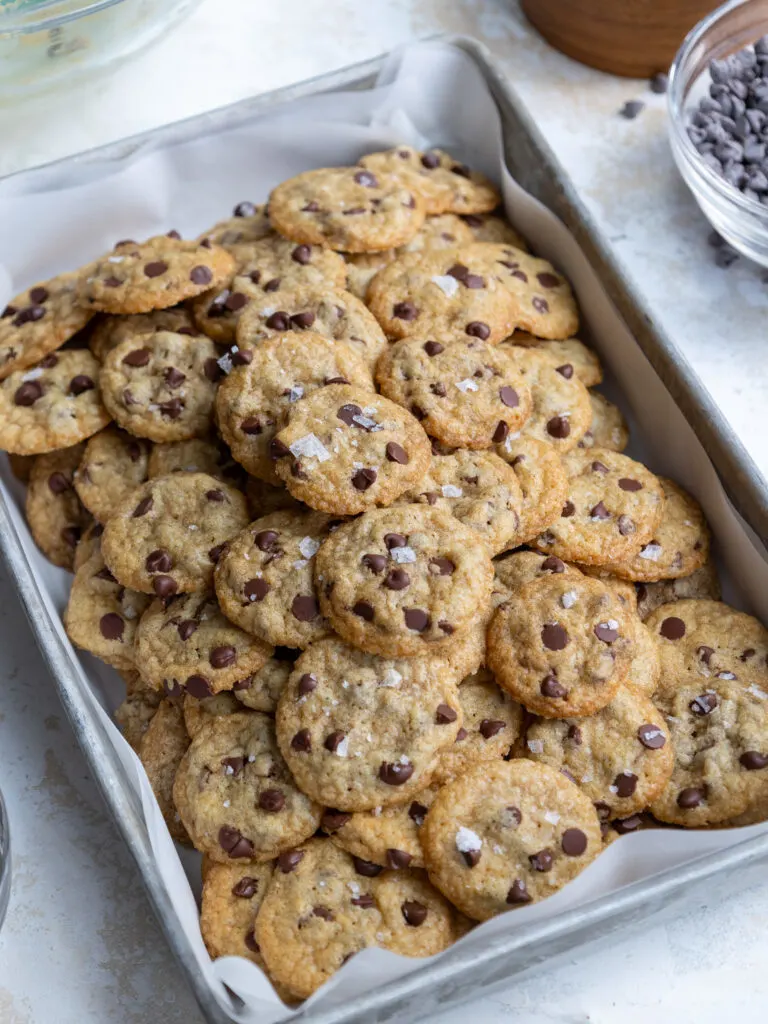
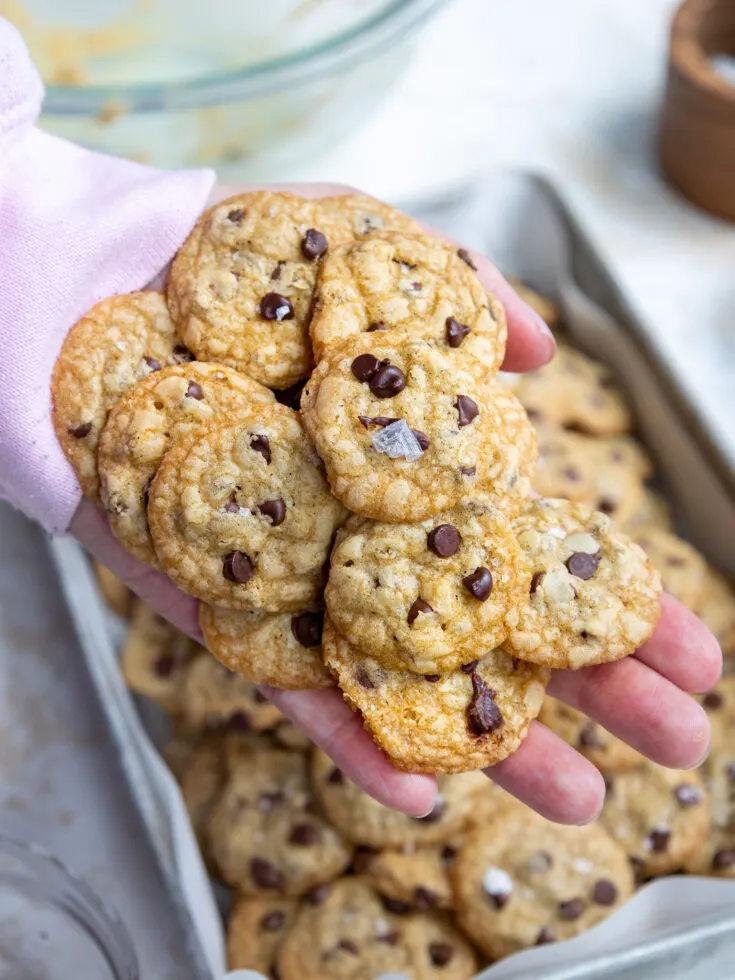
These mini chocolate chip cookies are adorable and absolutely delicious! They’re the perfect way to satisfy your cookie craving!!
And while this recipe makes a TON of cookies, don’t worry – you don’t have to spend hours rolling out little balls of cookie dough. The dough is soft enough to be piped, so we actually pipe each little cookie!
This makes the process so much faster and in my opinion, way more fun!

How to Make Mini Chocolate Chip Cookies
Let’s walk through each step of this recipe to make sure it turns out as amazing as possible.
I’ve also shared a video tutorial below.
Step 1: Melt & Cool the Butter While Prepping
Start by melting the butter. Place the unsalted butter in a microwave-safe bowl and cover it with a paper towel (trust me, there is nothing worse than butter exploding all over your microwave!).
Heat in 30-second intervals at half power until it’s fully melted, then set aside. I like to let my butter sit for about 10 minutes once it’s melted to cool down a bit. This prevents the butter from melting the mini chocolate chips and helps the cookies spread less while they bake.
While the butter cools, preheat the oven to 350 F / 175 C and line two 9×13″ baking sheets with silicone mats or parchment paper. If you only have one tray, that’s fine! The cookie dough can sit at room temperature for several hours as the mini cookies bake and cool.
Whisk together the flour, cornstarch, baking soda, and fine salt in a large bowl. Set aside.
Step 2: Whisk together the Wet Ingredients
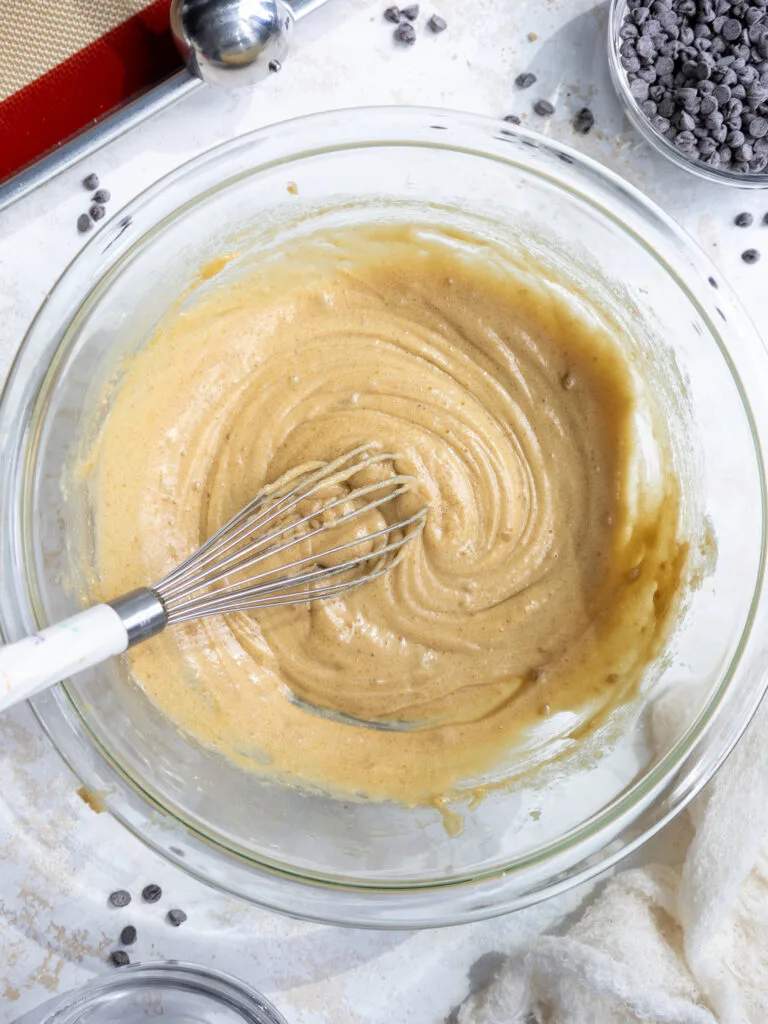
Pour the melted and cooled butter, brown sugar, and granulated sugar into a large bowl.
Whisk the ingredients together by hand or with a hand mixer for about a minute, until the mixture is smooth, and no lumps remain.
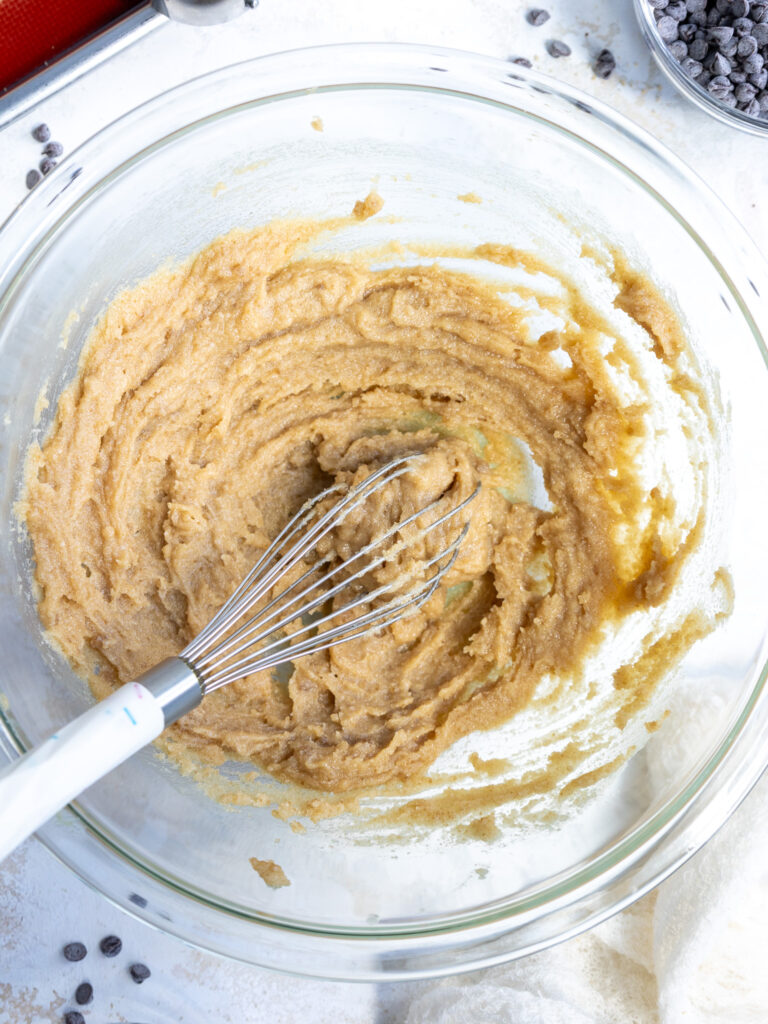
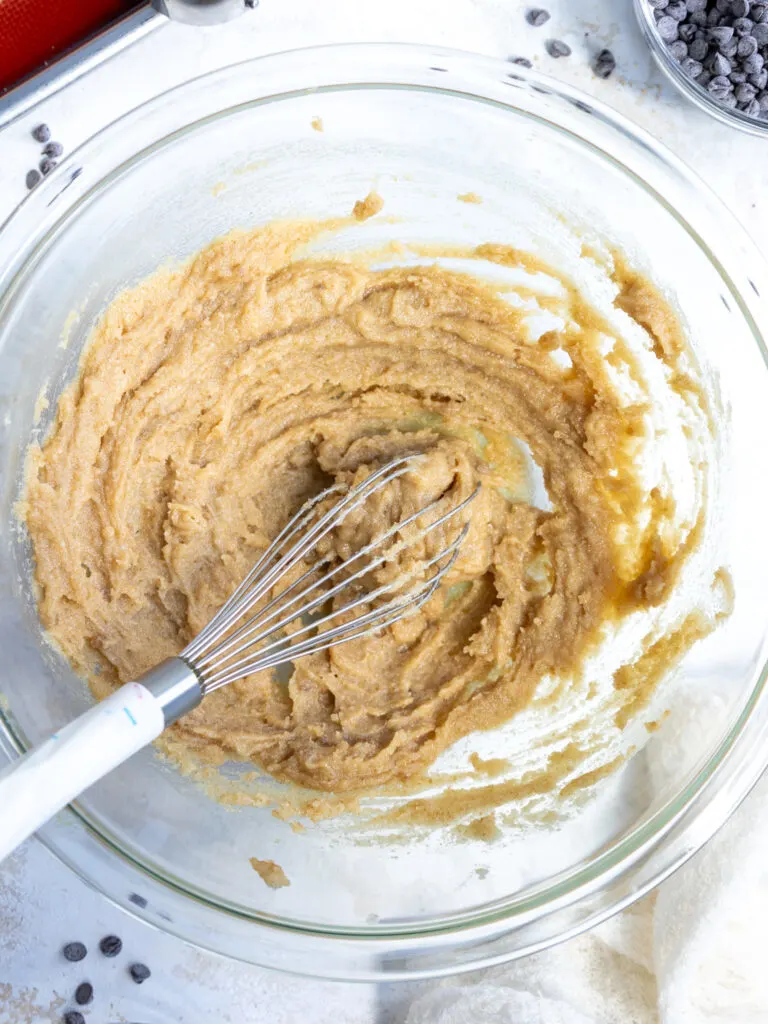

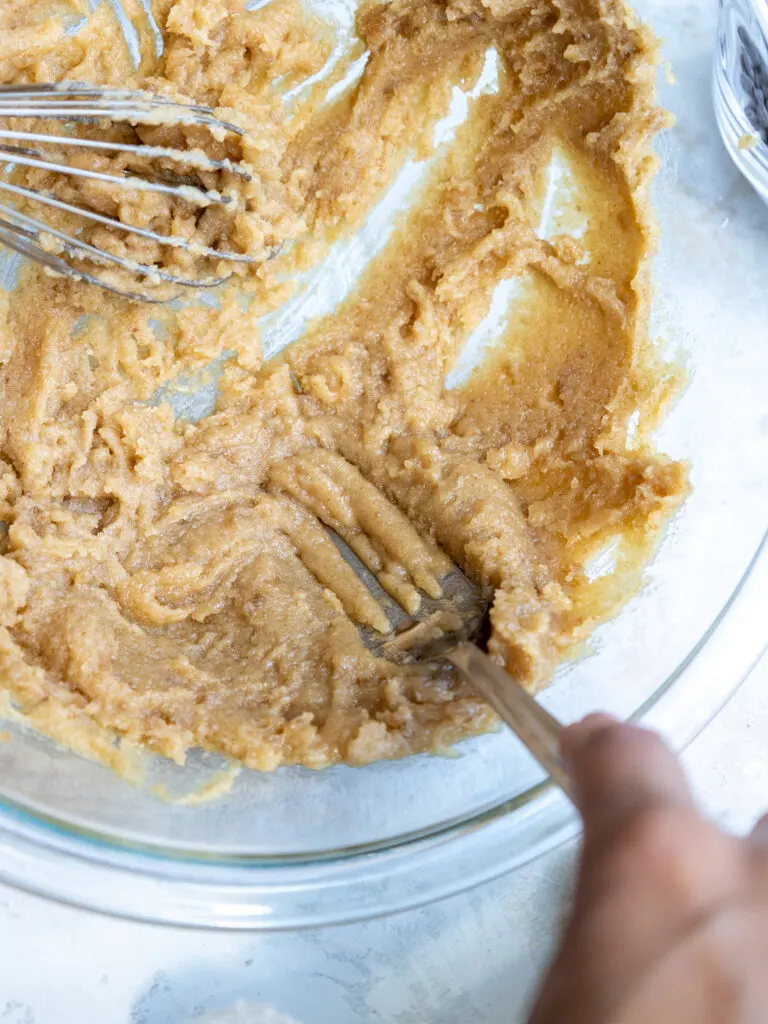
If you notice any lumps of brown sugar, use a fork to break them up. These cookies are so small that a big lump of brown sugar can really throw off their flavor and texture!
The mixture should become lighter in color as it’s whisked.
Then whisk in the egg and vanilla extract. Stir until the egg is fully incorporated.

Step 3: Mix in the Dry Ingredients
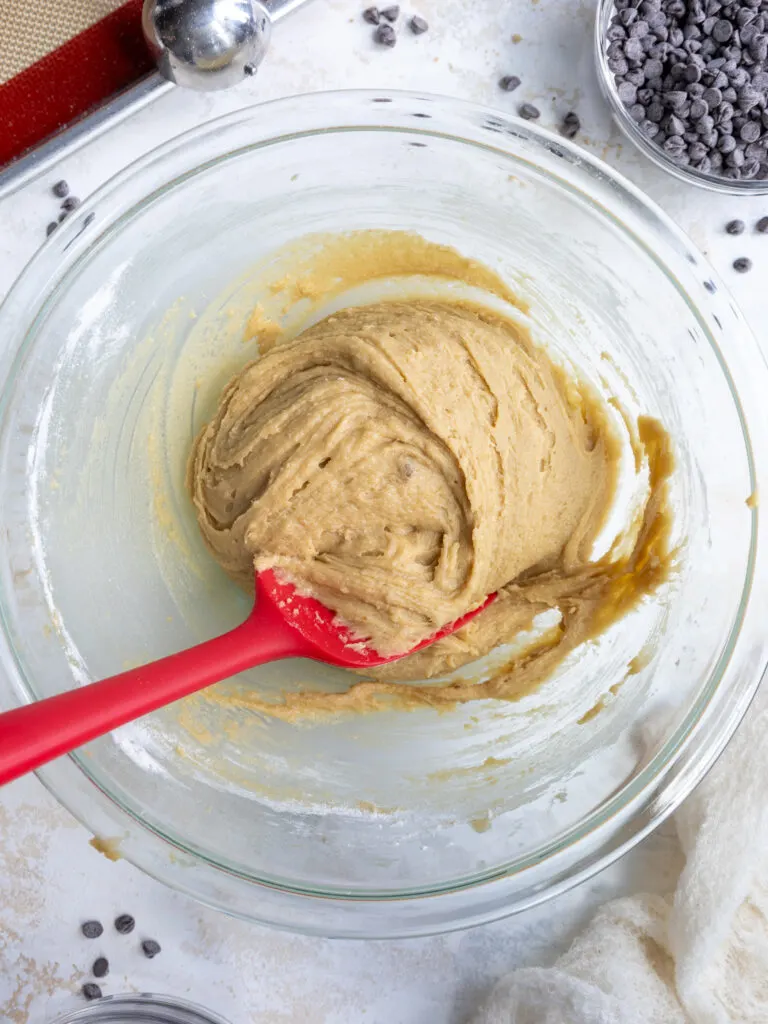
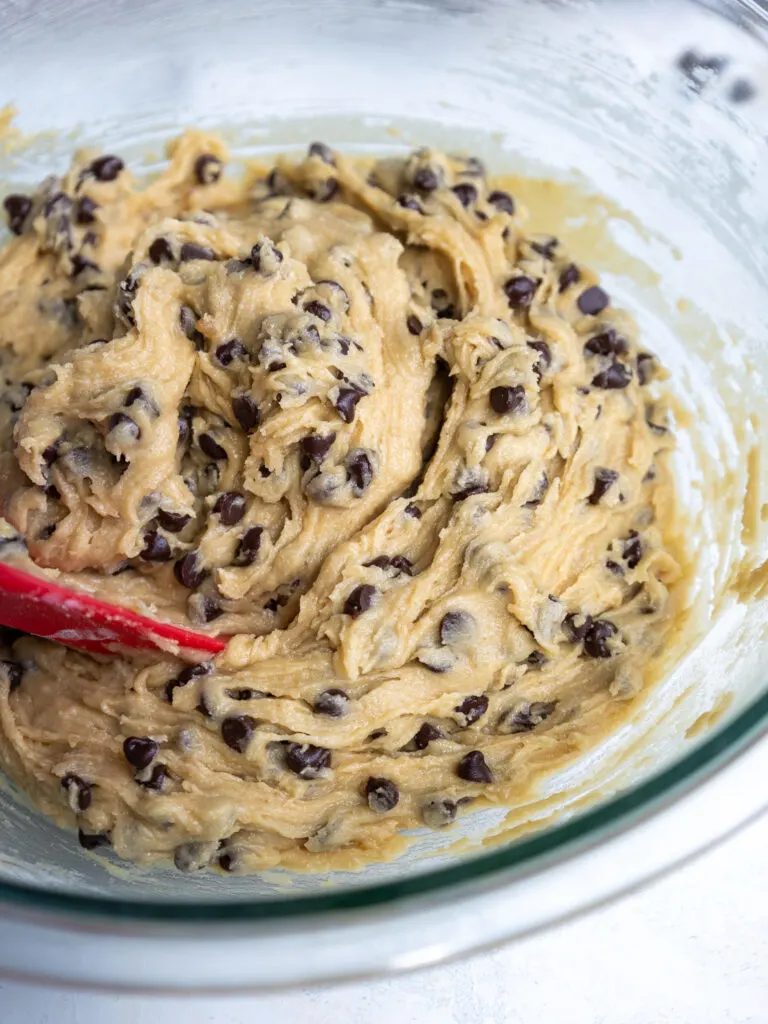
Pour the dry ingredients into the butter/sugar mixture and mix together with a rubber spatula until no visible streaks of flour remain.
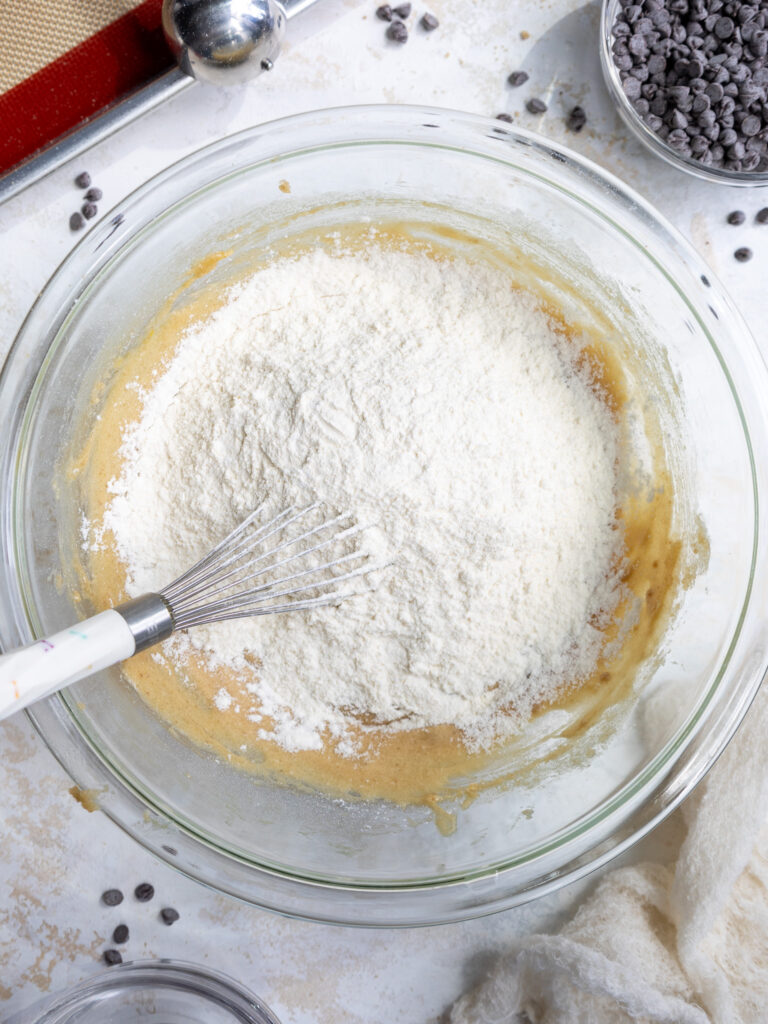
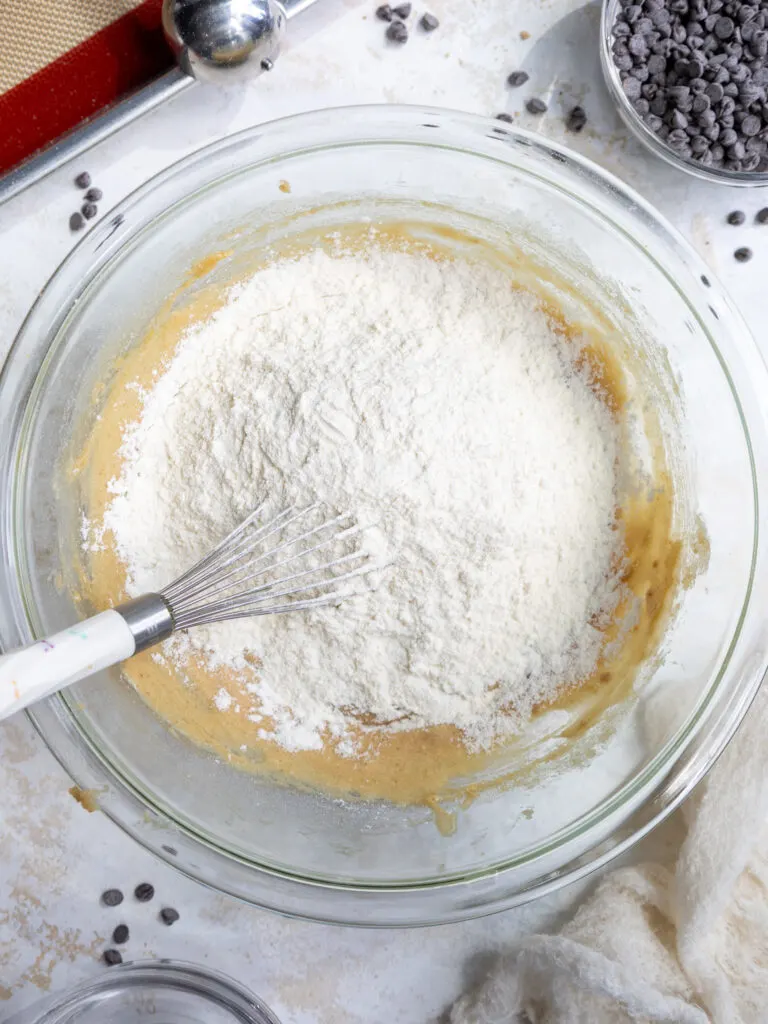
Scrape the bowl’s sides and bottom as needed to ensure everything gets properly mixed together.
The dough will be soft/sticky, but that’s how it’s supposed to be. We need it to be quite soft to be able to pipe the cookies.
Then fold in the mini chocolate chips or chopped-up chocolate chips of your choice.
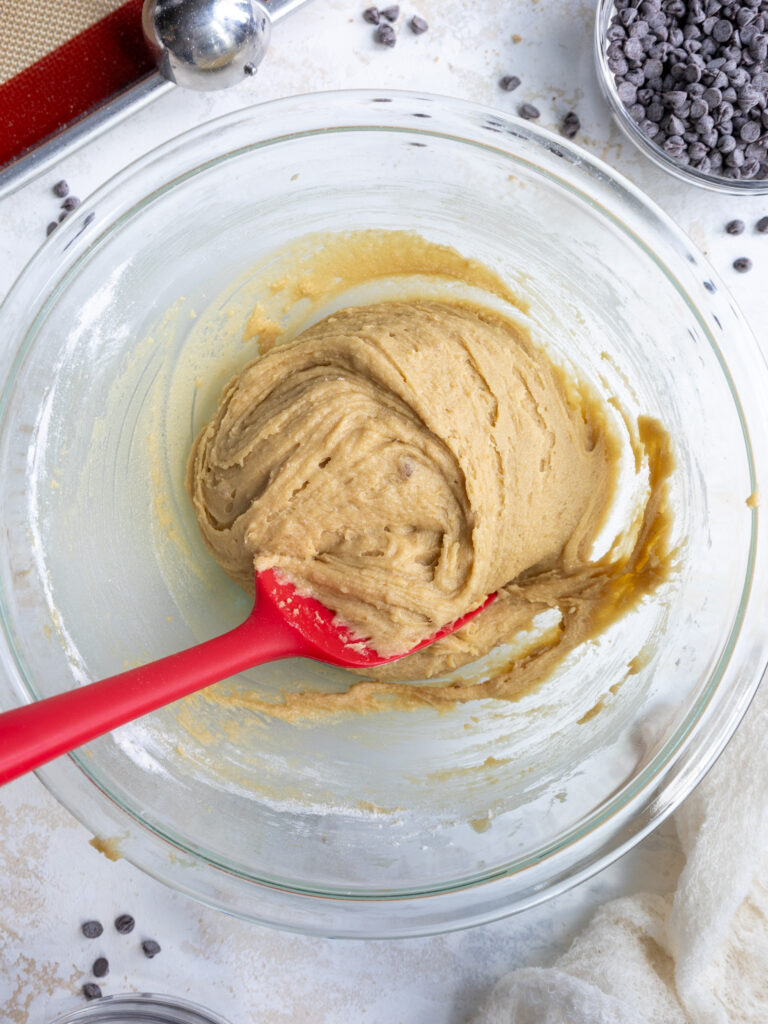


Scoop the dough into a large piping bag (I used an 18″ bag) or freezer Ziploc bag and seal the top with a rubber band or clip.
Cut an opening at the base of the bag that is about 1 inch or 2.5 cm in diameter.
Step 4: Pipe the Mini Cookies
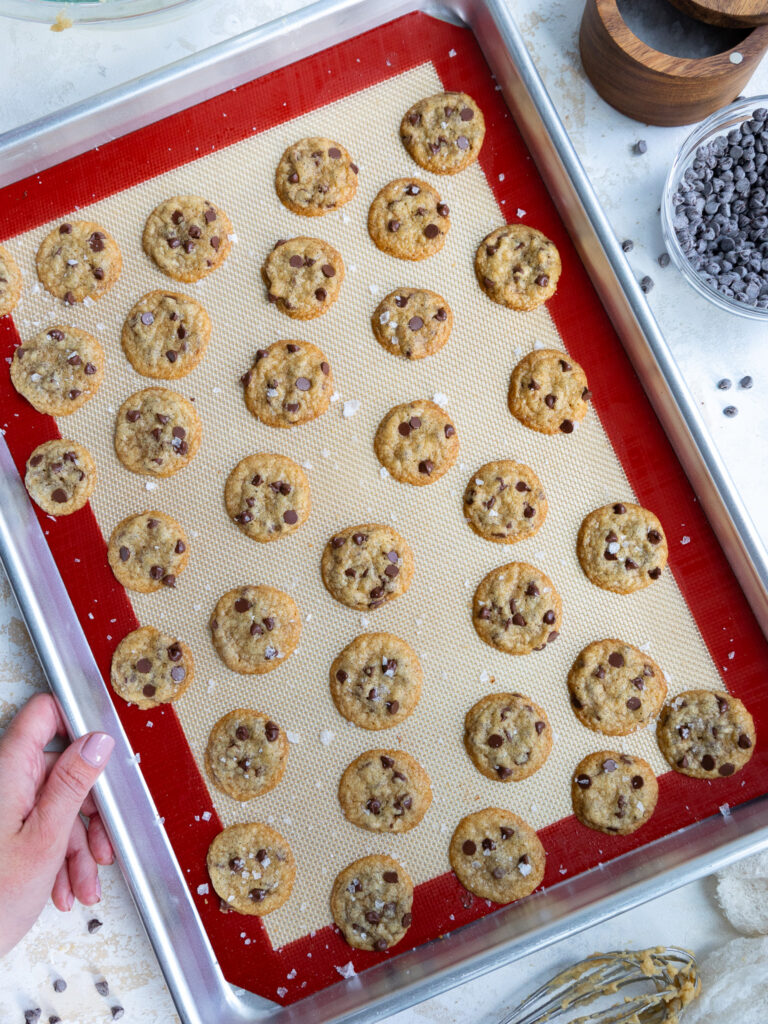
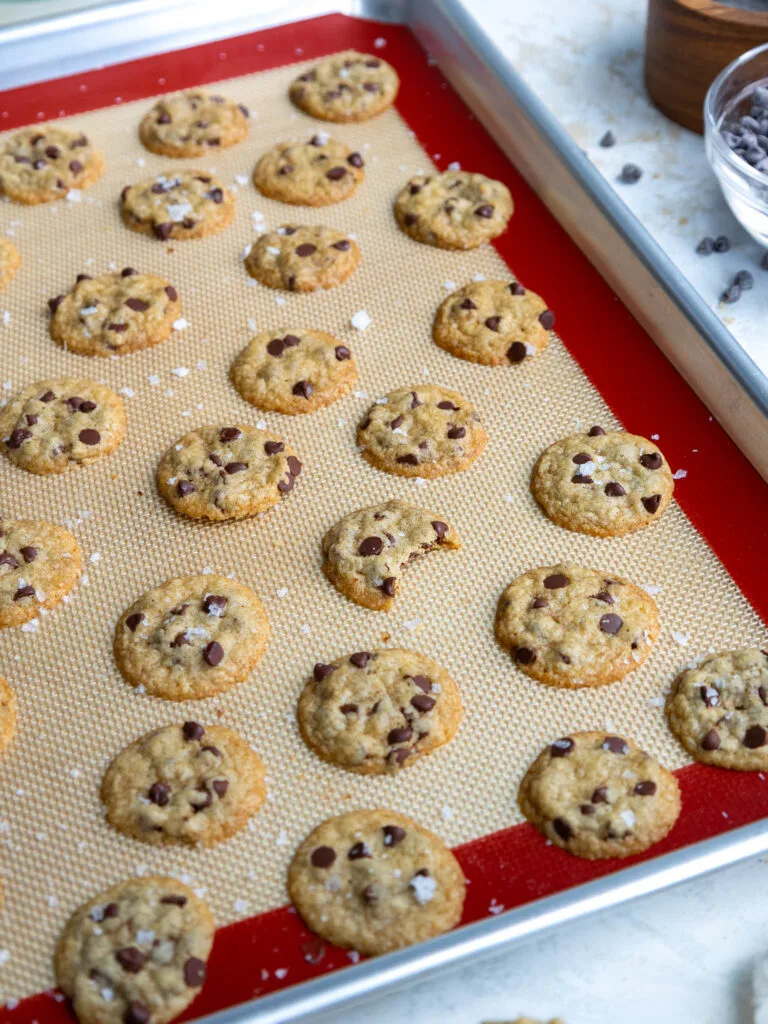
Pipe nickel-sized dollops of cookie dough onto the prepared baking sheets, spacing them about 1 1/2 inches or 4 cm apart.
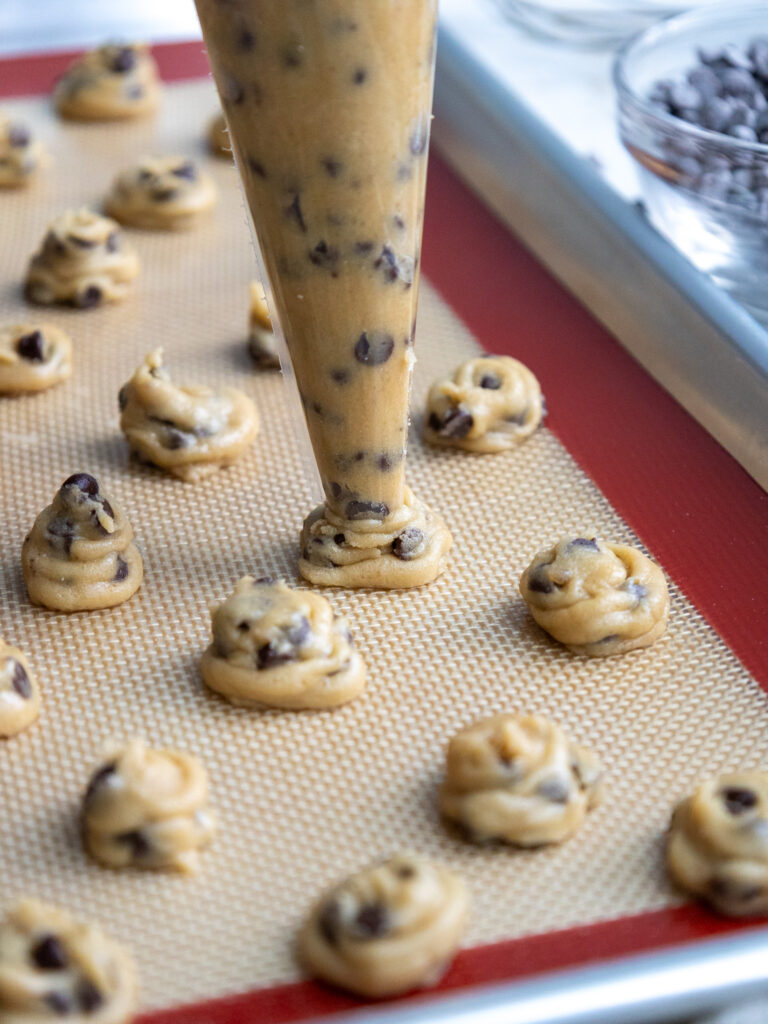


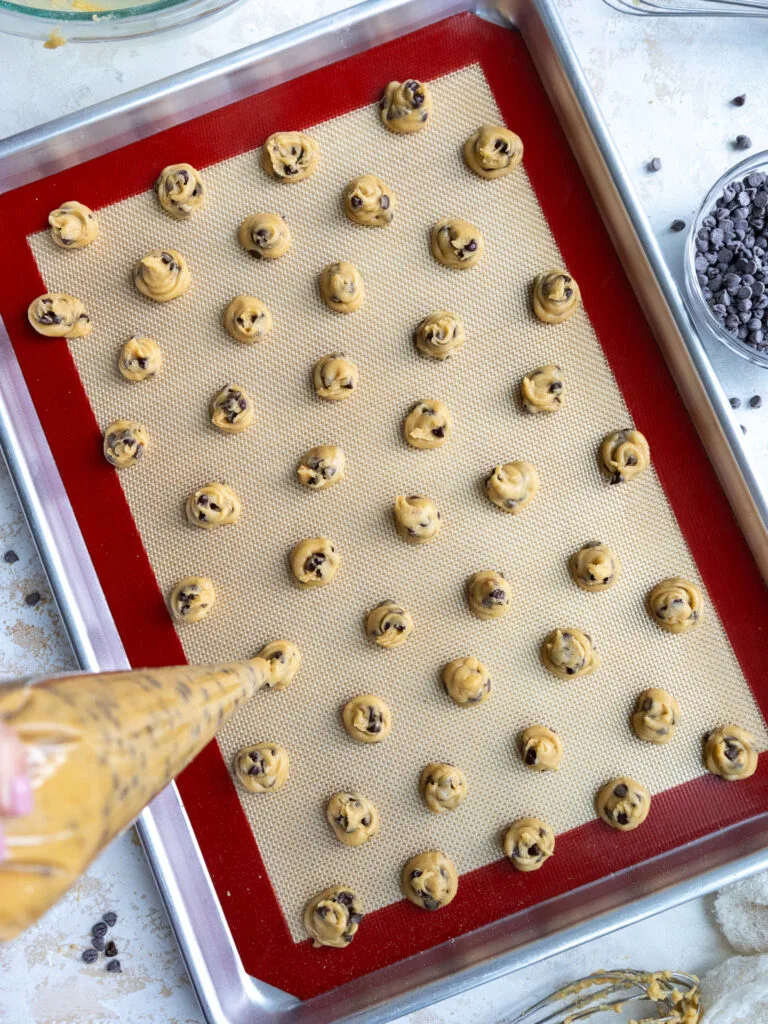
You should use about half of the dough to pipe the first two trays of cookies.
Step 5: Bake the Mini Chocolate Chip Cookies
Bake one tray of cookies at a time for 6-8 minutes. Bake time can vary a lot based on your oven, the type of pan you use, if you use silicone mats or parchment paper, how many trays you bake at a time, and whether you want chewy (shorter bake time) or crispy cookies (slightly longer bake time).
The sweet spot in my oven is baking one tray at a time for 7 minutes.
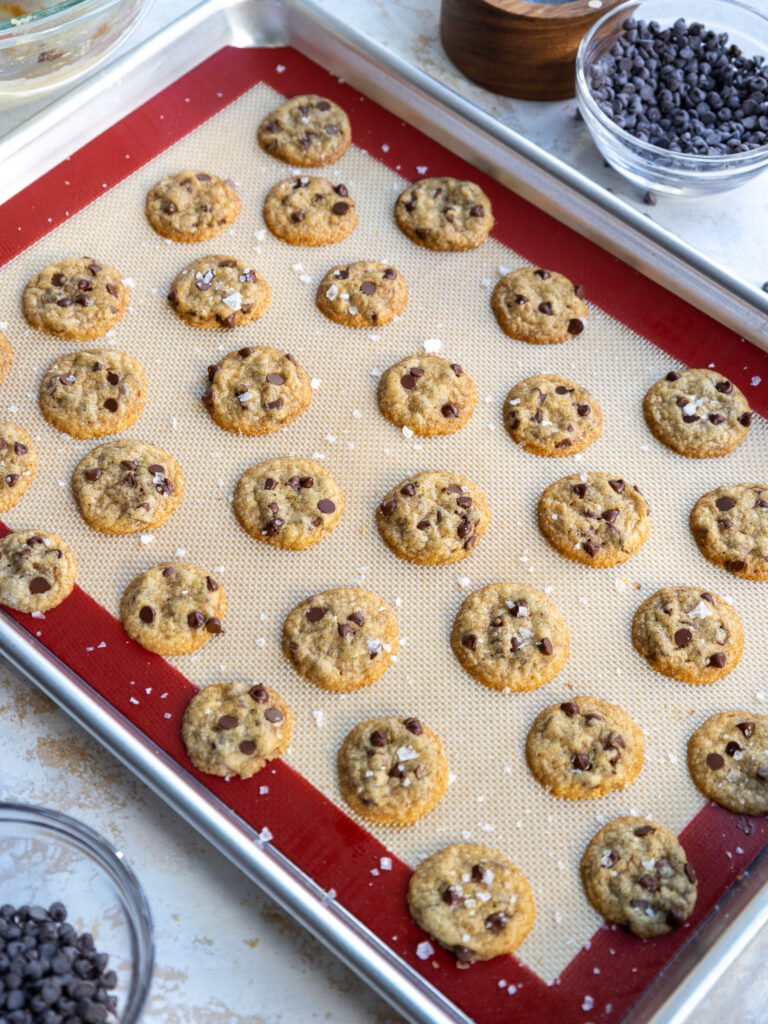
The cookies are ready when the edges just start to brown but the centers still look slightly under-baked. They will continue to bake on the sheet and firm up once removed from the oven, so it’s always best to err on the side of under-baked!

Wait for the first pan to bake and cool, then see if you’re happy with the doneness and adjust the bake time if needed for the following pans.
Note: If you are short on time and need to bake two trays at once, bake them for 8-9 minutes and swap the shelves that the pans are on halfway through to help them bake evenly. Bake time is slightly longer because heat will escape the oven as you open it.
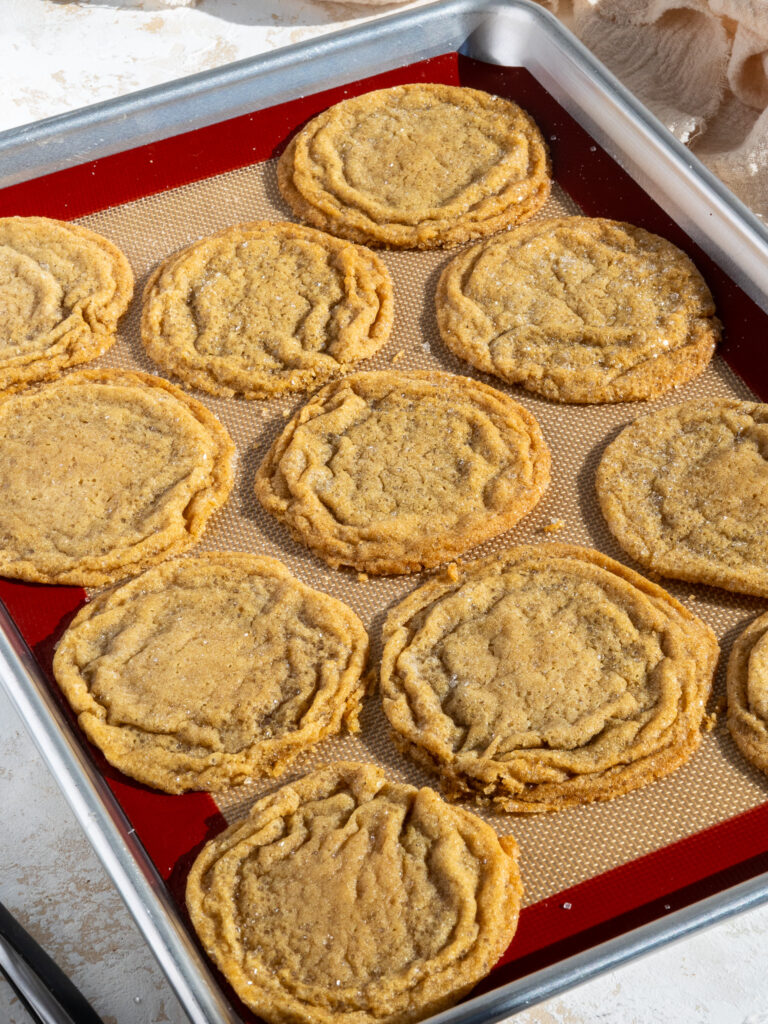
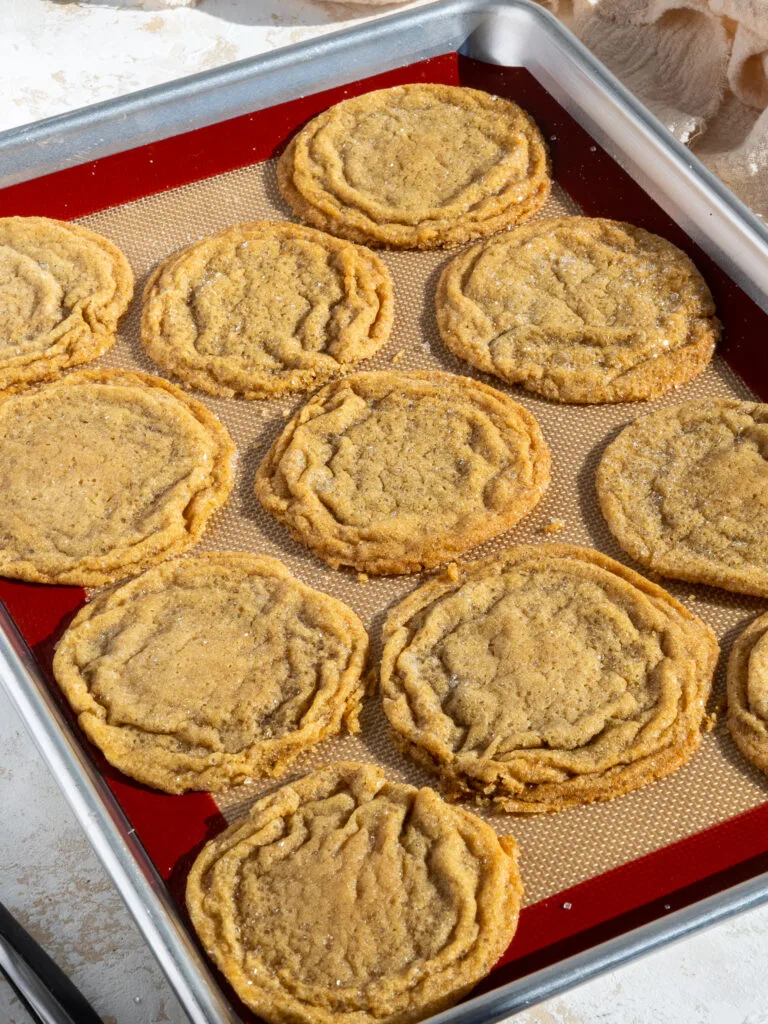
Once the cookies are done baking, place the cookie sheet on a wire rack and let the cookies cool fully on the pan. I like to press a few extra chocolate chips on top of each cookie while they’re still warm and add a garnish of flaky sea salt.

Remove the cooled cookies from the baking sheet, then pipe and bake another batch of cookie dough. Repeat until you’ve used up all the cookie dough.
Mini Chocolate Chip Cookie Ingredients & Substitutions
I love this mini chocolate chip cookie recipe just the way it is, but I know some people might not have all these ingredients on hand! Or you might have food restrictions or allergies.
Below are some swaps and variations that can be made in this recipe.

- All-purpose flour – This recipe turns out best with all-purpose flour, but you can use a gluten-free flour blend in its place if needed. I recommend using King Arthur’s Measure for Measure Gluten Free flour.
- Cornstarch – A little bit of cornstarch helps these cookies bake up soft and chewy! If you don’t have cornstarch on hand, you can skip this ingredient.
- Unsalted Butter – If you only have salted butter on hand, you can use it in place of the unsalted butter in this recipe. Just be sure to omit the salt included in this recipe. You can also use vegan butter in its place.
- Brown Sugar – This recipe calls for light brown sugar, but you can also use dark brown sugar.
- Mini Chocolate Chips – Mini chocolate chips work best in this recipe, but you can also cut up regular chocolate chips or chunks into smaller pieces. The goal is to have little bits of chocolate spread throughout these mini cookies and to make sure the chocolate bits don’t get clogged when piping the cookie.
- Flaky Sea Salt – This is an optional garnish, but it totally takes these cookies to the next level. I love using Maldon sea salt whenever I’m garnishing cookies!

How Many Cookies Does this Recipe Make?
The recipe makes 140 mini cookies. Yes, you read that right. 140 COOKIES!!
The yield can vary based on how large you pipe each cookie, but if you pipe out little mounds of cookie dough that are roughly the size of a nickel, you should end up with about 140 cookies.
I was able to pipe about 35 cookies onto each baking tray, and I ended up baking 4, 9×13″ trays of cookies.

If you want to make slightly larger or smaller cookies, be my guest! Just tweak the bake time a bit to make sure they come out when the edges are just beginning to brown and the centers are still soft.
Storing these Mini Chocolate Chip Cookies
As I always say, fresh is best!! Truly nothing tastes better than one of these mini cookies when it’s still warm and fresh out of the oven.
However, leftover cookies can be stored in an airtight container or sealable bag at room temperature for up to 3 days.
Baked cookies can also be frozen! These cookies last for up to a month if frozen in an airtight container.
Move them to the fridge the day before you plan to eat them, then let them sit out at room temperature for a few hours before diving in.

Tips for Making the Best Mini Chocolate Chip Cookies
- If you only have one large cookie tray, that’s fine! The cookie dough can sit at room temperature for several hours as the mini cookies bake and cool. Or if you have a half-sheet pan, you can use that too.
- Properly measure your flour! Fluff and level with a knife or use a digital kitchen scale.
- Don’t over-mix your cookie dough once you’ve added the flour! Mix in the dry ingredients just until the flour has been incorporated.
- Space the cookies 1 1/2 inches apart before baking them. They will spread quite a bit as they bake.
- Don’t over-bake your cookies. Even if the centers seem a bit soft coming out of the oven, they will firm up as they cool.
- Wait for the first pan of cookies to bake and cool, then see if you’re happy with the doneness and adjust the bake time if needed for the following pans.
- Press extra bits of chocolate on top of the cookies while they’re still warm to make them look even more gorgeous.
- Garnish with flaky sea salt to really take these cookies to the next level.

Let Me Know What You Think!
If you make these mini chocolate chip cookies, I’d love to hear what you think!
Please leave a rating on the recipe card below and tag @chelsweets or use #chelsweets so I can see your cookies!
Other Recipes You Might Like


Mini Chocolate Chip Cookies

These mini chocolate chip cookies are adorable and absolutely delicious! They're the perfect way to satisfy your cookie craving!!
Ingredients
Mini Chocolate Chip Cookies
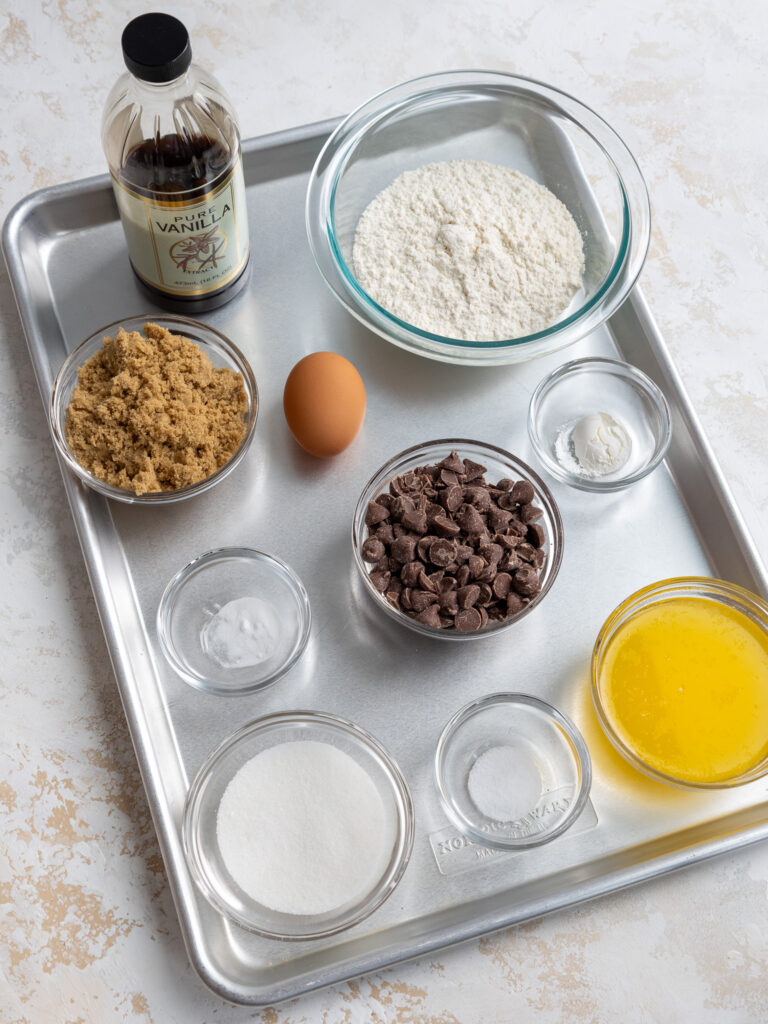
- 1/2 cup or 1 stick unsalted butter, cut into 1 Tbsp-sized pieces (113g)
- 1 1/3 cups all-purpose flour (160g)
- 1 1/2 tsp cornstarch (5g)
- 1/2 tsp baking soda (3g)
- 1/2 tsp fine salt (3g)
- 2/3 cup packed light brown sugar (133g)
- 1/4 cup granulated sugar (50g)
- 1 large egg, room temperature (56g)
- 1 tsp vanilla extract (4g)
- 1 cup mini or chopped-up chocolate chips (175g)
- 1 Tbsp flaky sea salt for garnish - optional
Recommended Equipment
Instructions
- Start by melting the butter. Place 1/2 cup of unsalted butter that's been cut into TBSP-sized pieces in a microwave-safe bowl and cover it with a paper towel (trust me, there is nothing worse than butter exploding all over your microwave!!!). Heat in 30-second intervals at half power until it's fully melted, then set aside. I like to let my butter sit for about 10 minutes once it's melted to cool down a bit. This prevents the butter from melting the mini chocolate chips and helps the cookies spread less while they bake.
- While the butter cools, preheat the oven to 350 F / 175 C and line two 9x13" baking sheets with silicone mats or parchment paper. If you only have one tray or smaller baking sheets, that's fine! The cookie dough can sit at room temperature for several hours as the mini cookies bake and cool.
- Whisk together 1 1/3 cups flour, 1 1/2 tsp cornstarch, 1/2 tsp baking soda, and 1/2 tsp salt in a large bowl. Set aside.
- Pour the melted and cooled butter, 2/3 cup packed brown sugar, and 1/4 cup granulated sugar into a large bowl. Whisk the ingredients together by hand or with a hand mixer for about a minute, until the mixture is smooth, and no lumps remain. If you notice any lumps of brown sugar, use a fork to break them up. The mixture should become lighter in color as it's whisked.
- Whisk in 1 large egg and 1 tsp vanilla extract. Stir until the egg is fully incorporated.
- Pour the dry ingredients into the butter/sugar mixture and mix together with a rubber spatula until no visible streaks of flour remain. Scrape the bowl's sides and bottom as needed to ensure everything gets properly mixed together. The dough will be soft/sticky, but that's how it's supposed to be. We need it to be quite soft to be able to pipe the cookies in step 8!
- Fold in 1 cup of mini chocolate chips or chopped-up chocolate chips of your choice. Scoop the dough into a large piping bag (I used an 18" bag) or freezer Ziploc bag and seal the top with a rubber band or clip. Cut an opening at the base of the bag that is about 1 inch or 2.5 cm in diameter.
- Pipe nickel-sized dollops (about 2 cm in diameter) of cookie dough onto the prepared baking sheets, spacing them about 1 1/2 inches or 4 cm apart. I was able to fit about 35 cookies on each 9x13" baking tray. You should use about half of the dough to pipe the first two trays of cookies.
- Bake one tray of cookies at a time for 6-8 minutes. Bake time can vary a lot based on your oven, the type of pan you use, if you use silicone mats or parchment paper, how many trays you bake at a time, and whether you want chewy or crispy cookies. The sweet spot in my oven is baking one tray at a time for 7 minutes. The cookies are ready when the edges just start to brown but the centers still look slightly under-baked. They will continue to bake on the sheet and firm up once removed from the oven, so it's always best to err on the side of under-baked!
- Wait for the first pan to bake and cool, then see if you're happy with the doneness and adjust the bake time if needed for the following pans. Note: If you are short on time and need to bake two trays at once, bake them for 8-9 minutes and swap the shelves that the pans are on halfway through to help them bake evenly. Bake time is slightly longer because heat will escape the oven as you open it.
- Once the cookies are done baking, place the cookie sheet on a wire rack and let the cookies cool fully on the pan. I like to press a few extra chocolate chips on top of each cookie while they're still warm and add a garnish of flaky sea salt. Remove the cooled cookies from the baking sheet, then pipe and bake another batch of cookie dough. Repeat until you've used up all the cookie dough.
- Enjoy warm with a glass of milk, or store fully cooled cookies in an airtight container at room temperature for up to 3 days.
Notes
How Many Cookies Does this Recipe Make?
This recipe makes 140 mini cookies. Yes, you read that right. 140 COOKIES!!
The yield can vary based on how large you pipe each cookie, but if you pipe out little mounds of cookie dough that are roughly the size of a nickel, you should end up with about 140 cookies.
I was able to pipe about 35 cookies onto each baking tray, and I ended up baking 4, 9x13" trays of cookies.
If you want to make slightly larger or smaller cookies, be my guest! Just tweak the bake time a bit to make sure they come out when the edges are just beginning to brown and the centers are still soft.
Storing these Mini Chocolate Chip Cookies
As I always say, fresh is best!! Truly nothing tastes better than one of these mini cookies when it's still warm and fresh out of the oven.
However, leftover cookies can be stored in an airtight container or sealable bag at room temperature for up to 3 days.
Baked cookies can also be frozen! These cookies last for up to a month if frozen in an airtight container.
Move them to the fridge the day before you plan to eat them, then let them sit out at room temperature for a few hours before diving in.
Tips for Making the Best Mini Chocolate Chip Cookies
- Be sure to properly measure your flour (fluff and level with a knife or use a scale).
- Don't over-mix your cookie dough once you've added the flour! Mix in the dry ingredients just until the flour has been incorporated.
- Space your cookies 1 1/2 inches apart before baking them. They will spread quite a bit as they bake.
- Don't over-bake your cookies. Even if the centers seem a bit soft coming out of the oven, I promise they will firm up as they cool.
- Wait for the first pan of cookies to bake and cool, then see if you're happy with the doneness and adjust the bake time if needed for the following pans.
- Press extra bits of chocolate on top of the cookies while they're still warm to make them look even more gorgeous.
- Garnish with flaky sea salt to really take these cookies to the next level!
Nutrition Information
Yield
140Serving Size
1Amount Per Serving Calories 16Total Fat 0gSaturated Fat 0gTrans Fat 0gUnsaturated Fat 0gCholesterol 2mgSodium 64mgCarbohydrates 3gFiber 0gSugar 2gProtein 0g
Jen M.
Sunday 8th of September 2024
These are so good! I made half with rainbow sprinkles and half with mini chocolate chips. I traced a nickel on the underside of the parchment paper to use as a size guide and ended up with 142 cookies. Will definitely make again.
Rachel Muir
Sunday 8th of September 2024
Perfect mini cookies! Recipe worked great!
Jen M.
Friday 6th of September 2024
These were so fun to make and eat. I made half with rainbow sprinkles and half with mini chocolate chips. I traced a nickel on the underside of the parchment paper to use as a guide to get them the right size and ended up with ~145 cookies. Will definitely make these again.
Sara
Monday 26th of August 2024
I absolutely love these, they're really easy to make and taste so so good. I like to have a batch in the freezer for "emergencies" and they freeze great. The only issue with them is that they're too easy to eat by being bitesize lol
Ginger
Monday 5th of August 2024
I can easily see how it should yield 140, but it’s easy to pipe these just a little too big. After I over-piped the first tray, I did these the “size of a nickel” and ended up with 100. Delicious bite-sized cookies! Love this recipe. Will be adding it to my rotation. Thank you!!