
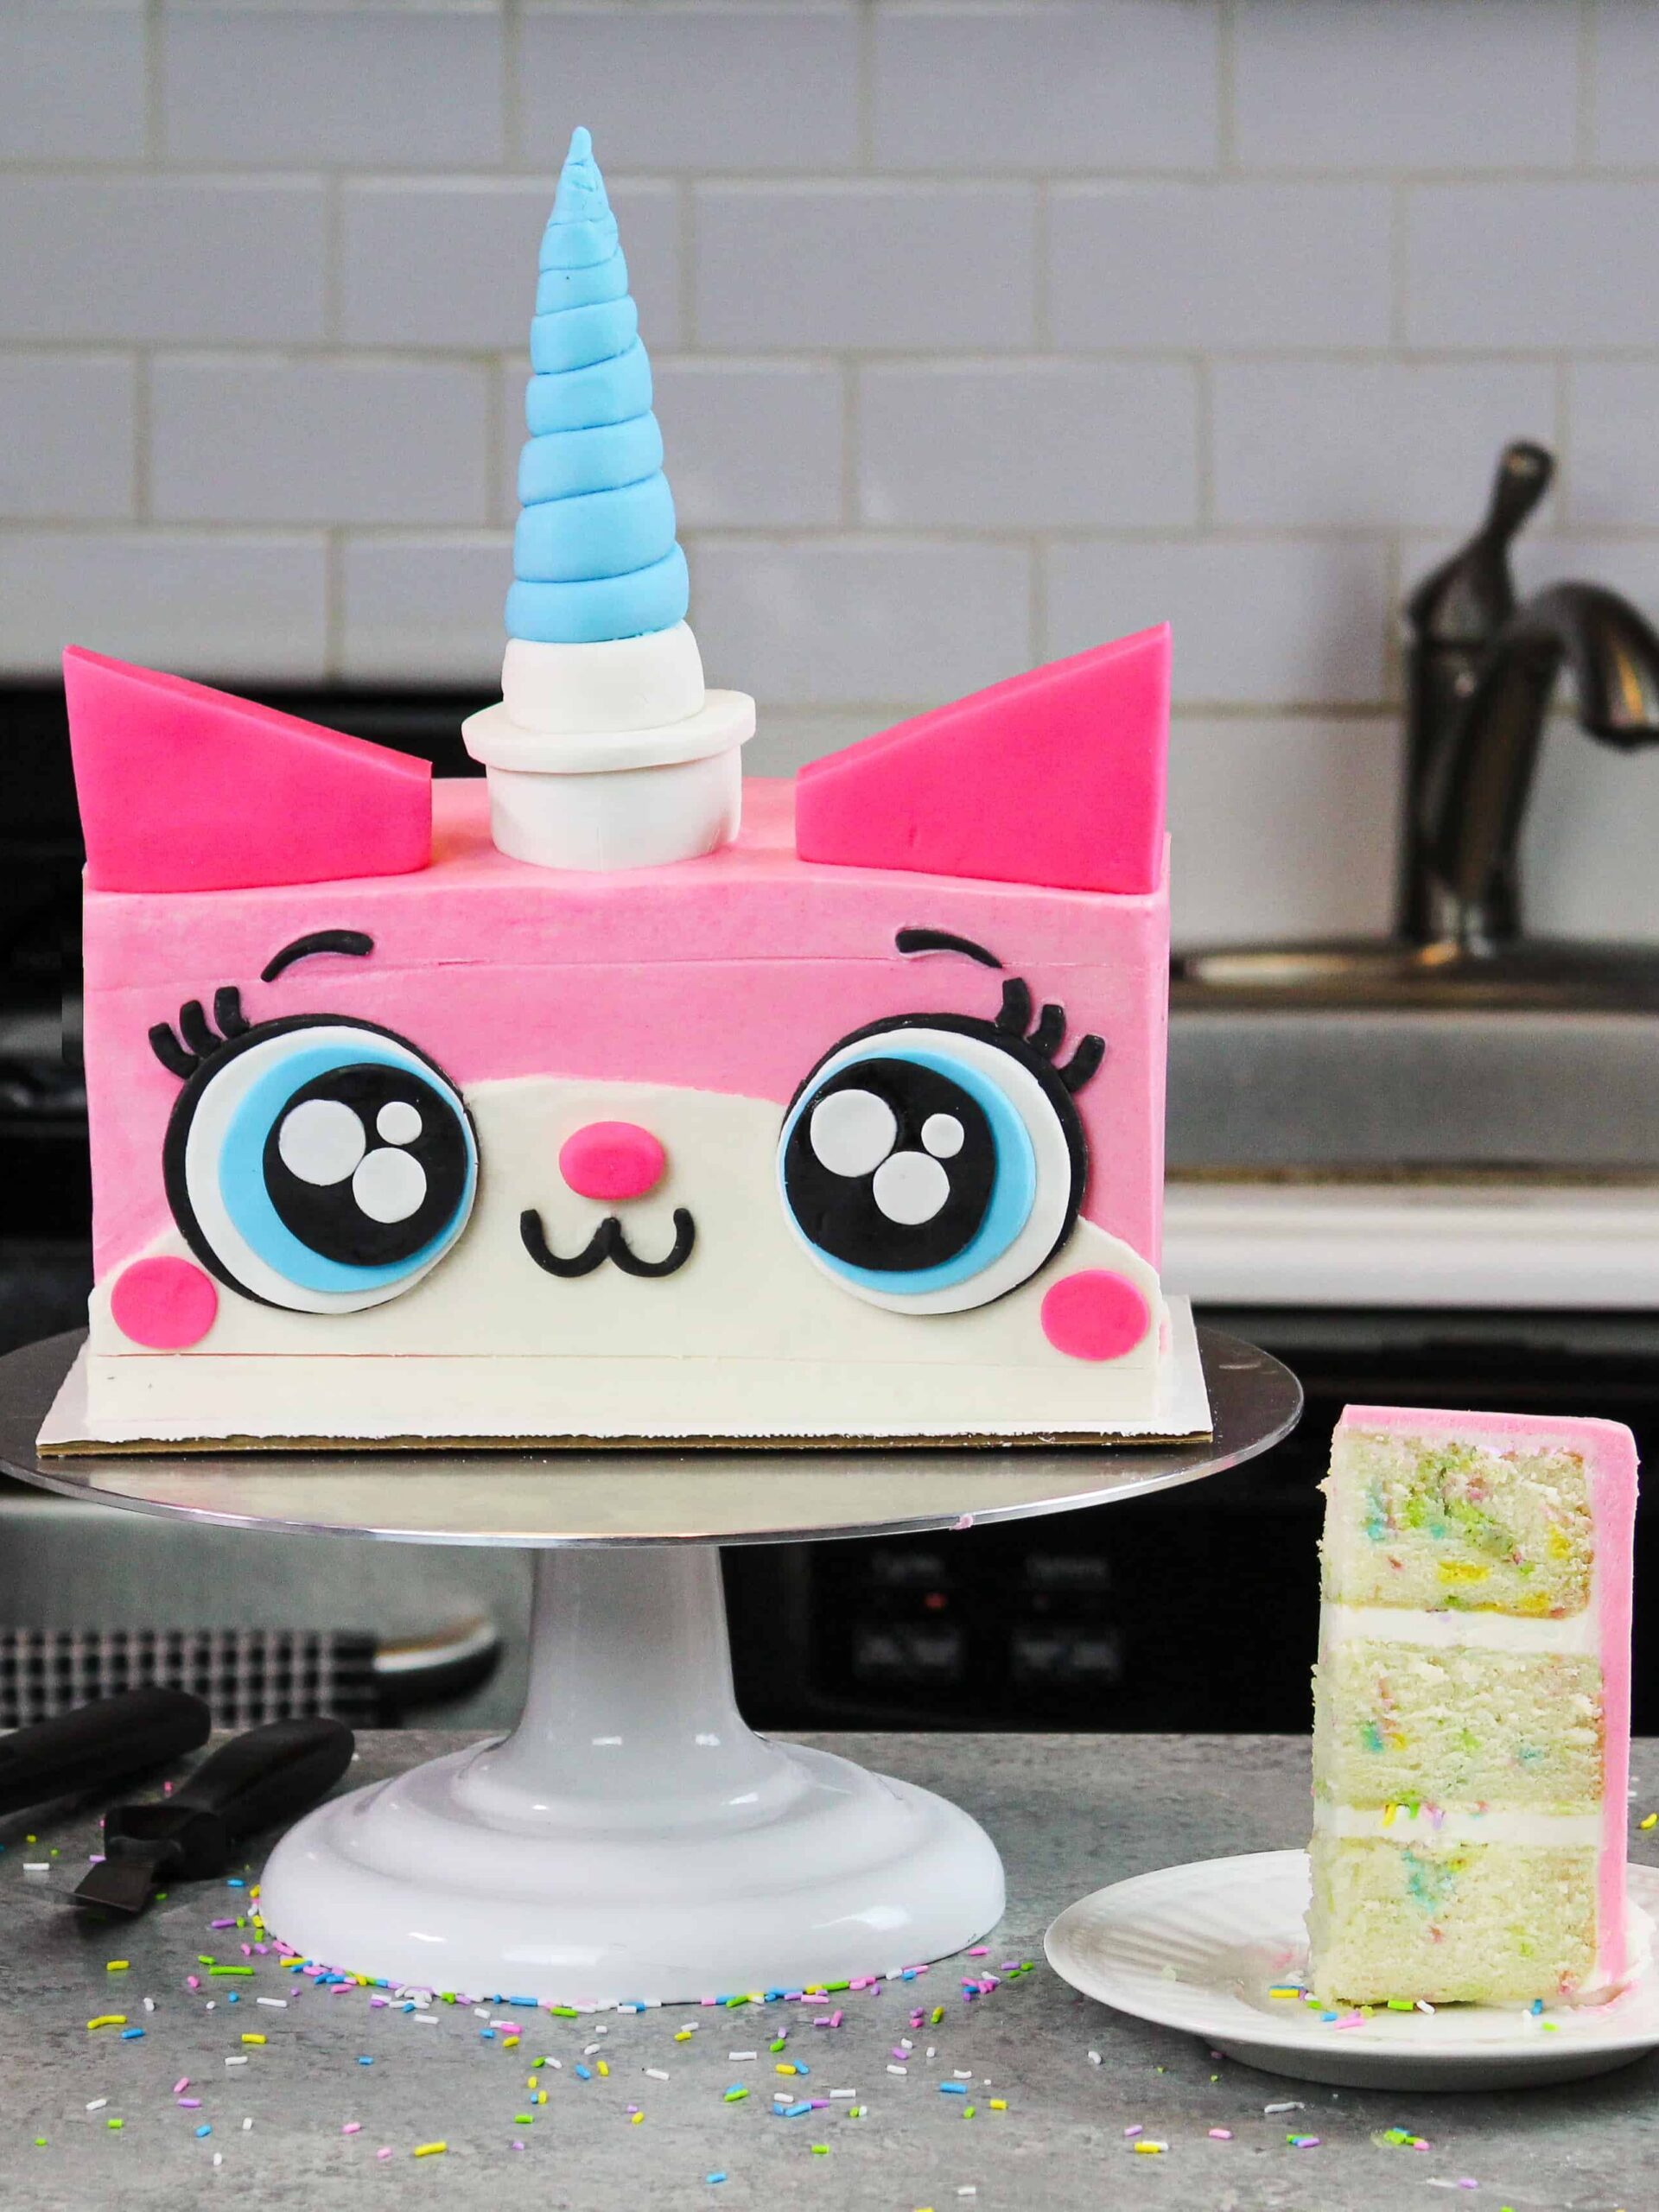
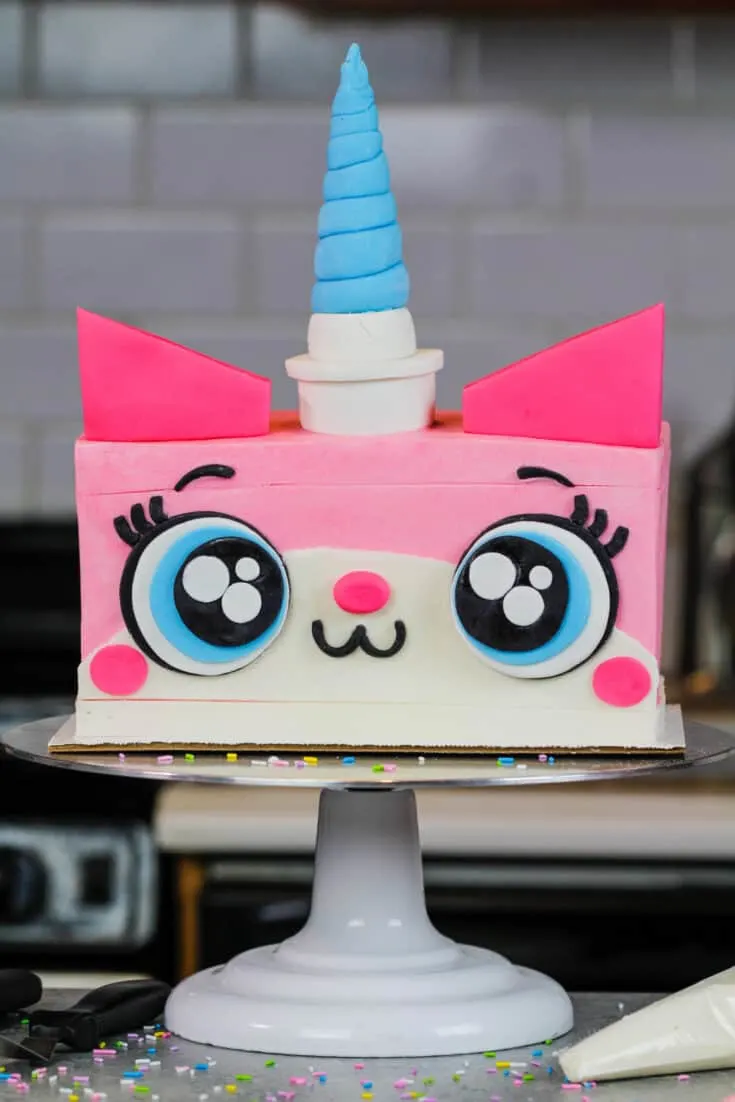
Today I’m sharing a recipe and detailed tutorial on how to make a Unikitty cake! Unikitty is my favorite character from The Lego Movie, and I figured it was about time I share a cake of her!!

Making Unikitty’s Face
While I’m always team buttercream, there are some situations where using a bit of fondant is just better than trying to pipe certain details.
Unikitty has those huge bright eyes and I wanted to get her expression just right.
I used circle cutters and thinly rolled out black, white, and blue fondant to create her eyes. I made her nose, cheeks and ears with bright pink fondant.
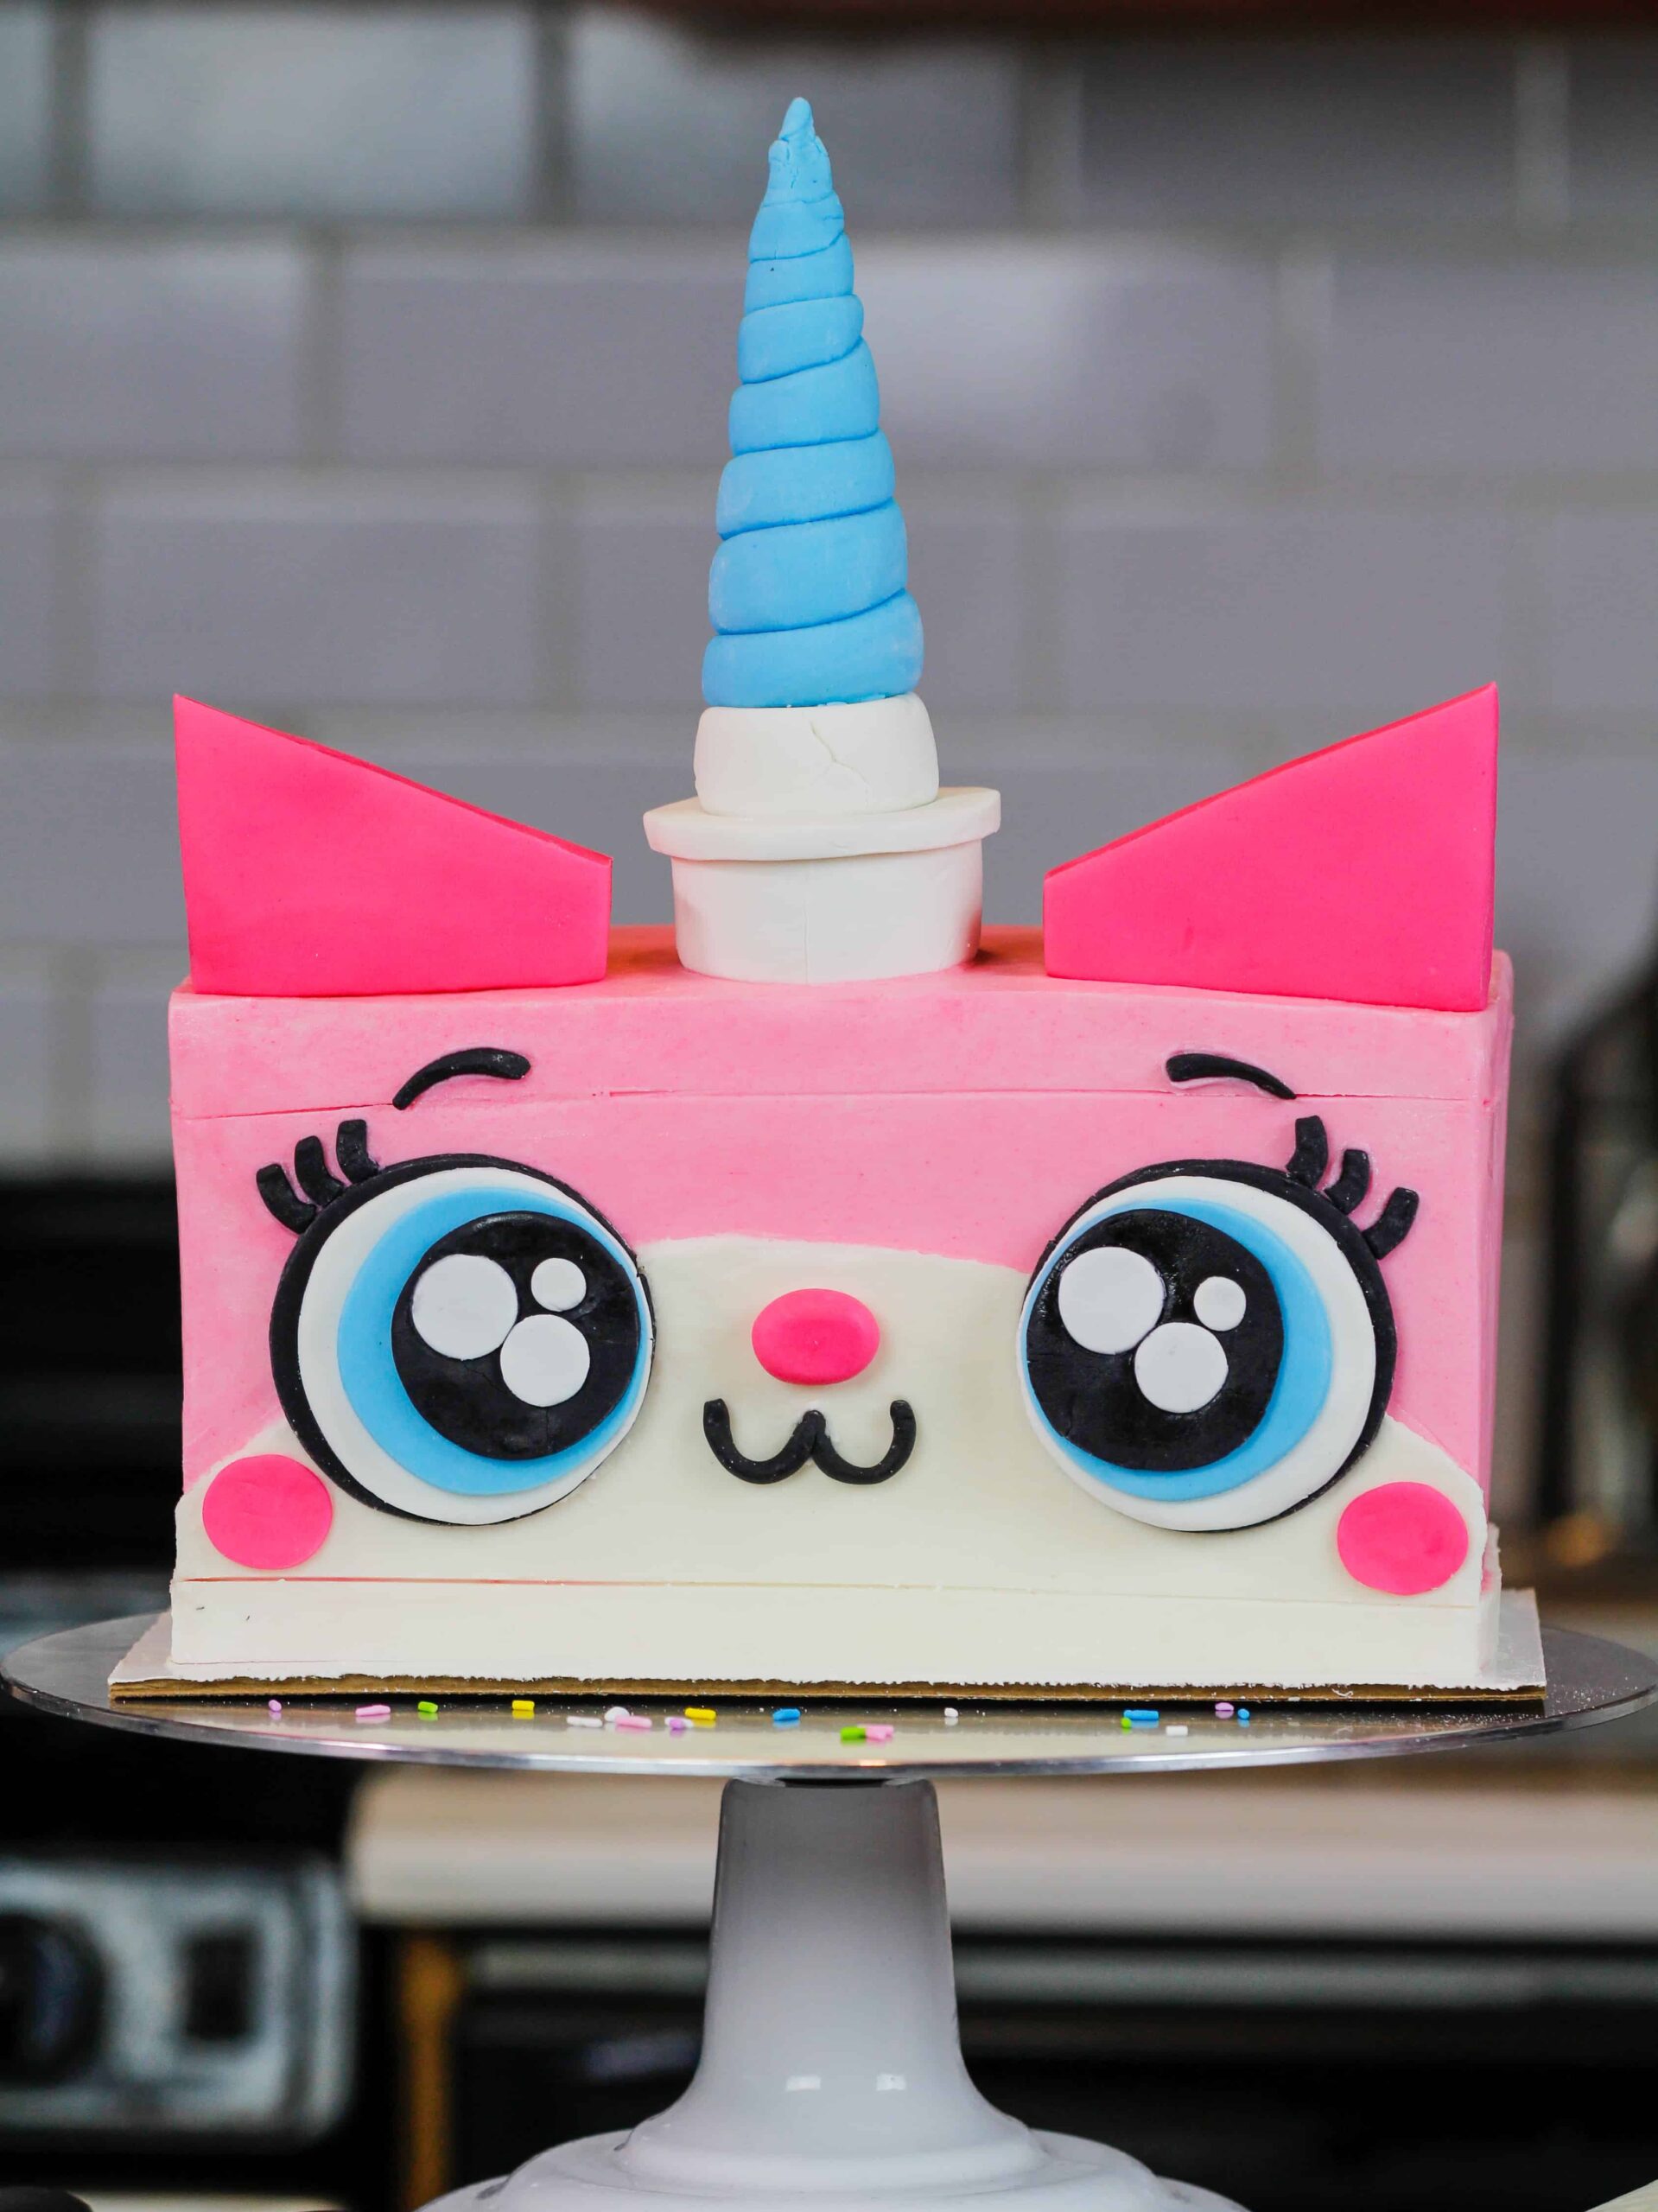

Then it was time to make Unikitty’s ears and horns. For this step it’s important to support them properly! I recommend inserted toothpicks into her ears to make sure they stayed upright.
When creating her horn, roll out a long, tapered piece of blue fondant and wrap it tightly around a wooden dowel. Leave a bit of wooden dowel exposed to allow you to press the horn into the cake.
To help the fondant stay tightly wound around the dowel, paint a bit of clear liquor or extract between the coils to seal them together.
I usually use premade fondant that I order on amazon, but you can also make your own fondant.
I figure if I’m already putting so much energy into making the cake and frosting from scratch it’s ok to take a little short cut on the fondant.
Substitutions and Swaps – Funfetti Cake Layers
This Unikitty cake recipe uses quite a few ingredients and I know you might not have all of them on hand. Or if you have food allergies or restrictions, I’ve got you covered.
Below are some swaps and substitutions that can be made in this cake:
- All Purpose Flour – This recipe turns out best with AP flour, but you can use a gluten free flour blend (be sure to also follow my tips below) or cake flour if that’s all you have on hand. I don’t recommend using straight almond flour though!
- Granulated Sugar – I do not recommend reducing the amount of sugar or changing the type of sugar, as it will change the texture of the cake layers.
- Unsalted Butter – If you only have salted butter on hand, you can use it in place of the unsalted butter in this recipe. Just be sure to omit the salt that this recipe calls for. You can also use vegan butter in its place!
- Egg whites – If you don’t have egg whites on hand (I use the type out of the carton), you can use 4 whole eggs in place of the egg whites. Or you have an egg allergy you can use flaxseed eggs in their place or 1 cup of unsweetened applesauce.
- Sour Cream – You can also use full fat yogurt, buttermilk, whole milk or an alternative yogurt or milk (almond, soy, oat) if you’re dairy free.
- Vegetable Oil – You can use any flavorless oil in this recipe. Canola or even sunflower oil would work great!
- Almond Extract – I love adding a little almond extract into this cake recipe, but you can omit it if you’re allergic or not a fan.
Substitutions and Swaps – Vanilla Buttercream Frosting
- Unsalted Butter – If you only have salted butter on hand, you can use it in place of the unsalted butter. Just be sure to omit the salt that this frosting recipe calls for. You can also use vegan butter in its place!
- Heavy Cream – Whole milk or alternative milk (soy, almond, oat) will work fine in this frosting recipe if that’s what you have on hand.
- Almond Extract – I love adding a little almond extract into the frosting as well, but you can omit it if you’re allergic or not a fan of it.
Tips for Making the Best Unikitty Cake
- Properly measure your flour (spoon into the cup measure, then level) or use a kitchen scale to measure your dry ingredients.
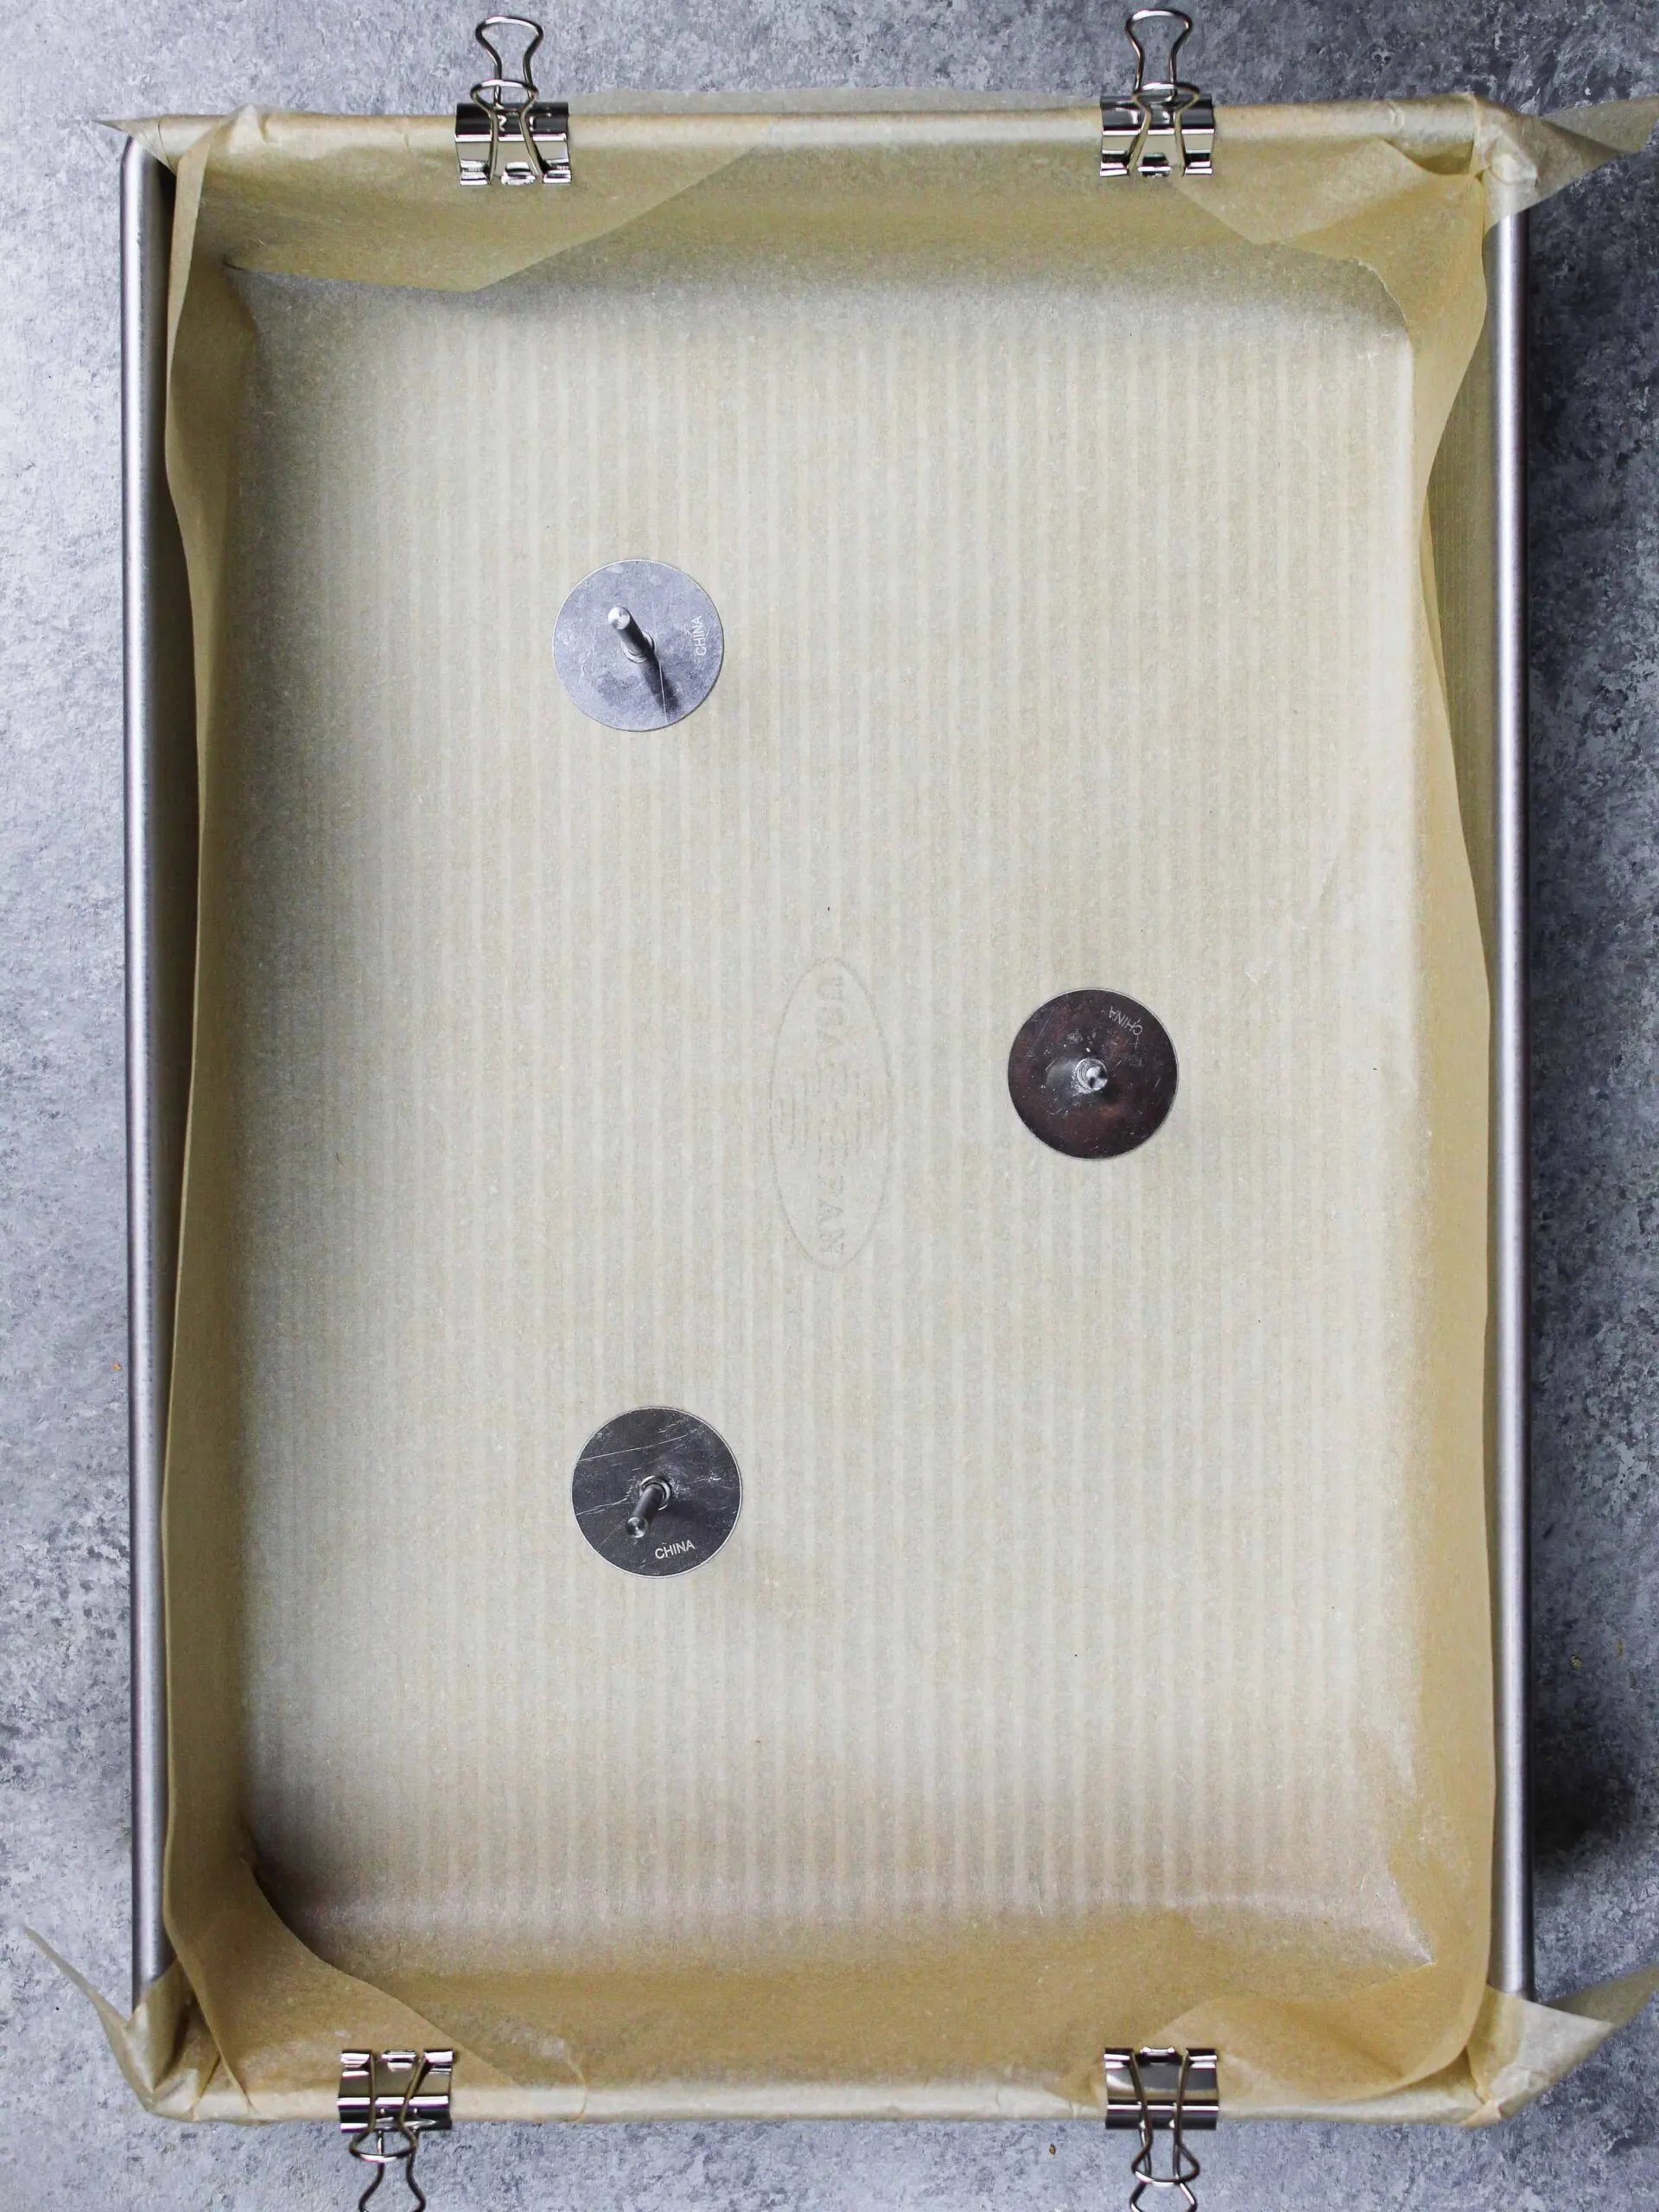
- Use flower nails to help your sheet cake bake more evenly and quickly. If you don’t have any on hand, increase your bake time by 5-10 minutes.
- Shape your Unikitty horn around a wooden dowel to help it keep its shape and securely place it on top of the cake.
- Natural food coloring (either liquid or powder) can be used in place of the pink gel food coloring. The color won’t be quite the same, but it will still be beautiful.
- Ingredients at room temp mix together better. Set out any cold ingredients ahead of time.
- Mix your cake batter just until the ingredients are incorporated. This will ensure your cake layers are tender and fluffy.
- Chill your cake layers in the freezer for about 20 minutes before assembling the cake. This makes it easier to stack and frost.
- Make this unikitty cake vegan or dairy free! Use your favorite type of dairy free milk to replace the sour cream and heavy cream and use vegan butter sticks in place of the butter.

Making This Unikitty Cake in Advance & Storage Tips
Make your cake layers in advance and freeze them. It breaks the process up and makes it more approachable.
Make your frosting ahead of time too or save any leftover frosting. It can be stored in an airtight container in the fridge for up to a month. Or store it in the freezer for up to 3 months! Be sure to give it a good stir once it thaws to get the consistency smooth again.
A frosted cake can last in the fridge for up to a week. In the freezer it can last for up to a month! The buttercream locks in all the moisture, keeping the cake fresh and delicious.
The fondant on this cake can be refrigerated as long as you don’t live in a warm/humid environment. If you live somewhere really warm, wait to add the fondant features until the day you plan to serve the cake.
If you cut into the cake and have leftovers, use any remaining frosting to cover the cut section to keep it moist. It can be stored in the fridge like this for up to a week.

Let Me Know What You Think!
If you make this unikitty cake recipe, I’d love to hear what you think of it! Please leave a rating and comment below.
Don’t forget to tag me @chelsweets and use #chelsweets so that I can see your amazing creations on social media.
Other Recipes You Might Like:


Unikitty Cake

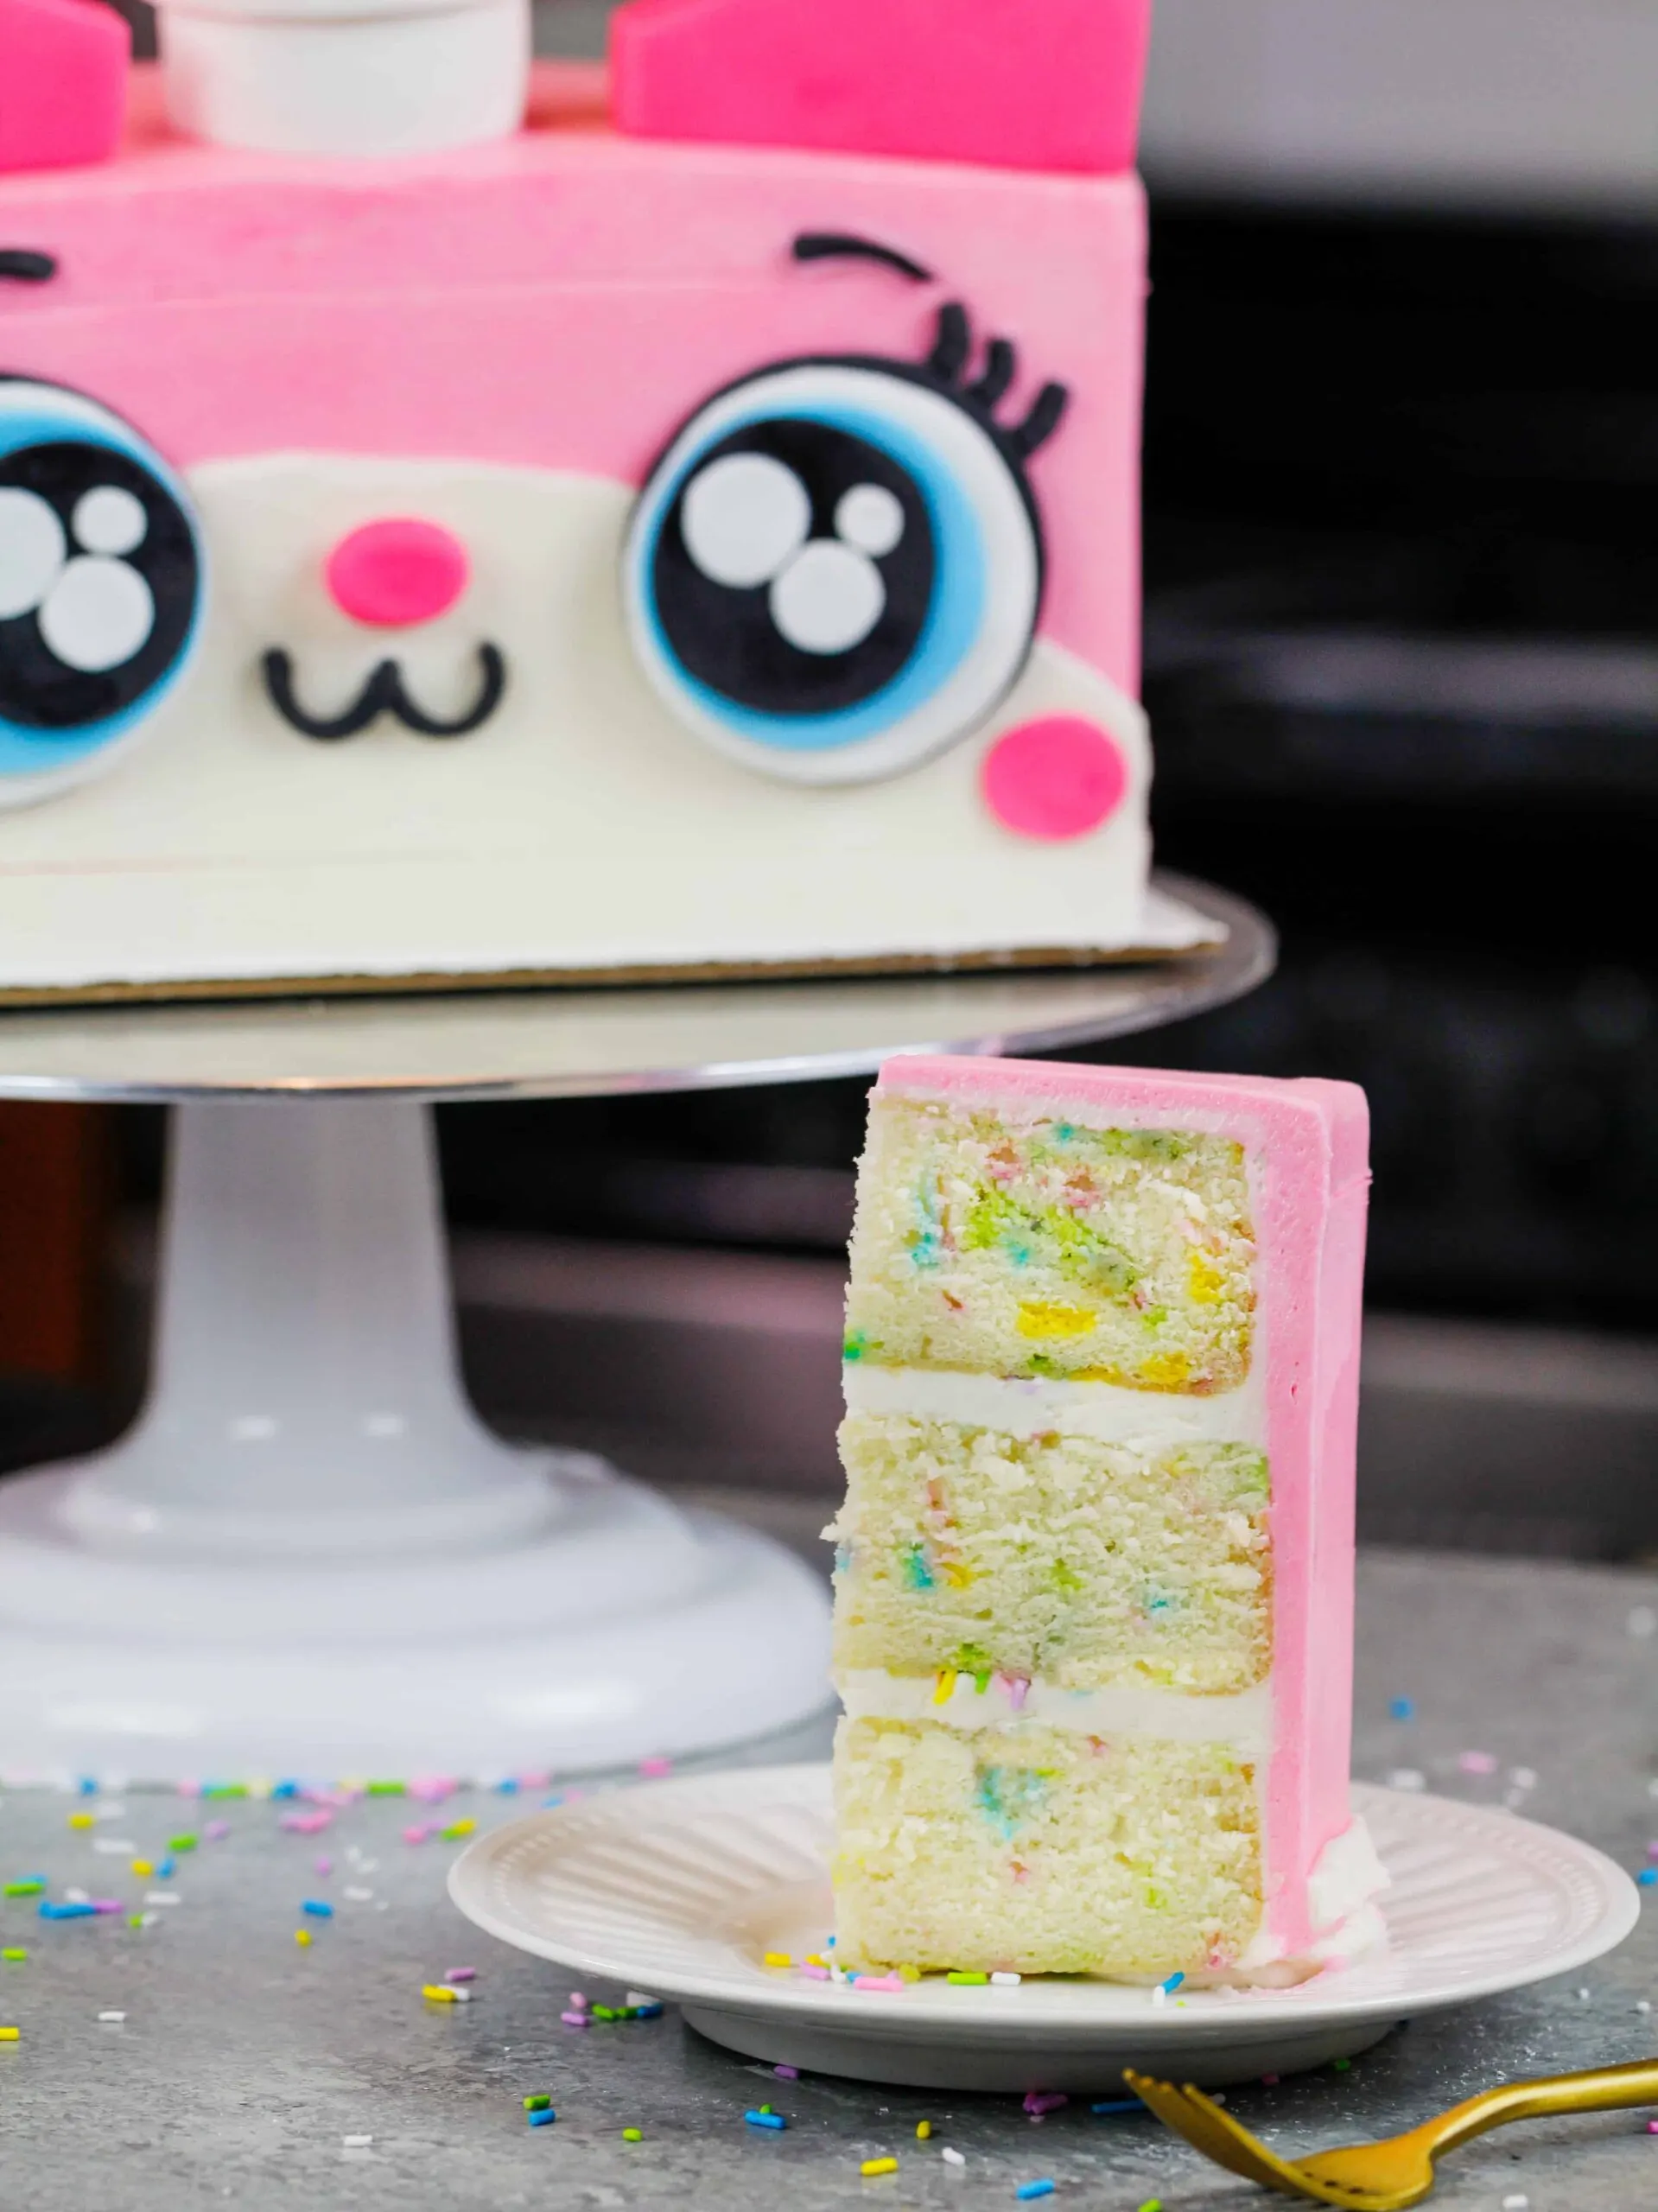
This Unikitty cake is just fun to make as it is eat! It's made with funfetti cake layers and frosted with buttercream frosting.
Ingredients
Funfetti Sheet Cake
- 3 cups all-purpose flour (375g)
- 3 cups granulated sugar (600g)
- 2 1/2 tsp baking powder (10g)
- 1 tsp fine salt (6g)
- 1 cup unsalted butter, room temperature (226g)
- 1 cup pasteurized egg whites from a carton or about 7 egg whites, room temperature (235g)
- 1 1/2 cups sour cream, room temperature (380g)
- 1/8 cup vegetable oil (28g)
- 2 tsp vanilla extract (8g)
- 1 1/2 tsp almond extract (6g)
- 3/4 cup of rainbow jimmies or long strand sprinkles (130g)
Vanilla Buttercream Frosting
- 3 cups unsalted butter, room temperature (678g)
- 1 Tbsp vanilla extract (12g)
- 2 tsp of almond extract (8g)
- 1 tsp fine salt (6g)
- 11 cups powdered sugar (1375g)
- 1/3 cup heavy cream or whipping cream, room temperature (75g)
Decorations and Tools:
Instructions
Funfetti Cake Layers:
- Preheat oven to 325°F. Line a 9x13 inch (quarter sheet) pan with parchment paper and two flower nails / heating cores.
- Spray the pan and flower nails with nonstick baking spray.
- Place two flower nails in the center of the pan with the flat side resting flat against the cake pan. Make sure they are a few inches apart.
- Mix together 3 cups all purpose flour, 3 cups sugar, 2 1/2 tsp baking powder and 1 tsp salt in a stand mixer with a paddle attachment or hand mixer on a low speed until combined.
- Mix in 1 cup of unsalted butter slowly into the dry ingredients on a low speed. Continue to mix until no large chunks of butter remain, and the mixture looks crumbly.
- Pour in 1 cup of egg whites and mix on low until just combined.
- Mix in 1 1/2 cups sour cream on a low speed.
- Add in 1/8 cup of vegetable oil, 2 tsp of vanilla extract and 1 1/2 tsp of almond extract. Mix at a low speed until incorporated.
- Scrape down the sides of the bowl with a rubber spatula then beat on a low speed for about 30 seconds to make sure everything is properly mixed together.
- Fold 3/4 cup sprinkles into the cake batter using a rubber spatula, just until they're evenly distributed.
- Pour the batter into the prepared pan.
- Reposition the flower nails so that they’re event spaced across the pan.
- Bang the pan on your counter to remove any air bubbles, then bake for 38-45 minutes or until a toothpick comes out with a few moist crumbs.
- Rotate the pan halfway through to help the cake bake evenly.
- Let the cake cool in the pan for about 15 minutes, then flip the cake upside down onto the wire rack and remove the flower nails.
- Once the cake has finished cooling use a flat surface like a cutting board to flip the sheet cake upright then use a serrated knife to level the top of the cake.
- Use a ruler to cut three even sections from the sheet cake that are roughly 4 1/4 inches x 9 inches. Set aside.
Vanilla Buttercream Frosting:
- While the cake layers bake and cool, make the vanilla buttercream frosting.
- Beat 3 cups of butter on a medium speed for 30 seconds with a paddle attachment or hand mixer until smooth.
- Add in 1 Tbsp of vanilla extract, 2 tsp of almond extract and 1 tsp of salt and mix on a low speed.
- Slowly mix in 11 cups of powdered sugar on a low speed. Add 1/3 cup of heavy cream halfway through to make it easier to mix.
- Once fully mixed, beat on low until for a couple extra minutes to make the frosting super smooth and to push any extra air out of the frosting.
- If the frosting is too thick, add in additional cream (1 Tablespoon at a time). If the frosting is too thin, add in more powdered sugar (quarter of a cup at a time).
- Place about 1 cup of uncolored frosting in a piping bag and seal the top with a rubber band.
- Leave the remaining frosting uncolored and cover with plastic wrap to prevent crusting. Set aside.
Assembling This Unikitty Cake:
- Stack and frost the cake layers on a greaseproof cake board using a dab of frosting to help stick the first cake layer to the board.
- Add an even layer of white buttercream between each cake layer with a large offset spatula.
- Spread a thin coat of frosting around the cake to fully cover the cake layers. Smooth using a bench scraper then chill the cake in the fridge (20 minutes) or freezer (10 minutes) until the frosting is firm to the touch.
- Color the remaining frosting pink with gel food coloring.
- Add a second, thicker layer of frosting to the cake and smooth using a bench scraper.
- Chill the cake again in the fridge (20 minutes) or freezer (10 minutes) until the second coat of frosting is firm to the touch.
- Cut a 1 cm hole in the piping bag with frosting that you reserved earlier and pipe a thin line of white frosting around the base of the cake.
- Pipe a semi-circle halfway up the font, long side of the cake. Fill in the semi-circle with additional white frosting and smooth with a bench scraper.
- Use black, white, pink and blue fondant to create Unikitty's facial feature, ears and horn.
- Carefully place the fondant facial features on the chilled cake with small dabs of buttercream.
- Place the ears and horn on top of the cake and secure them with toothpicks and a wooden dowel.
Notes
Make your cake layers in advance and freeze them. It breaks the process up and make it more approachable.
Make your frosting ahead of time too or save any leftover frosting! It can be stored in an airtight container in the fridge for up to a month or in the freezer for up to 3 months. Be sure to give it a good stir once it thaws to get the consistency nice and smooth again.
A frosted cake can last in the fridge for up to a week, or in the freezer for up to a month. The buttercream locks in all the moisture, keeping the cake fresh and delicious!
If you cut into the cake and have leftovers, use any remaining frosting to cover the cut section to keep it moist and store in the fridge for up to a week.
Nutrition Information
Yield
24Serving Size
1Amount Per Serving Calories 687Total Fat 35gSaturated Fat 20gTrans Fat 0gUnsaturated Fat 13gCholesterol 86mgSodium 297mgCarbohydrates 92gFiber 0gSugar 78gProtein 4g
Tami
Tuesday 12th of December 2023
Made this for my daughters 6th birthday yesterday. Some complaints: Too much batter for a 9x13. It rose along the edges and then fell into the middle giving me dark crusty edges and a raw center (I used 1 nail instead of 3). I carved the hard edges off and it was fine. So. Much. Buttercream. This is a pretty big, very rich cake. I should have halved it. Otherwise,it came together beautifully and we added a Santa hat out of fondant and buttercream because, why not? Also opted to use carved off bits to construct ears instead of flat fondant ears. Super cute. Wish I could post a pic because it really was beautiful and tasty, if a little dense. Thank you!
Chelsweets
Sunday 17th of December 2023
Hi Tami,
I hear you! It sounds like the cake needed some more time in the oven :/ Using fewer heating cores/flower nails will make it take longer to bake, so that makes sense. In the future I'd recommend testing the center with a toothpick and making sure it comes out with a few moist crumbs to ensure the cake is fully baked.
I always trim the edges off of my cake layers, especially on big cake layers like this. The caramelization is natural, especially when long bake times are involved like this.
This recipe does use a TON of buttercream!! I include a lot because it takes a lot to create really shape corners on square/rectangular cakes like this. I also like to add a thick layer between the layers, but if you add less you would be left with some leftover frosting.
Glad to hear it turned out great though, and I love the addition of the Santa hat! I wish you could post a picture too!!
Ghostbusters Cupcakes w/ Lime Curd Slime Filling - Chelsweets
Sunday 24th of April 2022
[…] Unikitty Cake Dumpling Cupcakes Pig Birthday Cake Penguin Cupcakes Yield: 12 cupcakes […]
Zebra Cake: Adorable Cake Recipe & Tutorial - Chelsweets
Tuesday 19th of April 2022
[…] Cake Elephant Cake Unikitty Cake Pig Birthday Cake {"@context":"http://schema.org","@type":"Recipe","name":"Zebra […]
Taylor
Monday 14th of September 2020
Hi Chelsea. What are the flowers nails for? Can I skip them? thanks!