
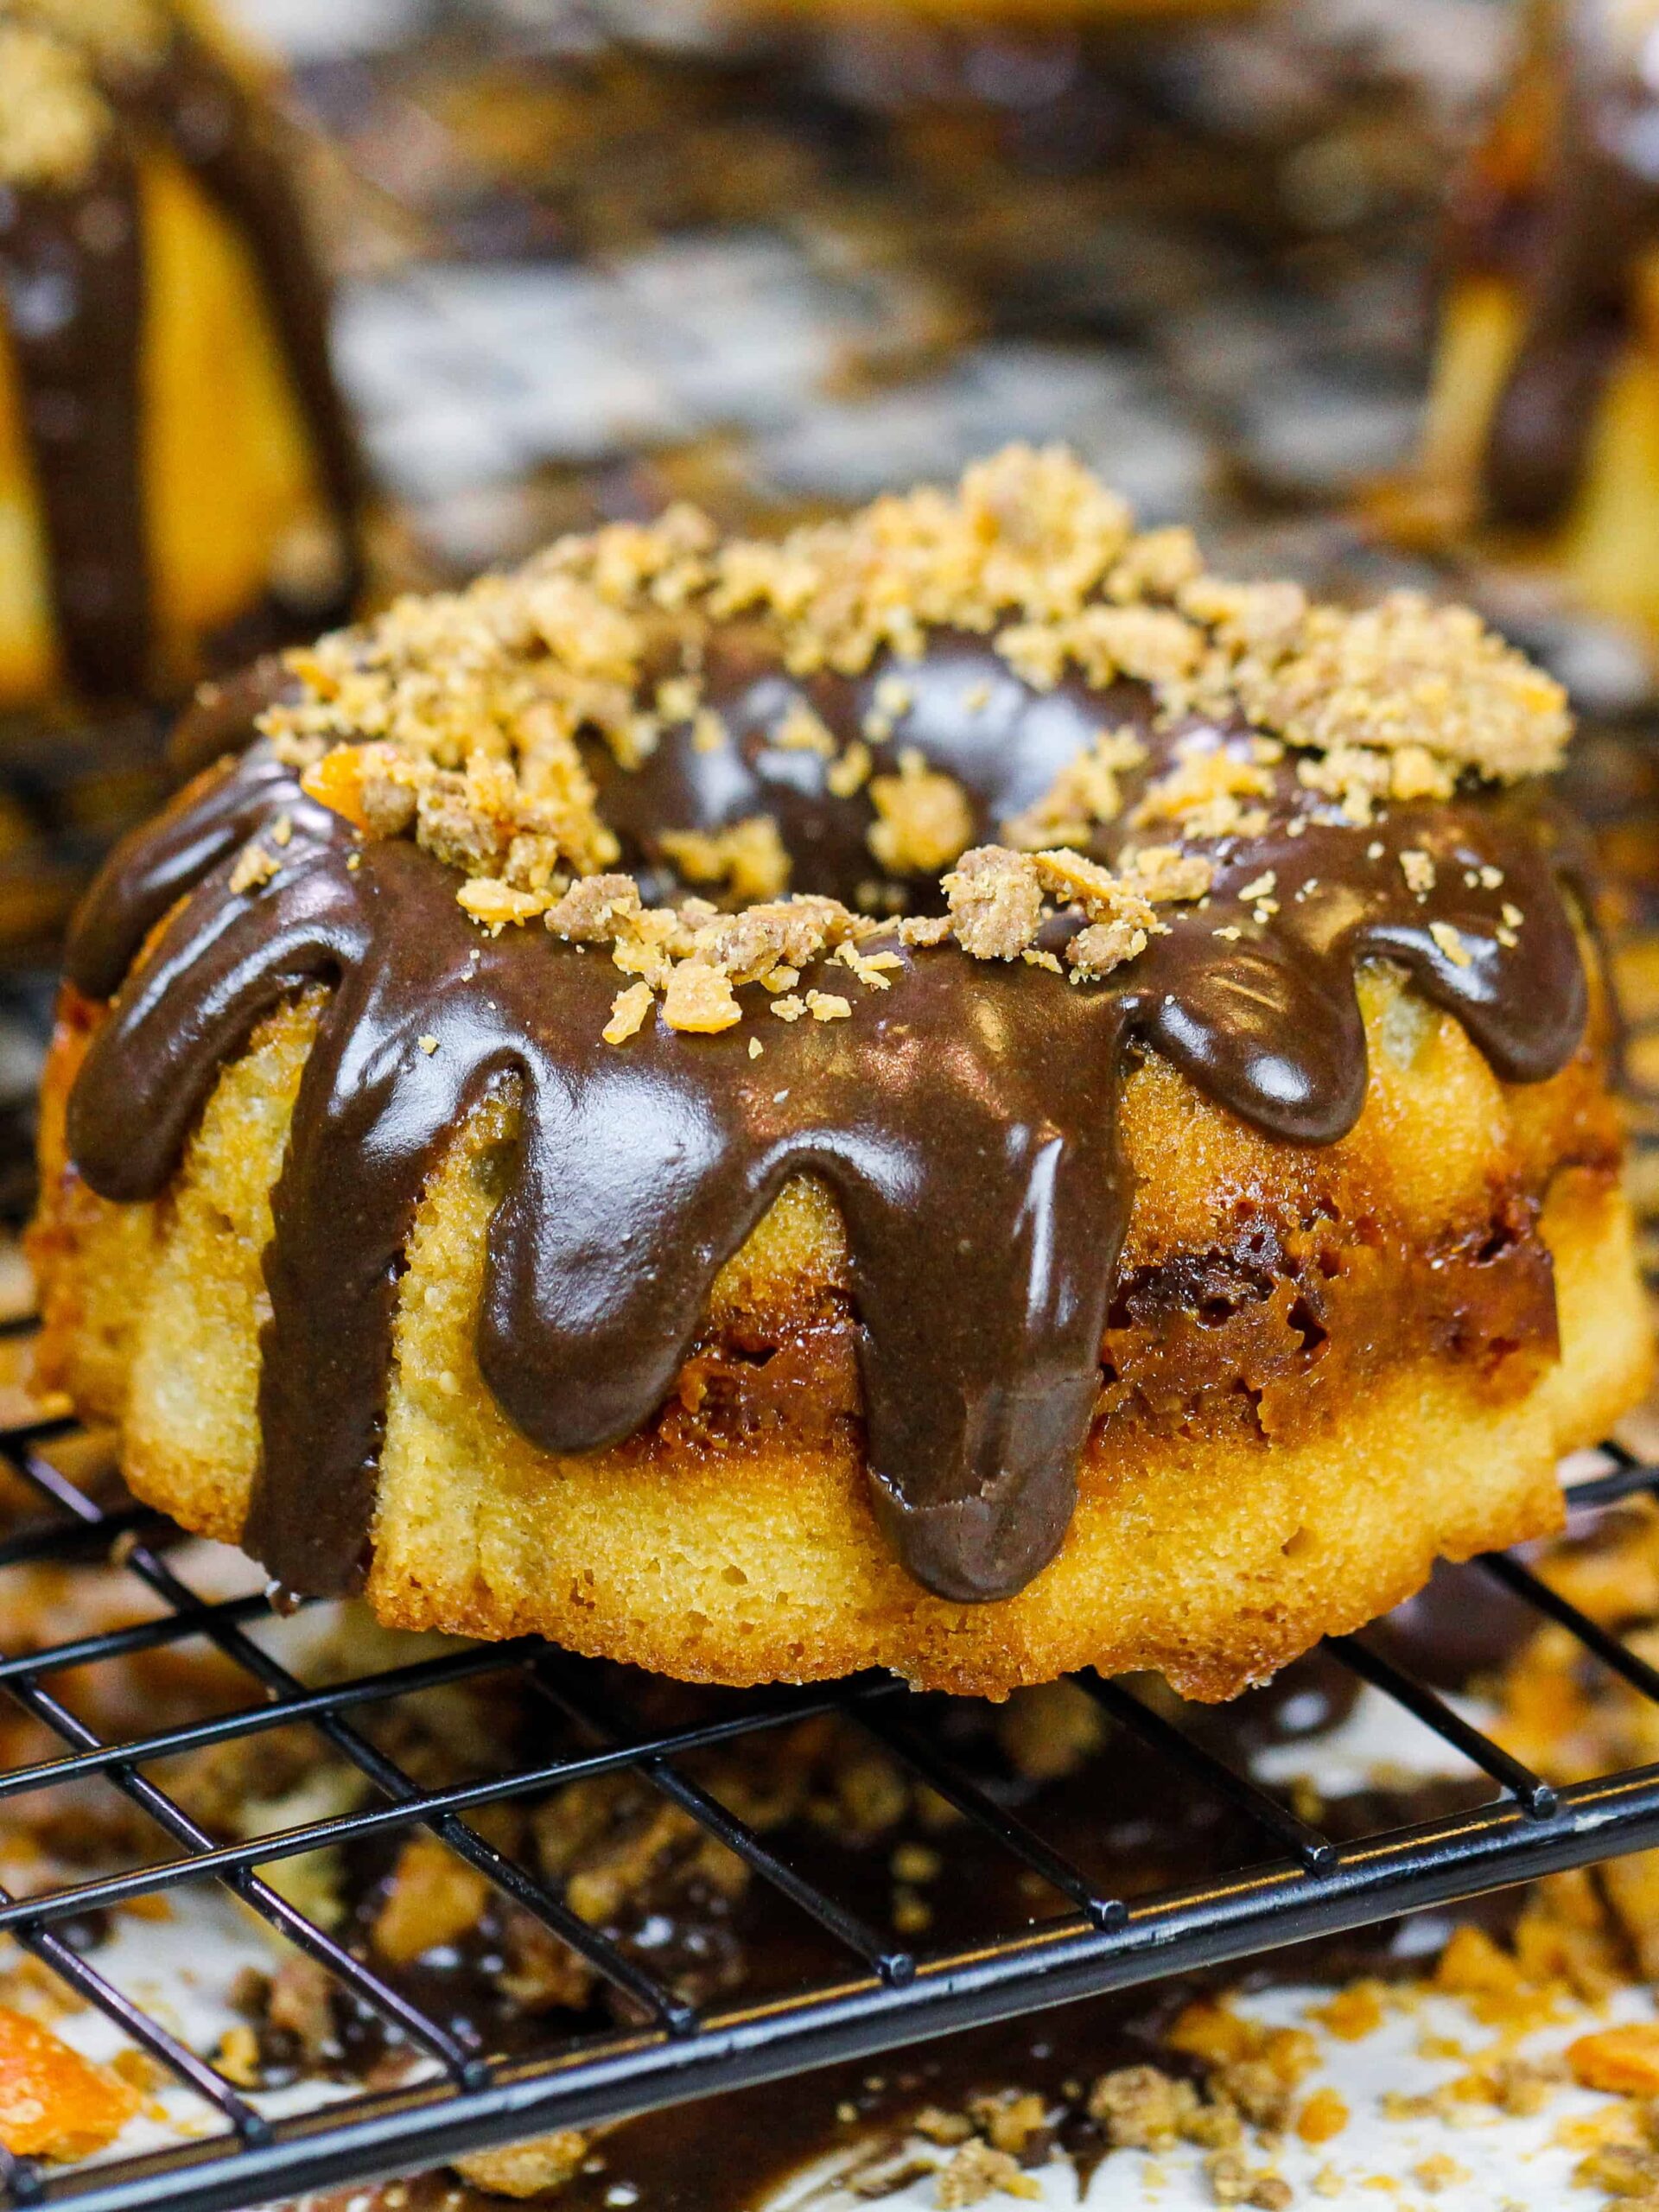
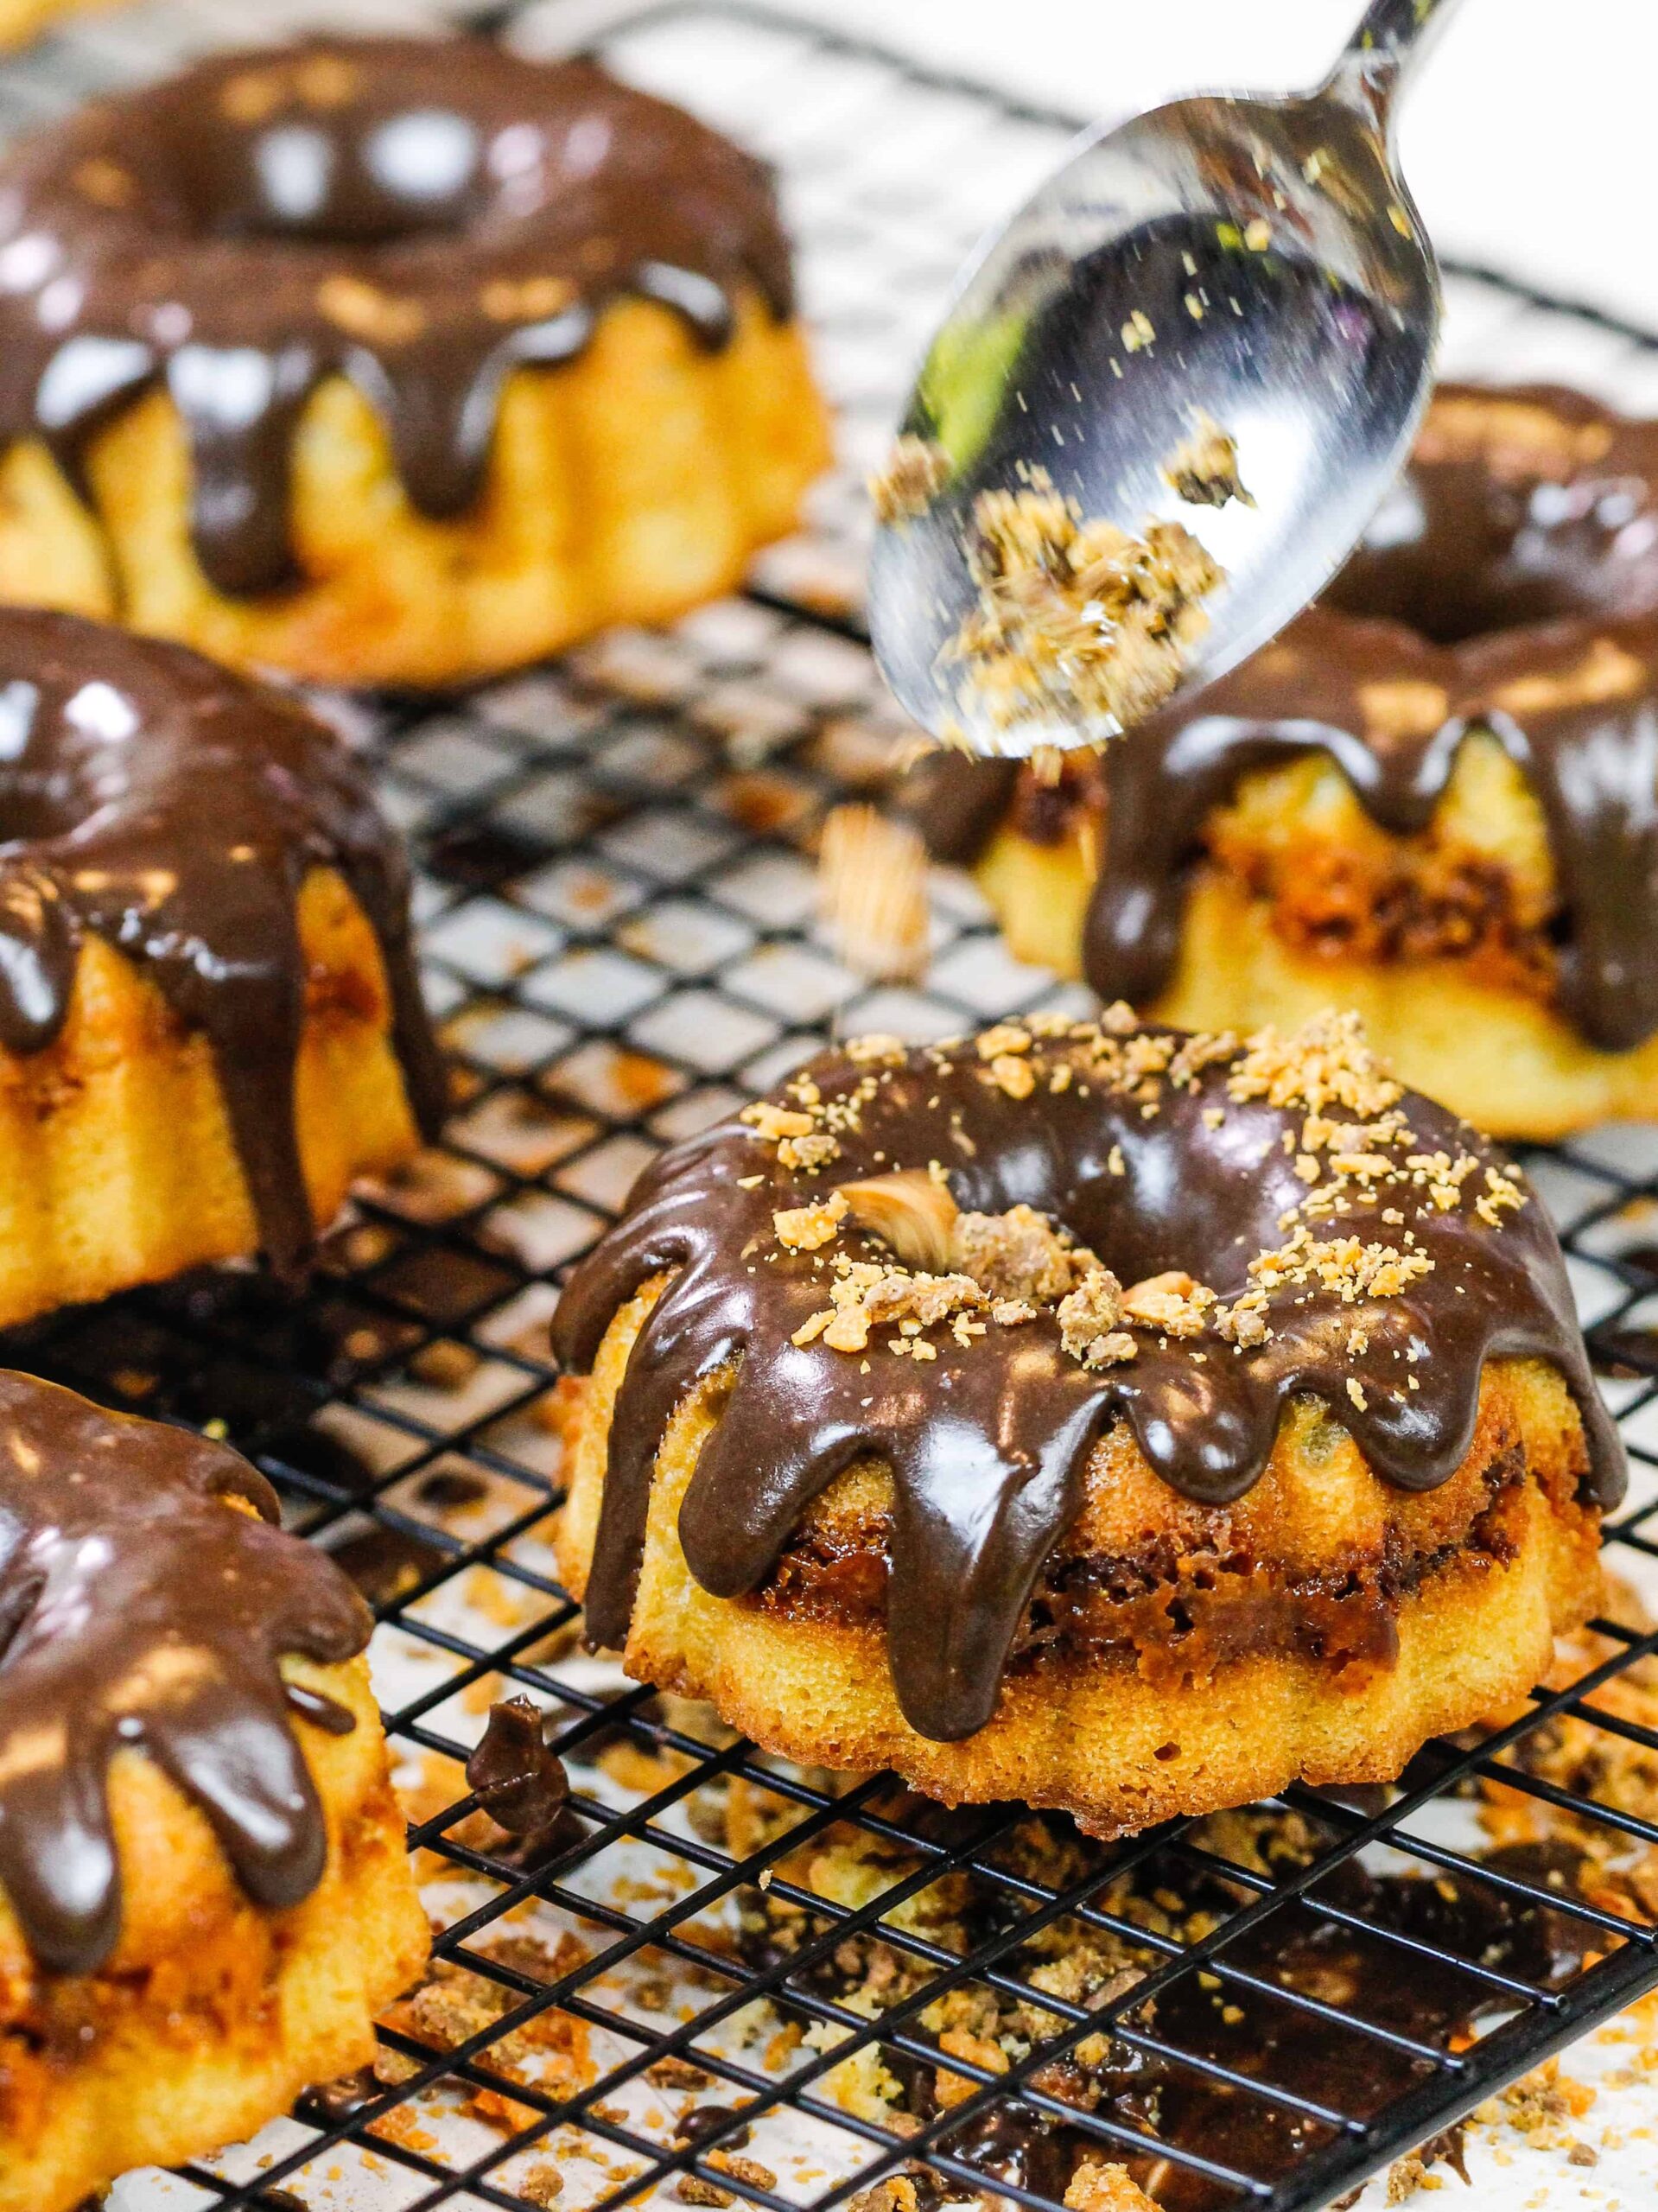
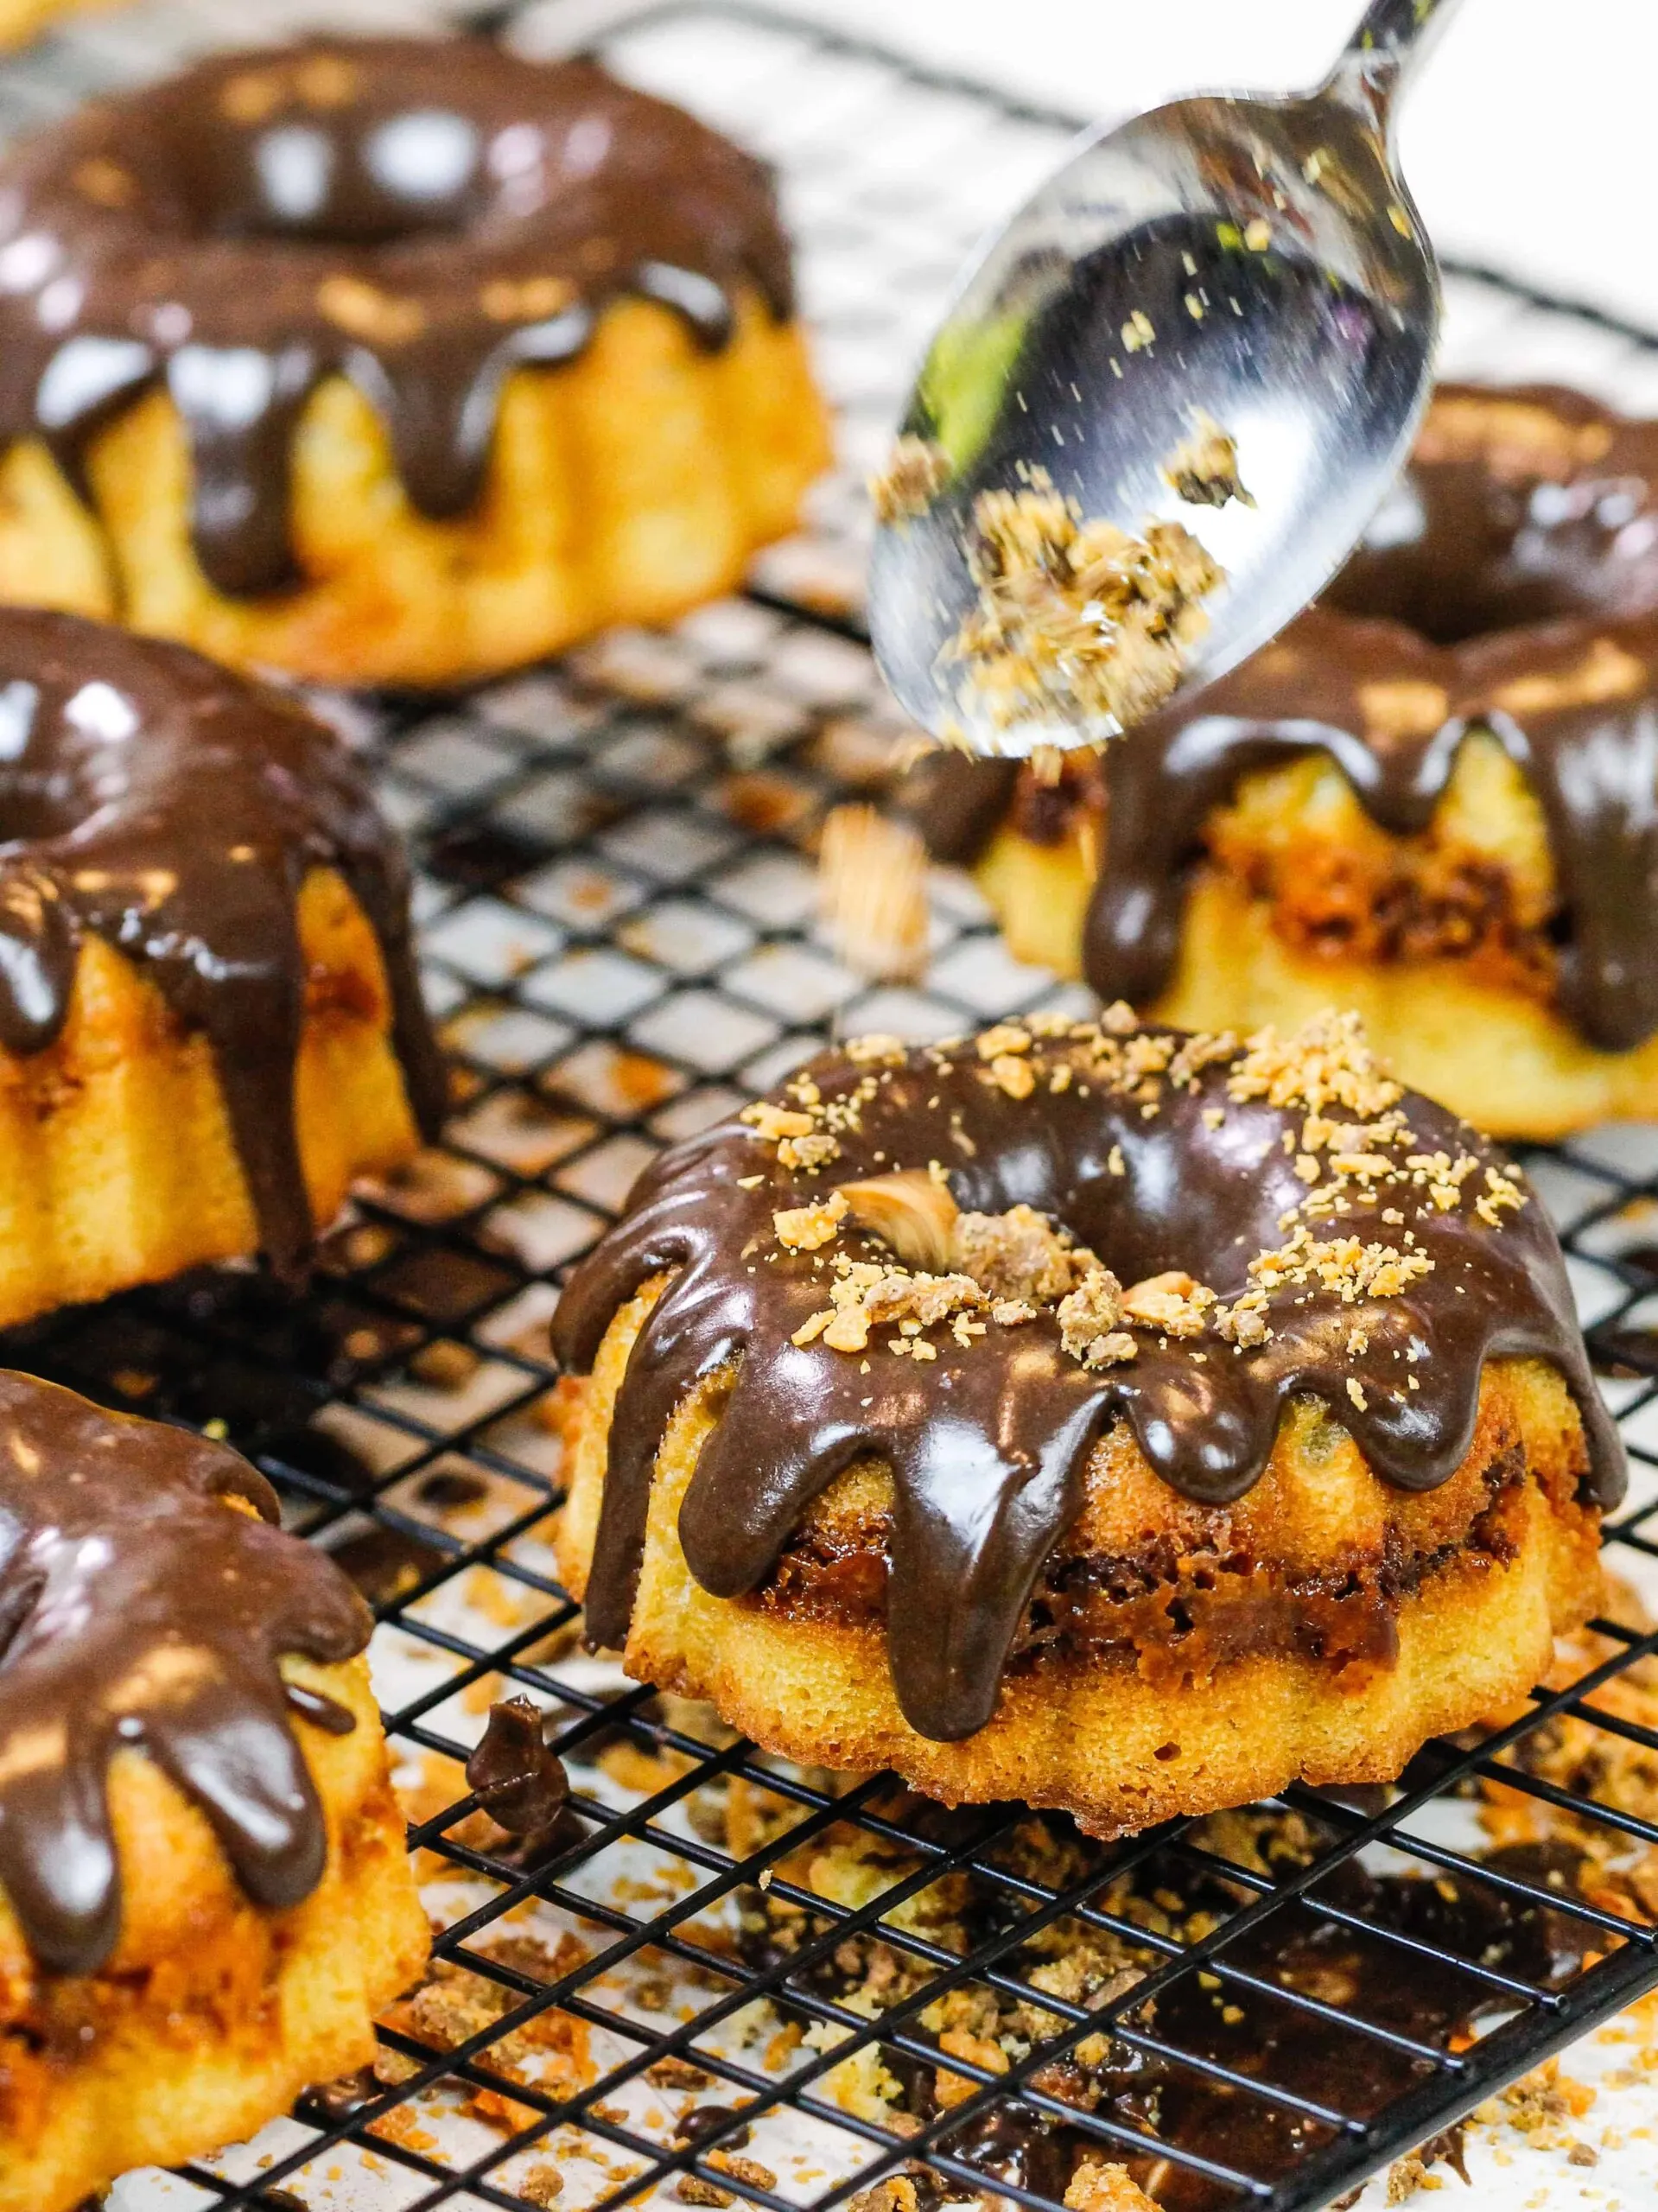
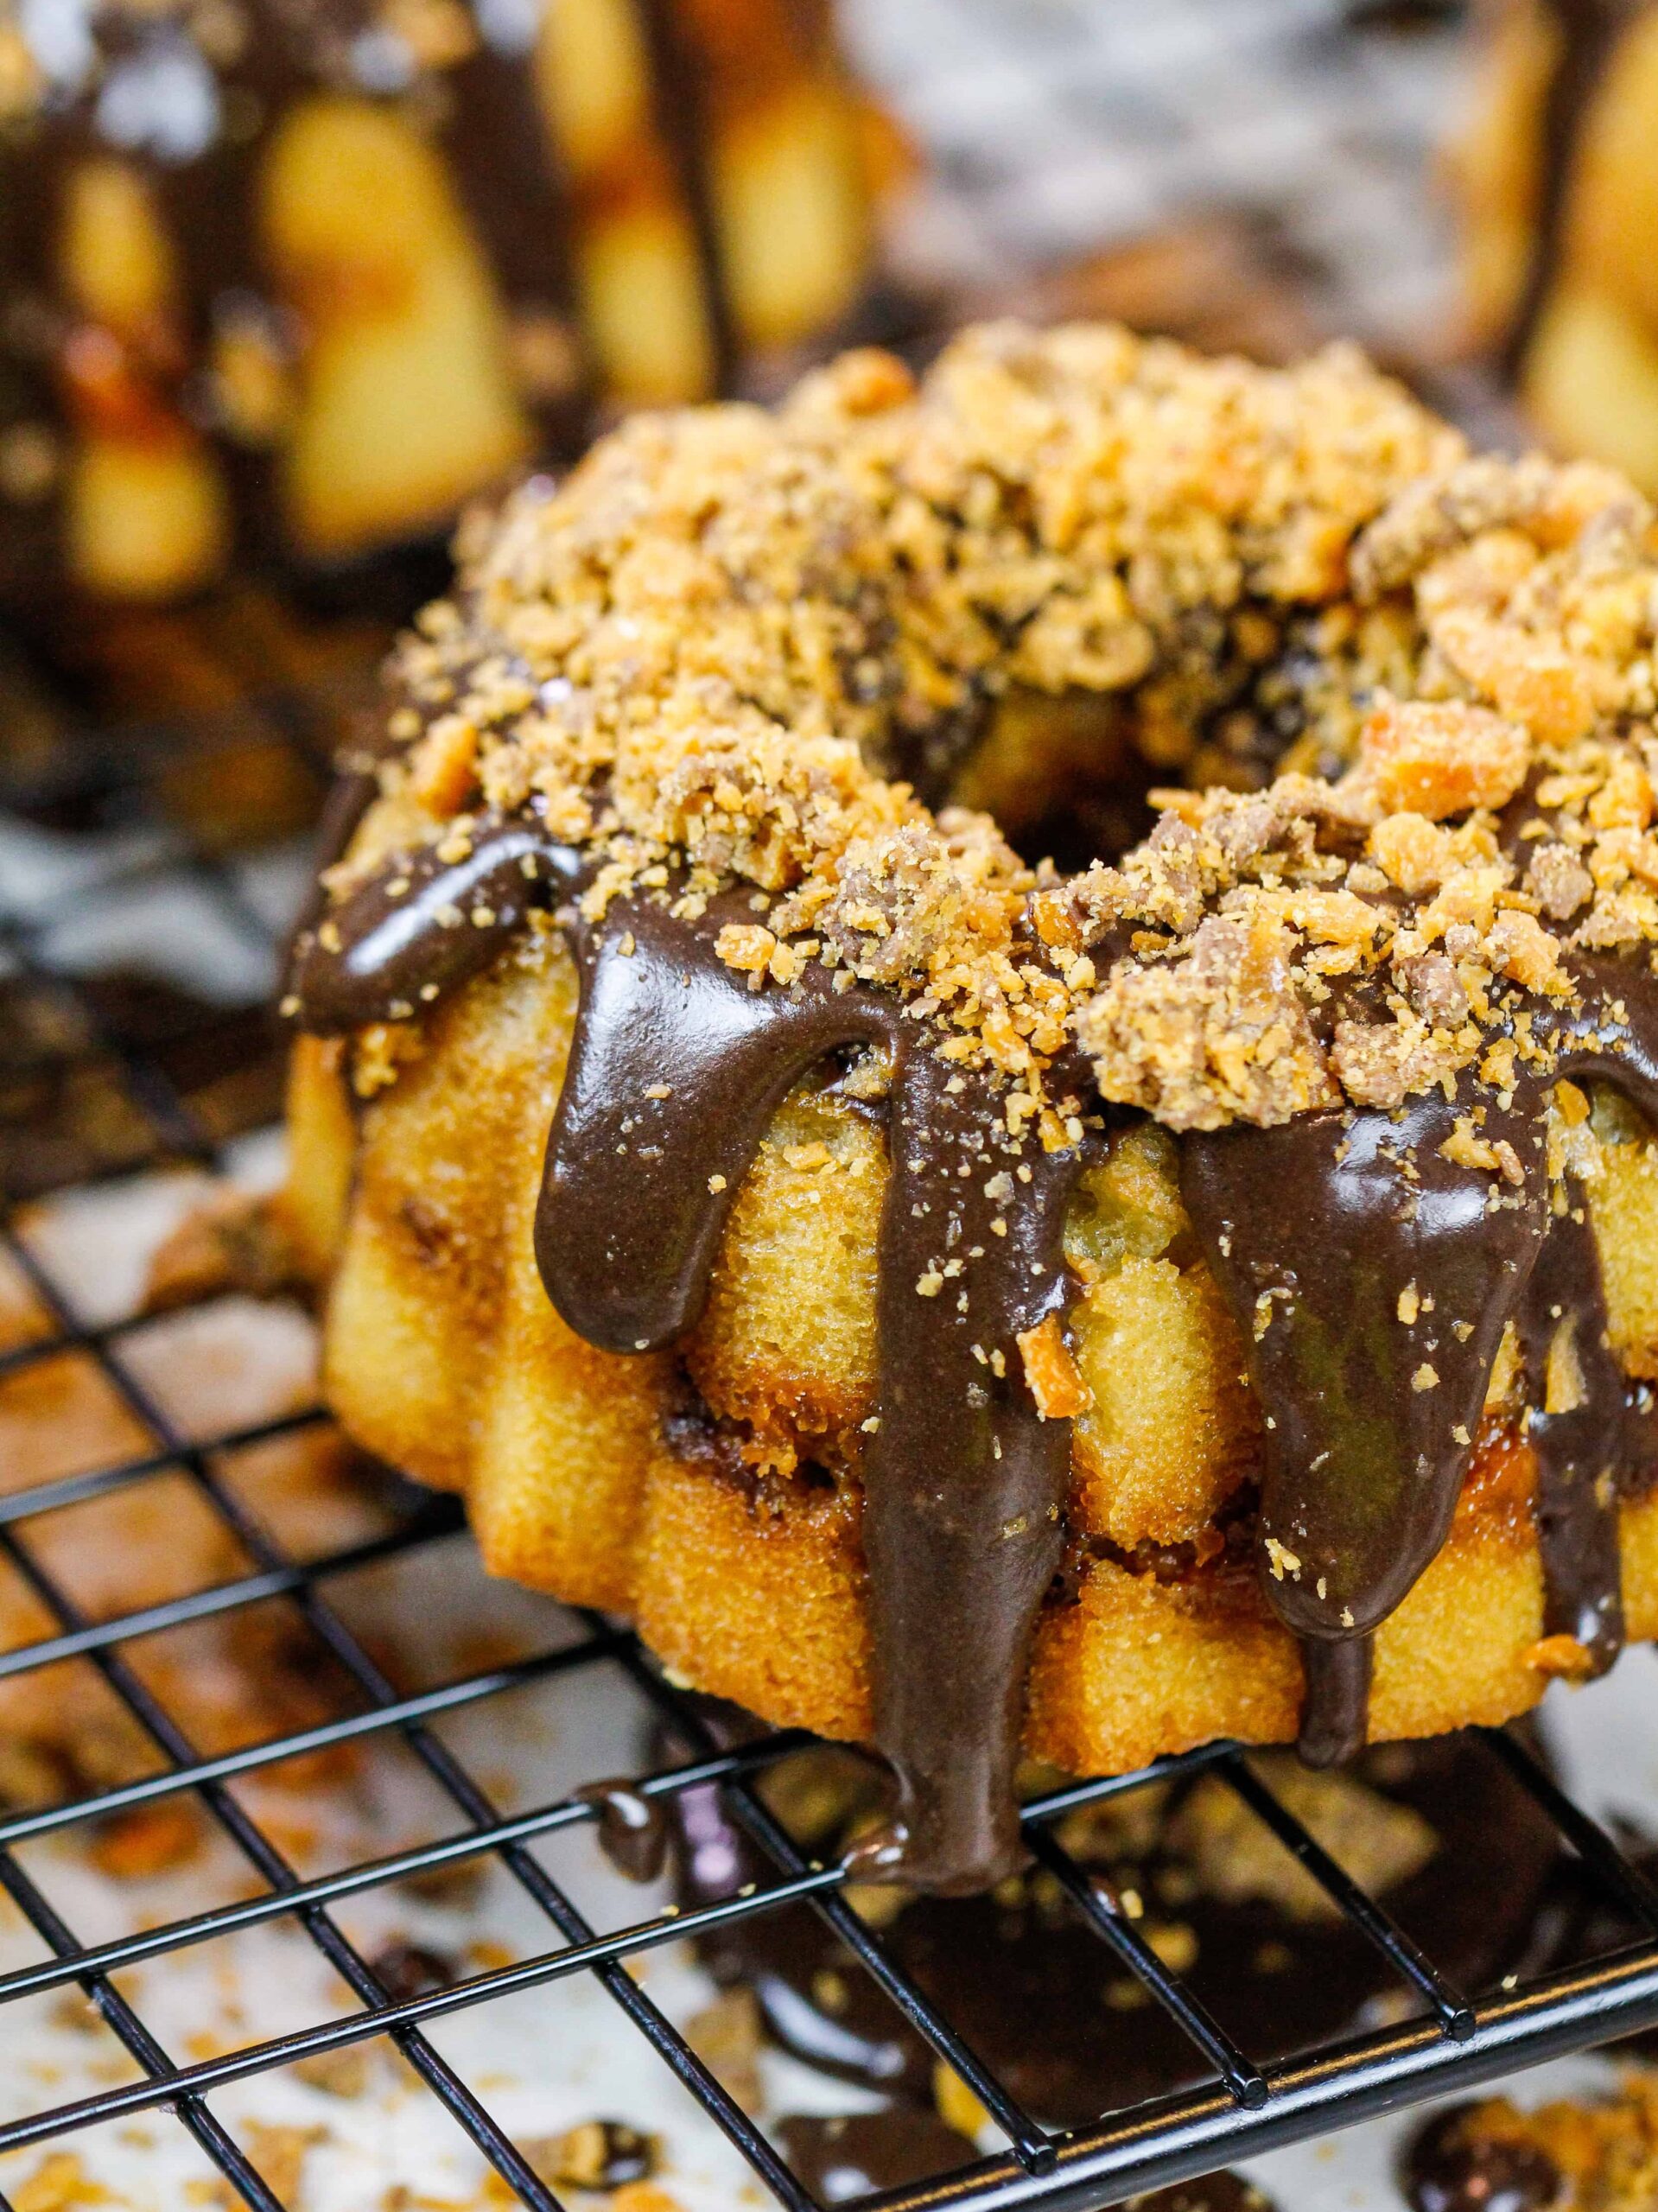
Today we’re making these adorable mini Butterfinger Bundt cakes! They’re just as delicious as they are adorable!!
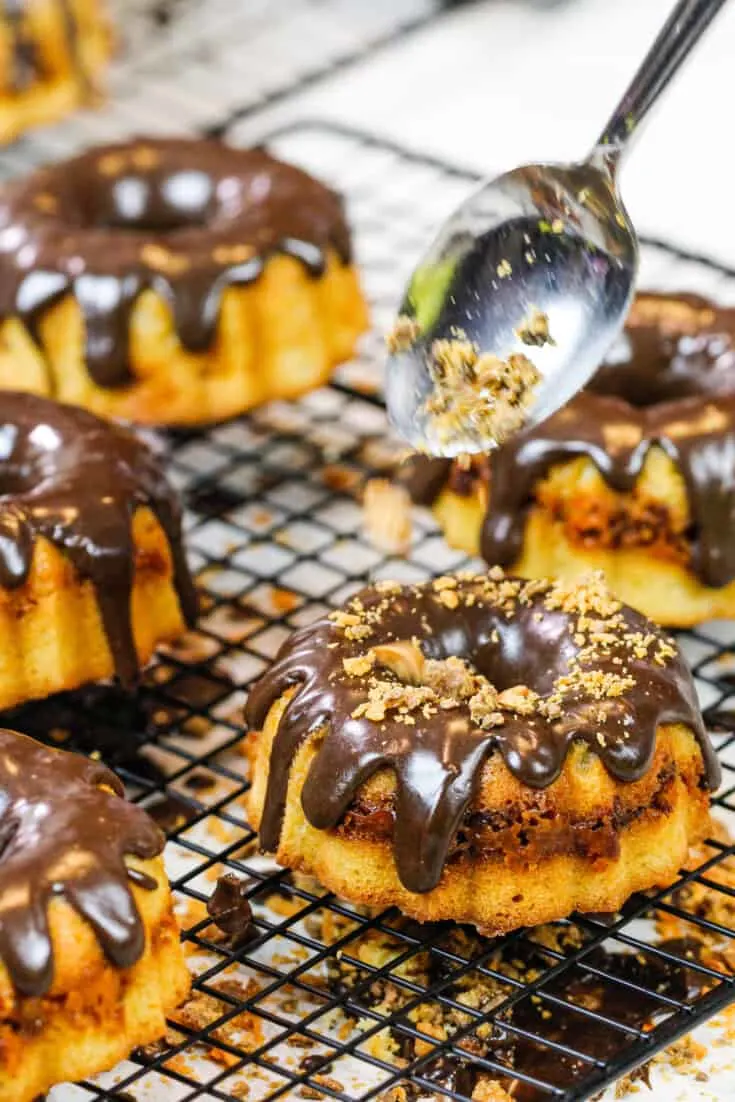
And yes, that is a chocolate ganache drip on top of each little cake!

A Recipe Inspired by Butterfingers
Butterfinger® is known for its iconic crispety, crunchety, peanut-buttery flavor.
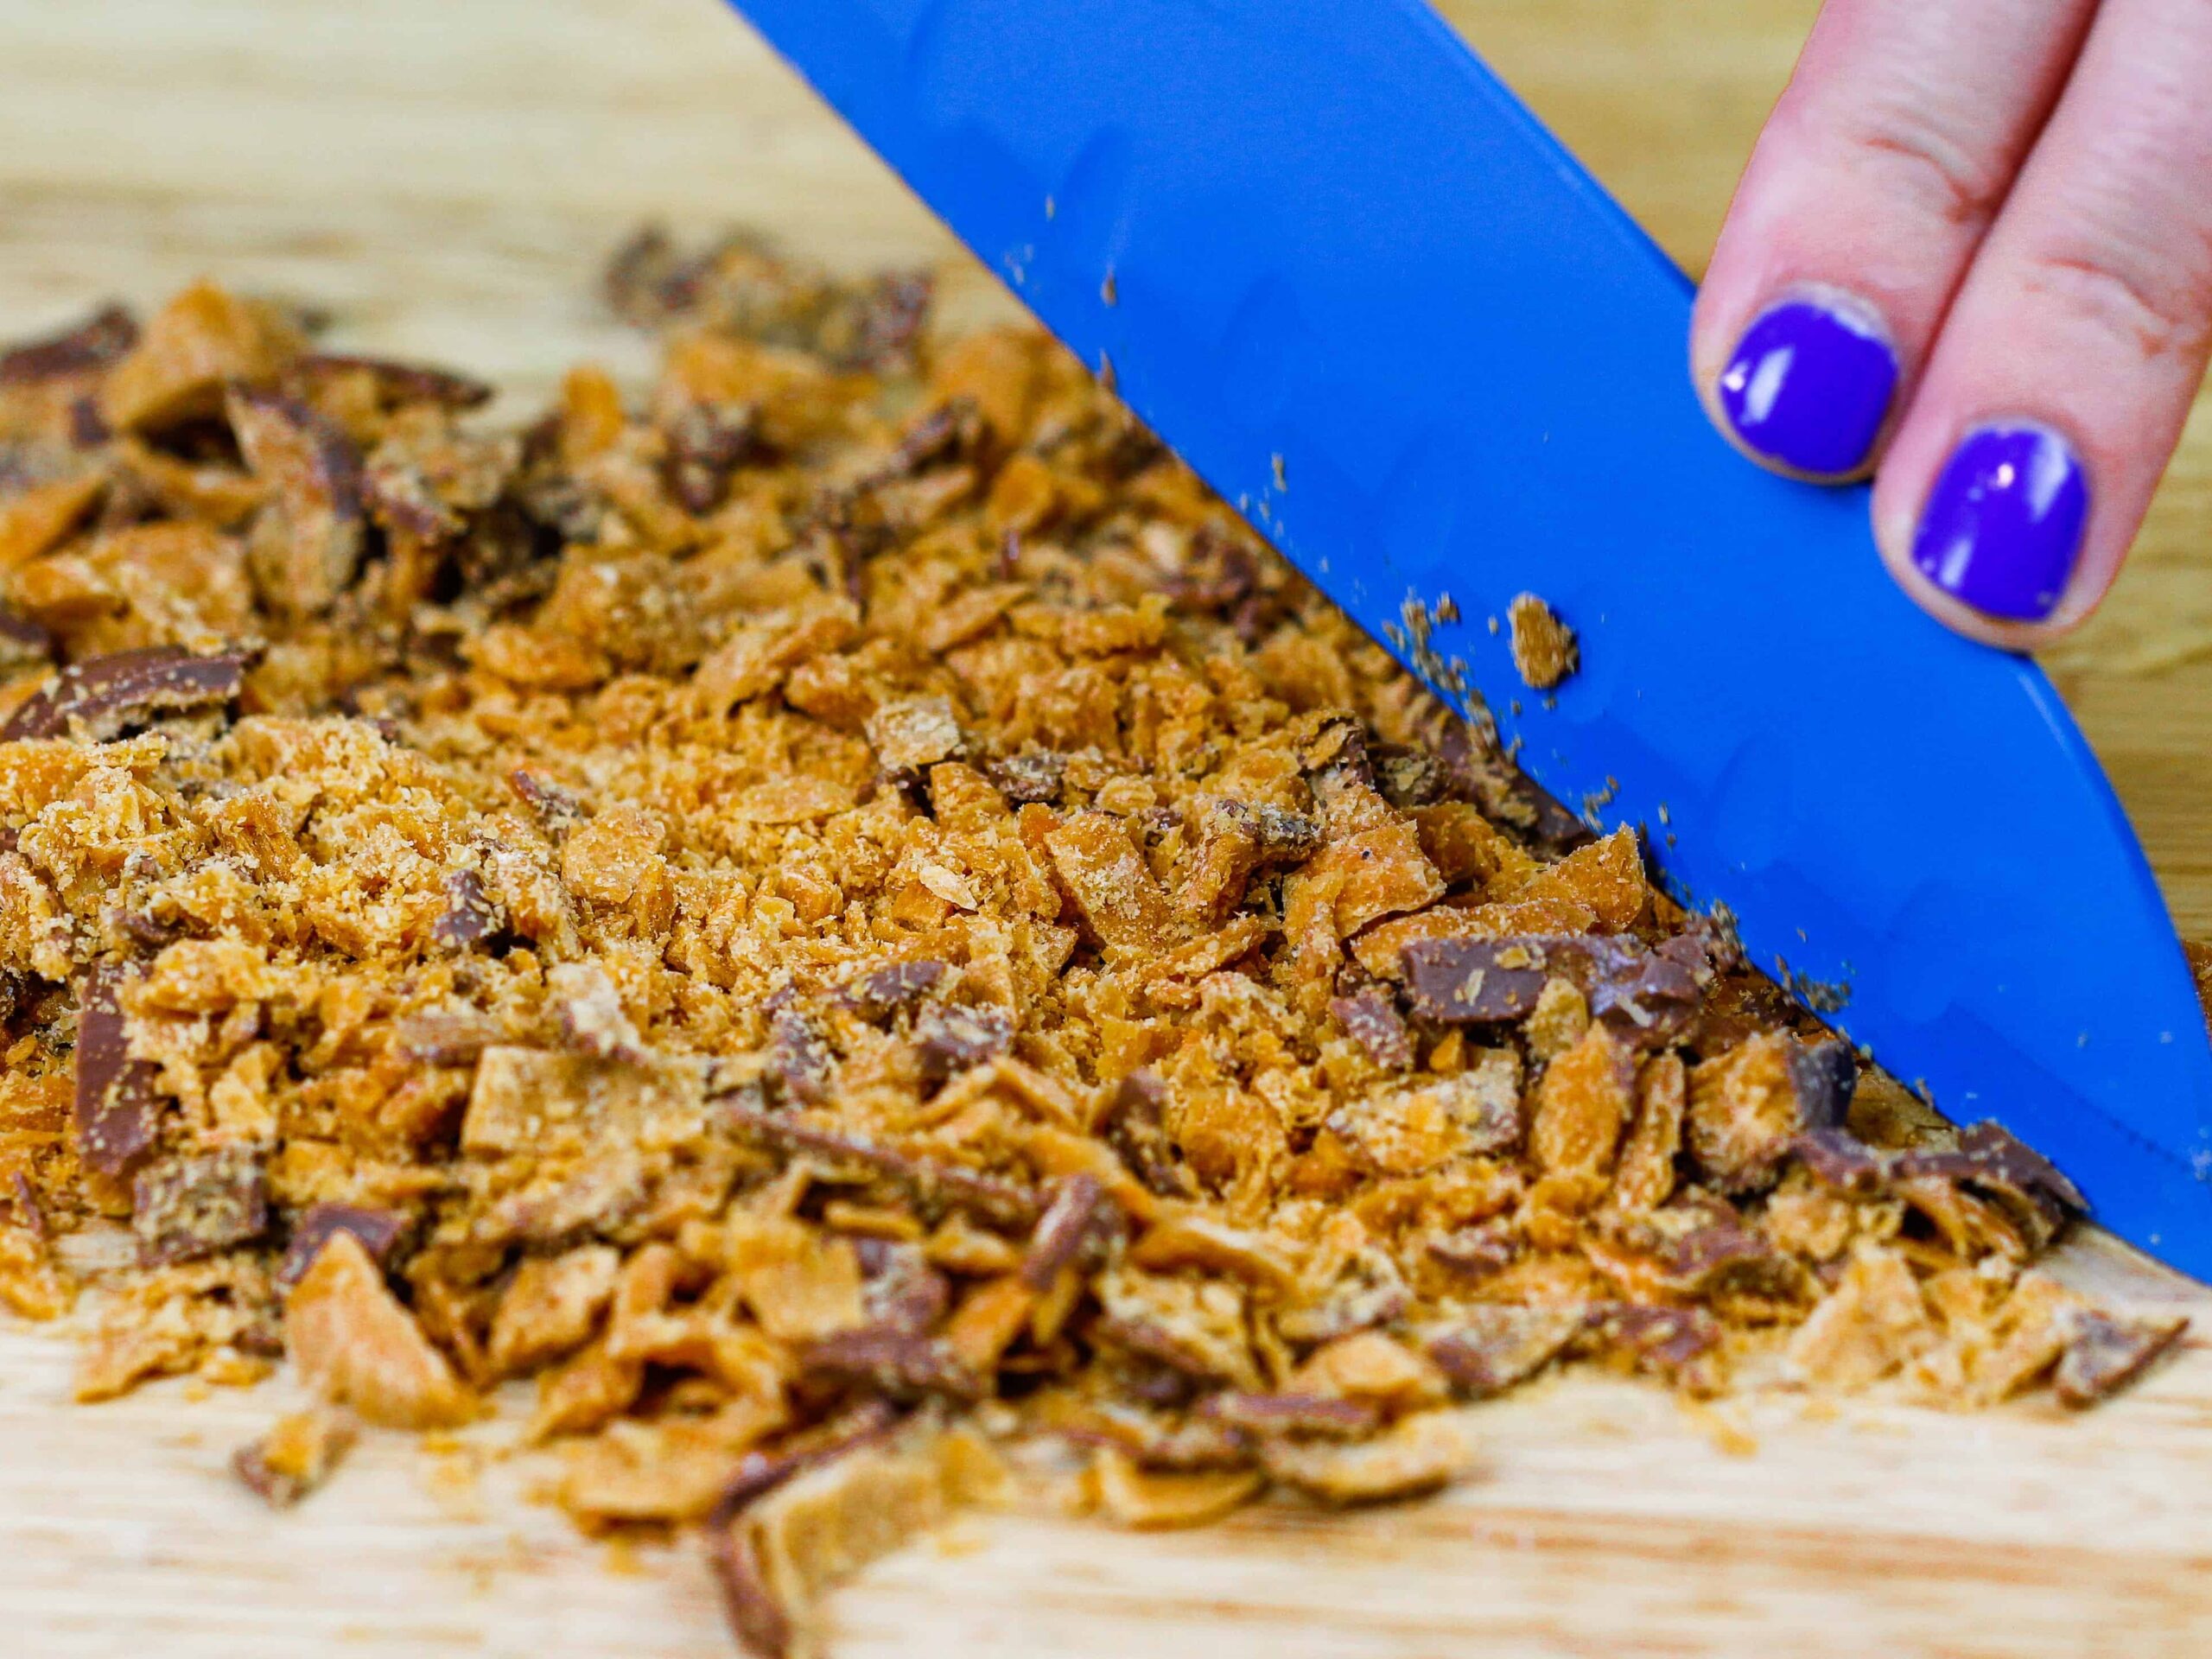

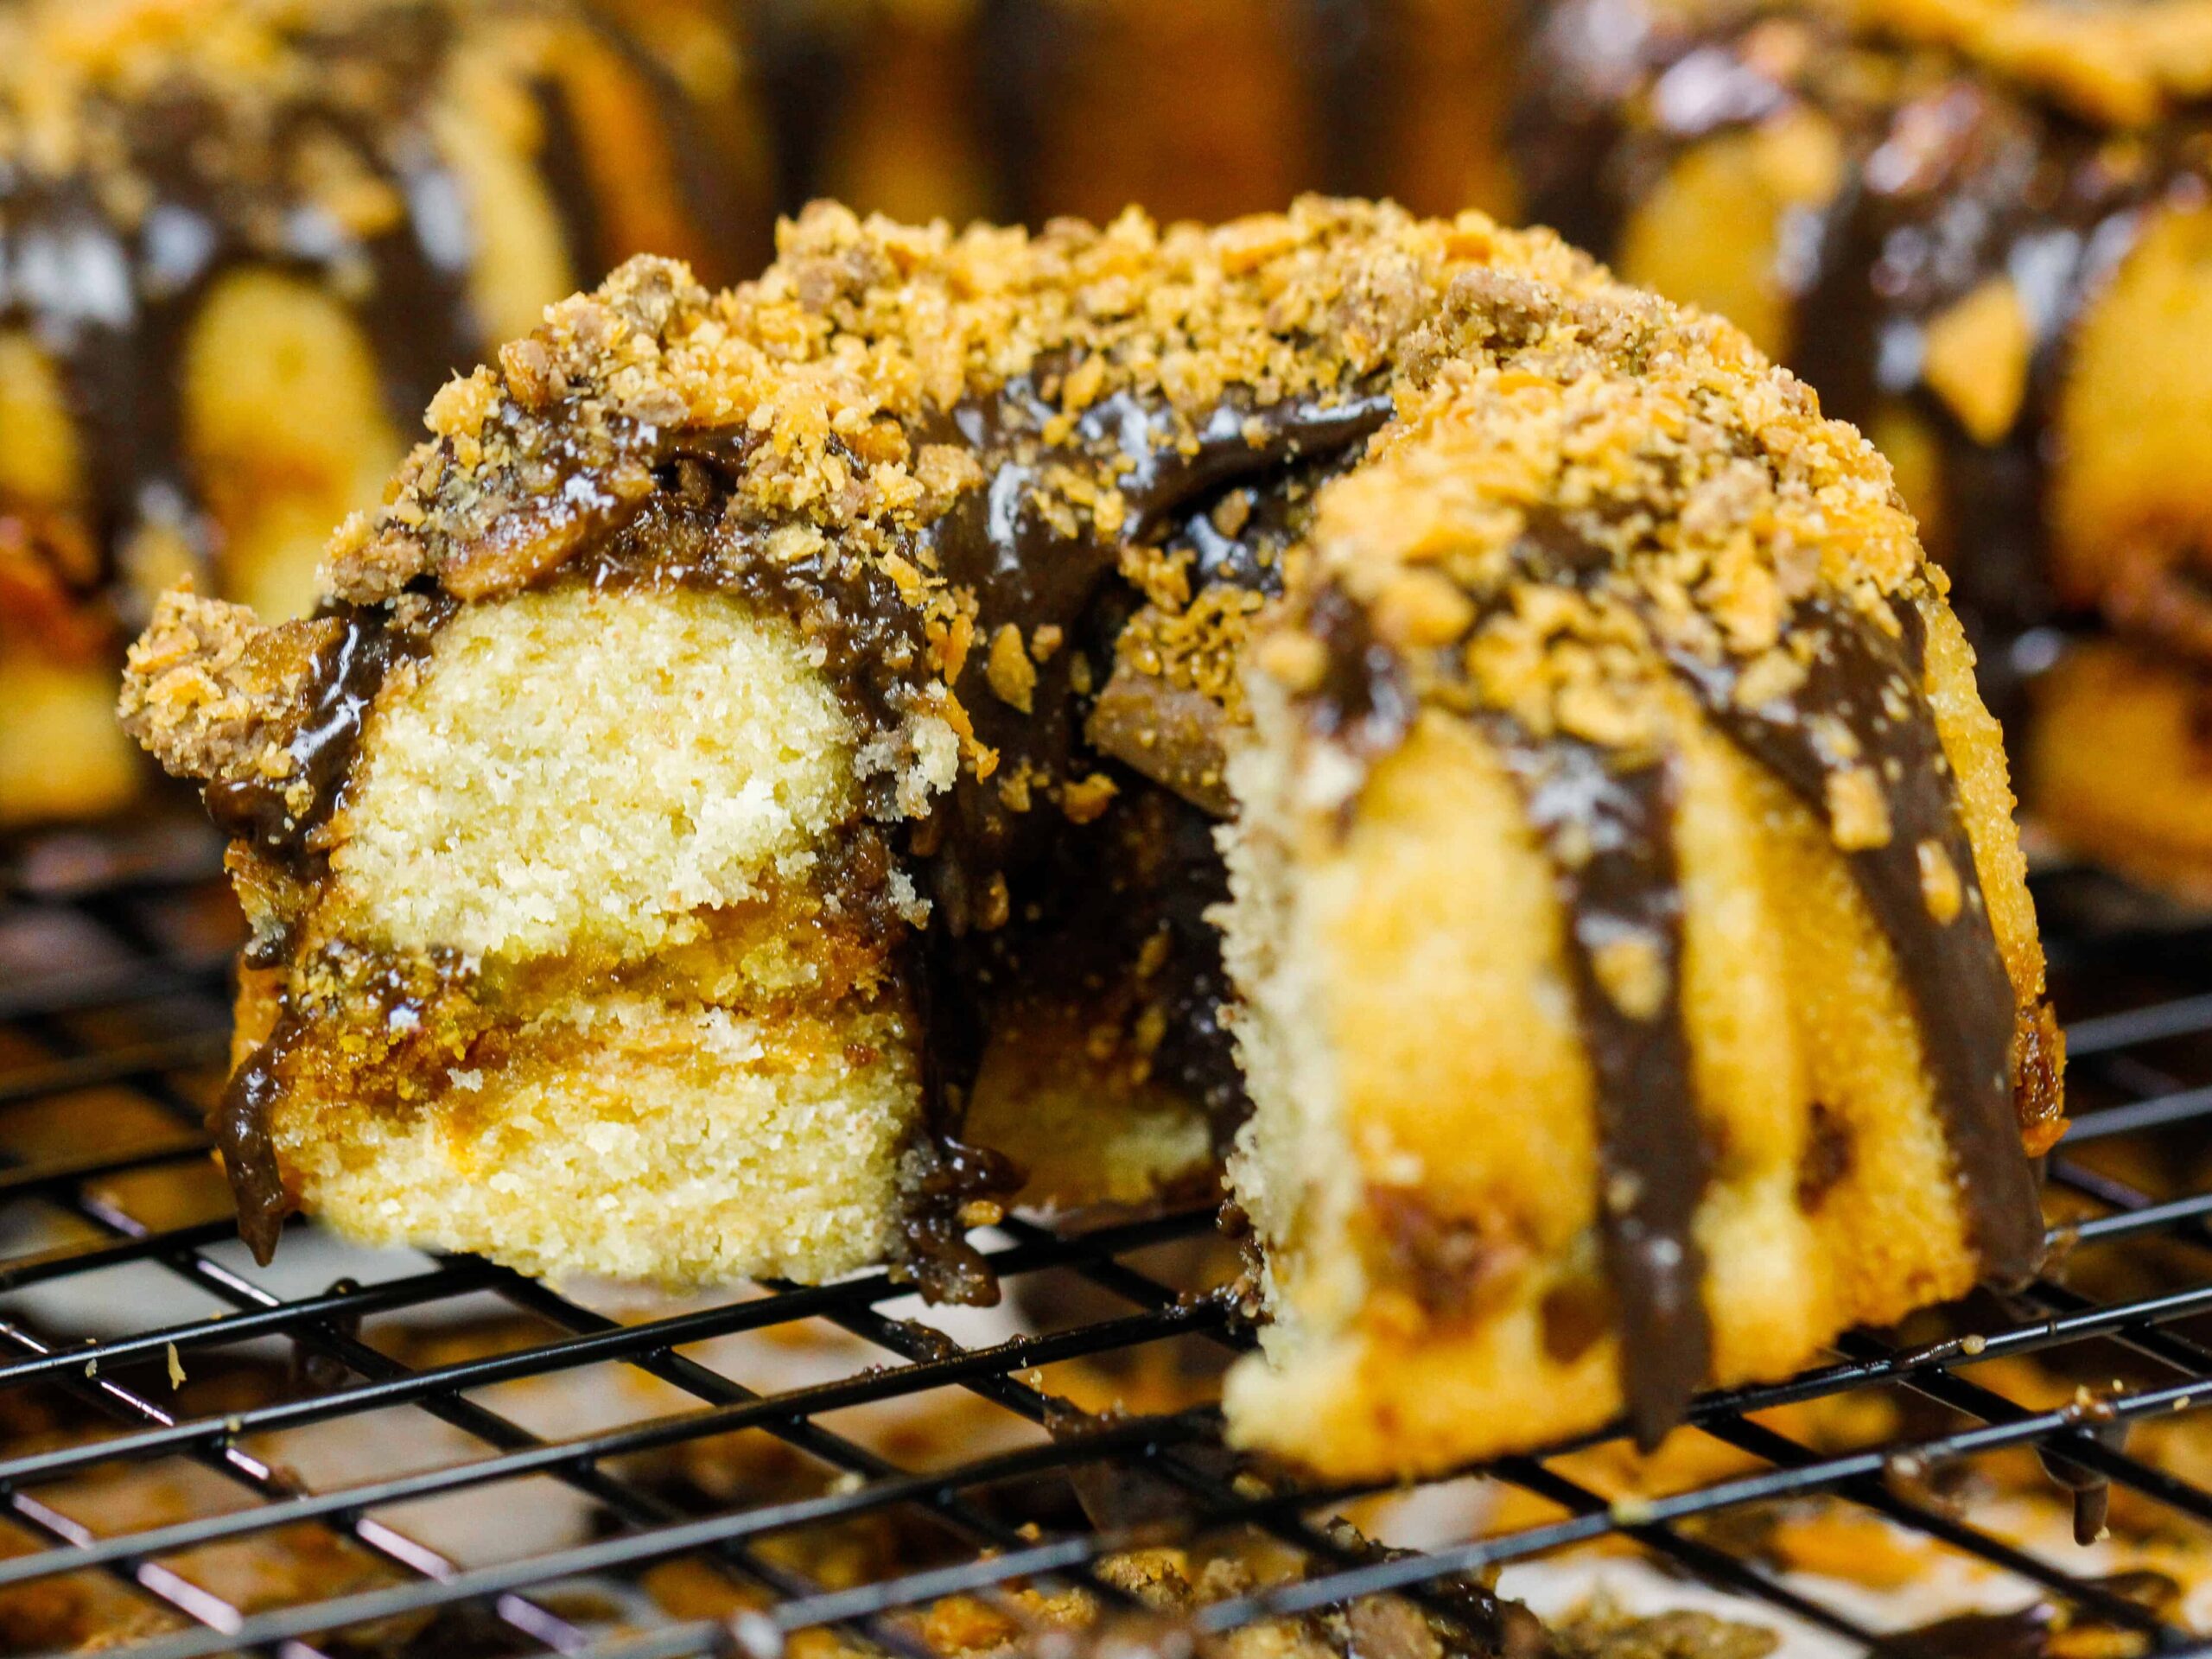
To incorporate those notes of peanut butter and toffee into these mini Bundt cakes, I use brown sugar in the batter along with a delicious peanut butter Butterfinger® filling.
The filling adds a beautiful ripple through the Bundt cakes, along with a delicious pop of flavor and texture.
Those little pieces of chopped-up Butterfinger® give every bite a wonderful crunch!!

What Type of Bundt Pan Should I Use?
Picking the right pan for this recipe can make all the difference in how these mini Bundt cakes turn out. But that’s the fun of making a Bundt cake, its shape is solely reliant on the pan it bakes in.
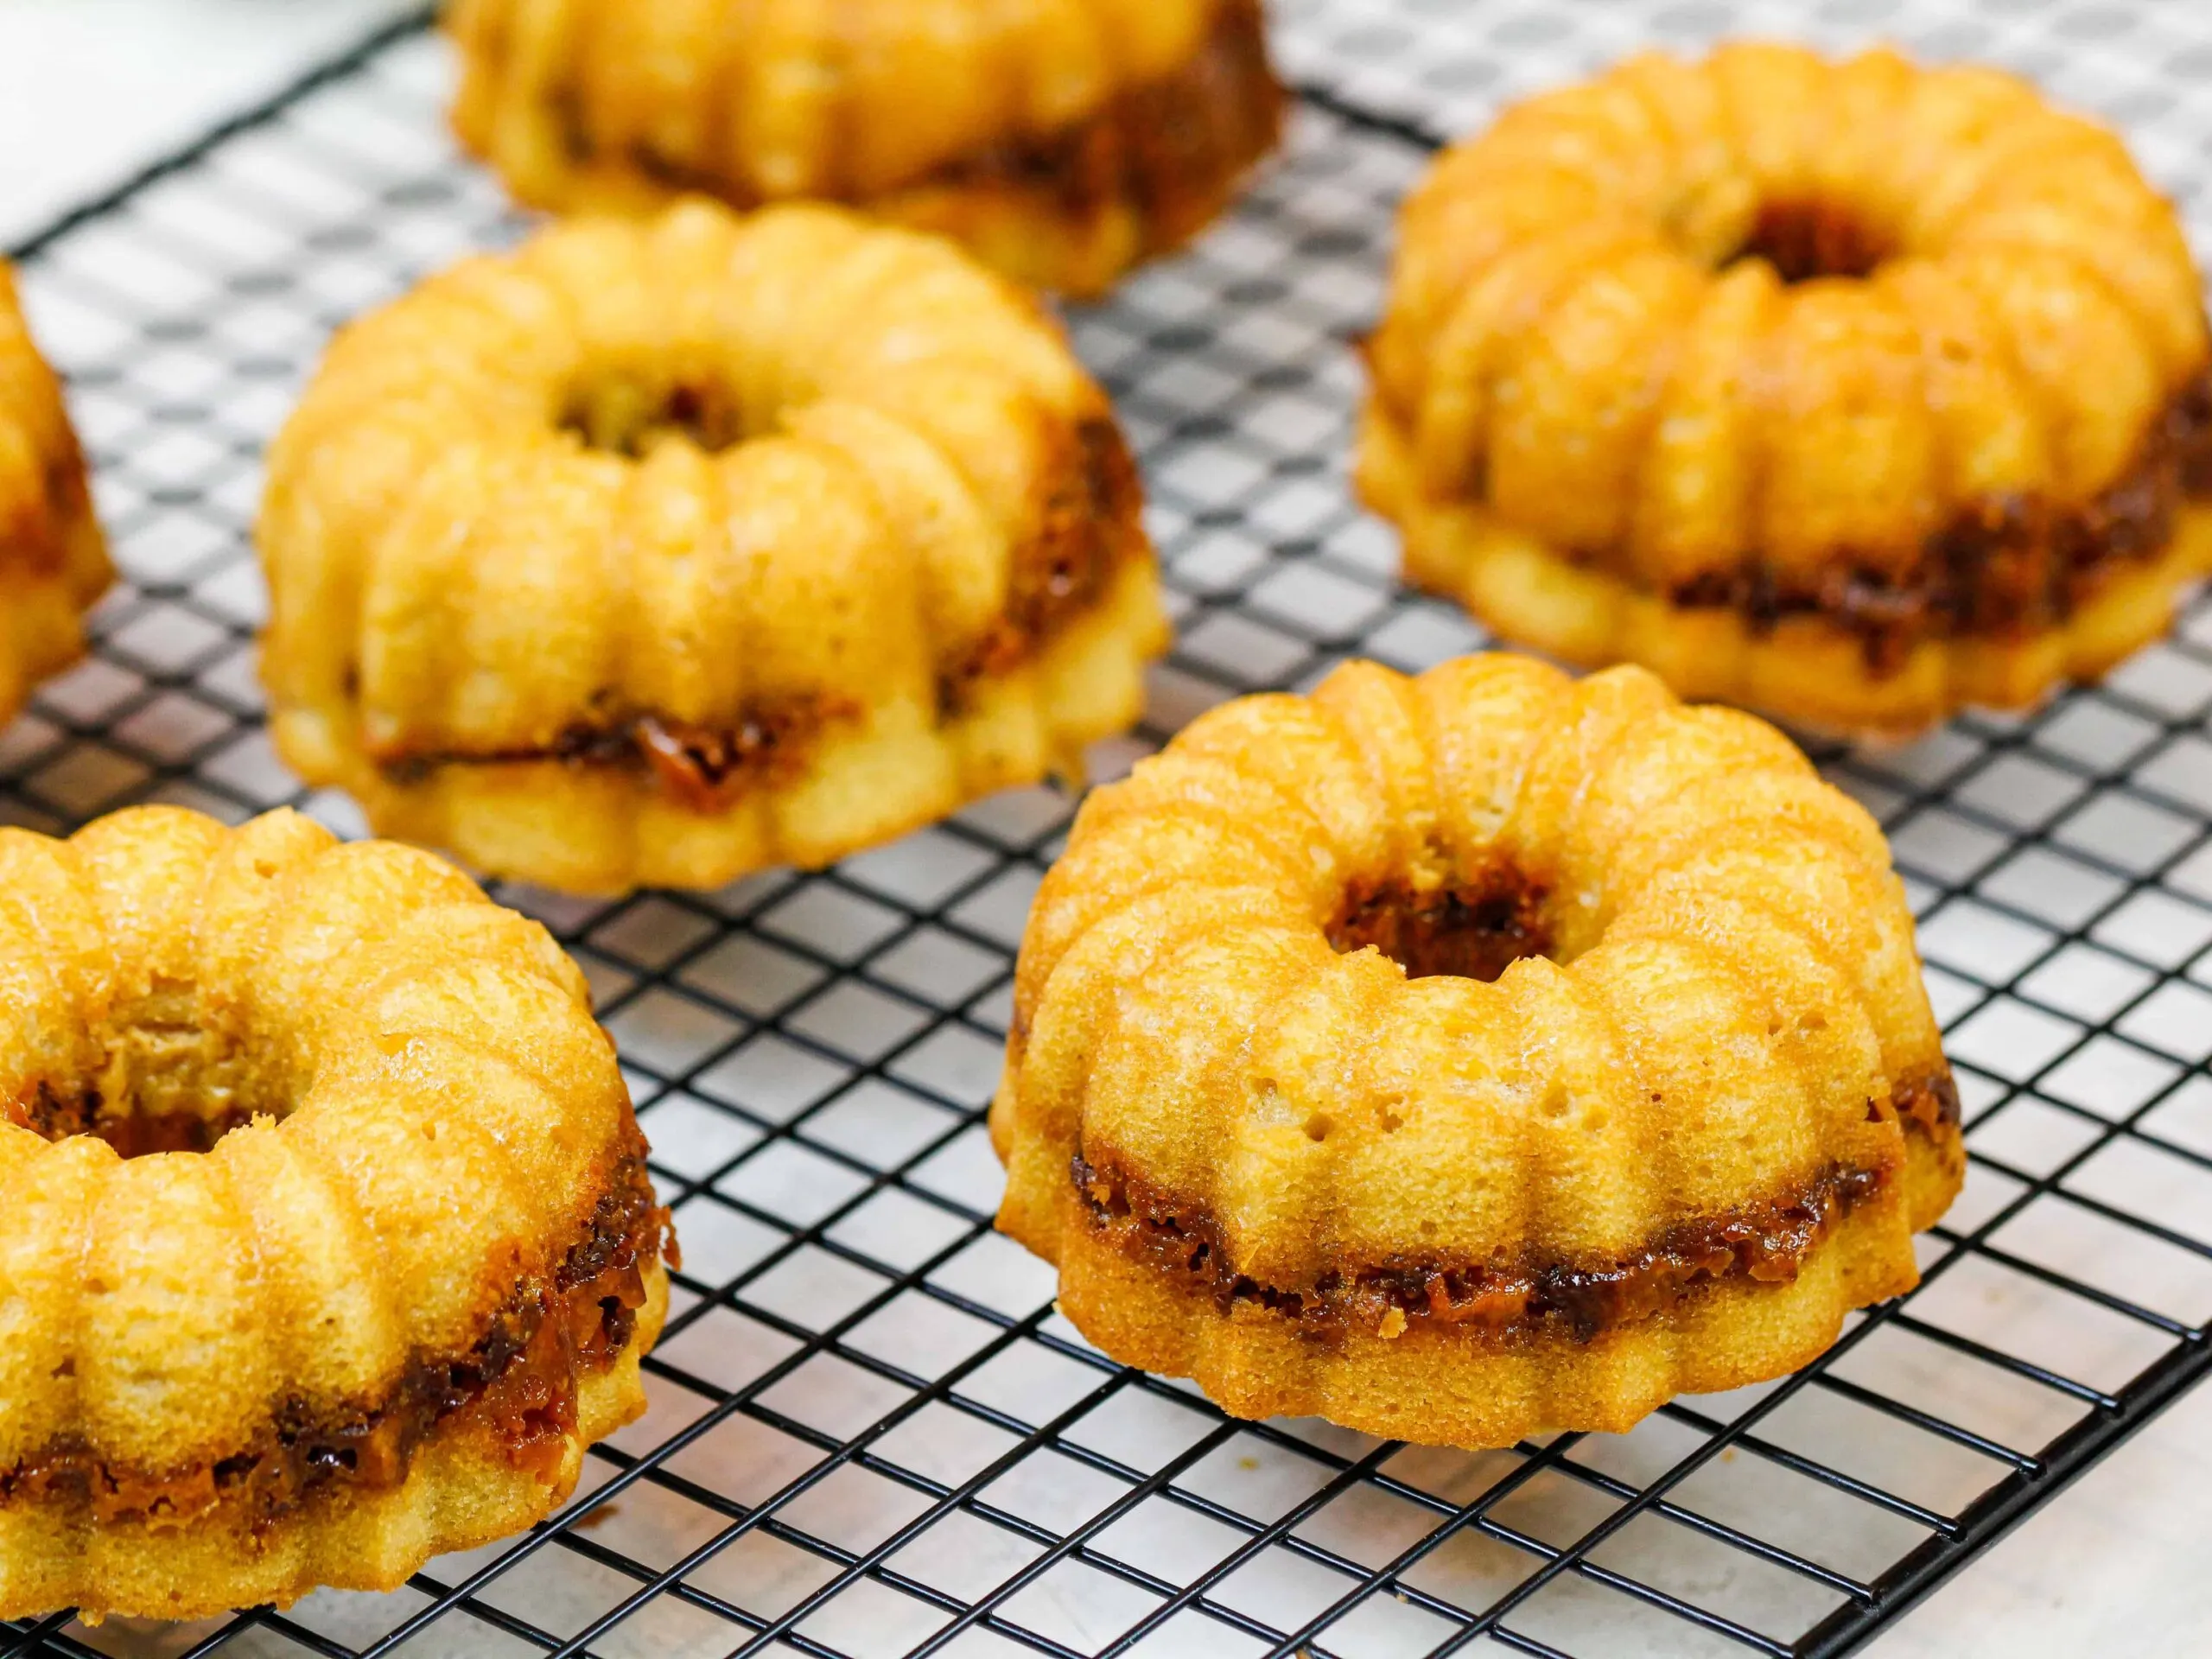
I like to use this Bundt pan to make mini Bundt cakes, which has 6 cavities with a 1 cup capacity. I bake 6 mini cakes at a time and let the remaining batter sit at room temperature until I can bake the next batch.
However, a lot of people have a classic Bundt cake pan which can also be used to make this Butterfinger® Bundt cake.
This recipe will bake up great in just about any regular sized Bundt pan as long as it has a capacity of at least 8 cups. Most large Bundt pans are able to hold this much batter.
Bake time will vary based on the size of your Bundt pan. If you make one large Bundt cake, I recommend baking it at 350 F for 40-50 minutes. Be sure to check on your cake every few minutes once it’s been in the oven for 40 minutes.

One word of advice. No matter what pan you use be sure to properly butter and flour or heavily grease your pan before adding the batter. Make sure you get into every nook and cranny!!
It sounds dramatic but you’ll thank yourself later when your gorgeous Bundt cake pops right out of the pan.
Tips to Make the Best Mini Butterfinger® Bundt Cakes
- Mix your cake batter just until the ingredients are incorporated. This will ensure your cake has a tender crumb.
- Bake time can vary a lot based on your pan. Keep an eye on your mini Bundt cakes and check in every couple of minutes once they’ve been in the oven for 20 minutes.
- Butter and flour or heavily spray your Bundt pan to help your cakes easily release
- Only fill your Bundt cake cavities 2/3 full to ensure they bake up properly.
- Don’t add more peanut butter to the cake center than the recipe recommends! It can make it difficult to bake the center of the Bundt cakes and cause them to separate.
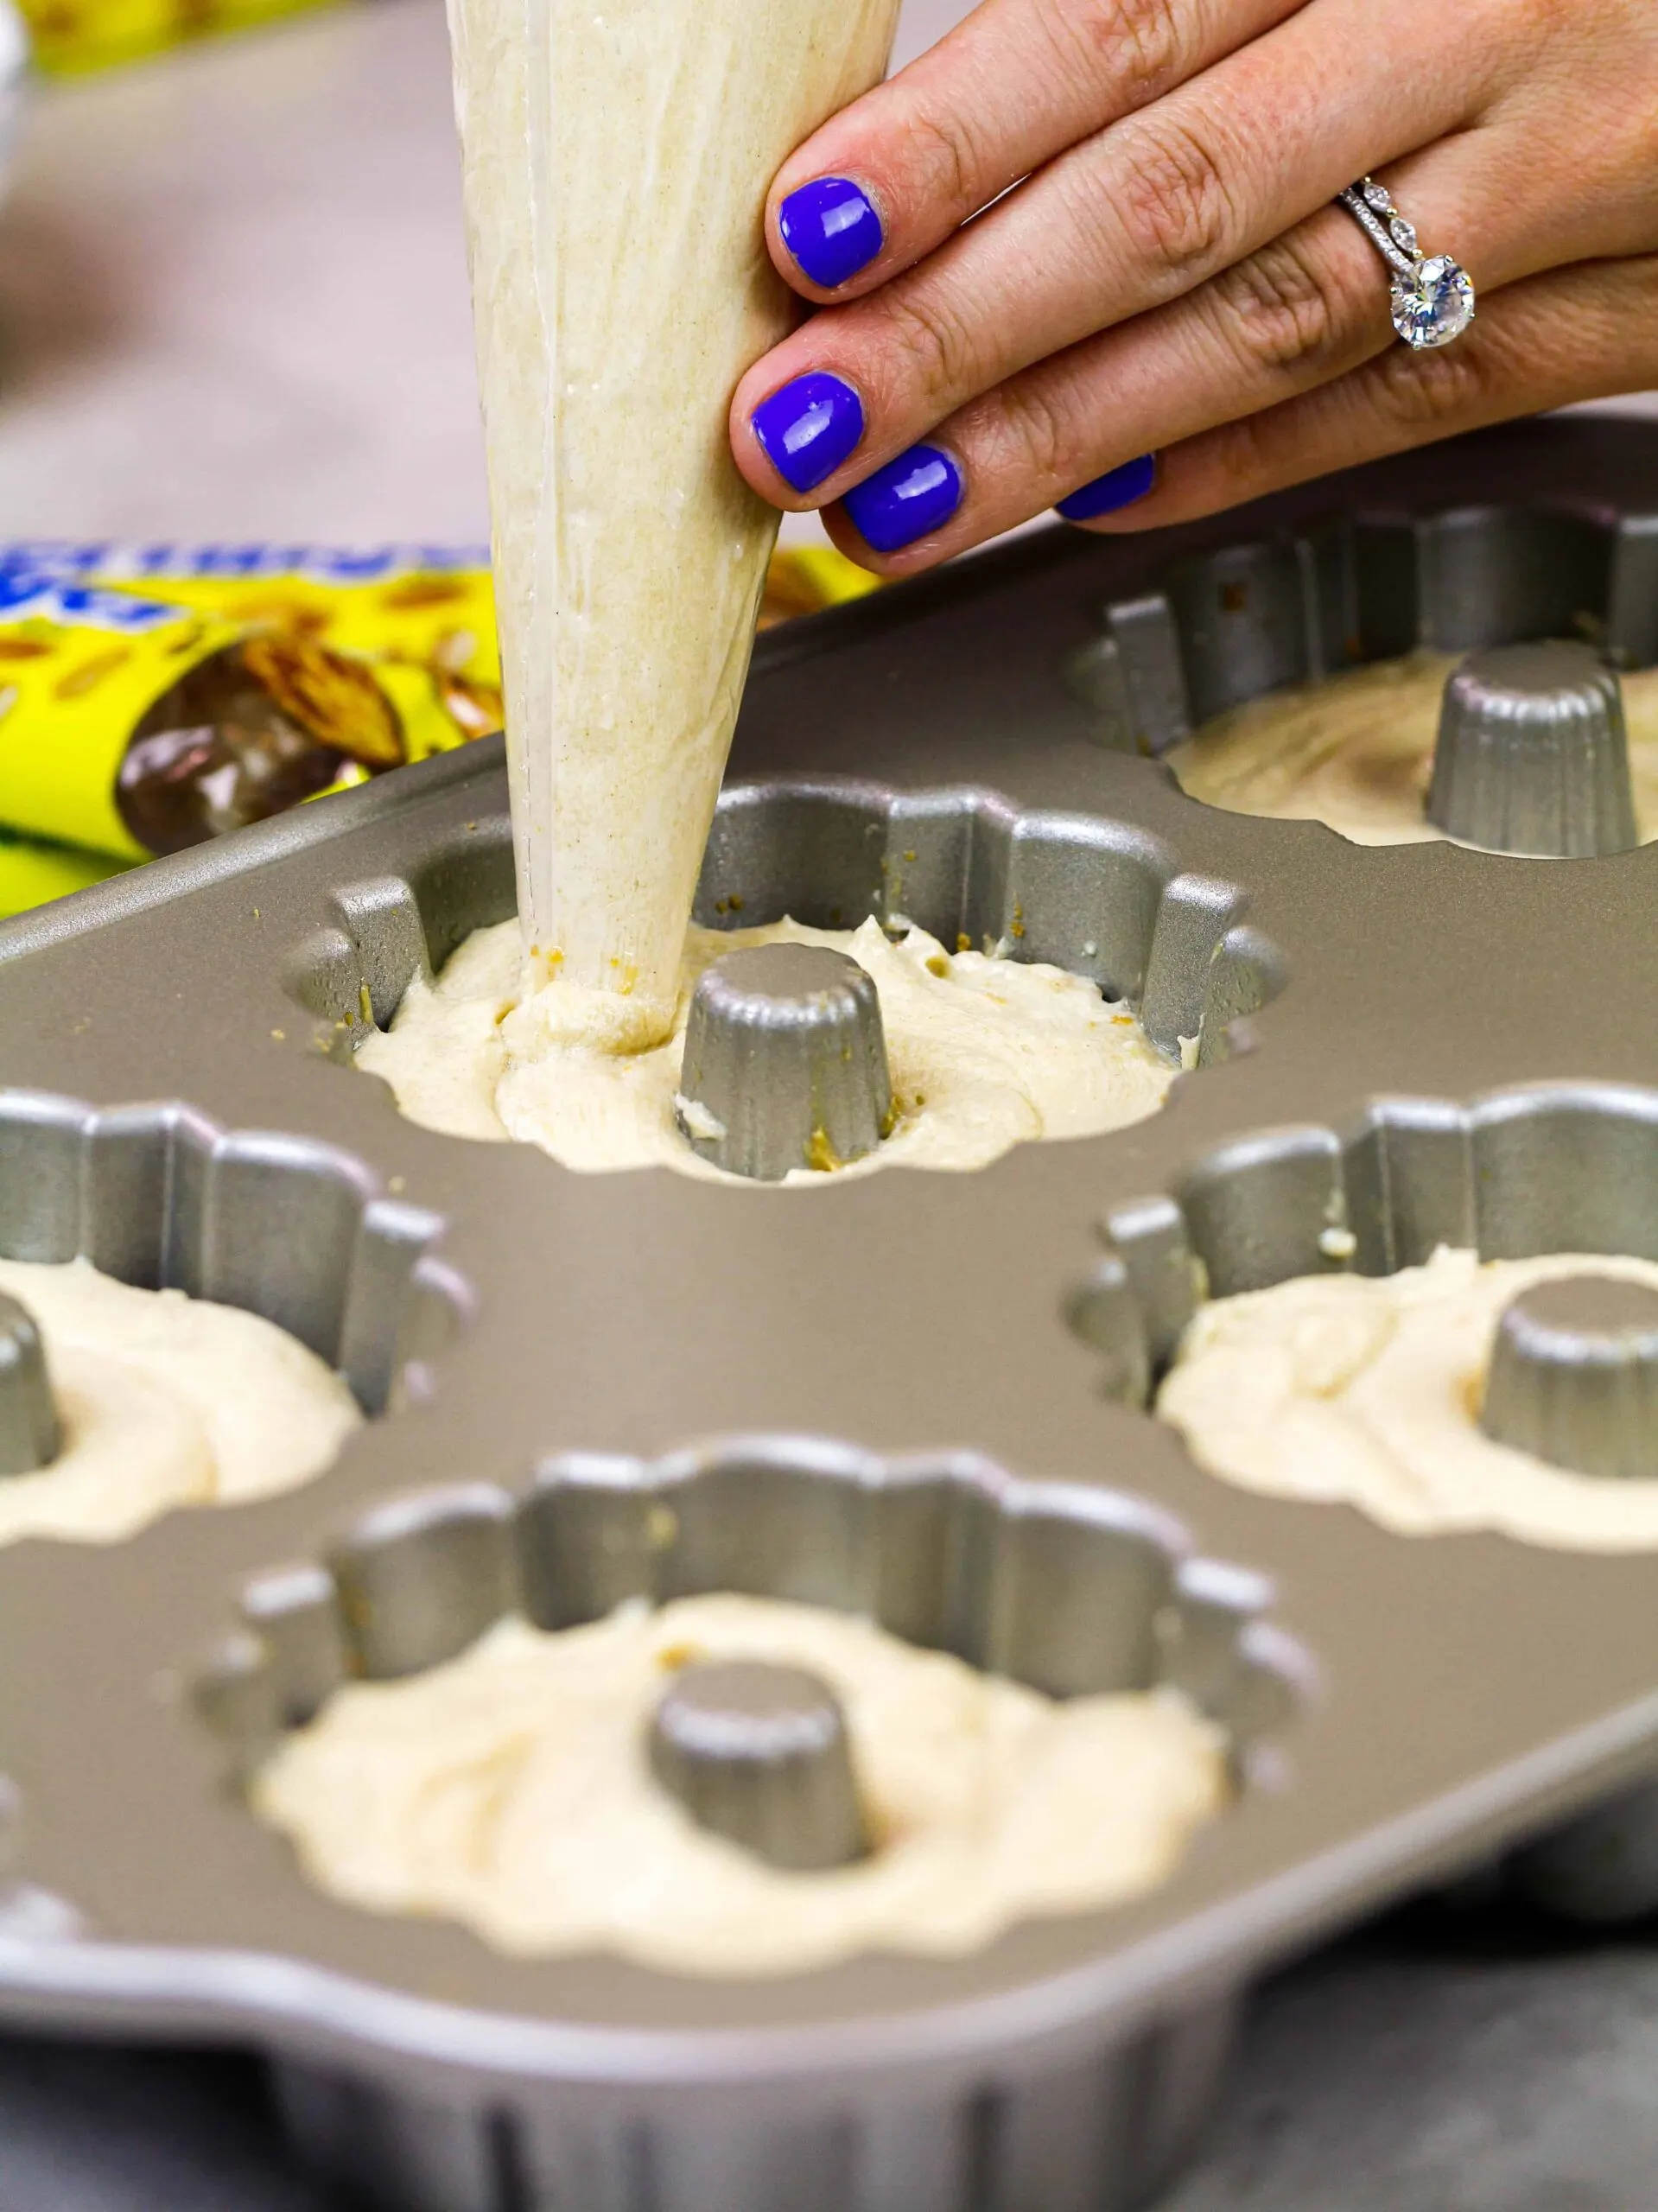
- Use a cookie scoop or piping bag to easily fill your mini Bundt pan cavities.
How to Store These Mini Butterfinger® Bundt Cakes
Store any leftover cakes in an airtight container at room temperature for up to 2 days or in the fridge for up to a week. If you make this cake in advance, the same rules apply.
These mini Bundt cakes can also be frozen for up to 1 month if stored in an airtight container. I recommend waiting to add the glaze until you thaw the cakes.

Let Me Know What You Think!
I’d love to hear what you think of this recipe for mini Butterfinger Bundt cakes! Please leave a rating and comment below.
Don’t forget to tag me @chelsweets and use #chelsweets so that I can see your amazing creations on social media.

Baby Butterfinger Bundt Cakes

These mini Butterfinger® bundt cakes are layered with chopped-up Butterfinger and peanut butter and topped with a delicious peanut butter glaze.
Ingredients
Mini Butterfinger Bundt Cake
- 1 cup salted butter, room temperature (226g)
- 1 1/2 cups brown sugar (300g)
- 4 large eggs, room temperature (224g)
- 3/4 cup buttermilk (180g)
- 2 cups all-purpose flour (260g)
- 1/2 tsp baking powder (2g)
- 1/3 cup peanut butter (80g)
- 1 1/2 cups chopped-up Butterfinger (195g)
- 3 Tbsp milk (45g)
- 1 cup powdered sugar (125g)
- 2 Tbsp cocoa powder (10g)
Instructions
Baby Butterfinger Bundt Cake
- Preheat oven to 350°F. Grease mini Bundt pan and set aside.
- Cream together butter and brown sugar. Add in the eggs, two at a time.
- Mix in buttermilk, then flour and baking powder.
- Fill the greased pan 1/3 full. Top with 1 tsp of peanut butter and 1 ½ Tbsp chopped-up Butterfinger. Cover with additional batter, filling the cavities 2/3 full.
- Bake for 20-23 minutes or until baked through.
- Mix remaining peanut butter, milk, powdered sugar and cocoa together to make a glaze.
- Top each cake with glaze and chopped-up Butterfinger.
Notes
Alterations
Make a regular sized Bundt cake using a Bundt pan with a 10-cup capacity and bake for 40-50 minutes at 350 F.
Tips to Make the Best Mini Butterfinger Bundt Cakes:
- Mix your cake batter just until the ingredients are incorporated. This will ensure your cake has a tender crumb.
- Bake time can vary a lot based on your pan. Keep an eye on your mini Bundt cakes and check in every couple minutes once they've been in the oven for 20 minutes.
- Butter and flour or heavily spray your Bundt pan to help your cakes easily release
- Only fill your Bundt cake cavities 2/3 full to ensure they bake up properly.
- Don't add more peanut butter to the cake center than the recipe recommends! It can make it difficult to bake the center of the Bundt cakes and cause them to separate.
- Use a cookie scoop or piping bag to easily fill your mini Bundt pan cavities.
How to Store These Mini Butterfinger Bundt Cakes:
Store any leftover cakes in an airtight container at room temperature for up to 2 days or in the fridge for up to a week. If you make this cake in advance, the same rules apply.
These mini Bundt cakes can also be frozen for up to 1 month if stored in an airtight container. I recommend waiting to add the glaze until you thaw the cakes.
Nutrition Information
Yield
12Serving Size
1Amount Per Serving Calories 511Total Fat 25gSaturated Fat 13gTrans Fat 1gUnsaturated Fat 10gCholesterol 104mgSodium 287mgCarbohydrates 67gFiber 2gSugar 43gProtein 8g
Biscoff Cupcakes Filled with Cookie Butter - Chelsweets
Sunday 24th of April 2022
[…] Butter Cake Mini Butterfinger Bundt Cakes Caramel Cupcakes Cookie Dough Bites Yield: […]
Mini Chocolate Cake Recipe: The Perfect Date Night Dessert
Friday 22nd of April 2022
[…] Vanilla Cake Recipe Tiny Butterfinger Bundt Cakes Mini Macarons Mini Cheesecake Yield: […]
Rolo Cake: Candy-Inspired Chocolate Cake with Gooey Caramel Center
Monday 14th of February 2022
[…] Mini Butterfinger Bundt Cakes Caramel Cupcakes Chocolate Caramel Poke Cake Caramel Apple Cinnamon Rolls Yield: 16 servings […]
Butterfinger Cake: Chocolate Peanut Buttery Slice of Heaven
Wednesday 5th of January 2022
[…] Mini Butterfinger Bundt Cakes […]
Sonia Puente
Thursday 26th of November 2020
Can you use this recipe for a layered cake?