
While I frost most of my cakes with American buttercream, sometimes I like to mix things up! After a bit of experimenting, I feel like I’ve finally perfected an easy Swiss meringue buttercream frosting (SMBC).
This type of frosting definitely takes a bit more effort and time than my American buttercream, but it is totally worth it. It’s truly a dream to pipe and frost with!
My favorite thing about Swiss meringue is that it doesn’t crust. You don’t have to cover it with plastic wrap or worry about your frosting crusting on your cake if you make it in advance.

Over the years I’ve found that I prefer mine with slightly less butter than most Swiss meringue buttercream (SMBC) recipes call for.
How to Make Swiss Meringue Buttercream
While half the battle of SMBC is having a good recipe, the other half is how you make it!
So, let’s walk through everything you need to know to make the smoothest, fluffiest Swiss meringue buttercream! I’ve also shared a video if you’re more of a visual learner.
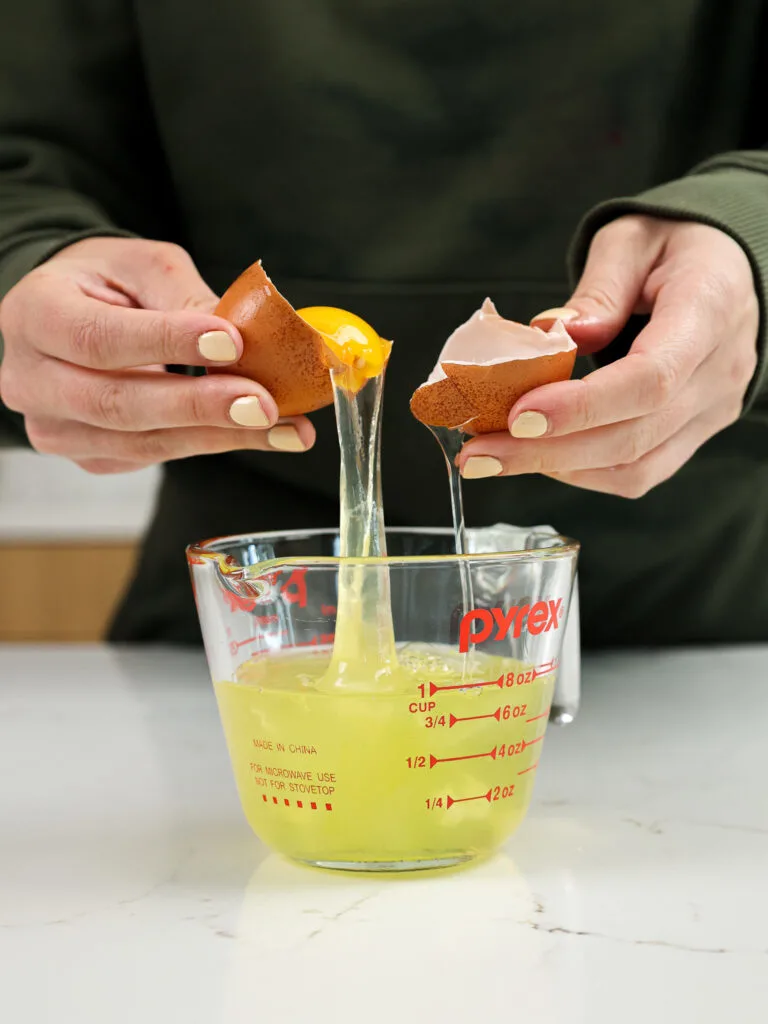
Step #1: Separate the Egg Whites
What gives this frosting its incredible texture is the meringue that it’s made with. That’s why the eggs in this recipe are so important. Or more specifically the egg whites!
I recommend separating the eggs when they’re cold. It makes it way easier, and they’ll be heated before being whipped so there’s no need to bring them to room temperature ahead of time.
Be careful as you do this, because they won’t whip up properly if any yolk gets into the mixture!
If you’re not quite sure what to do with the egg yolks you’ll be left with after making this frosting, here’s a great post with loads of ideas for using up leftover egg yolks.

Normally I’m a huge fan of using egg whites out of a carton, but that’s when I’m adding them into a batter.
When it comes to making meringue, I find that carton egg whites simply don’t whip up as well.
I really struggle getting stiff peaks with them. The pasteurization process weakens the proteins in the egg whites and makes them so much harder to whip up.
I don’t recommend using egg whites from a carton to make Swiss meringue frosting. However, you can use them to make my hybrid buttercream frosting.
Step #2: Heat Up the Egg Whites & Dissolve the Granulated Sugar
There’s something about the idea of raw eggs in frosting that seems a bit creepy. A lot of people worry it isn’t safe to eat, but we take an important step to ensure that it is!
By heating up and whisking our egg whites and granulated sugar over a double boiler to 160 F / 71 C, we accomplish two things at once.
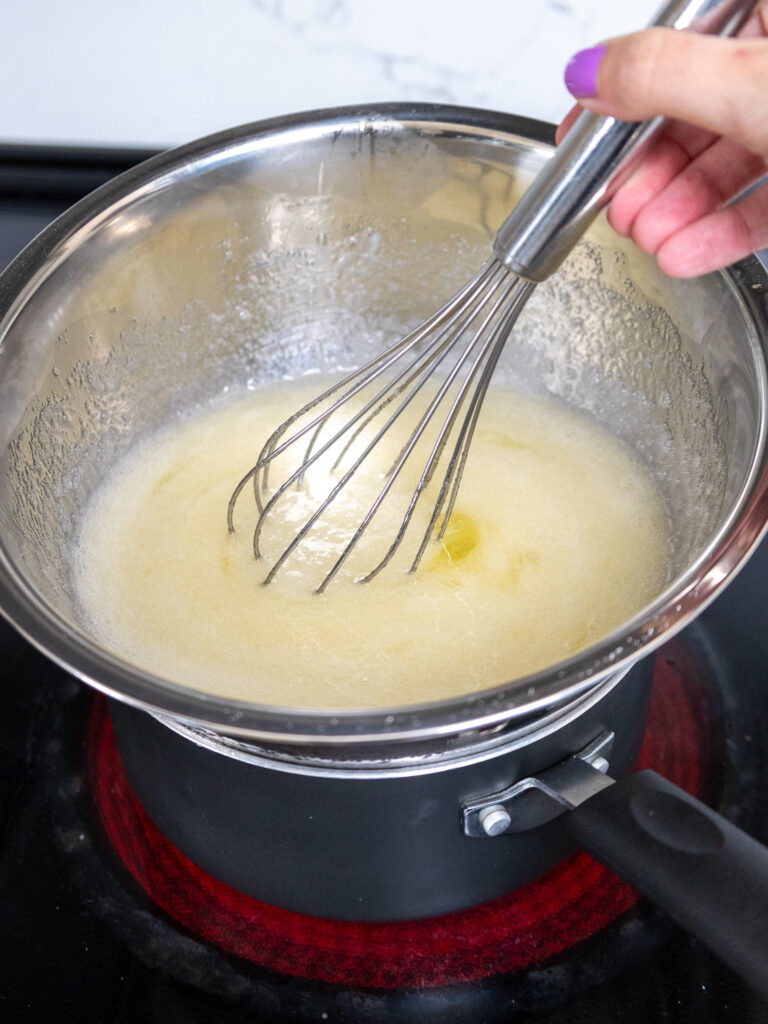

The first is that we kill any potentially harmful bacteria. Salmonella is killed at this temperature.
The second is that it dissolves the granulated sugar, which gives the frosting a silky-smooth texture.
The easiest way to ensure the mixture gets hot enough is to use a digital thermometer. This helps you know exactly when the egg whites are warm enough and prevents you from overheating them.
If you don’t have a digital thermometer on hand, you can test the mixture by rubbing a tiny bit between your fingertips. The sugar should be fully dissolved, and it should feel super smooth and hot to the touch.
If you do feel sugar granules, I suggest heating the egg white/sugar mixture a bit longer, then testing it again to make sure it’s smooth.
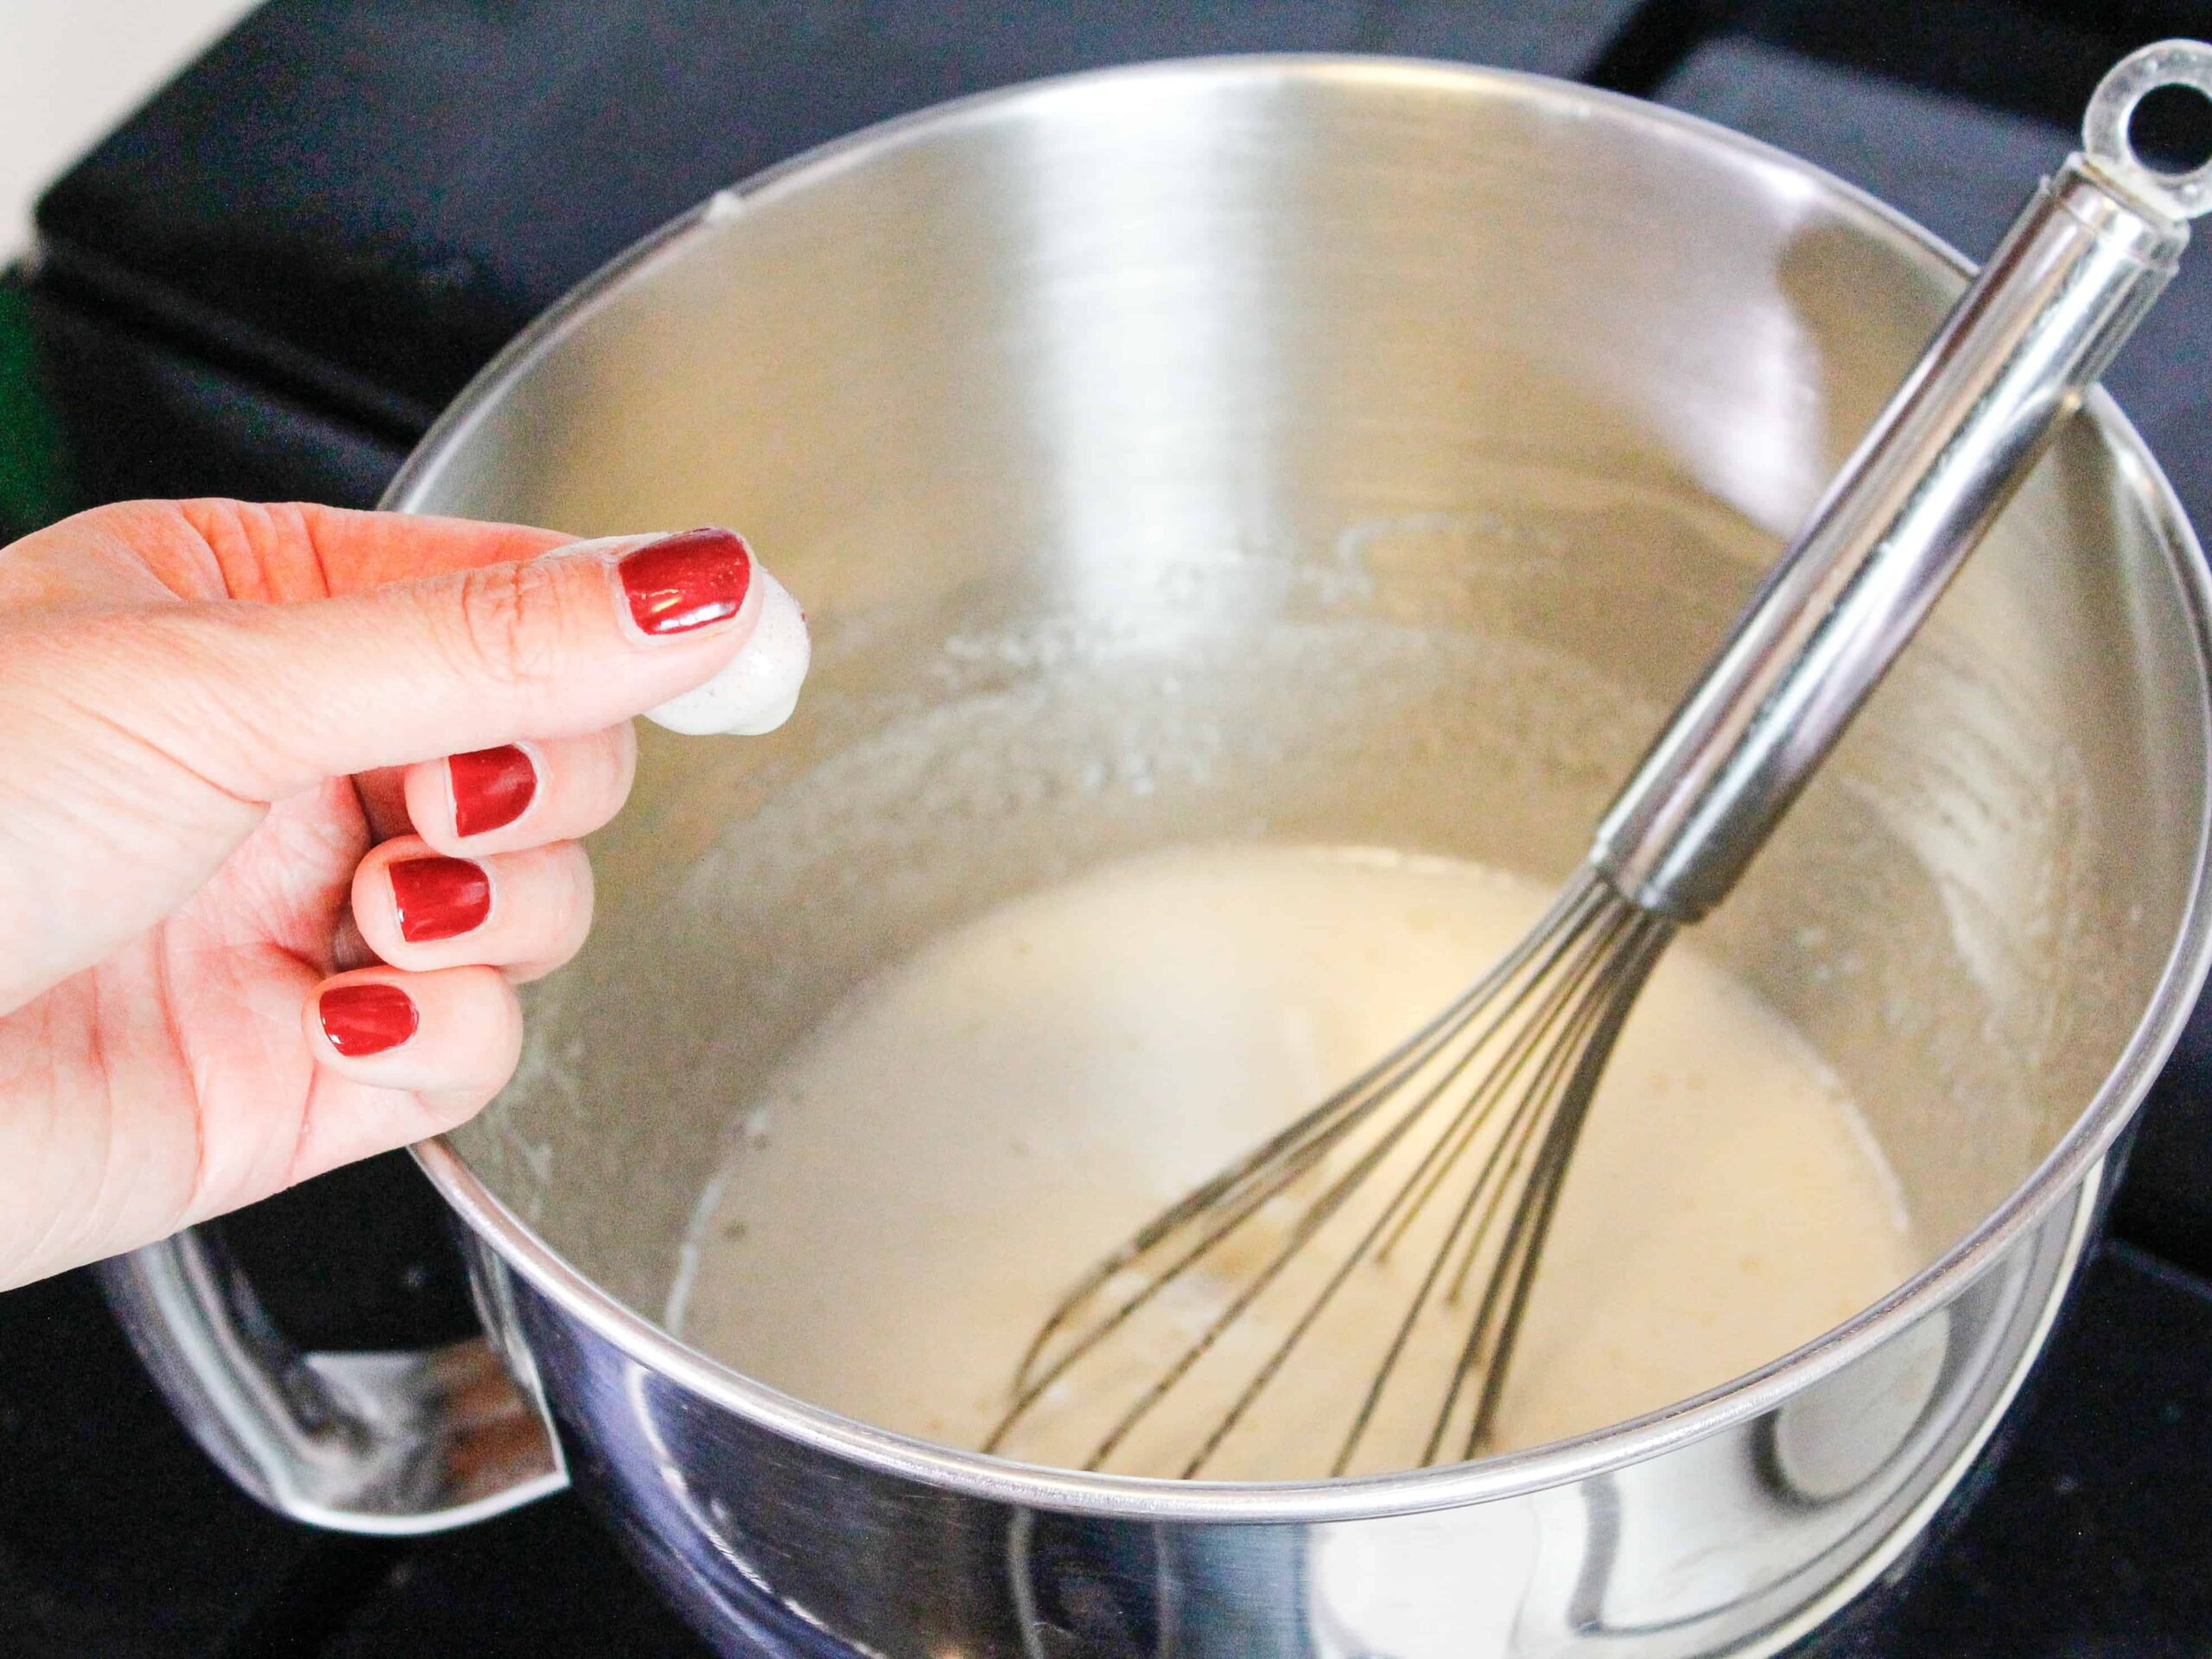
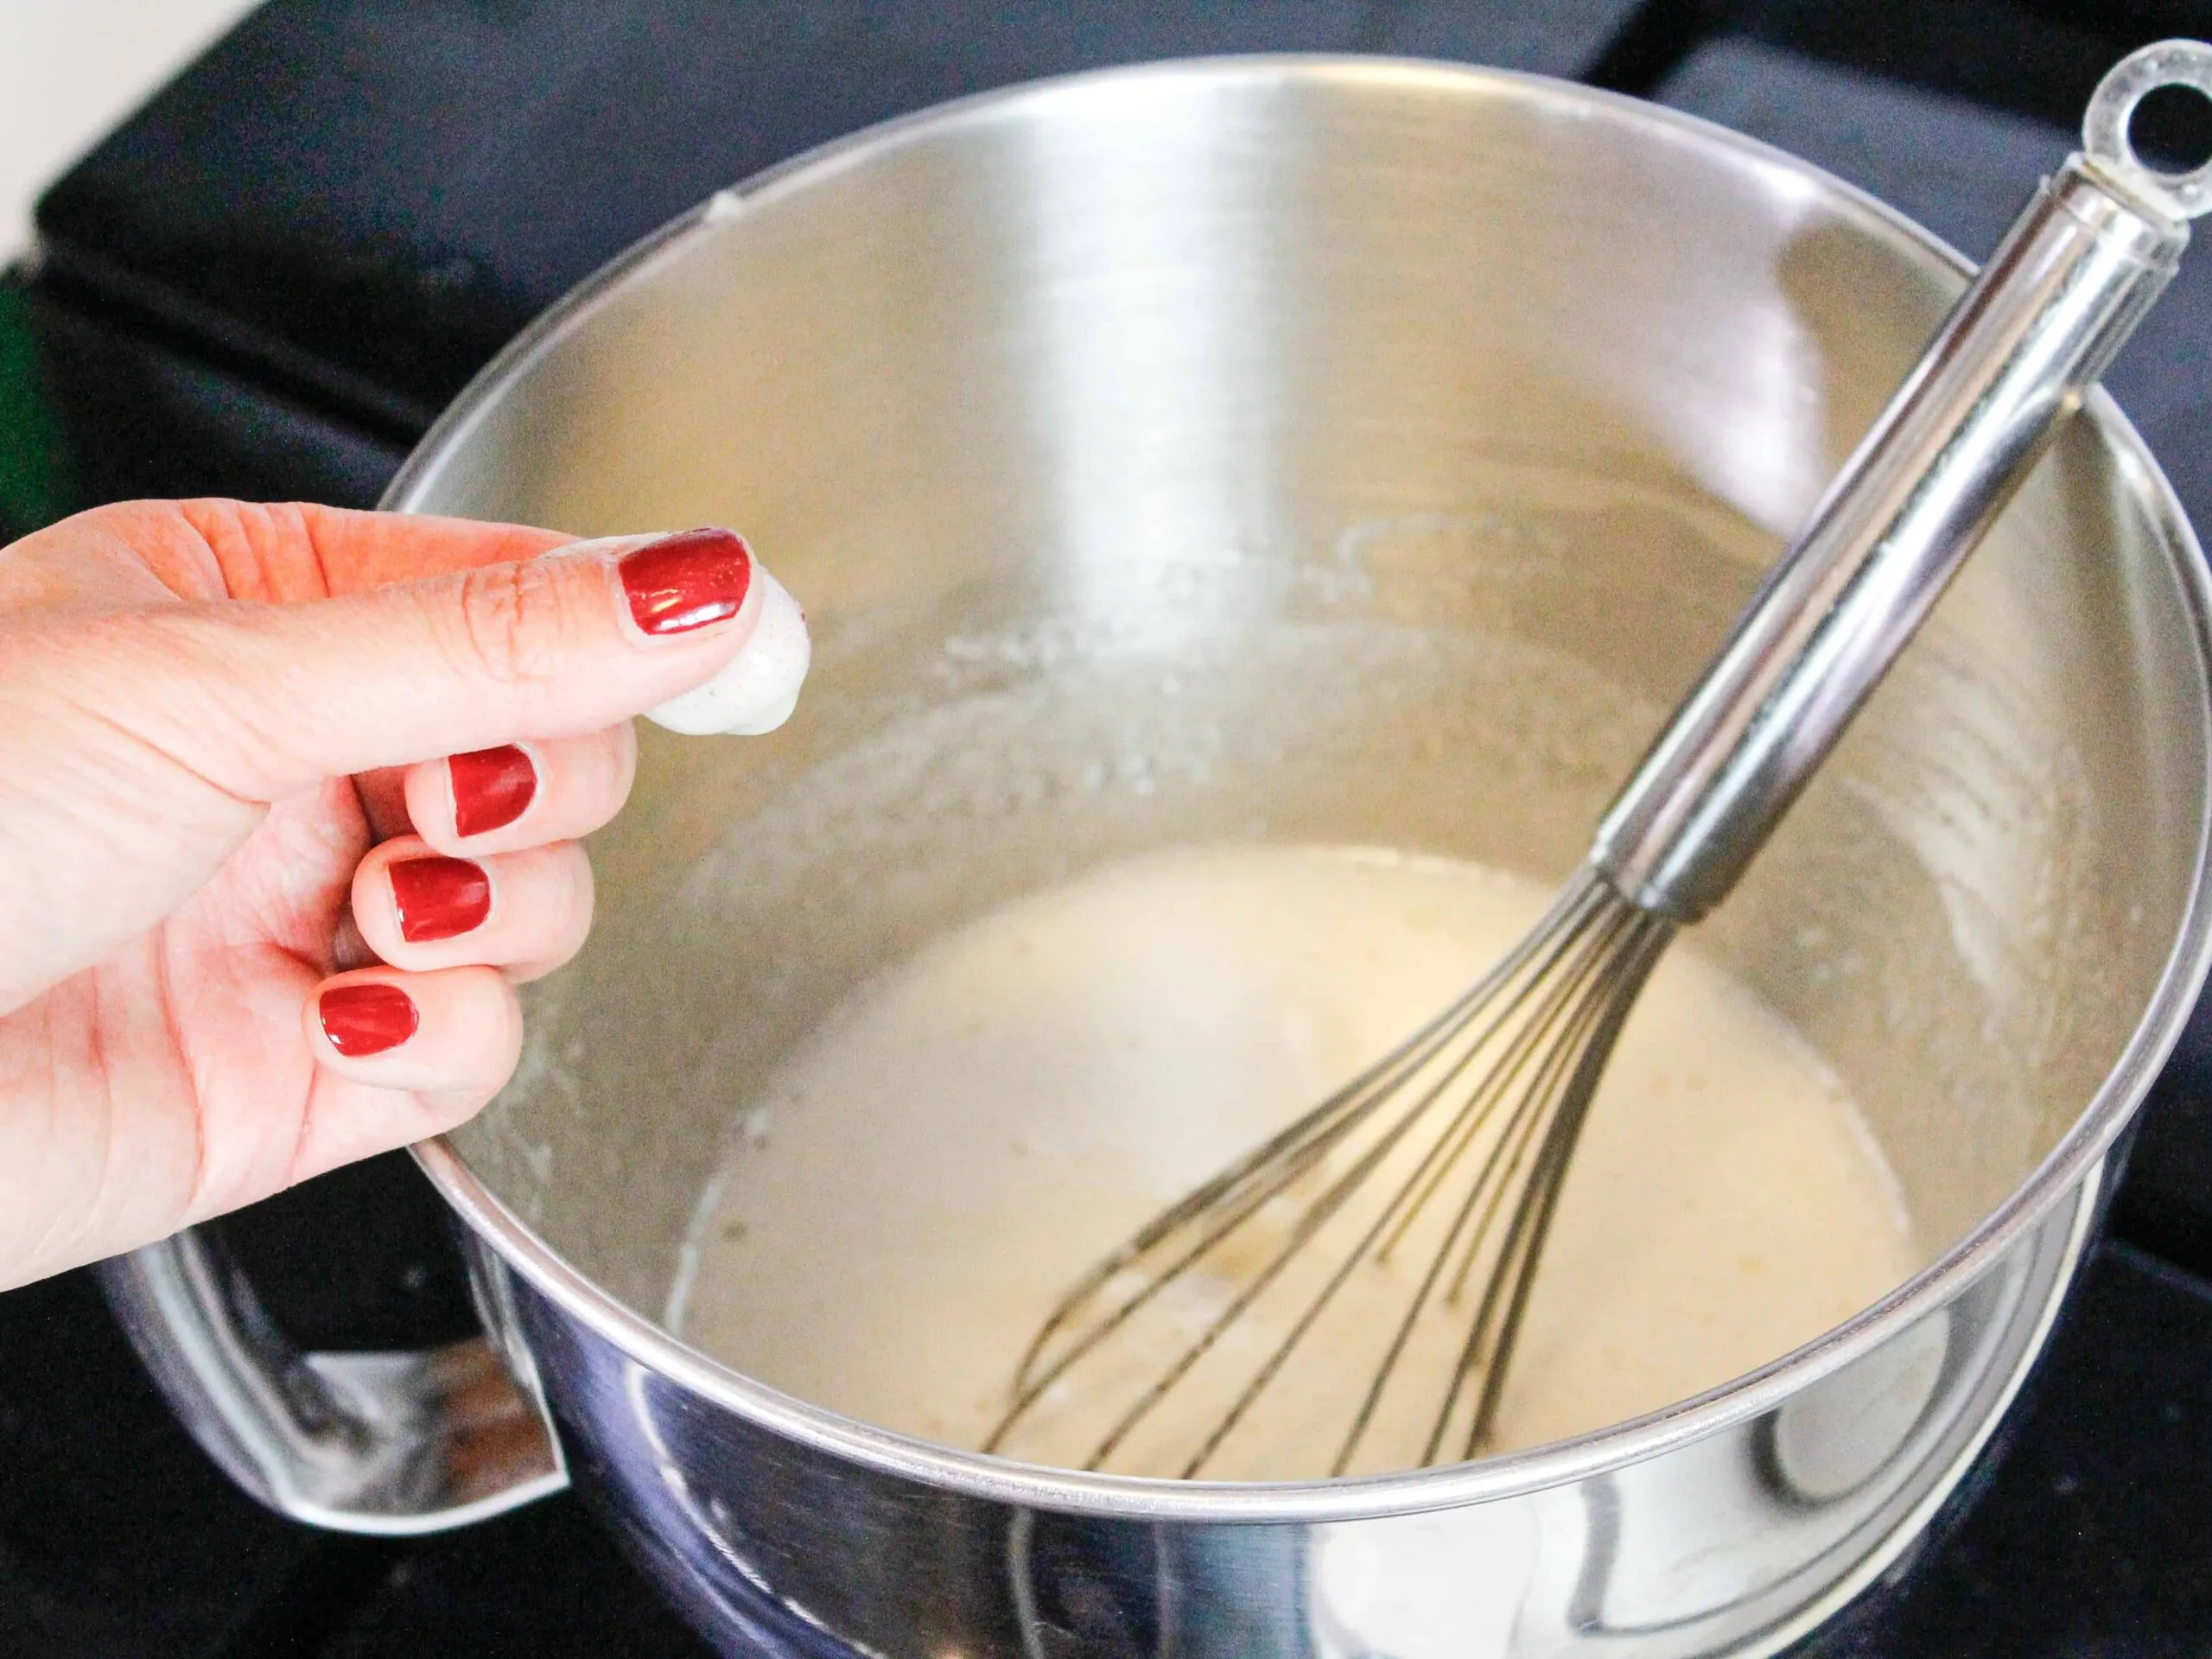
It’s very important that the sugar is fully dissolved before you make the meringue, or else your frosting can end up with a grainy texture.
Step #3: Whip the Swiss Meringue to Stiff Peaks
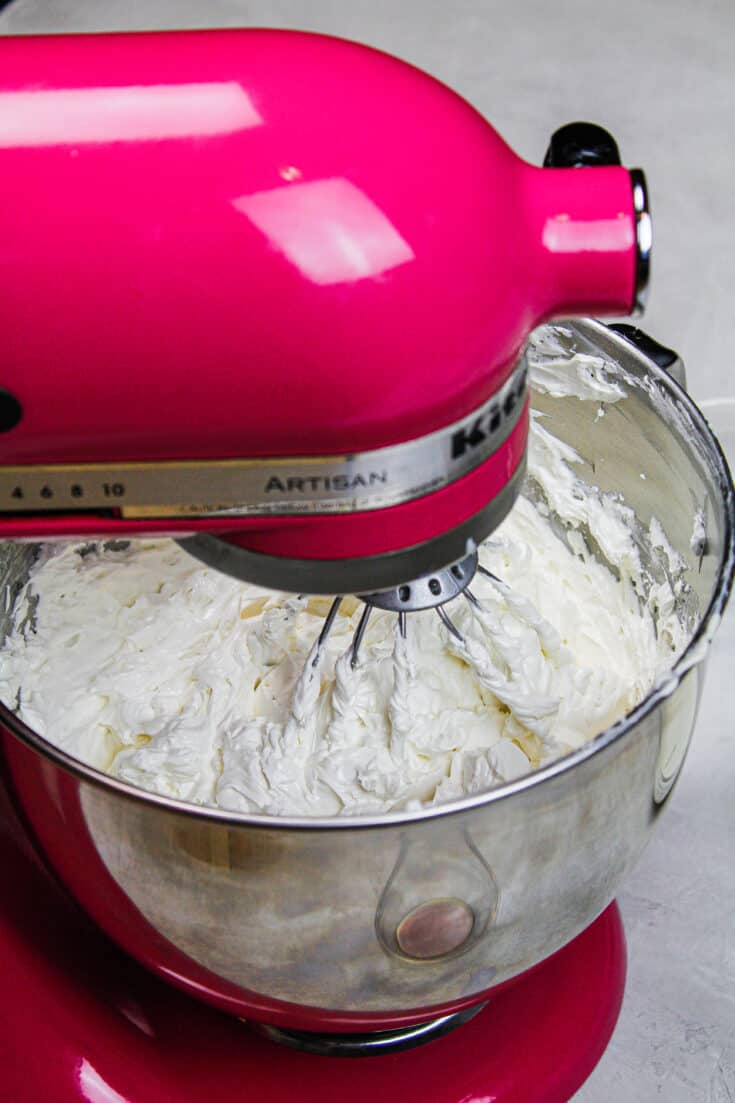
Once the sugar is fully dissolved and the mixture is smooth, it’s time to whip the meringue until it has stiff peaks. This takes quite a bit of time!
It usually takes me about 10 minutes with a stand mixer and whisk attachment on a medium-high speed.
While the meringue whips, I like to add something cold around the base of my bowl.
I find the meringue stays quite warm while it whips up and placing a bag of frozen veggies around the base of the bowl helps cool it back to room temperature. This can prevent your buttercream from becoming soupy in the next step.
You can also make this Swiss meringue buttercream with a hand mixer, but it takes forever!! Making it with a stand mixer is much easier and quicker.
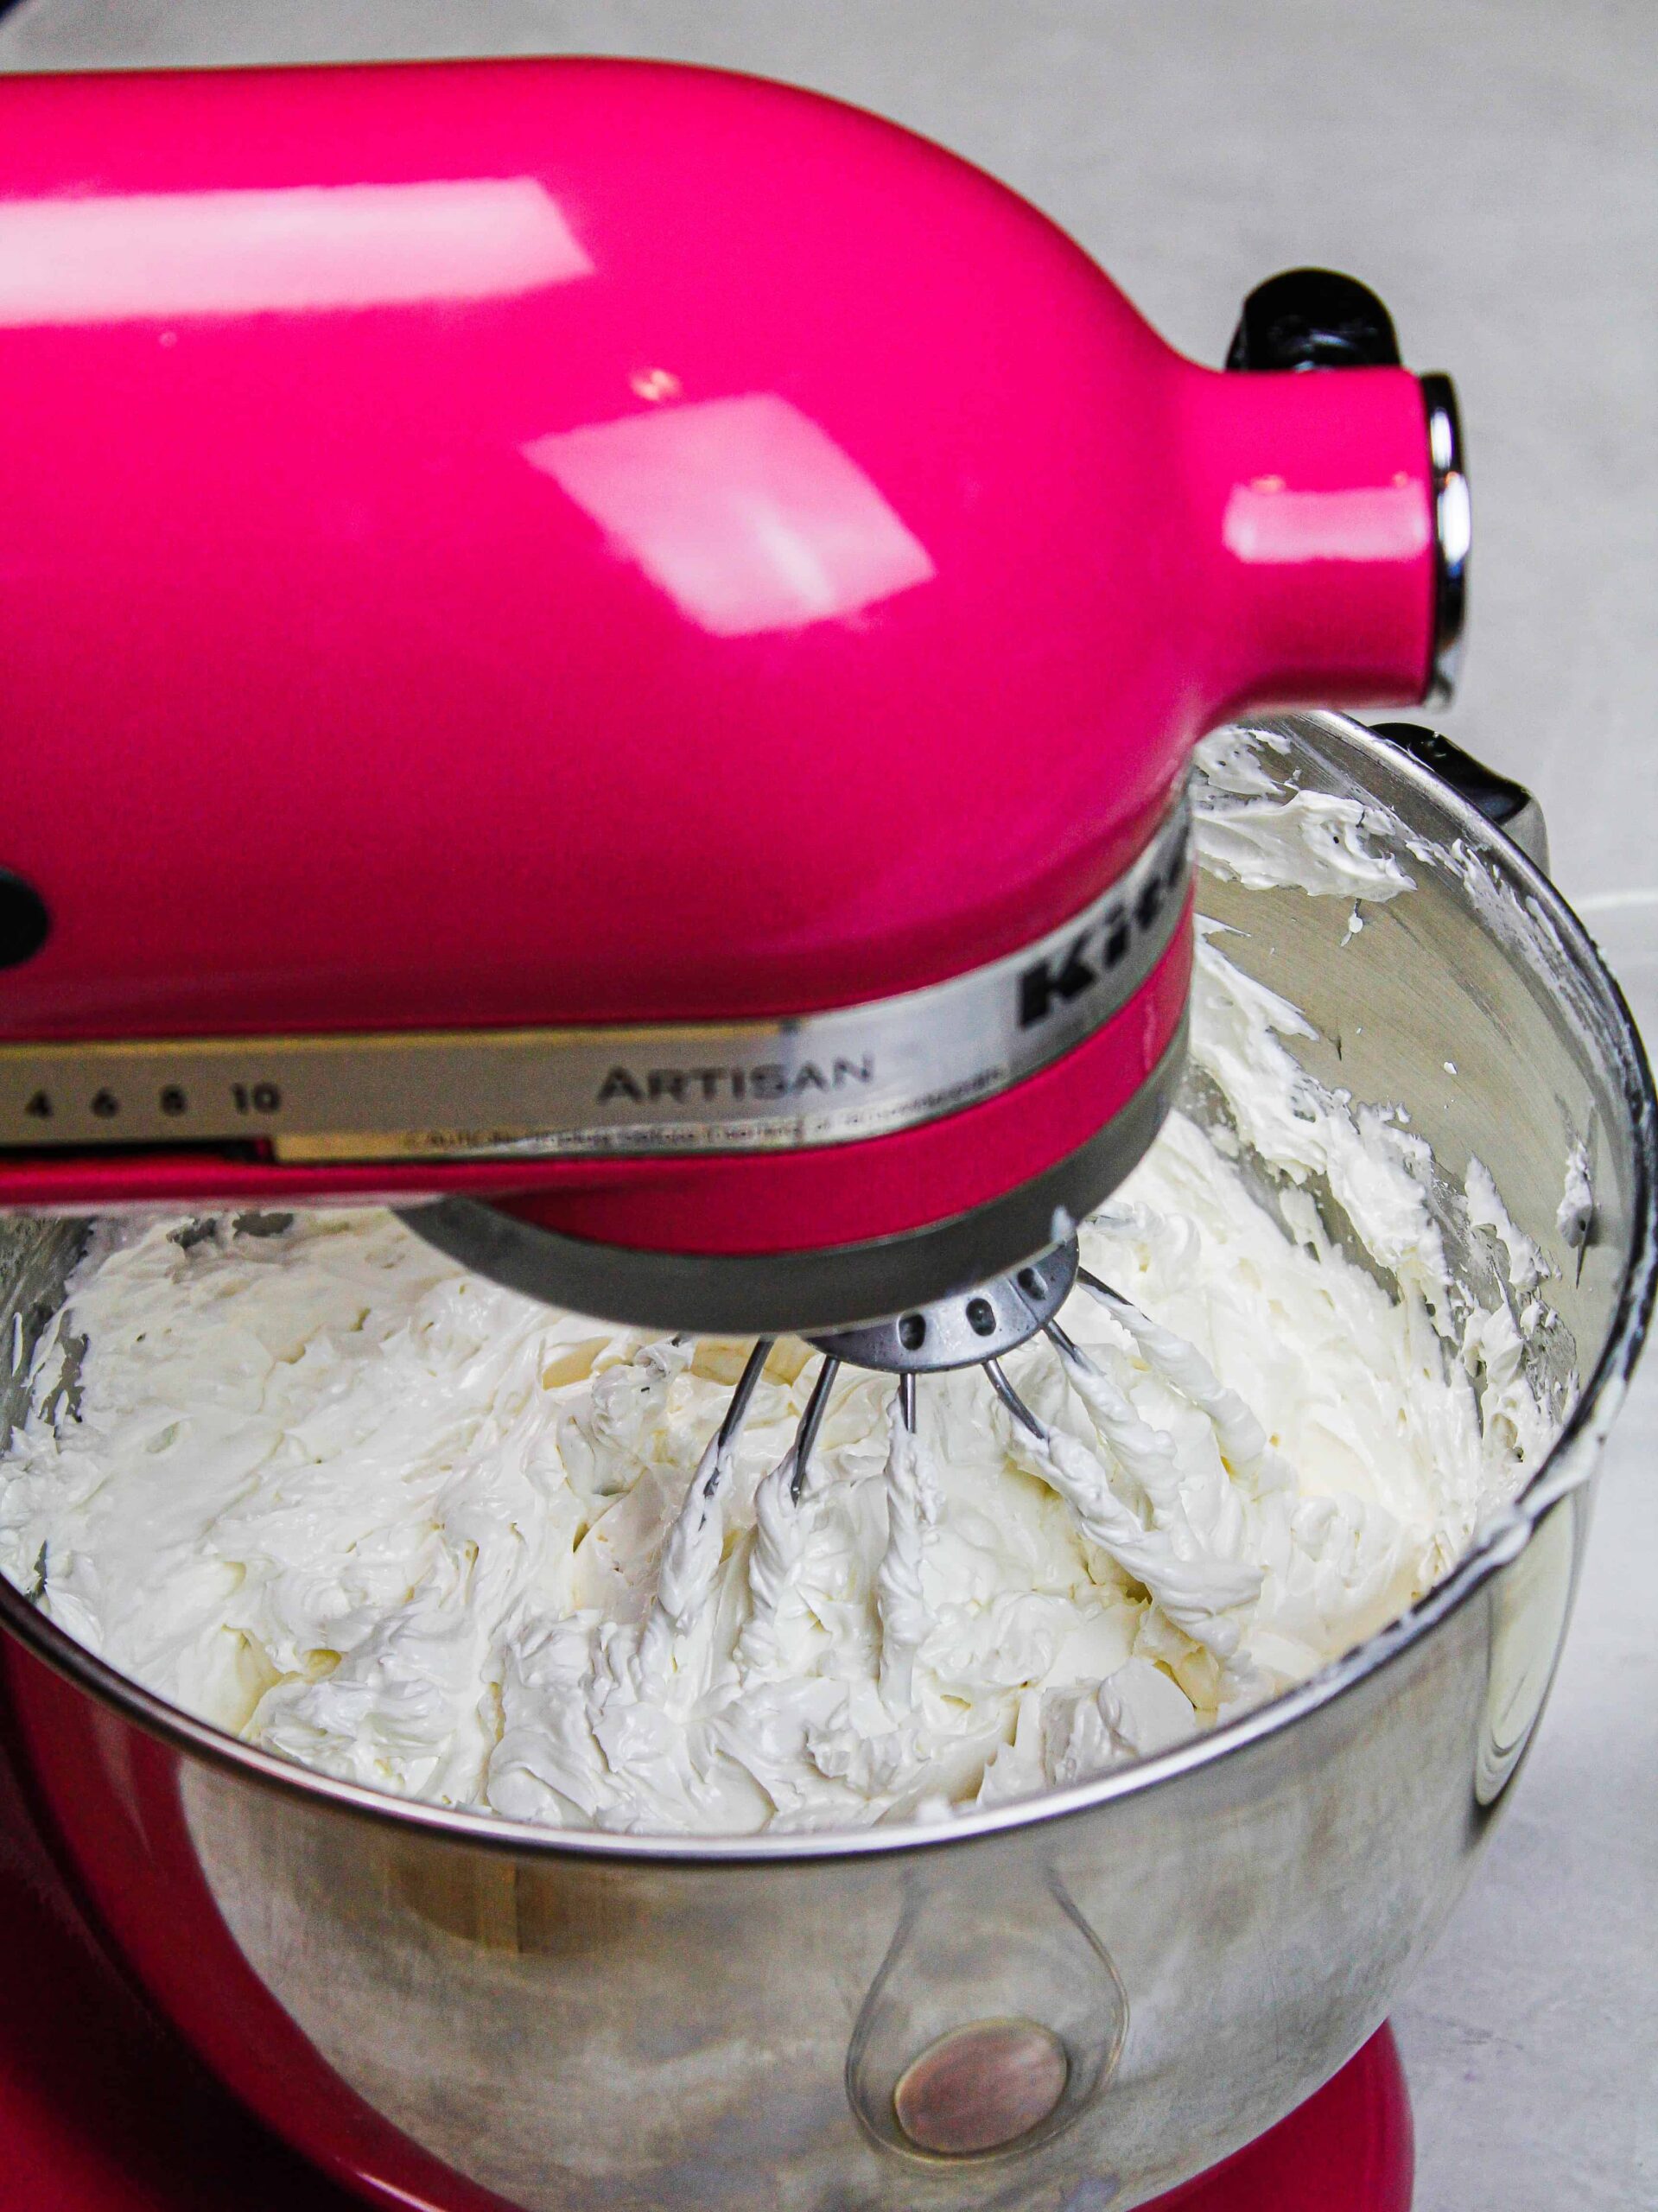
Once the meringue has stiff peaks, it should look like the photo below. The meringue should be able to stand up on its own when flipped upside down, and it should be nice and shiny.
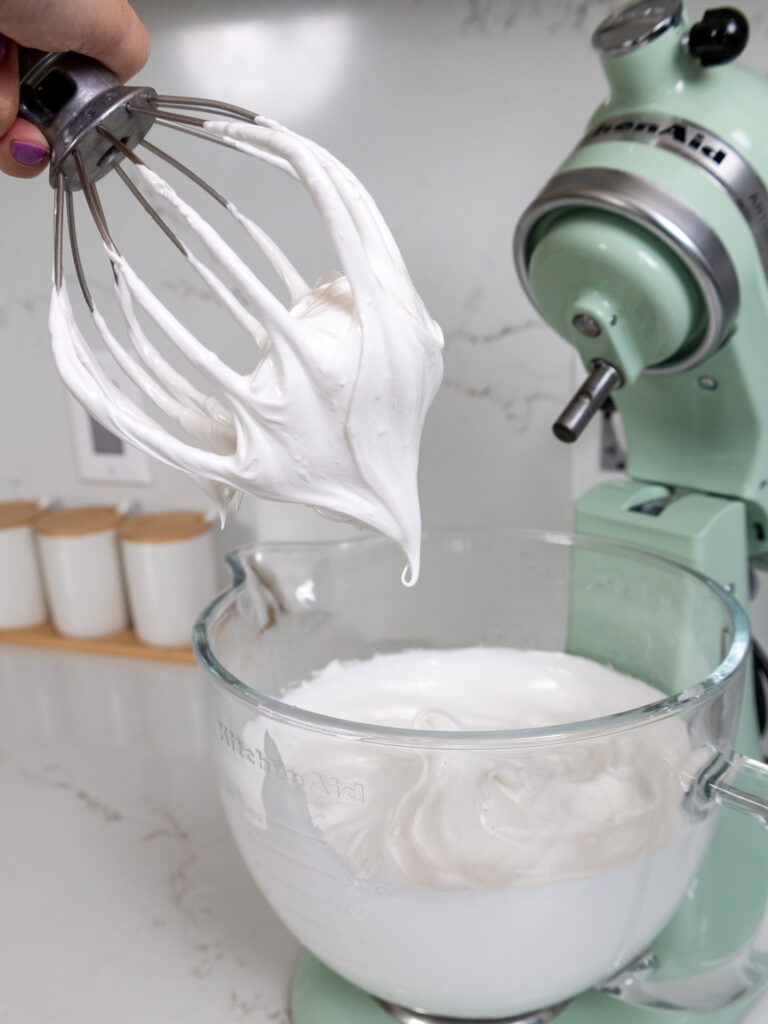

It can be hard to tell when the meringue reaches this stage just by looking at your mixing bowl, so feel free to take breaks and test it by removing the whisk attachment and flipping it upside down.
Step #4: Adding in the Butter, Vanilla Extract, and Salt
Once the meringue has stiff peaks, it’s time to mix in the unsalted butter.
After all that mixing, you’d think your bowl would have fully cooled off, right? But you might be wrong! At this point in time, I like to feel the bottom of my bowl with my hand.
If it feels pretty much room temperature, then I add in the butter. If it still feels warm, I’ll either wait another 15 minutes to add the butter or pop my bowl into my fridge for 5 minutes to help it cool down.
Usually by making sure the meringue and bowl have cooled to room temperature, you can prevent your Swiss meringue buttercream from becoming too thin or soupy.
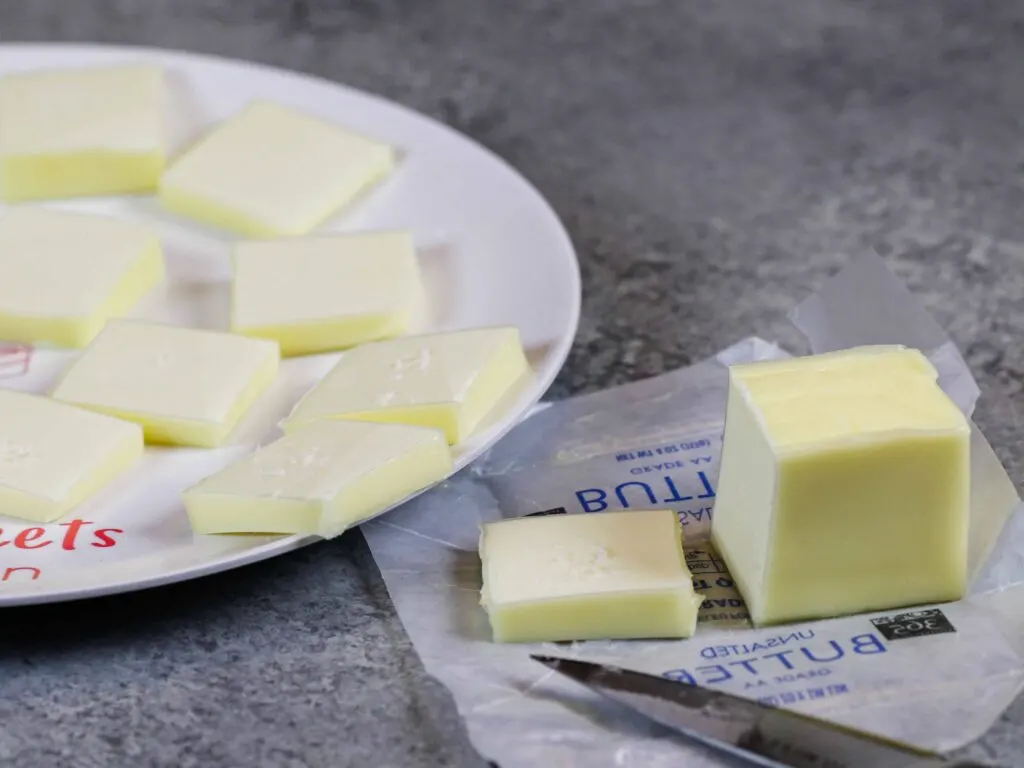
When I do start to add in the unsalted butter, I add it in one stick at a time. This gives your meringue time to incorporate the butter, and helps it come together more easily.
As you add the butter, it’s super important that the butter is room temperature. This does NOT mean soft to the touch or greasy.
It should be soft enough for you to press your finger into, but firm enough that you have to apply a bit of pressure to do so.
The time it takes for a stick of butter to come to room temperature can vary based on the type of butter you use and the temperature and humidity of your kitchen.

In my kitchen it usually takes 1-2 hours (1 hour in the summer, 2 hours in the winter).
Once the butter is mixed in, add in the vanilla extract and fine salt and mix until combined.
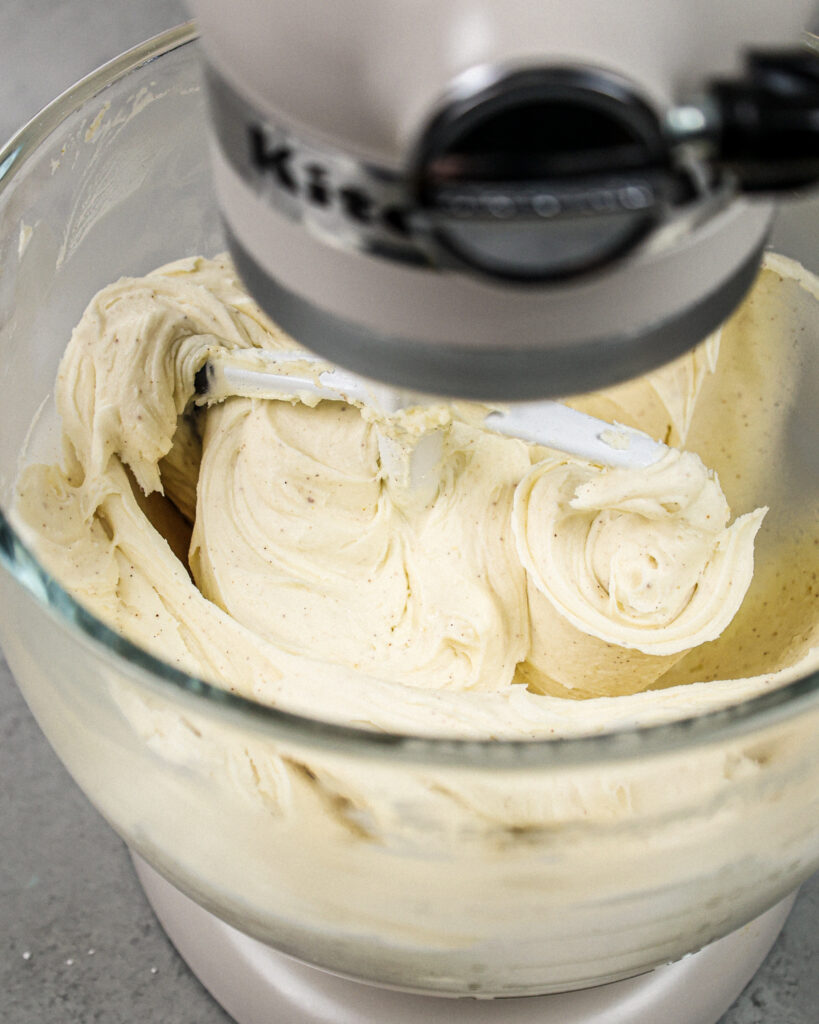
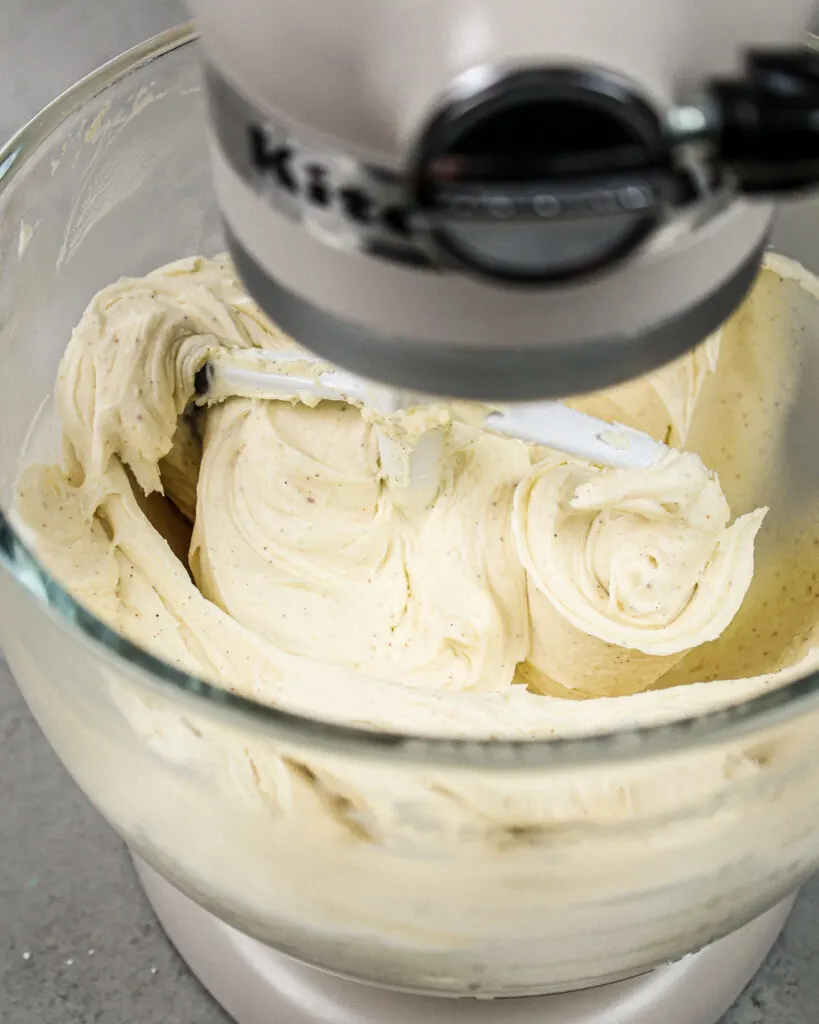
Step #5: The Attachment Switcheroo
When all the ingredients are mixed in, it’s time to swap out your whisk attachment.
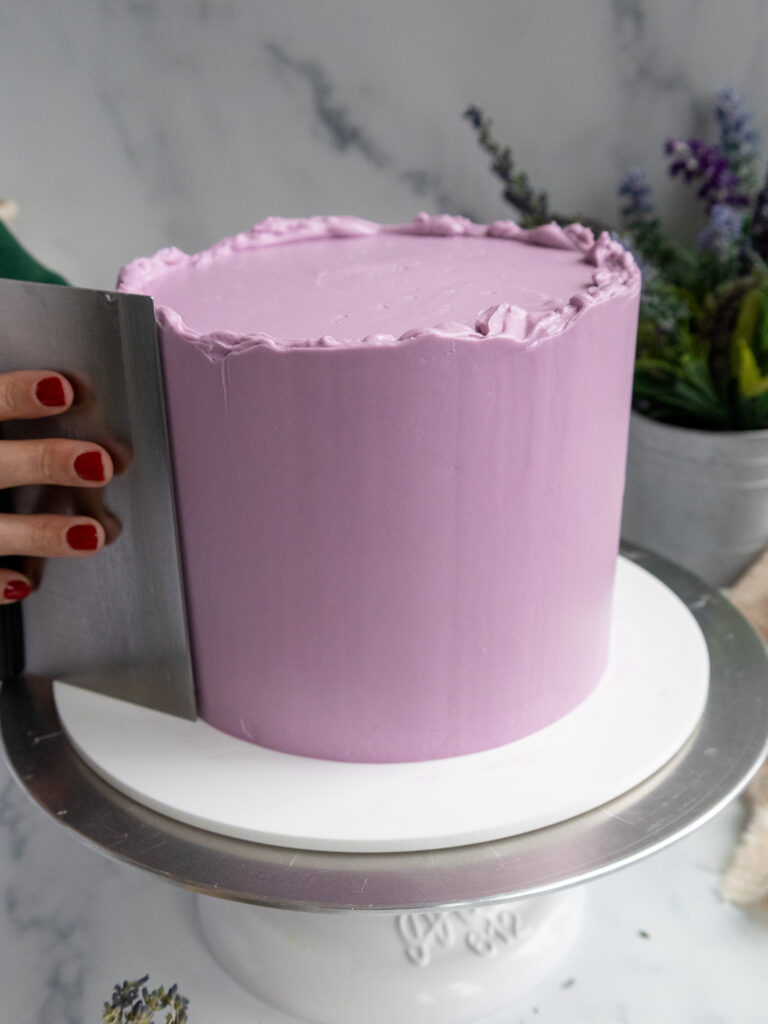
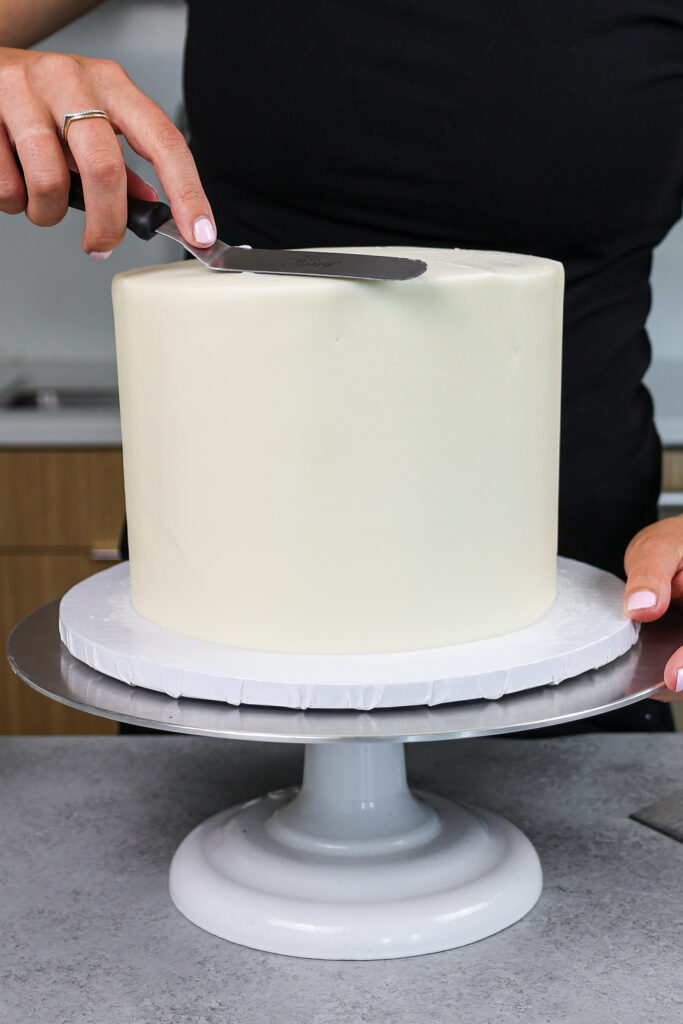
While we want our buttercream to be fluffy and light in texture, we also want it to be smooth.
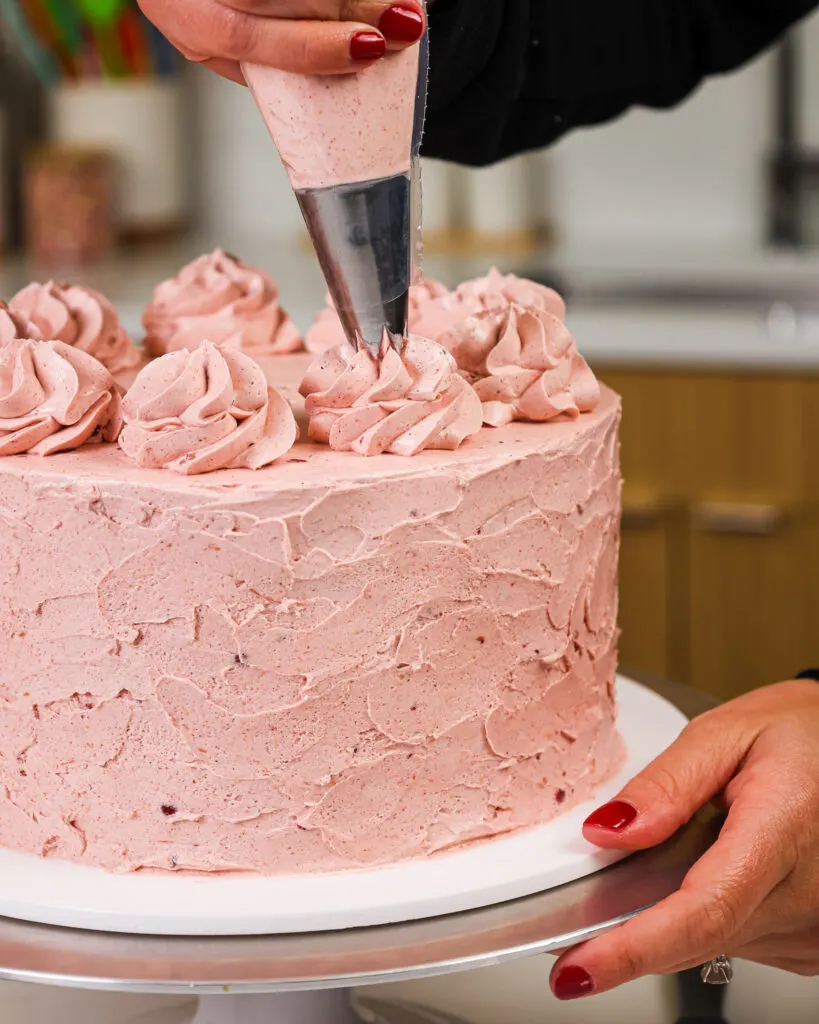
Whether you plan to spread your frosting onto a cake or pipe with it, the frosting needs to be smooth and free of air bubbles.

I find that mixing the finished buttercream on a low speed with a paddle attachment for a few minutes makes a world of a difference. It makes it so much easier to smooth onto cakes!!
Swiss Meringue Buttercream Troubleshooting
Two of the most common issues people run into when making this type of buttercream are curdled or soupy frosting.
While it might seem terrifying to watch your frosting seem to fall apart, fear not. Both problems are actually pretty easy to fix!!
How to Fix Curdled / Broken Swiss Meringue Buttercream
A lot of different things can cause SMBC to break or curdle.
Maybe your butter was too cold, or your kitchen was too chilly. Maybe you were thawing a batch of buttercream made in advance, and it hadn’t fully come to room temperature before you started mixing it.
Whatever the reason, your frosting looks chunky, dense, watery, and greasy.
But don’t worry, your frosting isn’t ruined! There’s an easy workaround that will bring the frosting back together.
Simply place the bowl over a hot water bath / double boiler until the frosting around the edge of the bowl has melted. Then give it a good mix on a medium speed for about 5 minutes.
The melted, warm buttercream around the edge of the bowl will mix with the frosting that’s too cold.
This will bring the overall temperature of the buttercream up to the right temperature and allow it to become smooth again.
How to Fix Soupy Swiss Meringue Buttercream
On the other hand, if your frosting is too warm it might become a soupy, runny mess. This can happen if the meringue is too warm when you add the butter, if the butter is too warm, or if your kitchen is too toasty!!
If the buttercream isn’t sturdy enough to keep its shape, you need to cool it down. To do this, just pop the mixing bowl and whisk right into the fridge.
Chill the bowl for 10-20 minutes. At this point, the center might still be a bit soupy, but the buttercream along the sides of the bowl should be firmer. Then mix the buttercream for a few minutes to see if it comes together.
If after 3-4 minutes of mixing it still looks too soft, chill the bowl for another 10 minutes before mixing it again. That usually does the trick!
Coloring Swiss Meringue Buttercream Frosting
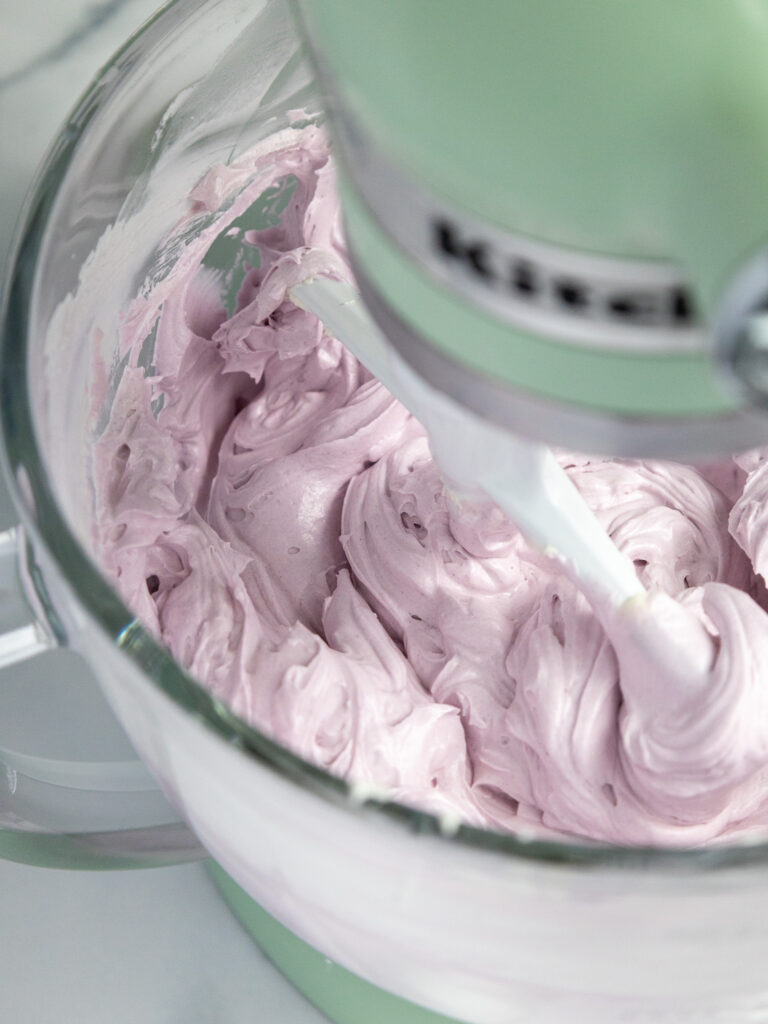
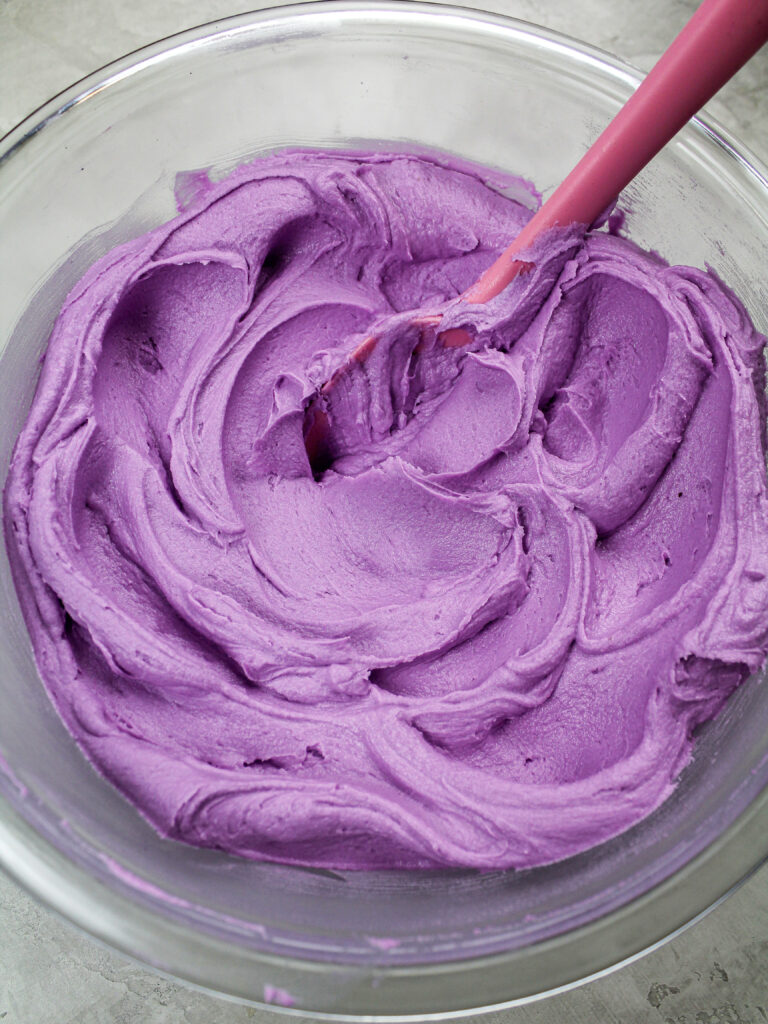
The last thing I want to touch on is coloring Swiss meringue buttercream frosting.
This type of frosting is a bit more difficult to color than American buttercream. To make it bright and colorful, gel food coloring is a must.
My favorite gel food coloring is Americolor, and it’s the only food coloring I use.
Even with gel food coloring, I have to use quite a bit to get my colors really vibrant.
If you want to make deep or really intense colors, I highly recommend making your frosting in advance. The color of the frosting will deepen over time!
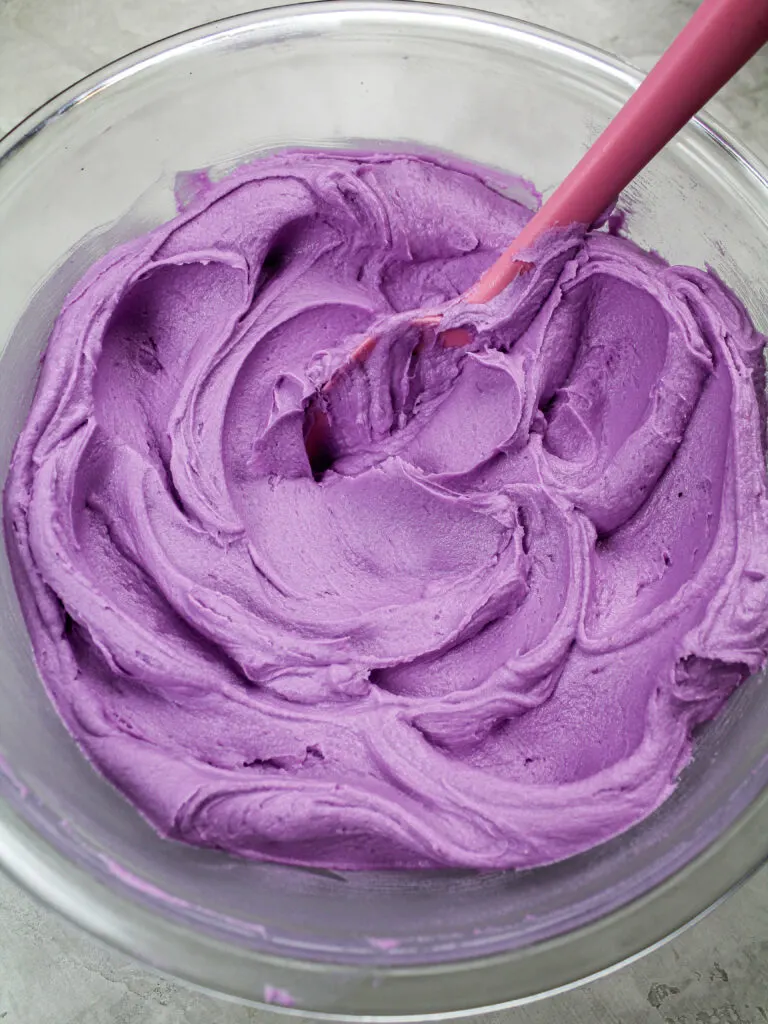
You can also use the microwave method to deepen the color.
To do this, scoop 1/2 cup of the finished buttercream into a microwavable bowl. Add additional gel food coloring and mix until the frosting reaches the desired color.
Then microwave the frosting for about 15 seconds. The frosting should be runny but deeper in color. Mix this back into the full bowl of frosting and you should achieve a deeper color.
If you end up using this method, let your frosting sit for about 30 minutes before you use it to allow it to thicken back up.
How Much Buttercream Does this Recipe Make?
One batch of this recipe makes about 7 cups of frosting. This should be enough to fill and frost a seven- or eight-inch layer cake, or frost 2-3 dozen cupcakes (depending on the size of your swirls).
This recipe can be halved, but I don’t recommend doubling it unless you have a commercial-size KitchenAid (8 qt). Otherwise, it can be really difficult to whip up the meringue to stiff peaks.

Tips For Making the Best Swiss Meringue Buttercream Frosting
- Wipe down your tools with lemon juice or vinegar to make sure they’re grease-free. Traces of grease in the mixing bowl can prevent the meringue from forming stiff peaks!
- Separate the eggs when they’re cold! It makes it way easier, and they’ll be heated before being whipped so there’s no need to bring them to room temperature.
- Heat the egg white / sugar mixture to 160 F / 71 C and check to make sure all the sugar is dissolved before removing it from the double boiler.
- Whip the meringue until your peaks are stiff enough to defy gravity.
- Make sure your butter is actually at room temp and add it in gradually (1 stick at a time).
- When in doubt (if the frosting breaks/curdles), just keep mixing!! It should come back together with the help of your stand mixer and a little more time.
- Mix the finished buttercream on the lowest speed with a paddle attachment for a few minutes to make it super smooth. This pushes out any excess air and will make it easier to smooth onto a cake.

Making This Swiss Meringue Frosting in Advance and Storage Tips
Make this frosting ahead of time or save any leftover frosting! It can be stored in an airtight container at room temperature for up to 2 days, in the fridge for up to 2 weeks, or in the freezer for up to 3 months.
Be sure to give it a good stir once it thaws to room temp to get the consistency nice and smooth again.
A frosted cake can last in the fridge for up to a week or in the freezer for up to a month. The buttercream locks in all the moisture, keeping the cake fresh and delicious!
If you cut into the cake and have leftovers, use any remaining frosting to cover the cut section to keep it moist and store it in the fridge for up to a week.
Let Me Know What You Think!
If you try this recipe for easy Swiss meringue buttercream, I’d love to hear what you think of it! Please leave a rating and comment below.
Tag me @chelsweets and use #chelsweets so that I can see your amazing creations on social media!
Other Recipes You Might Like:


Easy Swiss Meringue Buttercream Frosting

This easy Swiss meringue buttercream is made with fluffy, whipped meringue and has the perfect balance of sweetness and richness!
Ingredients
- 8 large egg whites (240g)
- 2 1/2 cups granulated sugar (500g)
- 2 cups unsalted butter, room temperature (452g; 1 lb. box)
- 2 tsp vanilla extract (8g)
- 1/2 tsp fine salt (3g)
- gel food coloring (if desired)
Instructions
Easy Swiss Meringue Buttercream Frosting
- Before making this frosting, be sure to thoroughly clean your mixing bowl. If there’s any grease it can make it difficult to whip up the meringue.
- In a medium sized pot, add about 1 inch of water and bring to a simmer.
- Add 8 egg whites and 2 1/2 cups of granulated sugar into a large metal bowl.
- Place the bowl on top of the pot filled with simmering water. The bowl should create a seal over the pot. Make sure the water isn’t actually touching the bottom of the bowl, or it can cook the egg whites.
- Whisk the mixture constantly for about 3 minutes, until it reaches 160°F / 71°C. You can test the mixture to see if it’s ready by rubbing a tiny bit between your fingertips. The sugar should be fully dissolved, and it should feel super smooth and hot to the touch.
- Once it reaches this stage, lift the bowl away from the pot and dry the bottom with a towel. Pour the mixture into the bowl of a stand mixer and beat on a medium-high speed with a whisk attachment. Mix for about 10 minutes, or until you have stiff, glossy peaks that stick straight up. While the meringue whips, I like to add something cold around the base of my bowl. I find the meringue stays quite warm while it whips up and placing a bag of frozen veggies around the base of the bowl helps cool it back to room temperature. This can prevent your buttercream from becoming soupy in the next step.
- Mix in 2 cups of unsalted butter at a medium speed, 1 stick at a time. Scrape the sides and bottom of the bowl with a rubber spatula as needed. The frosting should have a thick, whipped consistency once all the butter is mixed in. If it looks lumpy or broken, keep mixing until it looks fluffy and thick. If it doesn't seem to come together after an additional 10 minutes of mixing, check out the troubleshooting section in the post above.
- Once the consistency is right, swap out the whisk attachment for a paddle attachment and add in 2 tsp vanilla extract and 1/2 tsp fine salt. Continue mixing on a low speed for a couple minutes to make the frosting extra smooth.
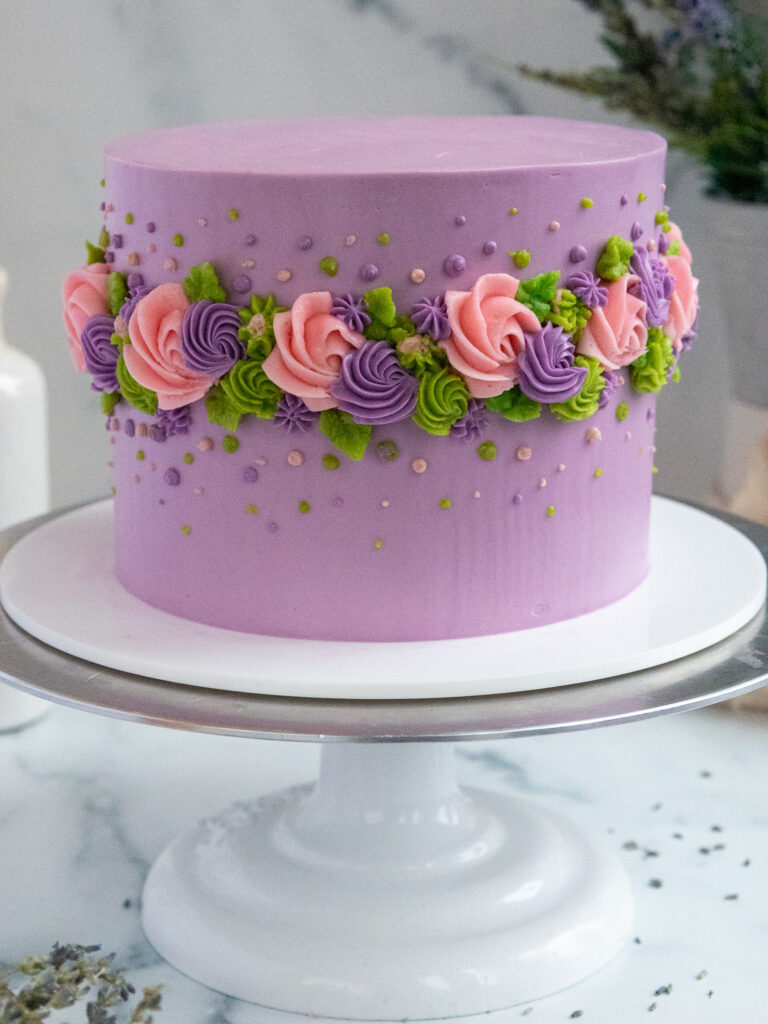
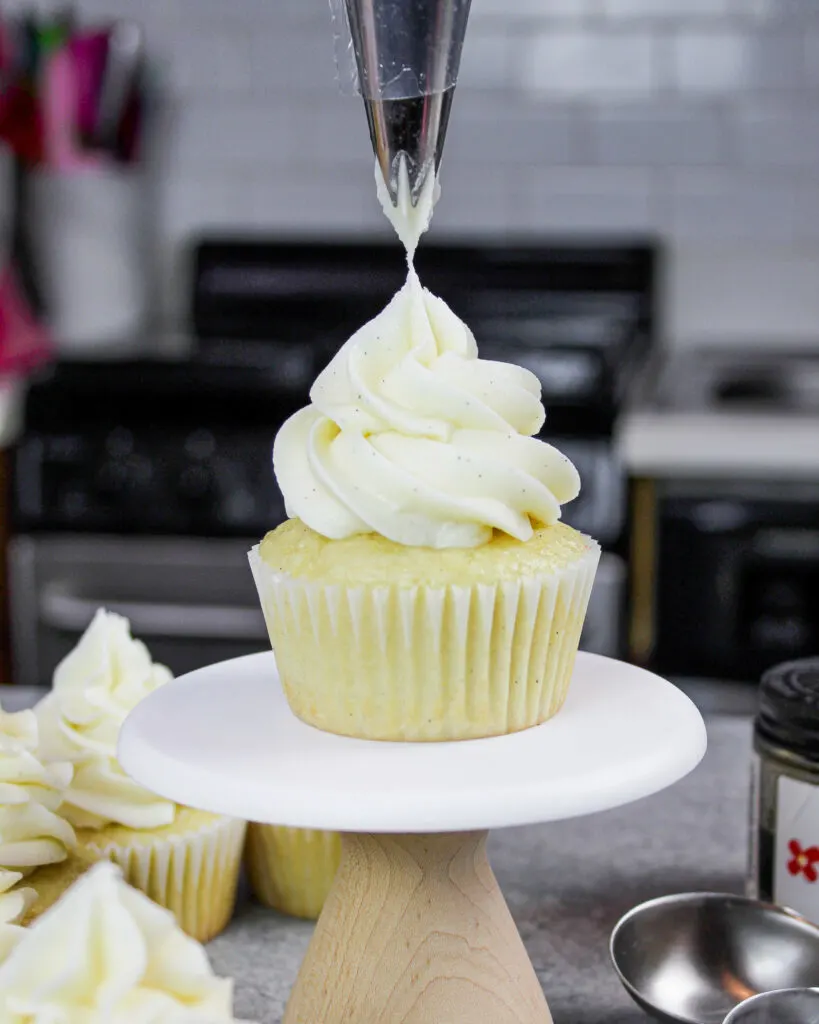
- Then comes the fun part! This buttercream can be used to frost everything from cakes to cookies!! It pipes like a dream and is also great for filling layer cakes. It can sit out at room temperature for up to 2 days or be stored in the fridge for up to 2 weeks.
Notes
Yield:
One batch of this recipe makes about 7 cups of frosting. This should be enough to fill and frost a seven- or eight-inch layer cake, or frost 2-3 dozen cupcakes (depending on the size of your swirls).
This recipe can be halved, but I don't recommend doubling it unless you have a commercial size KitchenAid (8 qt). Otherwise, it can be really difficult to whip up the meringue to stiff peaks.
Tips for Making the Best Swiss Meringue Buttercream
- Wipe down your tools with lemon juice or vinegar to make sure they're grease-free. Traces of grease in the mixing bowl can prevent the meringue from forming stiff peaks!
- Separate the eggs when they're cold! It makes it way easier, and they'll be heated before being whipped so there's no need to bring them to room temperature.
- Heat the egg white / sugar mixture to 160 F / 71 C and check to make sure all the sugar is dissolved before removing it from the double boiler.
- Whip the meringue until your peaks are stiff enough to defy gravity.
- Make sure your butter is actually at room temp and add it in gradually (1 stick at a time).
- When in doubt (if the frosting breaks / curdles), just keep mixing!! It should come back together with the help of your stand mixer and a little more time.
- Mix the finished buttercream on the lowest speed with a paddle attachment for a few minutes to make it super smooth. This pushes out any excess air and will make it easier to smooth onto a cake.
- If you're not quite sure what to do with the egg yolks you'll be left with after making this frosting, here's a great post with loads of ideas for using up leftover egg yolks.
Making This Swiss Meringue Buttercream in Advance and Storage Tips
Make this frosting ahead of time or save any leftover frosting! It can be stored in an airtight container at room temperature for up to 2 days, in the fridge for up to 2 weeks, or in the freezer for up to 3 months.
Be sure to give it a good stir once it thaws to room temp to get the consistency nice and smooth again.
A frosted cake can last in the fridge for up to a week or in the freezer for up to a month. The buttercream locks in all the moisture, keeping the cake fresh and delicious!
If you cut into the cake and have leftovers, use any remaining frosting to cover the cut section to keep it moist and store in the fridge for up to a week.
Nutrition Information
Yield
7Serving Size
1Amount Per Serving Calories 765Total Fat 53gSaturated Fat 33gTrans Fat 0gUnsaturated Fat 17gCholesterol 139mgSodium 237mgCarbohydrates 72gFiber 0gSugar 72gProtein 5g
Not Too Sweet Chocolate Frosting: Delicious & Fluffy
Monday 8th of April 2024
[…] This “not too sweet chocolate frosting” recipe is the perfect hybrid between American buttercream and Swiss meringue buttercream! […]
Patience
Saturday 16th of March 2024
Wonderful recipe! I used dairy free butter (country crock plant butter) instead. Turned out delicious. I had no trouble with the recipe thanks to your troubleshooting. I will definitely make again.
Chelsweets
Sunday 17th of March 2024
Hi Patience,
Thank you so much for sharing!! I'm so happy to hear that :) Happy baking!
Debra Nelson
Friday 15th of March 2024
This turned out great! You said not to double this recipe. So do you have a recipe to make a larger amount or do you just make it again. Thanks Debra Nelson
Chelsweets
Sunday 17th of March 2024
Hi Debra,
So happy to hear you love this recipe!! You can double this recipe if you have a really large mixer like an 8qt/commercial kitchen aid, but otherwise it's a lot for a regular sized stand mixer to whip up all the meringue. A double batch would fit in a standard kitchenaid, but it would be filled to the brim! I do sometimes make a 1.5 batch in my mixer at one time, or if I need a double batch I usually just make two batches. Hope that helps, happy baking
Bumble Bee Cookies: Delicious Recipe w/ Step-By Step Tutorial
Tuesday 13th of February 2024
[…] use an American buttercream to keep things simple, but you can also use a less sweet frosting like Swiss Meringue buttercream or a hybrid […]
Ty
Monday 5th of February 2024
Hello is this enough to also pipe a border for top and bottom of cake?
Chelsweets
Tuesday 13th of February 2024
Hi Ty,
This recipe makes about 7 cups of frosting, which I generally find to be enough to fill, frosting, and pipe a board onto a 6- or 7-inch cake. It should be enough for an 8-inch layer cake as well, but it depends on how many layers you're using, how much frosting you use between the layers, and what type of border you pipe around the top and bottom of the cake.