
Candy corn is a polarizing candy. Some people are lovingly devoted to candy corn, while others think candy corn tastes like wax.
I’m going to be honest, I’m really a part of the latter group. When October hits and candy corn starts popping up in stores, I don’t eagerly grab a bag.
However, when it’s sitting out in a candy jar, I usually eat a few. And you know what? They’re not that bad.

While they’re by no means my favorite halloween candy, they’re festive and iconic, and I can get behind them. And that’s why I made this candy corn cake.
What Flavor is Candy Corn?
I love bright colors and Halloween, and the idea of making a candy corn cake seemed pretty appealing. But I had to pause when I thought about what flavor the cake would be. What does candy corn really taste like? Sugar?
They’re made with marshmallow and vanilla (among other ingredients), so those were flavors I decided to focus on in this cake. I used my small batch vanilla cake recipe, and paired it with a fluffy marshmallow buttercream.

When I make marshmallow buttercream, I kind of cheat and just add marshmallow fluff to my American buttercream recipe. It creates a delicious, sweet frosting that reminds me of my childhood.
Making this Cake Look Just Like Candy Corn
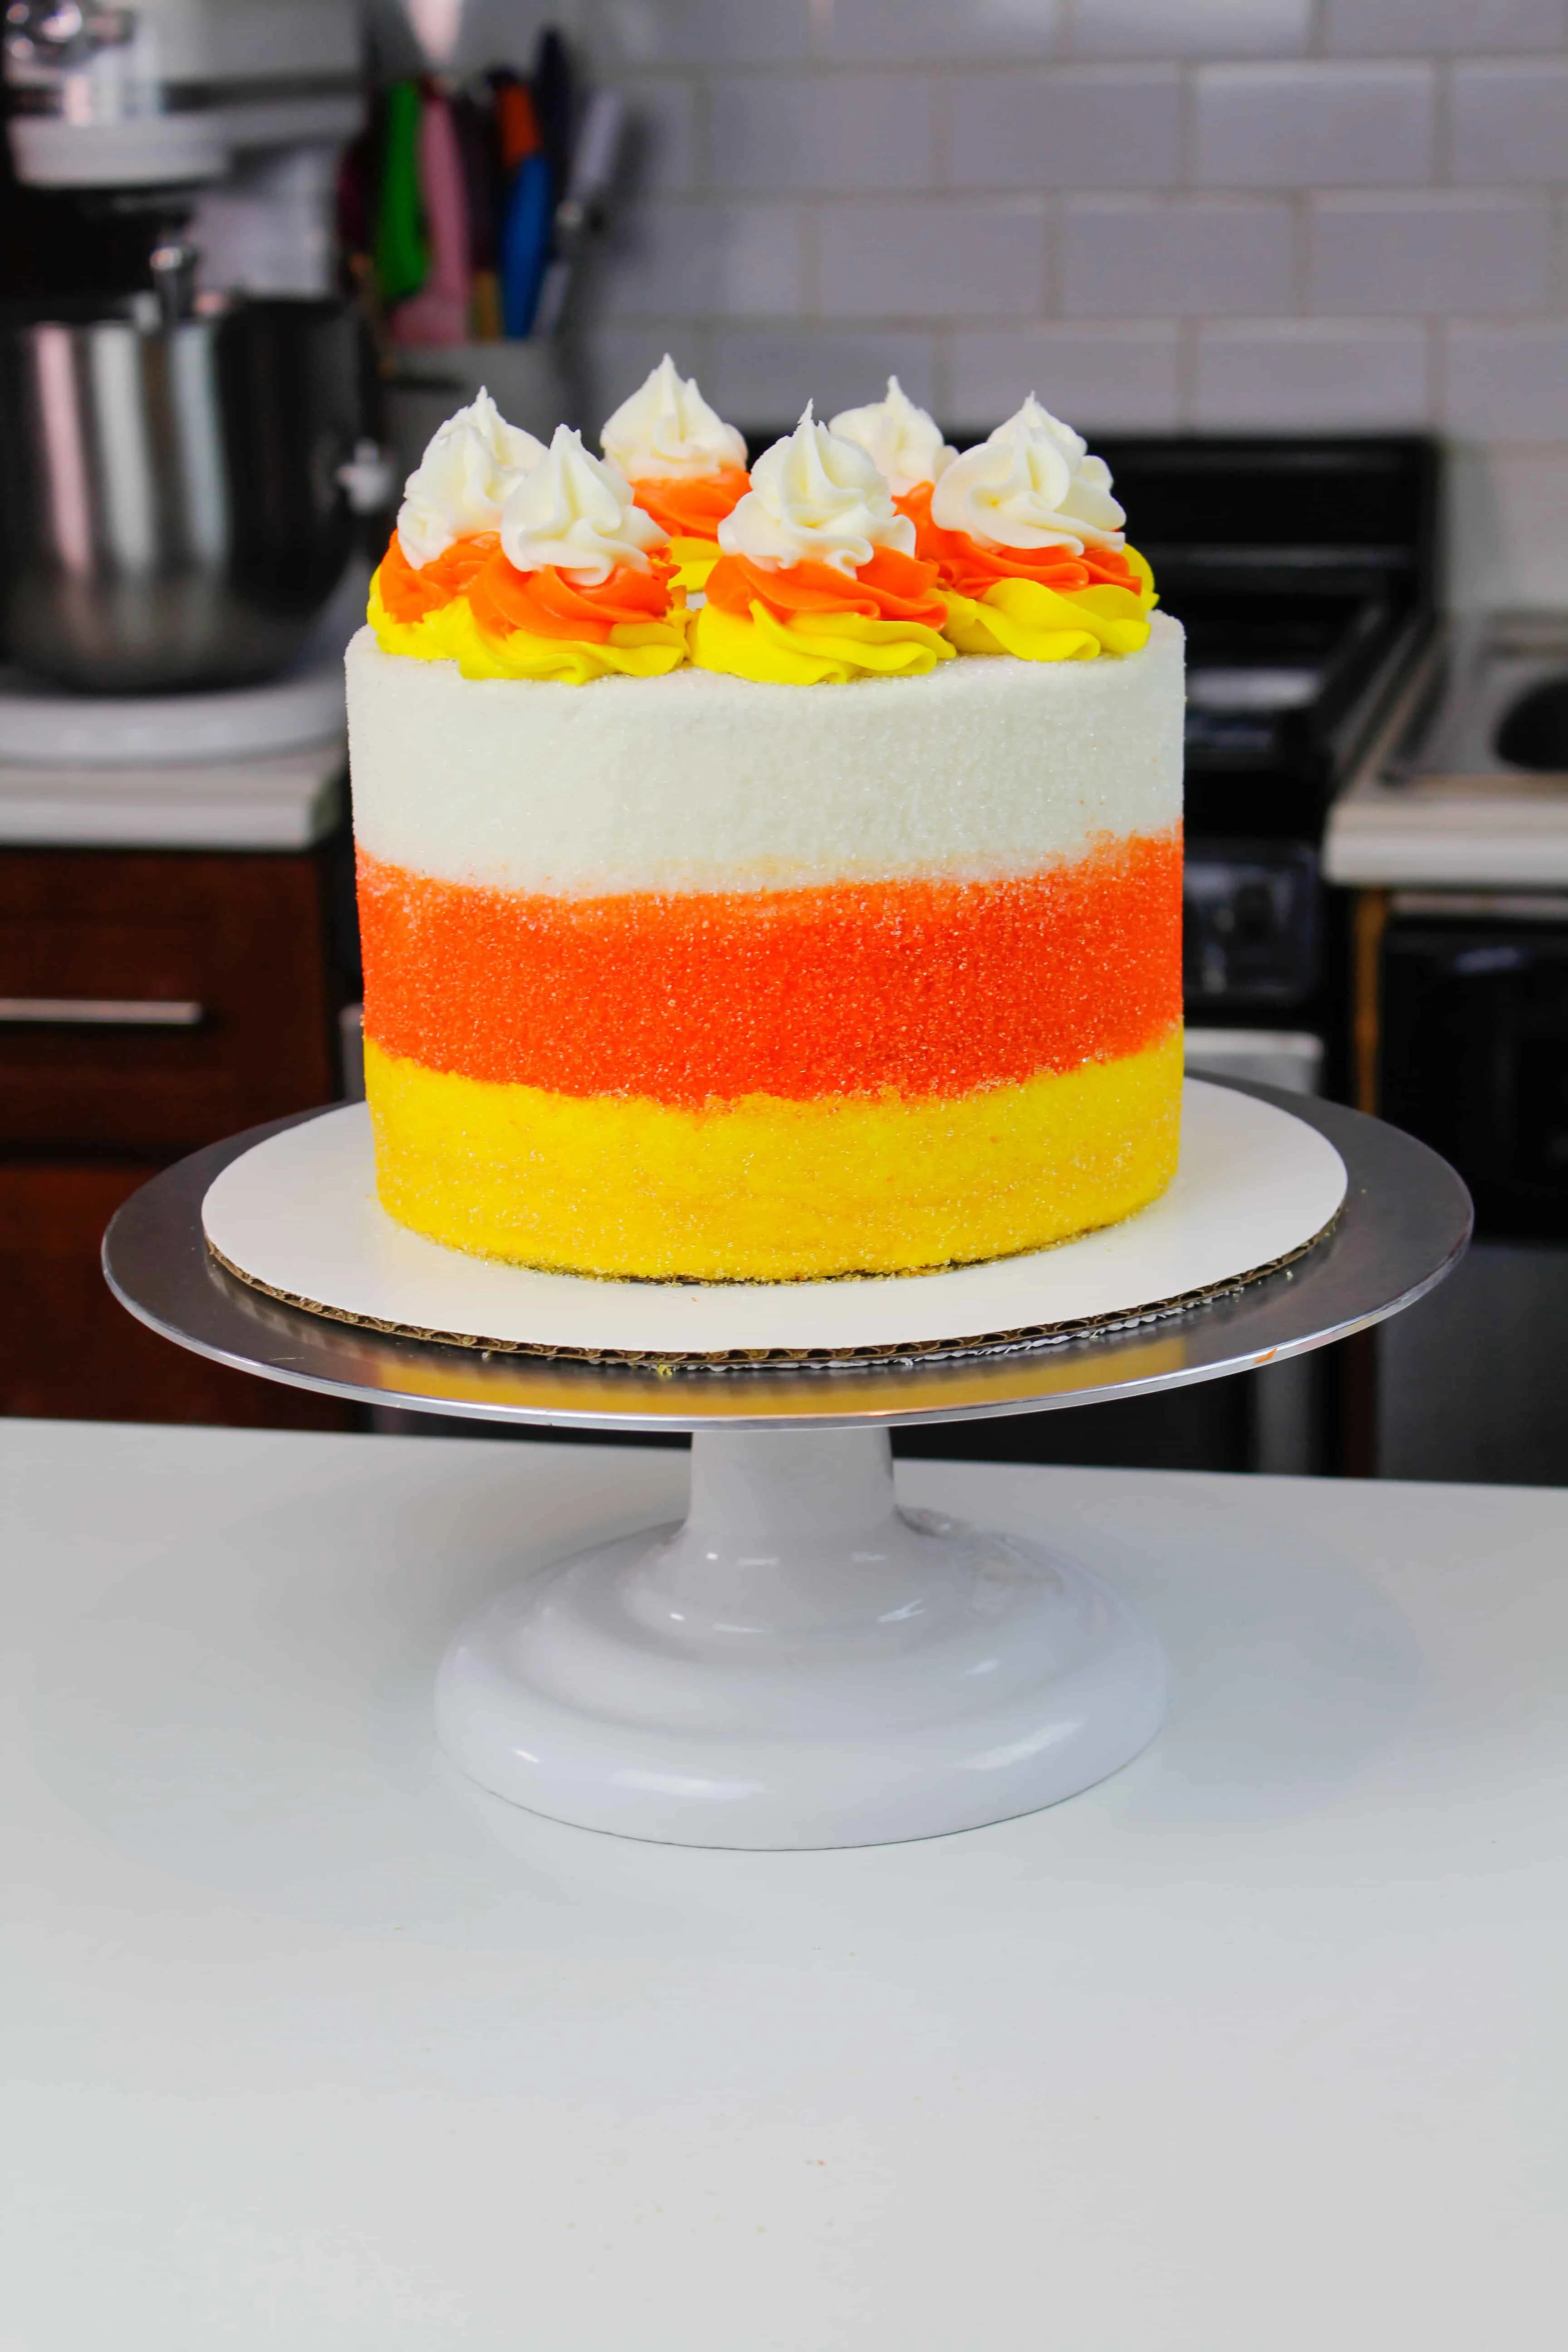
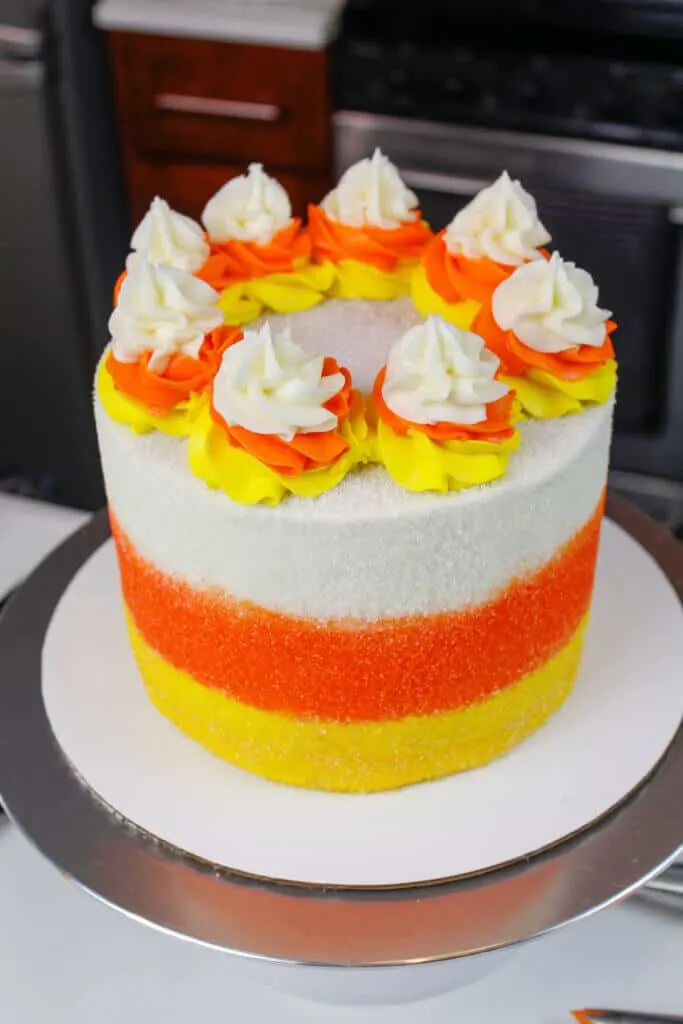
They say imitation is the most sincere form of flattery, right?? Well, I wanted this cake to look just like a piece of candy corn.
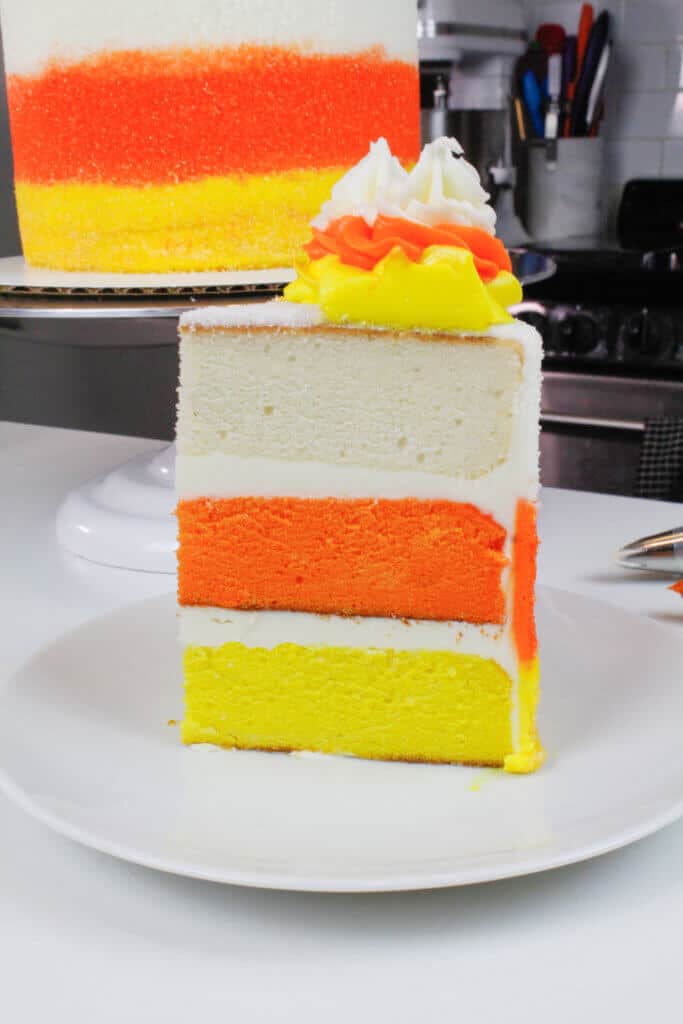
Bright yellow, followed by orange, then topped with white. I followed this order with both the the cake layers, and the frosting on the outside of the cake.
This is where things got a little crazy. I decided to roll the cake in matching sanding sugar. I thought it would add a cool texture to the cake, which it did. However, it’s a lot of extra work and stress!
This is totally optional, and I think the cake would look great with just the colorful buttercream stripes!
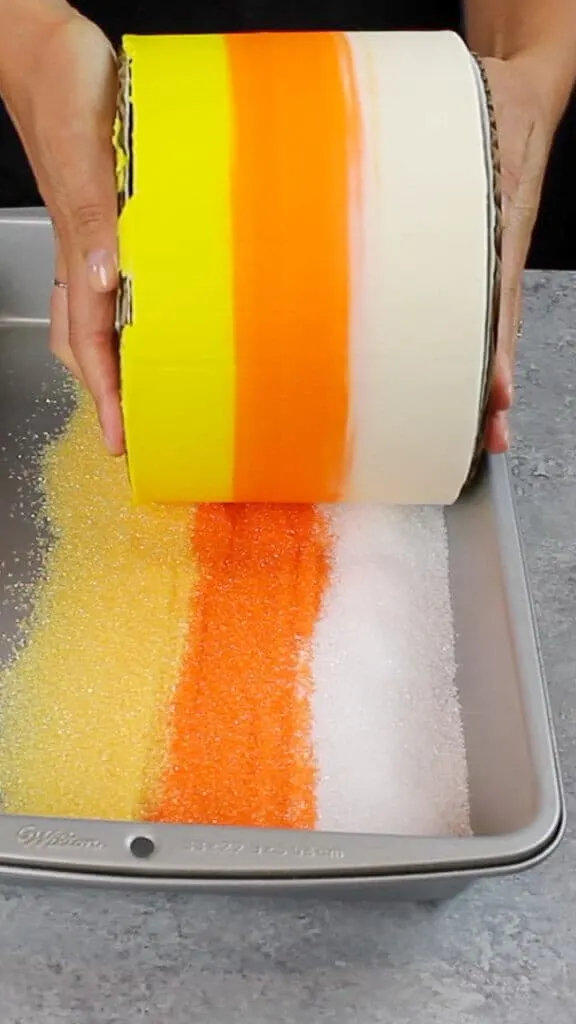
But if you’re feeling adventurous, you can add some stripes of yellow, orange, white sugar to a baking pan.

Build the cake on a 6-inch cake board, and thoroughly chill the crumb coated cake.
Once you’ve added the second layer of frosting, place another cake 6-inch cake board on top of the cake. Carefully lift the cake, and roll it’s sides in the sanding sugar.
Topping this Cake
I really struggled with how to decorate the top of this cake. Originally I wanted to make little dollops of frosting and place a piece of candy corn on each one.
But there were two problems with that. Bits of candy corn are so small, I was worried they wouldn’t really stand out on top of the frosting.
The second, more pressing issue was that I made this cake in early September, and the grocery stores in Manhattan didn’t have candy corn yet!
If you’re wondering why there isn’t a single piece of candy corn in any of my photos, that’s why 😛
So I had to improvise. I decided to make frosting swirl candy corn. Ok, so they don’t resemble an actual piece of candy corn, but they’re triangles, the right color, and taste like marshmallows. It’s as close as I could get!
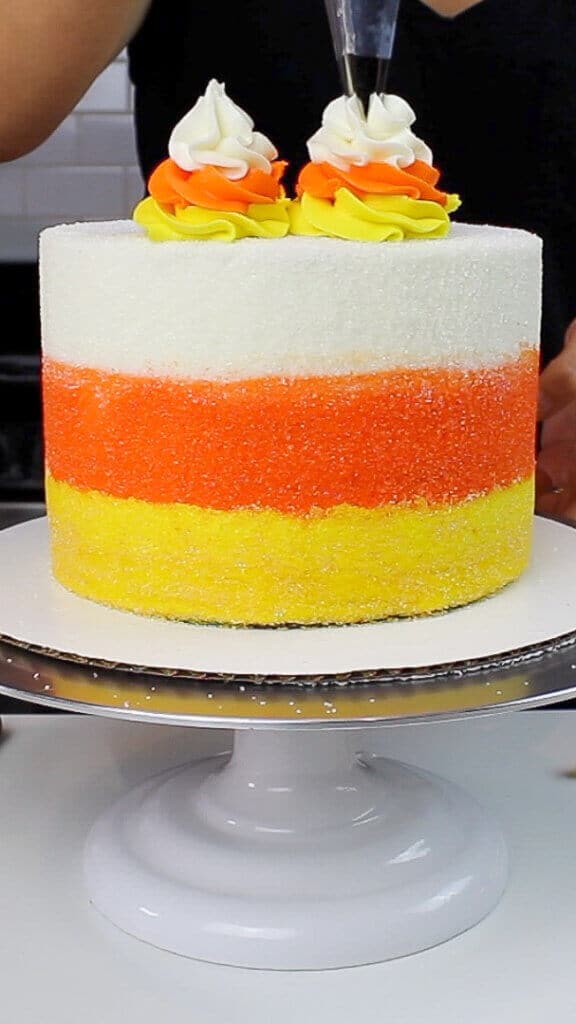
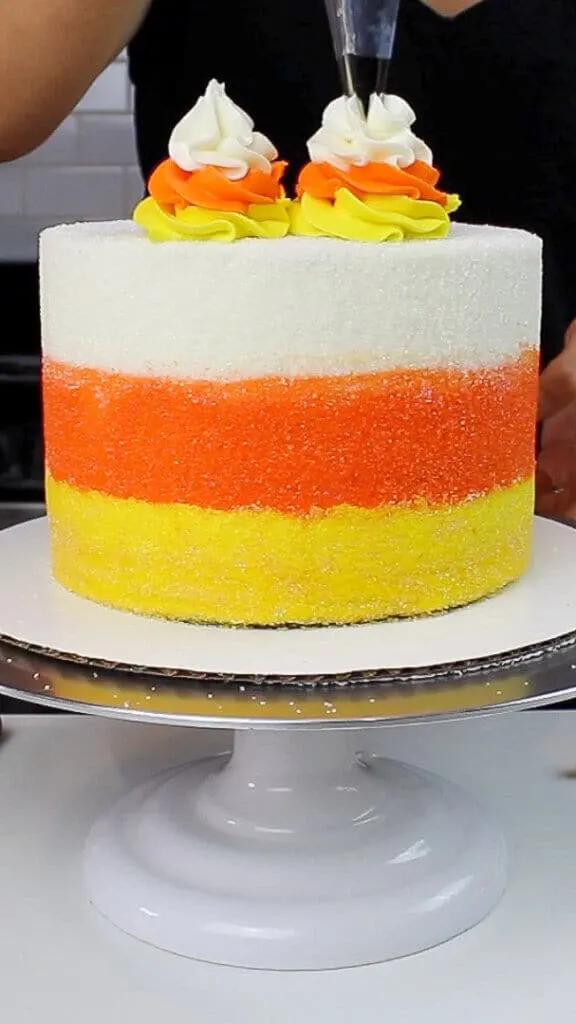
I used a wilton 1M frosting tip to make the buttercream swirls on top of this cake. If you don’t have that type of frosting tip on hand, you can always use a french tip or even a round tip!
The most important part of the look is to follow the right color order.
Tips for Making this Cake:
- Be sure to mix your cake batter just until the ingredients are incorporated; this will ensure your cake layers are tender and fluffy
- Use a scale to weight your cake batter, to make sure you evenly divide it before coloring it
- Be sure you are properly measuring your flour! Spoon fluffed flour into a measuring cup, and level with knife. Or even better, use a kitchen scale
- Use a serrated knife to level your cake layers once they’re fully cooled, to make it easier to assemble and frost your cake
- You can make these cake layers in advance!

Let Me Know What You Think!
If you try this candy corn cake, I’d love to hear what think of it! Please leave a rating, and let me know your thoughts by sharing a comment.
Or if you share your baking on social media, be sure to tag me @chelsweets.
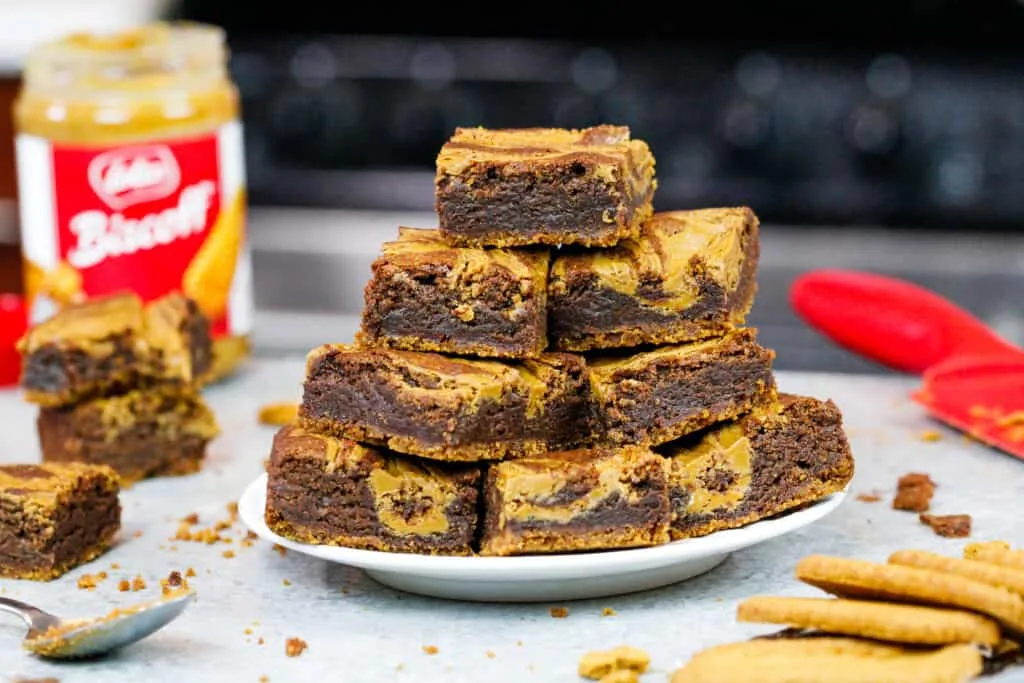
Other Recipes You Might Like:


Candy Corn Cake
This cake not only looks like a candy corn, it tastes like one too! It's made with vanilla cake layers and a fluffy marshmallow buttercream.
Ingredients
Vanilla Cake
- 2 cups + 2 Tbsp all-purpose flour (276 grams)
- 2 cups granulated sugar (400 grams)
- 1 1/2 tsp baking powder (6 grams)
- 1/2 tsp salt (3 grams)
- 2/3 cup unsalted butter, room temperature (150 grams) - 1 and 1/3 sticks
- 1 tsp. vanilla extract (4 grams)
- 2/3 cup egg whites (or about 5 egg whites) (155 grams)
- 1 cup sour cream, room temperature (228 grams)
- 1 Tbsp vegetable oil (14 grams)
- yellow and orange gel food coloring
Marshmallow Buttercream Frosting
- 2 cups unsalted butter, room temperature (434 grams)
- 7 cups powdered sugar (907 grams)
- 1 small jar of marshmallow fluff (7.5 oz or 213 grams)
- 1/2 tsp salt (3 grams)
- 1/3 cup heavy cream (or whipping cream) (80 grams)
- 1 Tbsp vanilla extract (12 grams)
- yellow and orange gel food coloring
Additional Decorations
- large piping bags
- wilton 1M frosting tip
- orange, yellow, and white sanding sugar (optional)
- 2 6-inch greaseproof cake boards
Instructions
Vanilla Cake Layers:
- Preheat oven to 350°F. Line three 6 inch pans with parchment rounds, and grease with non-stick cooking spray.
- Mix together all dry ingredients (flour, baking powder, sugar, and salt) in a stand mixer with a paddle until fully combined.
- Mix chunks of room-temperature butter slowly into the dry mix, on a low speed. Continue to mix until no large chunks of butter remain, and the mixture becomes crumbly.
- Pour in egg whites, and mix on low until just incorporated. Mix in the sour cream on a low speed.
- Add in vanilla and oil, and mix at a low speed until fully incorporated. Scrape down the sides of the bowl with a spatula, then beat on medium speed for about 30 seconds.
- Divide the batter evenly between three bowls. Color one yellow with gel food coloring, and one orange with gel food coloring. Leave the third uncolored.
- Pour each color of batter into one of the prepared cake pans.
- Bake for 32-34 minutes, or until a toothpick comes out clean. Allow the pans to cool for 10 minutes, then run an offset spatula around perimeter of the pan to separate the cake from the pan.
- Place cake layers into the freezer for 30 minutes, to accelerate the cooling process. Once the layers are fully cooled, carefully flip the pans and remove the layers.
- Use a serrated knife to level the tops of the layers.
Marshmallow Buttercream Frosting:
- While the cake layers bake and cool, make the vanilla buttercream frosting.
- Beat the butter on a medium speed for 30 seconds with a whisk attachment, until smooth. Slowly add in the powdered sugar, 1 cup at a time. Alternate with small splashes of cream.
- Once fully mixed, add in the marshmallow fluff, vanilla and salt, and beat on a medium speed until the ingredients are fully incorporated, and the desired consistency is reached.
- If the frosting is too thick, add in additional cream (1 teaspoon at a time). If the frosting is too thin, add in more powdered sugar (quarter of a cup at a time).
- Color 1 1/2 cups of frosting yellow with gel food coloring, and place in a piping bag with no frosting tip. Color 1 cup of frosting orange with gel food coloring, and place in a separate piping bag with no frosting tip. Put 1 cup of frosting into another piping bag.
To Assemble This Candy Corn Cake:
- Stack and frost cake layers on a 6-inch greaseproof cake board, using a dab of frosting to help stick the first cake layer to the board.
- Add an even layer of marshmallow buttercream between each cake layer.
- Spread a thin coat of frosting around the the cake, to fully cover the cake layers. Smooth using a bench scraper, then chill the cake in the fridge (10 minutes) or freezer (5 minutes) until the frosting is firm to the touch.
- Add a second, thicker layer of frosting to the cake, using the frosting in the piping bags. Cover the bottom third of the cake with yellow buttercream. Pipe orange frosting around the middle third of the cake, and use white buttercream to cover the top third of the cake. Do not add more frosting to the top of the cake.
- Smooth with a bench scraper.
- Place the second greaseproof cake board on top of the cake. Add sanding sugar into a baking pan, pouring each color in the same order and width as the frosting on the side of the cake.
- Carefully lift the cake sideways, and roll in the sanding sugar.
- Place the cake back on your cake stand. Remove the top cake board, and cover the top of the cake with white sanding sugar.
- Use a coupler to fit each frosting bag with a wilton 1M frosting tip, and pipe buttercream swirls on top of the cake.
Notes
One batch of cake batter makes about 1200 grams, so when I'm making a cake with three layer, I add 400 grams of batter into each pan.
Once the layers have fully cooled, I sometimes like to trim the caramelized bits from the sides of the layers using a serrated knife.
These cake layers can be made in advance!! Learn more about how far in advance they can be made, and how to properly wrap them in my post on how to make cake layers ahead of time.
Since this frosting will be used to decorate a cake, it is important to mix the buttercream on the lowest speed at the end of the process for a couple minutes, to get out any extra air that might have be incorporated during the mixing process.
You can also stir the frosting in a bowl with a rubber spatula, pushing it from side to side, to get rid of any air bubbles.This will make it easier to get super smooth sides on your cake!
Nutrition Information
Yield
16Serving Size
1Amount Per Serving Calories 678Total Fat 38gSaturated Fat 22gTrans Fat 0gUnsaturated Fat 14gCholesterol 102mgSodium 247mgCarbohydrates 85gFiber 1gSugar 81gProtein 3g
Sofía
Wednesday 21st of October 2020
Amazing recipe!!! what would be the measurements for 8 inch pans? And a substitute for marshmallow fluff?
Lanre
Monday 19th of October 2020
Thank you for this recipe am definitely gonna try it but am from Nigeria an I have never seen marshmallow fluff here but we have marshmallow any suggestions for substitute pls.
Amanda
Monday 11th of May 2020
I was icing this cake, and then I dropped the cake on the ground and now I have broken glass pieces as my toppings ??? #dumbbitchsyndrom p.s. it’s is my brothers birthday tomorrow and now he doesn’t have a cake because it is 12 am rn
Chelsweets
Wednesday 13th of May 2020
I'm so sorry to hear that Amanda!! That's so heart-breaking :/
Candy Corn Cake | CHELSWEETS | GoDiva Recipes
Saturday 2nd of November 2019
[…] The recipe can be found here: https://chelsweets.com/2019/10/28/candy-corn-cake/ […]
Amanda Brown
Wednesday 30th of October 2019
How much sanding sugar would you suggest buying to make sure I have enough to cover the cake?
Chelsweets
Friday 8th of November 2019
Such a good question!! I ended up buying two small containers of each color because I didn't want to run out, but only used one of each.
This is brand and size I used, it was 4 oz: https://amzn.to/2qz4bKg
Hope that helps, happy baking Amanda!