
The holidays are over, and I feel like January is when winter really begins to set in. It makes it the perfect time for of year for this hot chocolate cake.
I’m a sucker for a big mug of hot cocoa, especially this time of year. I want it made with real milk, loaded up with chocolate, and topped with ooey-gooey marshmallows.


Packing this Hot Chocolate Cake with Flavor
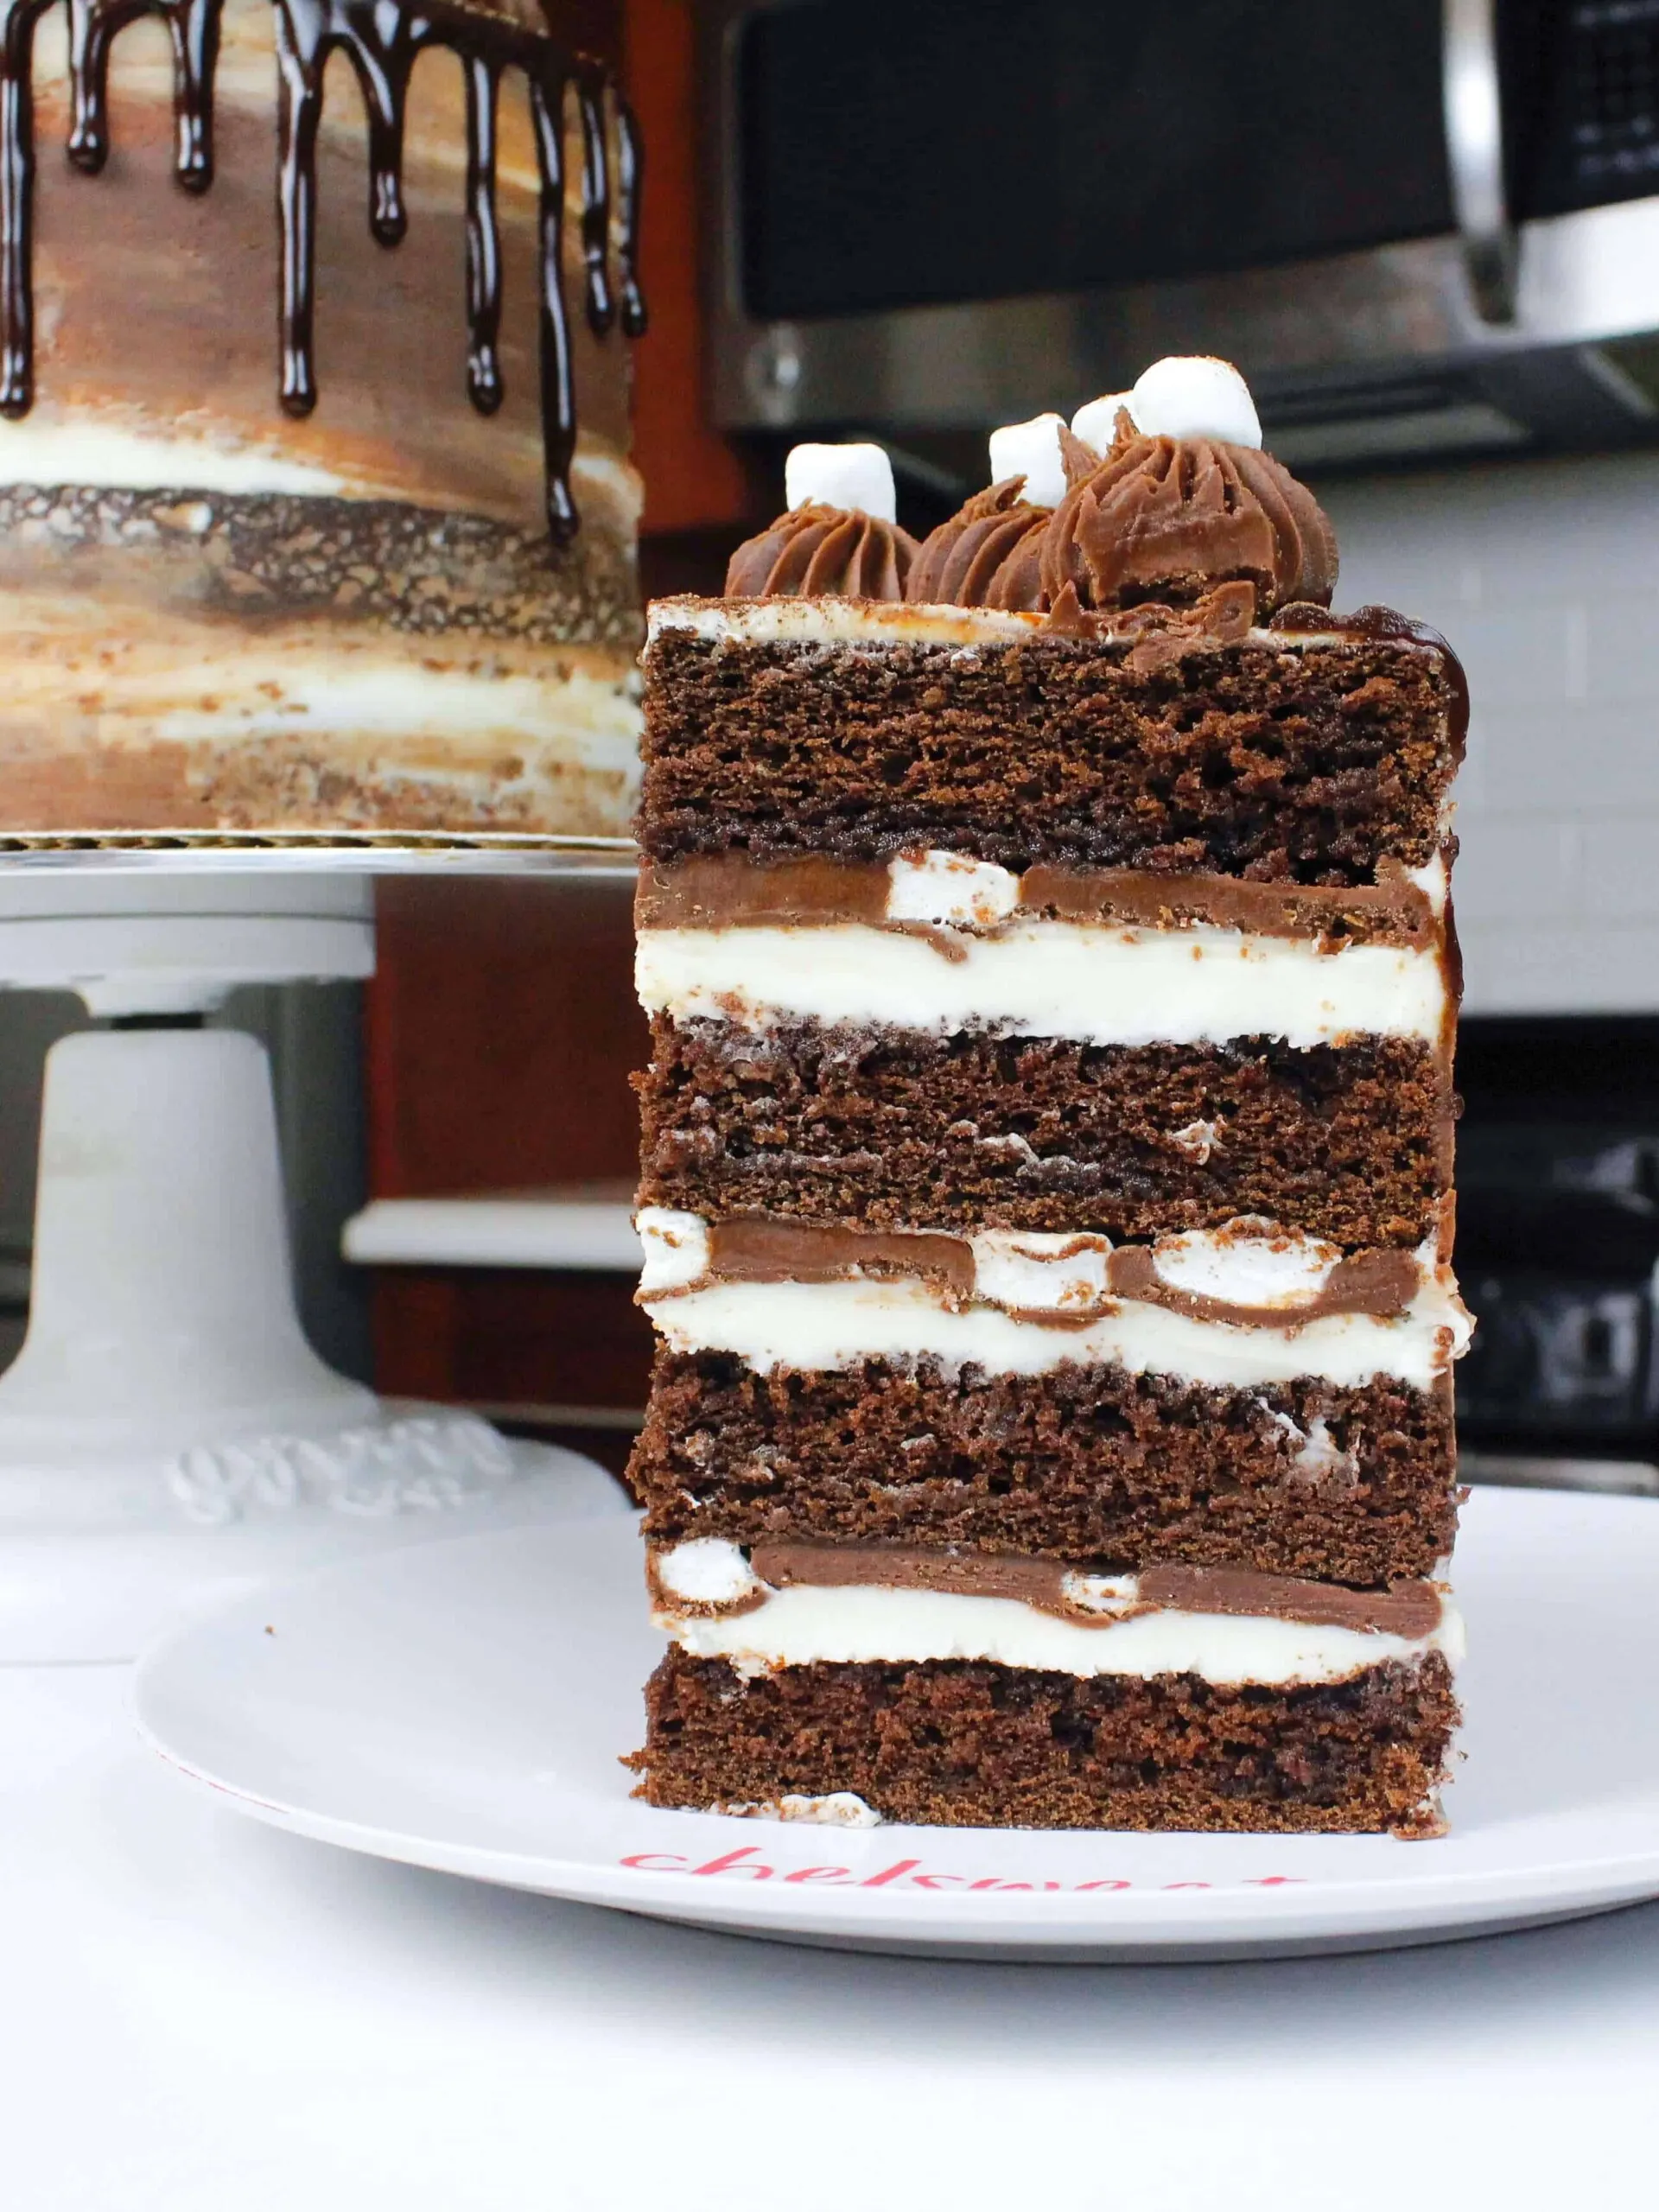
I wanted to incorporate all of those flavors into this cake, and have each bite warm your taste buds up just as much as a sip of hot chocolate. It’s made with my go-to chocolate layer cake recipe, frosted with both marshmallow buttercream and milk chocolate ganache, and filled with mini marshmallows.
I chose to also soak the cake layers with hot cocoa simple syrup (I normally don’t add it to this chocolate cake recipe), because I wanted it to be SUPER moist.
After all, it is trying to emulate a beverage. It also helps pack a bit more of that wonderful hot cocoa flavor into this cake, which I’m all for!!
Step 1: Make the Milk Chocolate Ganache Filling
Begin by making the milk chocolate ganache filling. It needs a few hours to set, so I highly recommend making it first, or even the day before! If you prefer dark chocolate, the recipe for my dark chocolate ganache filling can be found here.
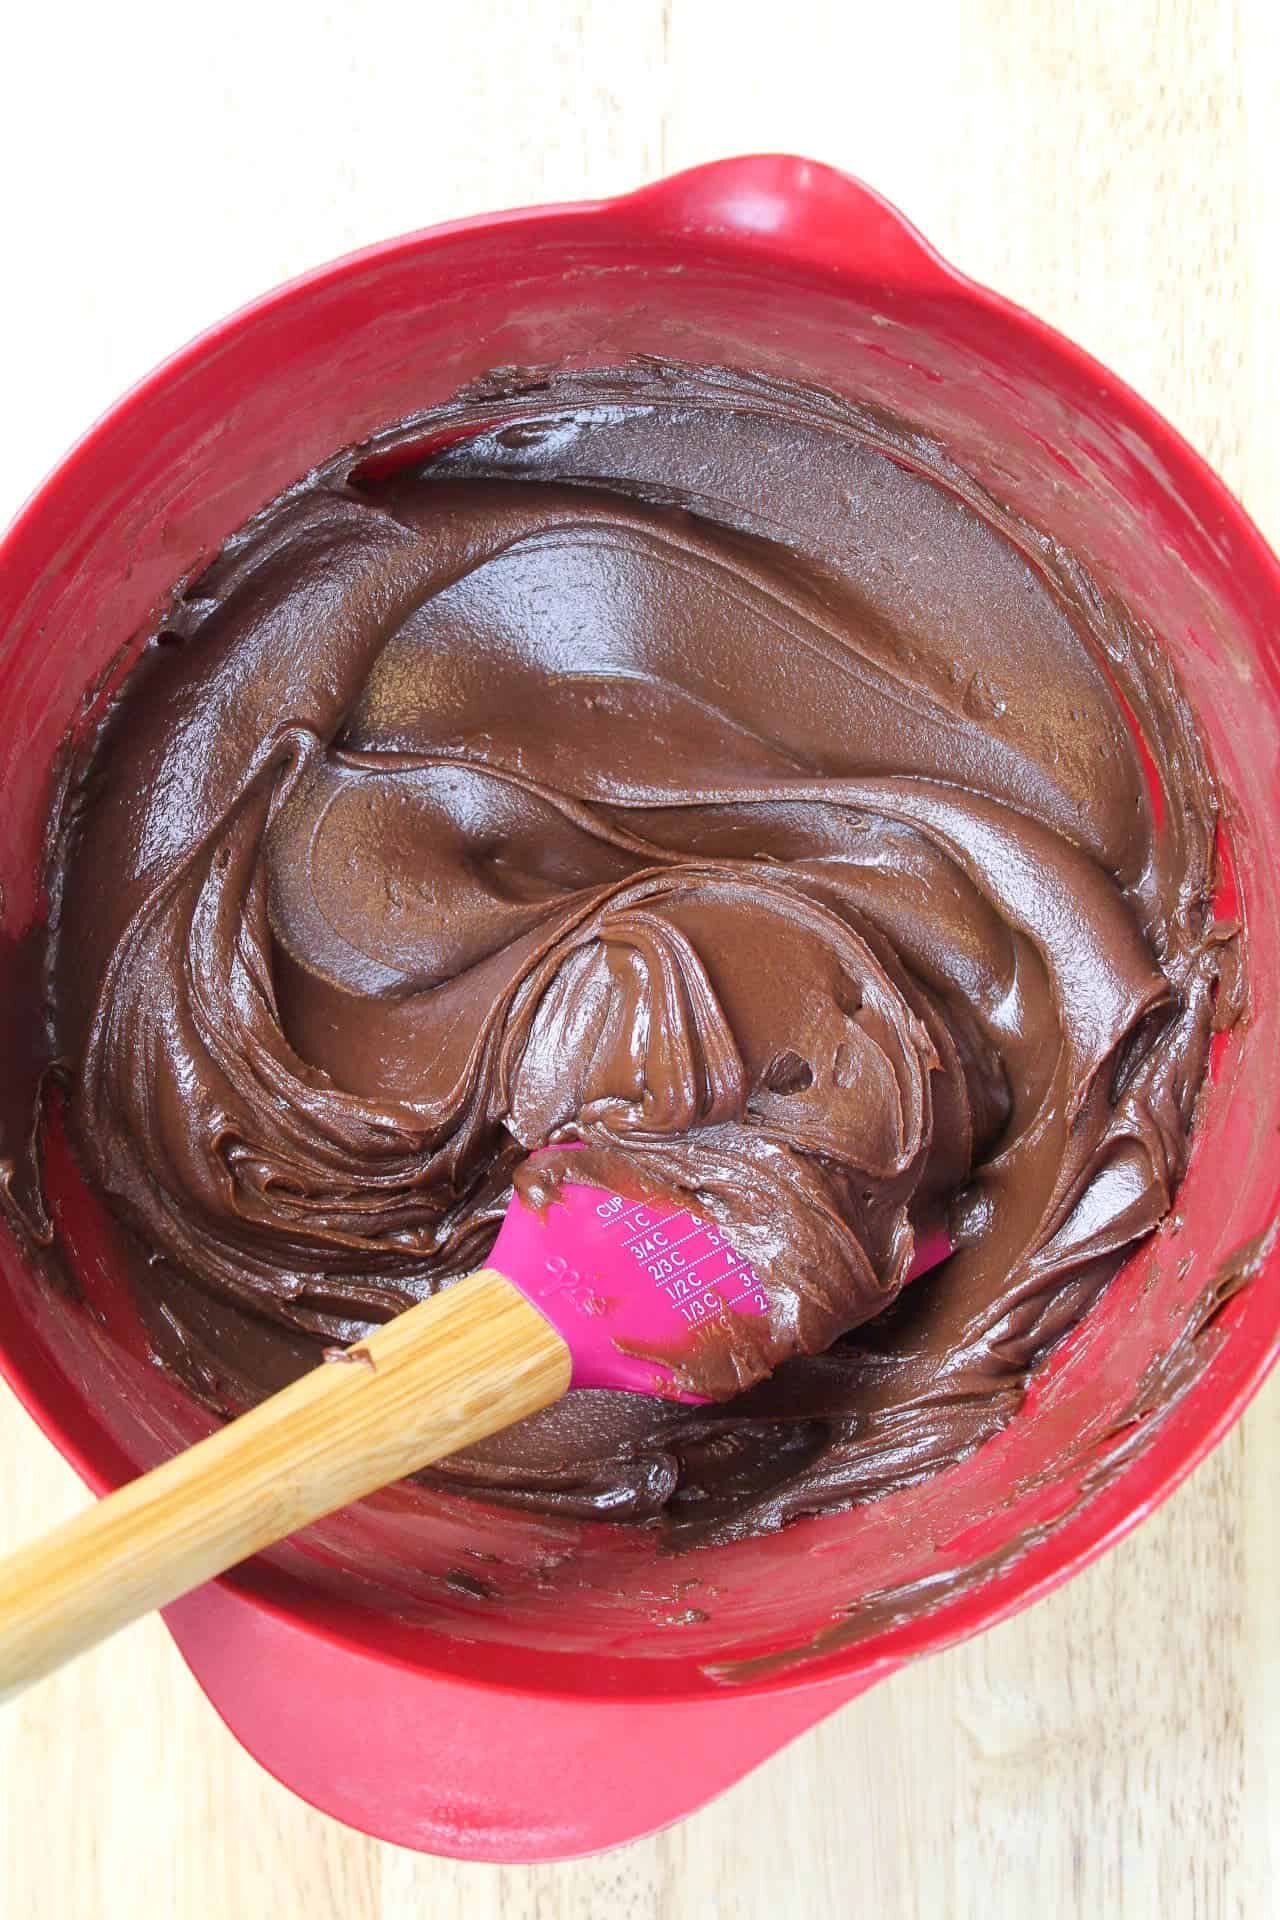
To make it, place both the milk chocolate (750 grams – about 2 bags of chocolate chips) and heavy cream (250 grams) in a heat proof bowl, and heat for 30 second increments (stirring between).
Usually after about 2 minutes of heat, all the chocolate is melted. Once the mixture is fully incorporated, place plastic wrap over the top of the ganache, and let it sit overnight (or at least a few hours).
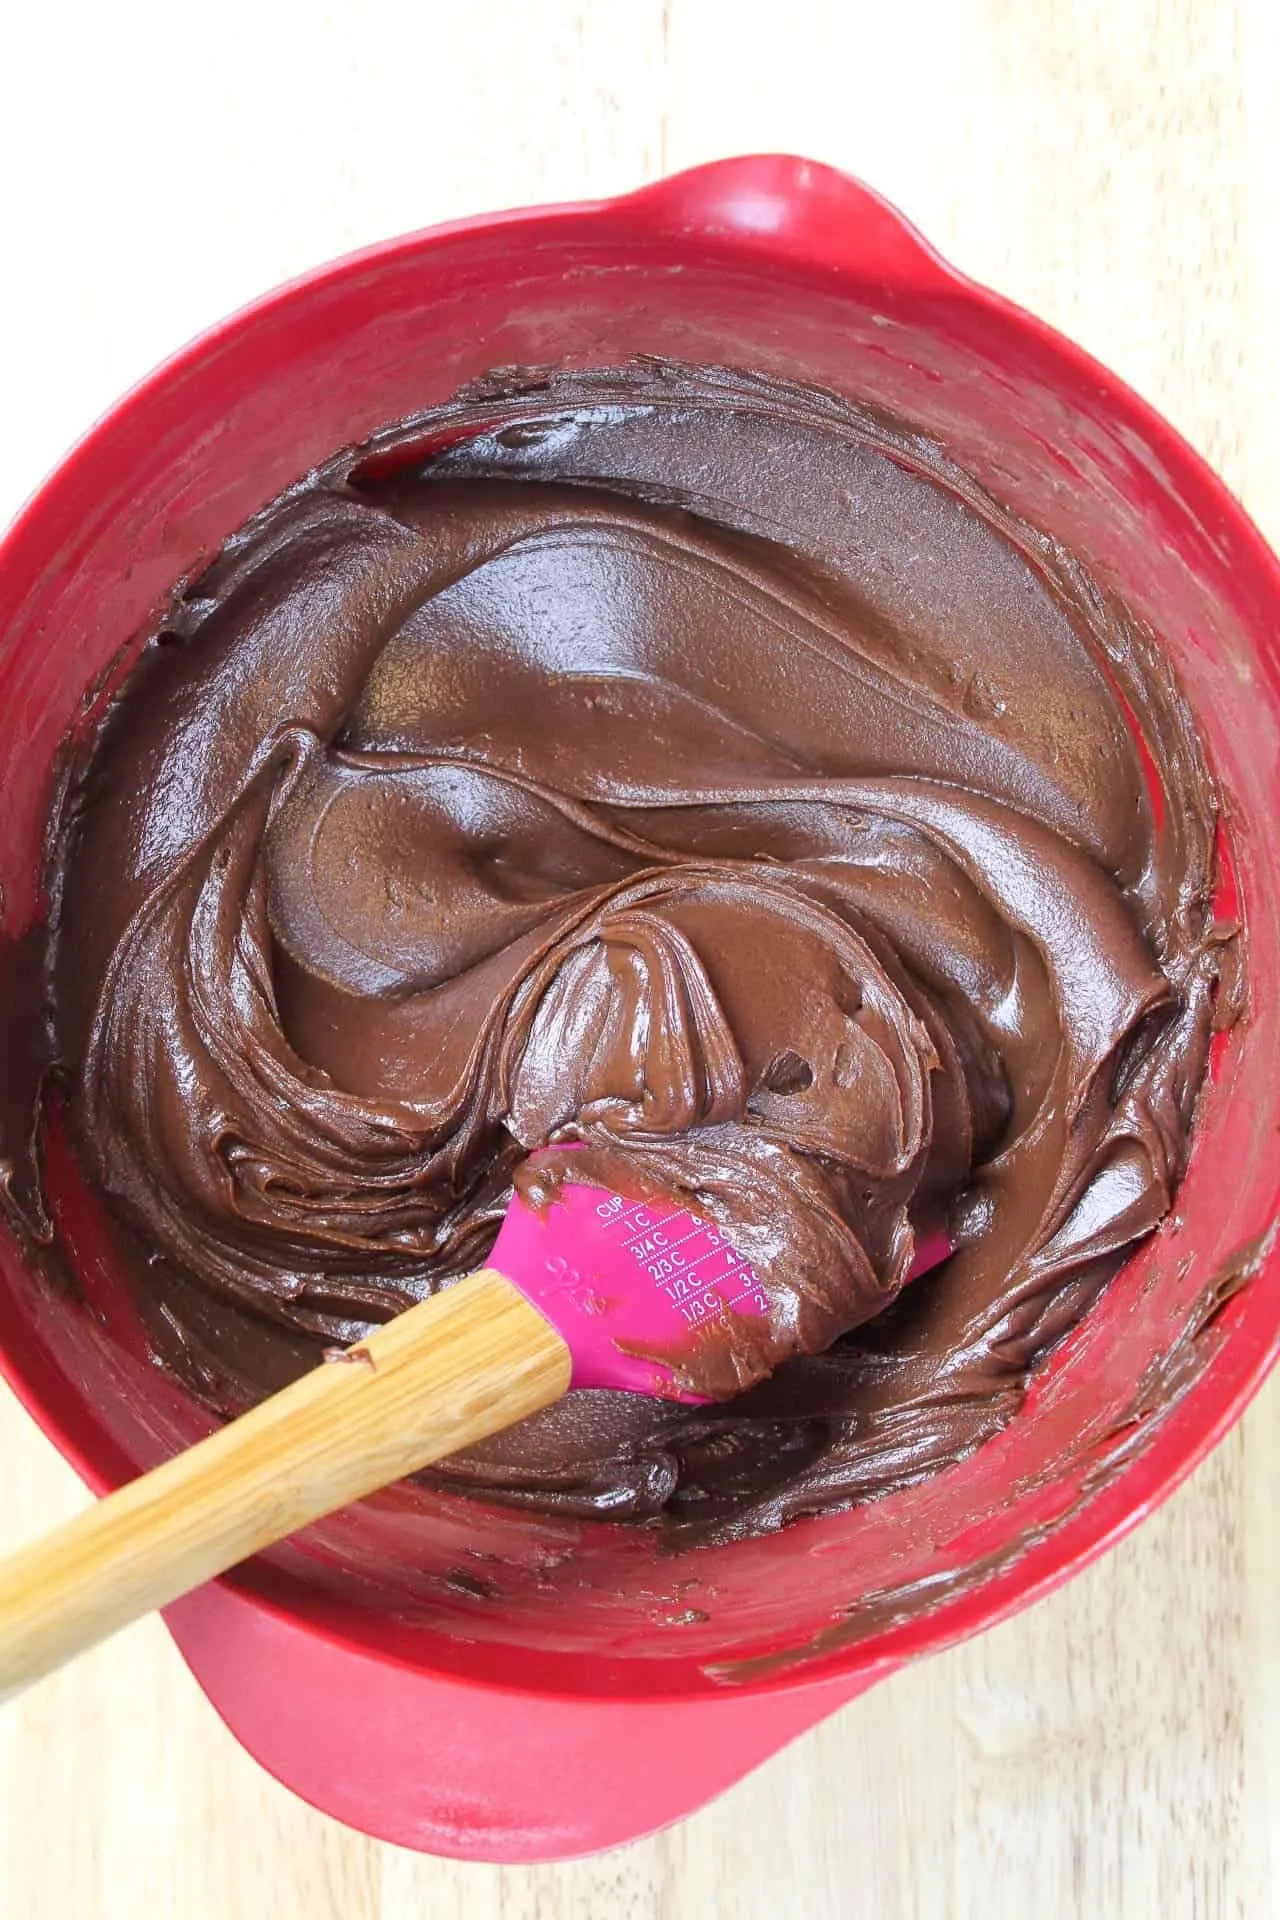
Before adding the room temperature ganache to a cake, give it a slow stir with a spatula to ensure it’s nice and smooth, and the right consistency.
Step 2: Make the Chocolate Cake Layers
Next, make the chocolate cake layers. These can also be made in advance if desired! Preheat the oven to 350 degrees Fahrenheit. Line four 7 inch or 8 inch pans with parchment rounds, and spray with non-stick spray.
Add the sugar and butter into the bowl of a stand mixer, and whisk on high for 1 minute. The mixture should become light in color.
Add in the eggs, one at a time. Then add baking soda, baking powder, and salt. Mix on high for another minute.
In a separate bowl, combine the cup of hot water, and cup of buttermilk. Pour in the cup of baking cocoa, and whisk until no clumps remain.
Next, add 1 cup of flour into the butter /egg mixture. Scrape the sides of the bowl with a spatula, to ensure the flour is fully incorporated.
Pour in half of the buttermilk / cocoa mixture, and gently pulse the mixture to incorporate the liquid (if you don’t, you’ll end up splattering the cocoa mixture all over you kitchen! Please learn from my mistakes :P).
Mix in the 2nd cup of flour, at a medium speed. Pour in the remaining buttermilk / cocoa mixture, and again gently pulse, then mix on low until fully combined.
Add in the last cup of flour, and mix on low until the flour is incorporated. Mix on high for 30 additional seconds, to incorporate a bit more air into the batter.
Evenly divide between the four prepared pans. I like to use a kitchen scale to ensure each pan has exactly the same amount of batter.
Bake according to the size of pan. For 7 inch layers, bake for 34-35 minutes. For 8 inch layers, bake for 32-33 minutes, or until a skewer comes out clean.
Allow layers to cool in the pans for about 10 minutes, then run an offset spatula around the edge of the pans to help separate the layers from the pans.
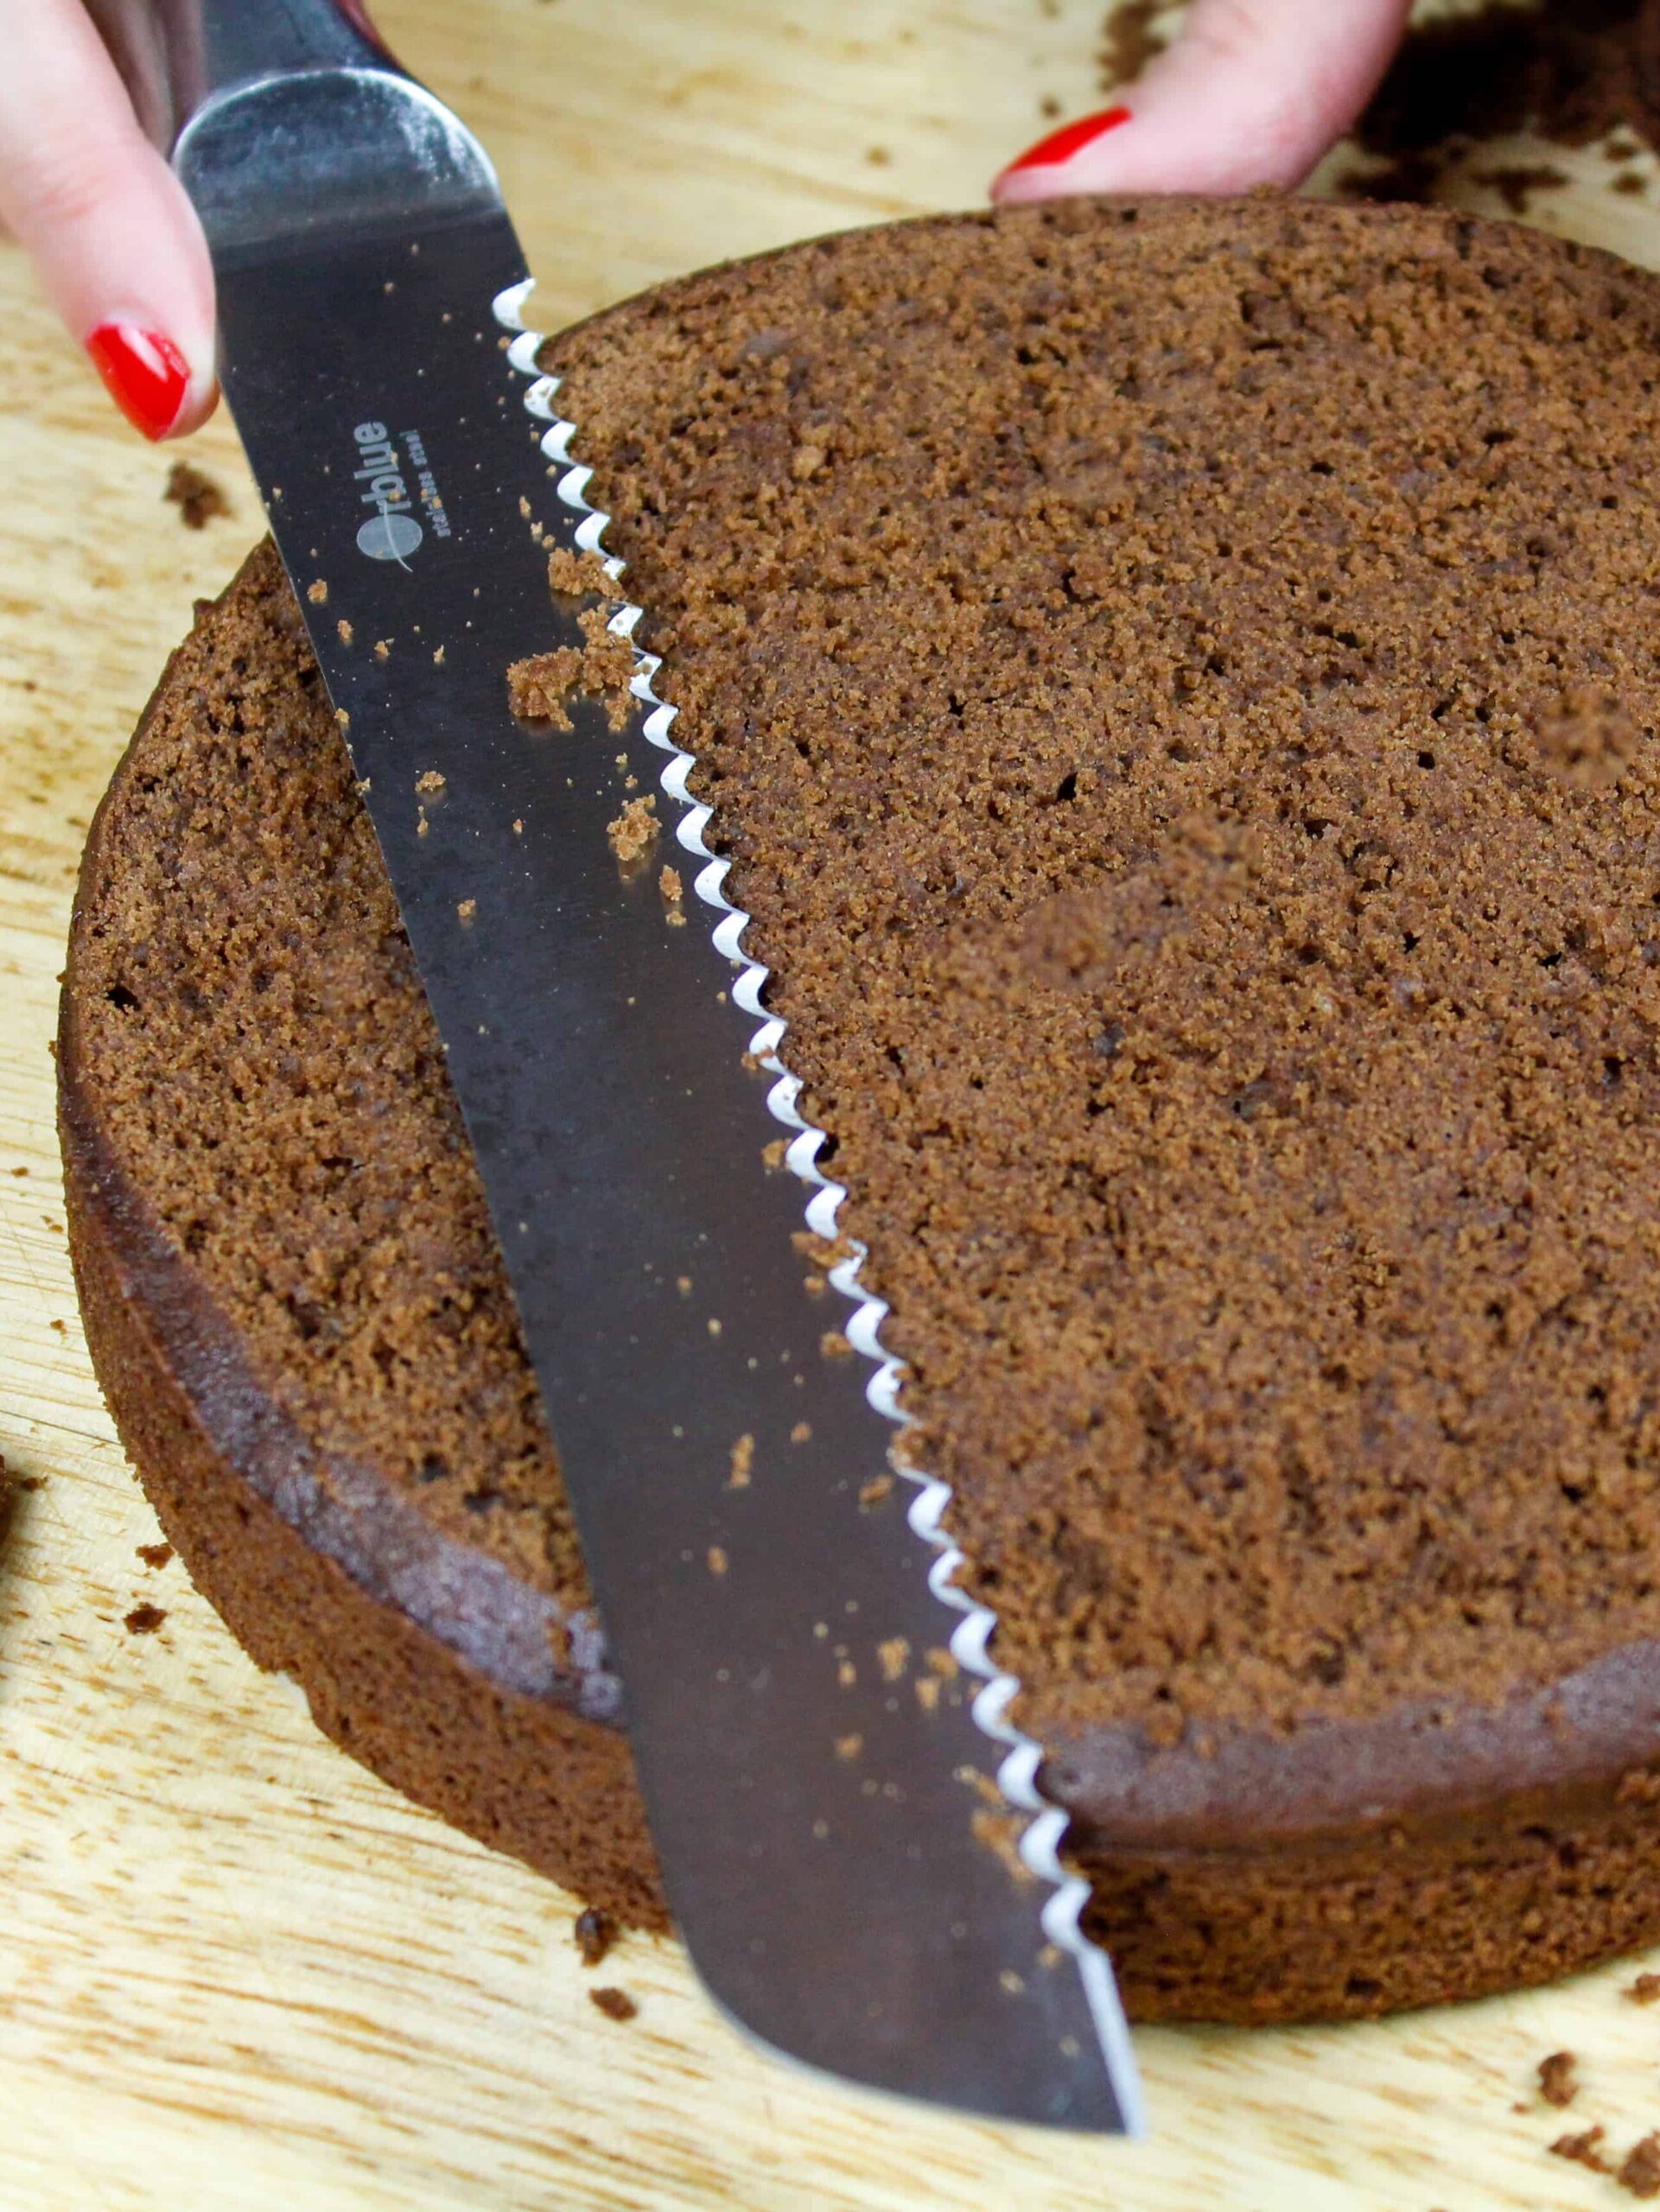
Place the pans in the freezer for about 45 minutes, to accelerate the cooling process. Once the layers are fully cooled, carefully flip the pans and remove the layers. If desired, level the cakes with a serrated knife once fully cooled.

Step 3: Make the Hot Cocoa Simple Syrup
It’s important to make the hot cocoa simple syrup ahead of time as well, to allow it to cool before adding it to the leveled cake layers.
Mix together the water and granulated sugar into a pot, and heat on high until the mixture just begins to bubble. At this point the sugar should be fully dissolved.
Turn off heat and remove pan from stove. Mix in the hot cocoa, and set aside to cool.
Step 4: Make the Marshmallow Buttercream
While the cake layers bake and cool, make the marshmallow buttercream frosting. Beat the butter on a medium speed for 30 seconds with a paddle attachment, until smooth. Slowly add in the powdered sugar, 1 cup at a time. Alternate with small splashes of cream.
Once fully mixed, add in the vanilla, marshmallow fluff and salt, and beat on low until the ingredients are fully incorporated, and the desired consistency is reached.
If the frosting is too thick, add in additional cream (1 teaspoon at a time). If the frosting is too thin, add in more powdered sugar (quarter of a cup at a time)
Step 5: Assemble this Hot Cocoa Cake
Once each component of the cake is ready, it’s time to assemble the cake!! Begin by using a large sterile paint brush to lightly soak each cake layer with the hot cocoa simple syrup.
Then add a dab of frosting onto your cake board or cake plate. This will help keep your cake layers in place as you frost and stack the layers.
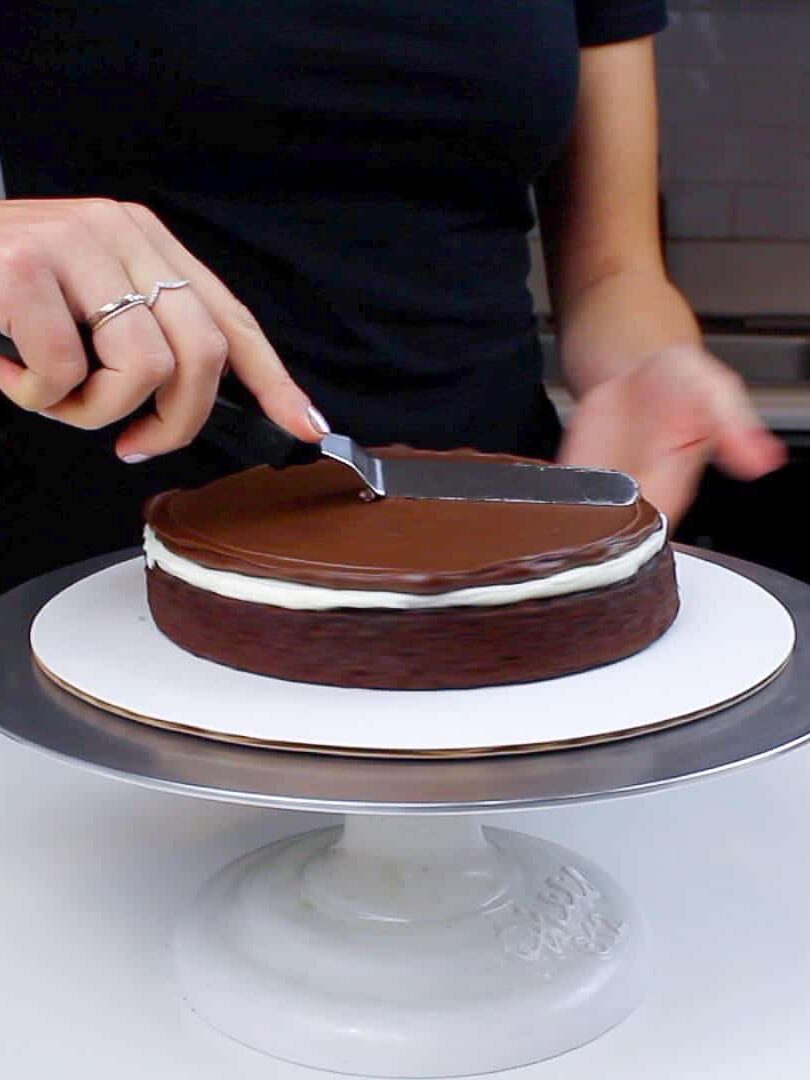
Use a large offset spatula to spread an even layer of marshmallow frosting and milk chocolate ganache onto each cake layer.
If you have trouble with the two blending together, you can always chill the cake in the freezer for a couple minutes after adding the marshmallow buttercream, to keep the two fillings cleanly layered.

Sprinkle mini marshmallows on top of the ganache, and gently press into place using you fingers. This will help keep them in place as you assemble cake, and help reduce air from being trapped between the layers.
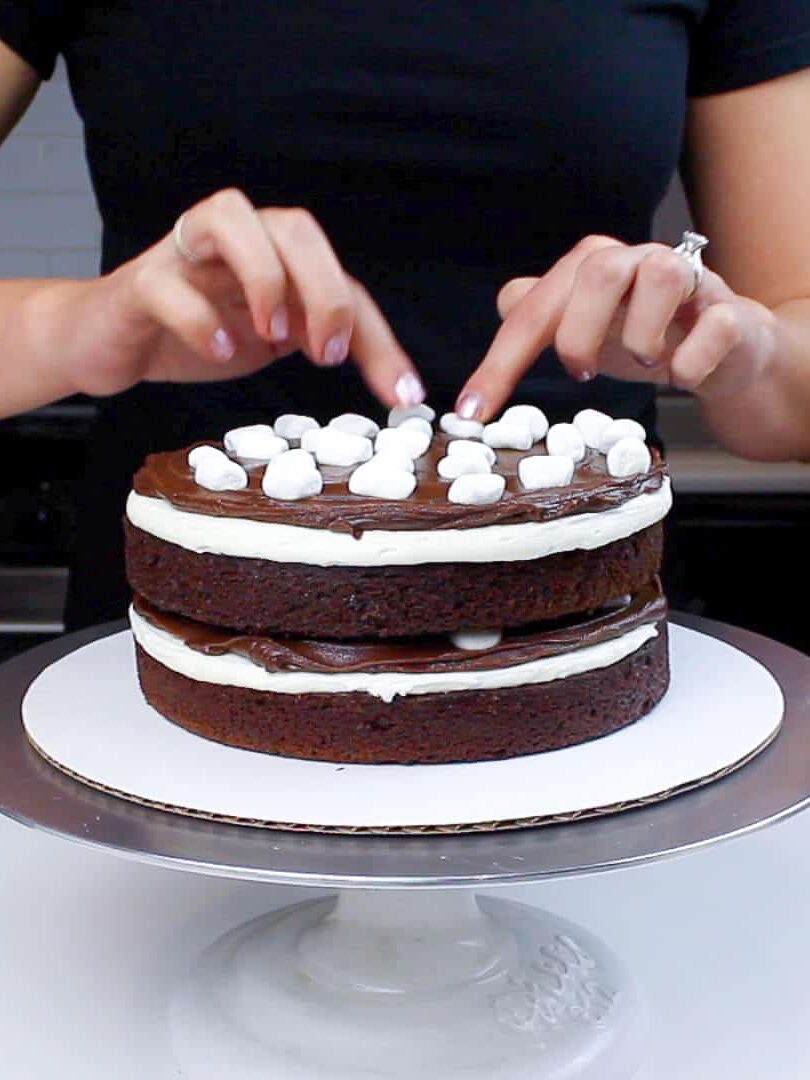
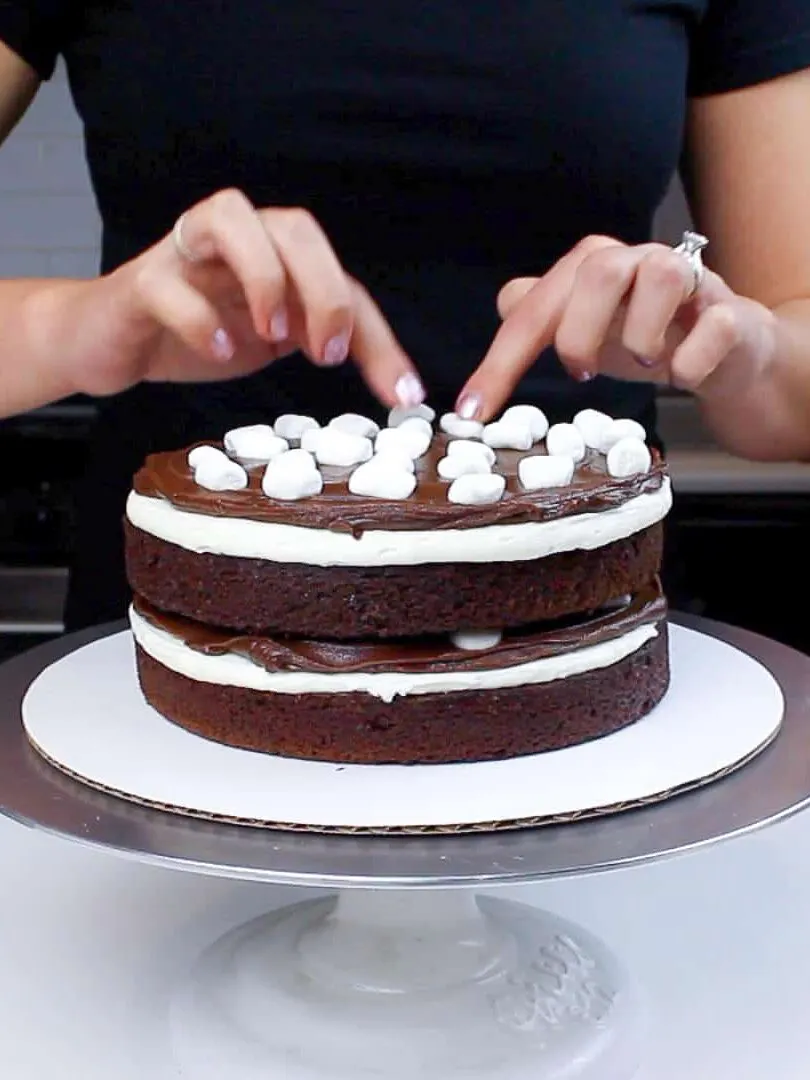
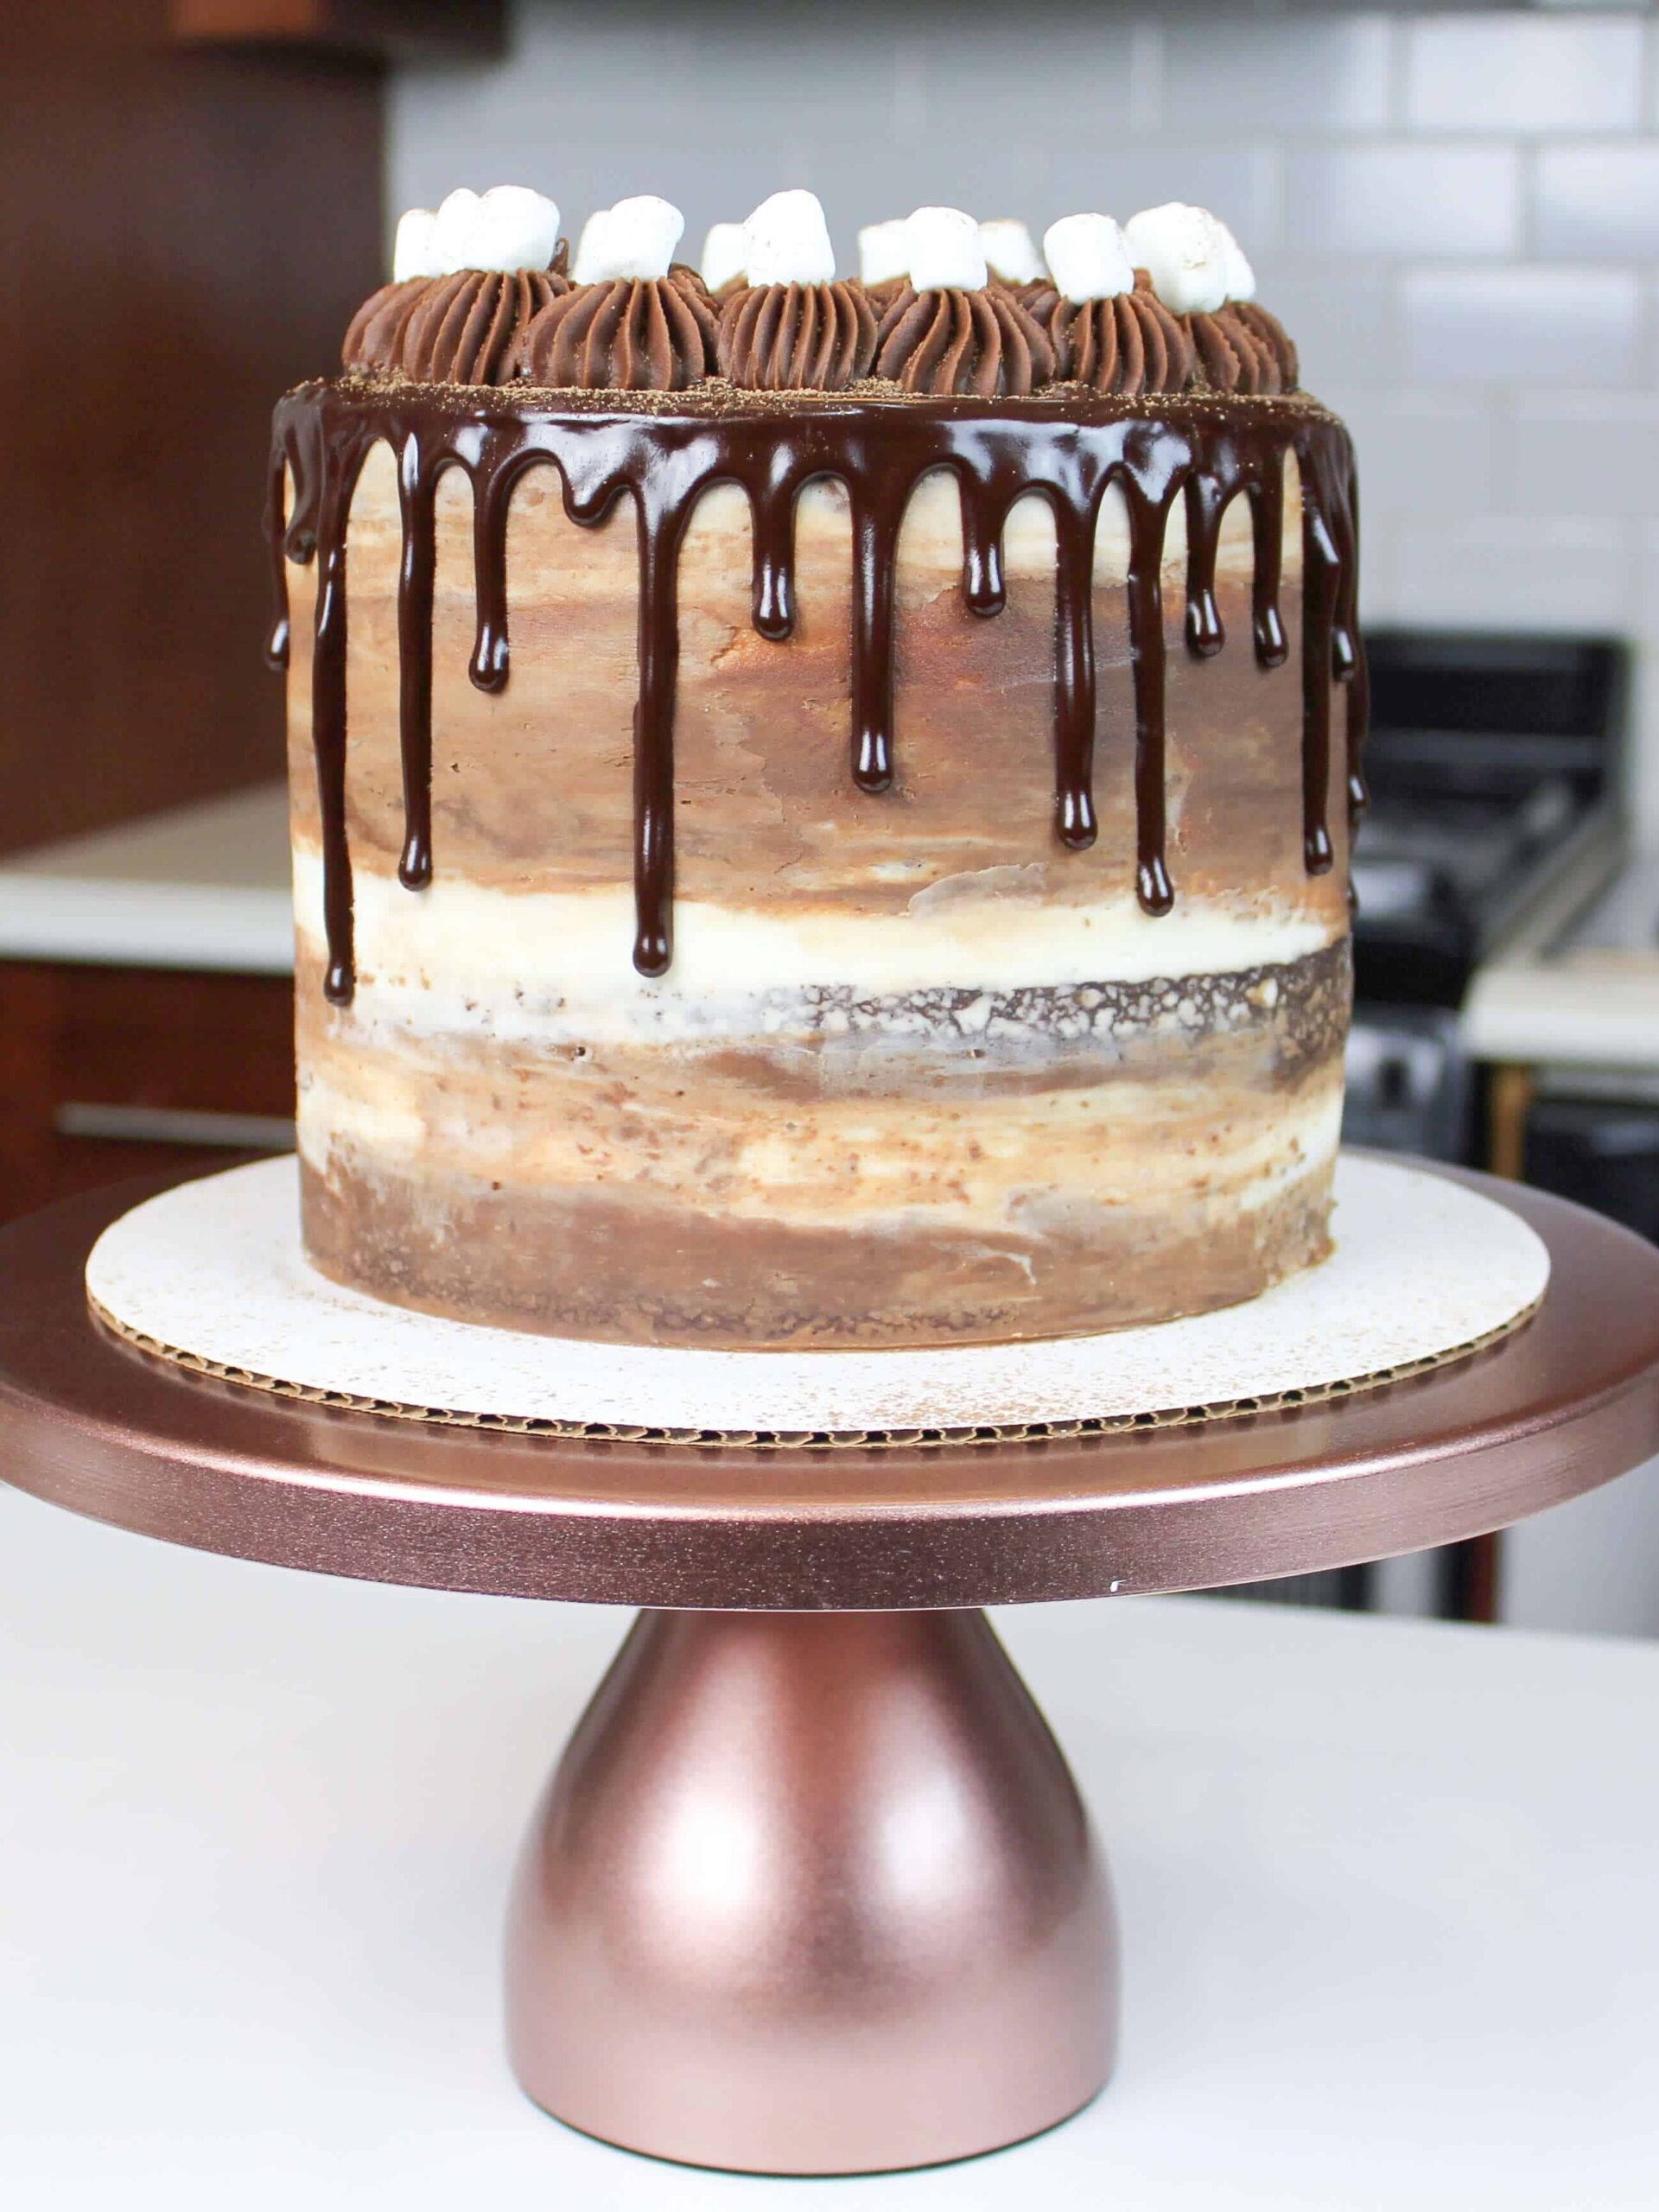
Repeat until all four cake layers are stacked. Next, cover the cake in a thin layer of frosting and chocolate ganache! Place dabs of both the ganache and buttercream around the cake, then gently spread them around the cake to cover the layers.
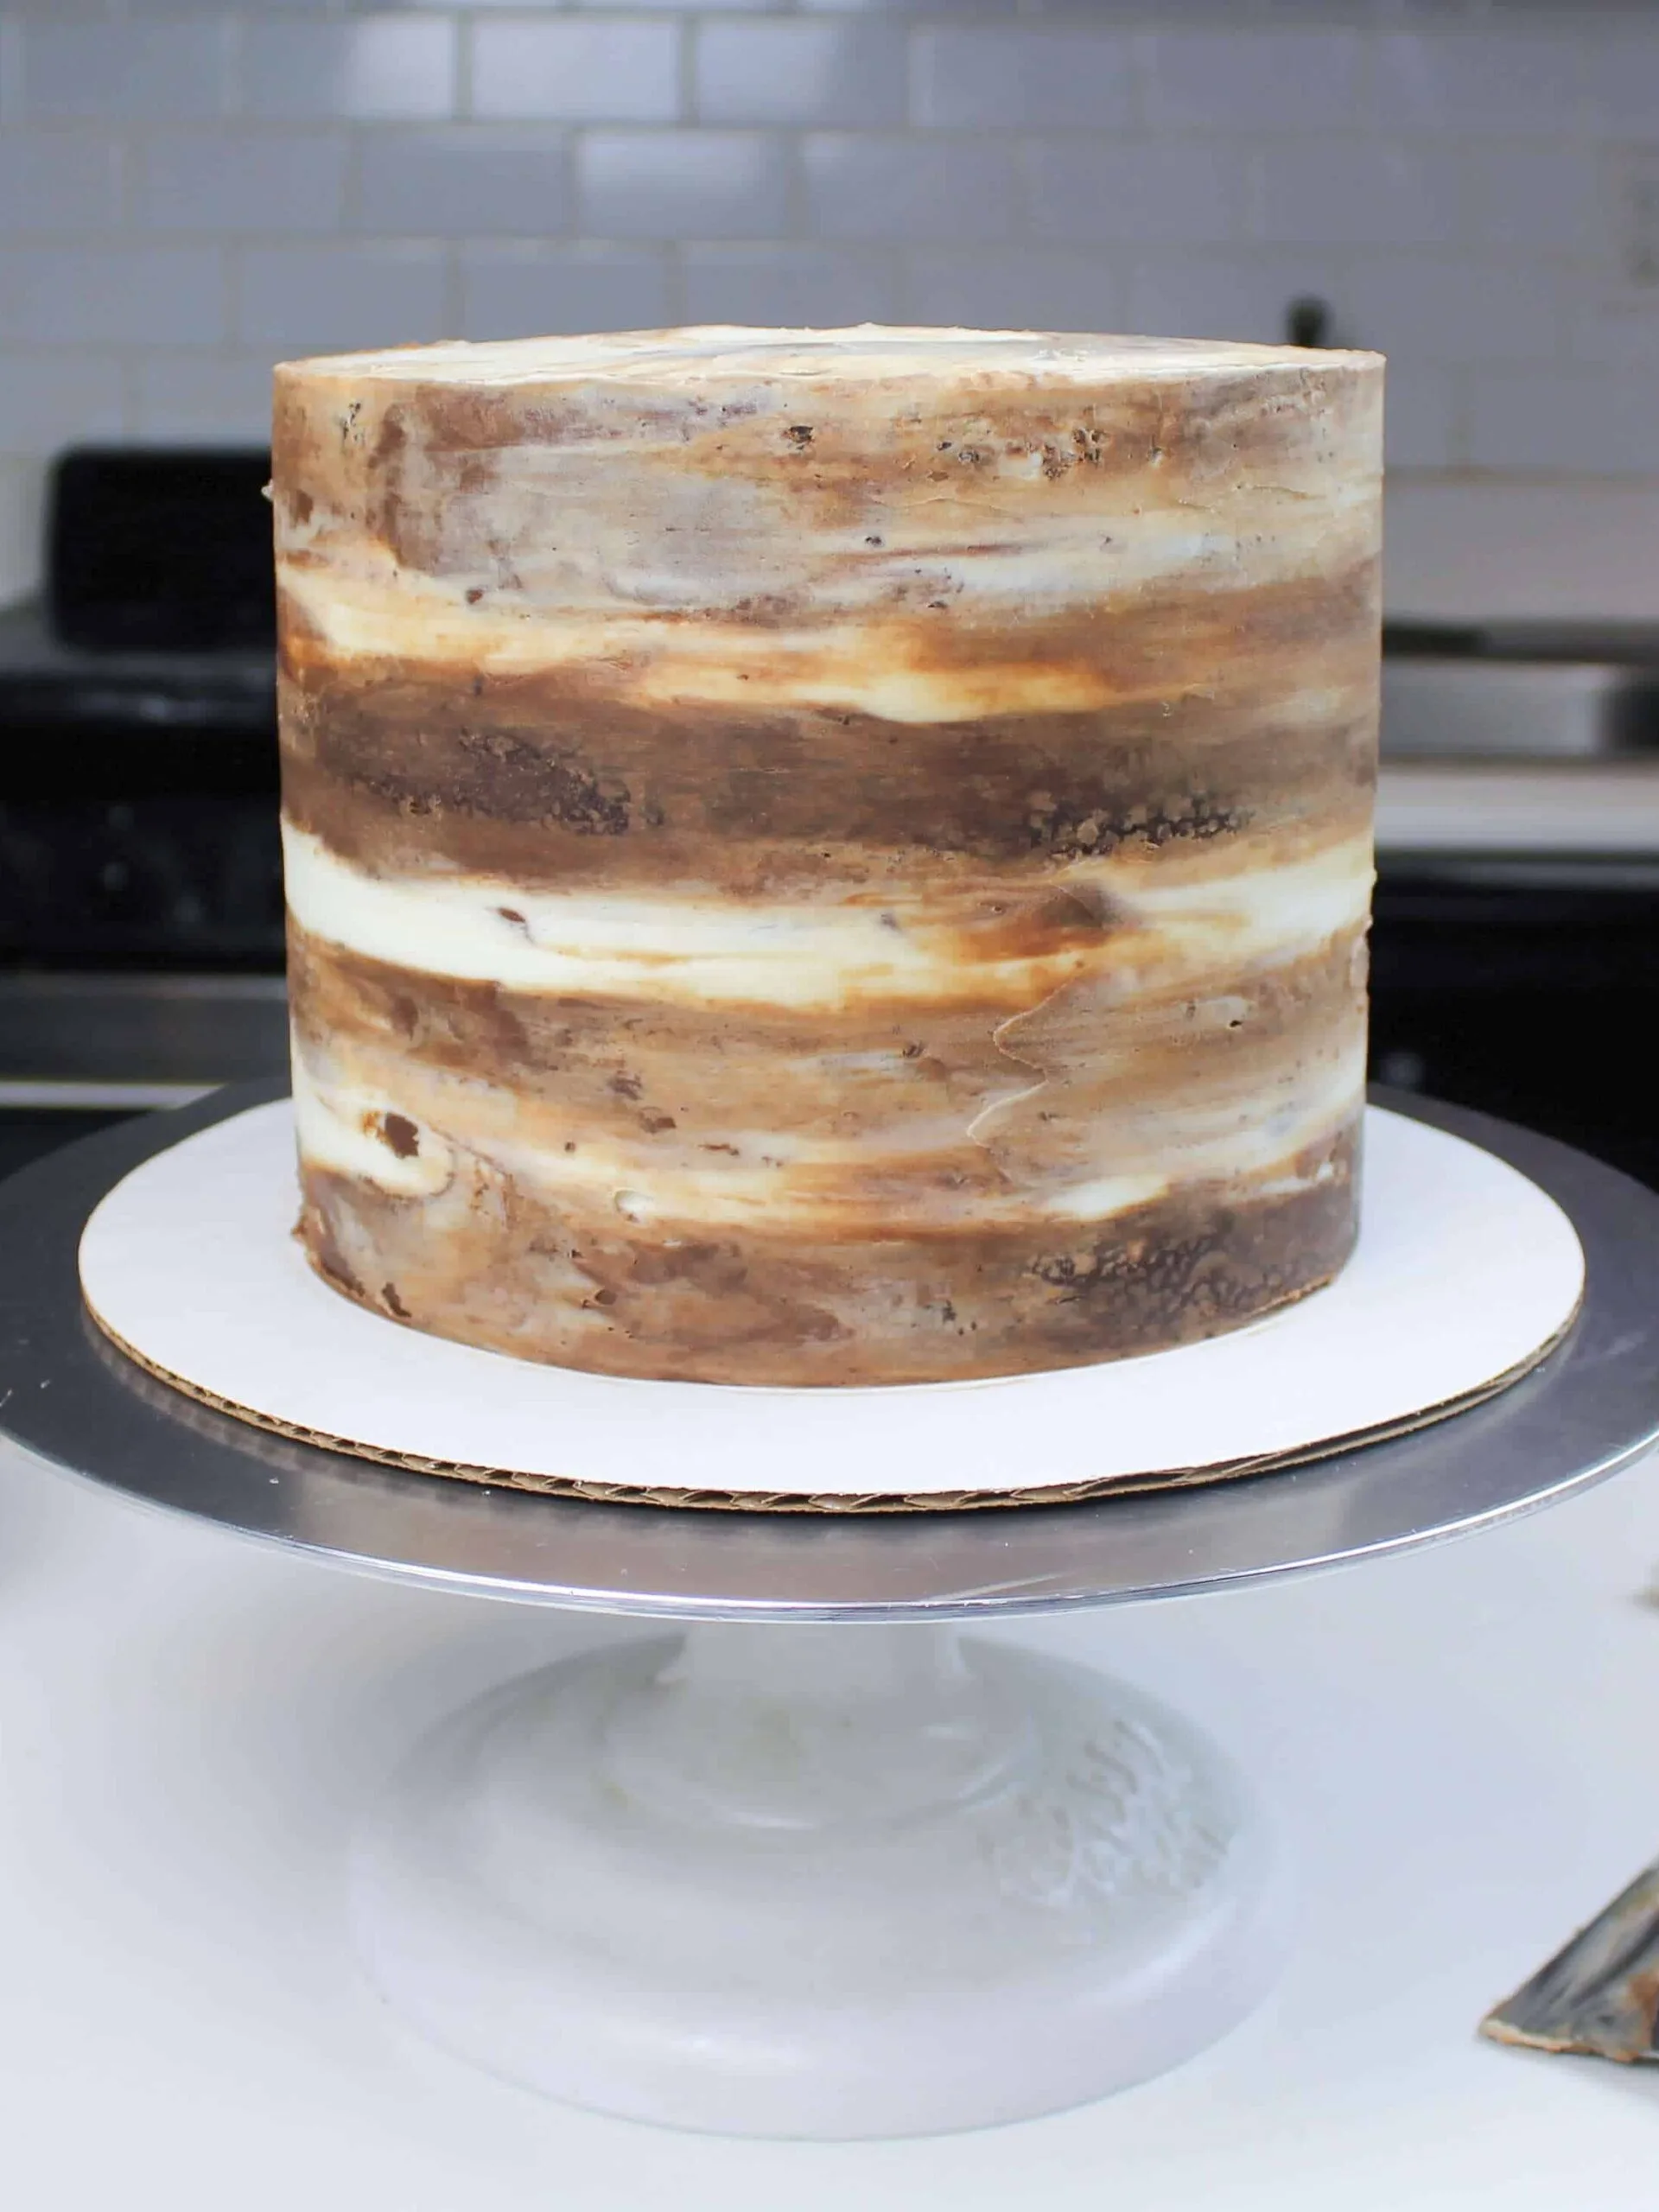
Use a bench scraper to get the frosting really nice and smooth. Normally I add a second, thicker layer of frosting, but I decided to give this cake a semi-naked look.
I just loved the way the ganache and frosting swirled together. It reminded me of whipped cream melting into a warm mug of hot cocoa!
Place the cake into the freezer for about 5 minutes, to chill it before adding on the warm ganache drips.

Place about 1 cup of remaining ganache into a piping bag fitted with a french tip, and set aside.
Step 6: Add the Chocolate Ganache Drips
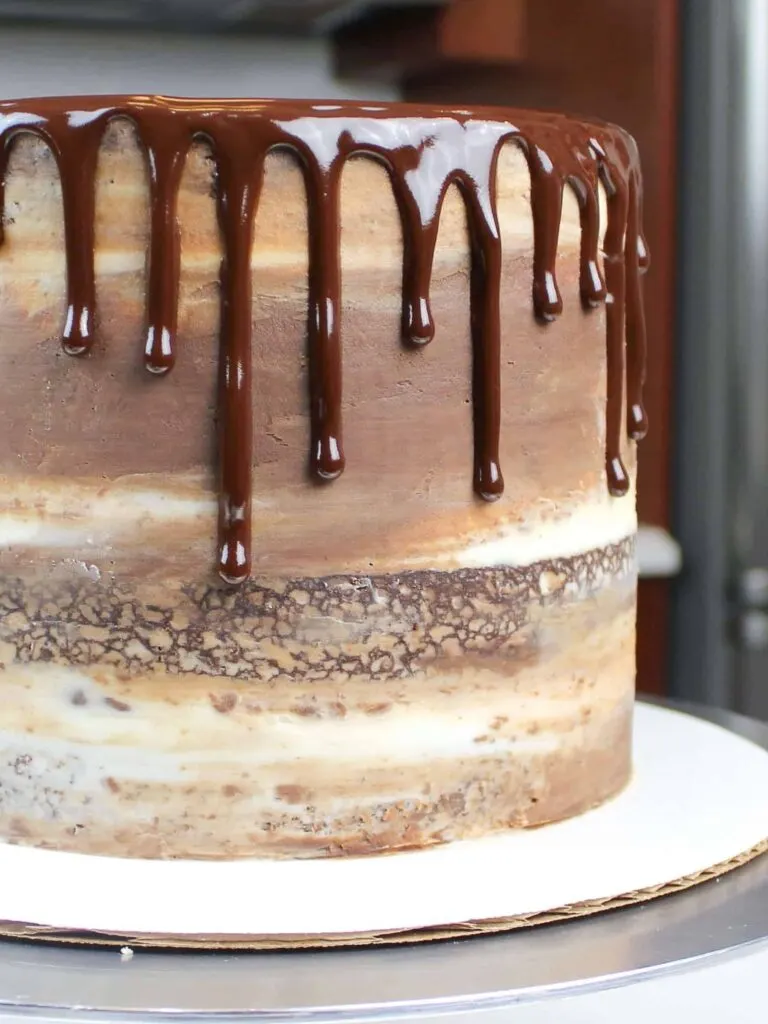
Add an extra splash of heavy cream to the remaining ganache, and heat in the microwave for about 10 seconds. Stir, and repeat until the ganache has a thinner consistency that will allow you to add drips to the cake.
MAKING A TEST DRIP IS SUCH A CRUCIAL STEP!!! Make one drip on the side of your cake, and let it flow. Allow it to sit for a couple minutes.
See what it looks like, if it’s the length and look you’re after. If not, adjust as needed.
Either pop the ganache into the fridge for a couple minutes to allow it to cool off a bit more if the drips are too long or thin, or pop the bottle (or bowl) in the microwave and heat for 5-10 seconds to get less thick and longer drips.

Step 7: Adding the Finishing Touches
Once you’ve covered the cake in ganache drips, pipe some ganache dollops around the top of the cake.
Place mini marshmallows on top of each frosting dollop. If desired, dust the top of the cake with hot cocoa powder.

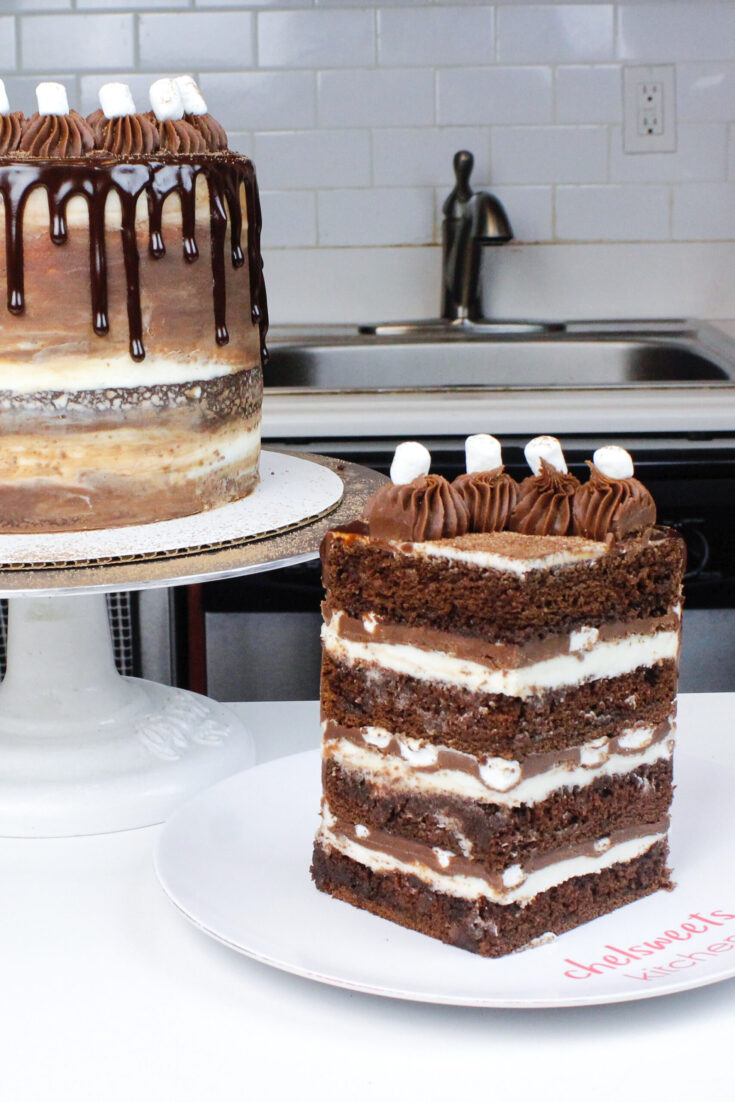
I swear this cake really will warm you up on a cold winter day! The filling is rich and decadent, and the mini marshmallows add such a fun texture to each bite.
This cake feeds 20-25 people, so make a big batch of hot cocoa and invite your friends over!!

Hot Chocolate Cake

This hot chocolate cake is made w/ moist chocolate cake layers and marshmallow frosting. It's just as decadent as a mug of warm hot chocolate.
Ingredients
Milk Chocolate Ganache
- 4 1/4 cups milk chocolate (750 grams)
- 1 cup heavy cream (250 grams)
Chocolate Cake Ingredients
- 2 1/2 cups granulated sugar (500 grams)
- 1 cup unsalted butter, room temp (2 sticks, 226 grams)
- 4 large eggs, room temp (224 grams)
- 1 tsp baking soda (6 grams)
- 1 1/2 tsp baking powder (6 grams)
- 1 tsp salt (6 grams)
- 1 cup hot water (237 grams)
- 1 cup buttermilk, room temp (240 grams)
- 1 cup unsweetened baking cocoa (100 grams)
- 3 cups all-purpose flour (390 grams)
Hot Cocoa Simple Syrup
- 1 cup water (240 grams)
- 1/2 cup granulated sugar (100 grams)
- 1/2 cup hot cocoa mix (75 grams)
Marshmallow Buttercream Frosting
- 2 cups (or 4 sticks) unsalted butter, room temperature (452 grams)
- 1 cup marshmallow fluff
- 1/2 tsp salt (3 grams)
- 6 cups powdered sugar (750 grams)
- 1/2 cup heavy cream (115 grams)
Optional Filling
- 2 cups mini marshmallows (100 grams)
Instructions
Milk Chocolate Ganache
- Begin by making the milk chocolate ganache filling. It needs a few hours to set, so I highly recommend making it first, or even the day before! If you prefer dark chocolate, the recipe for my dark chocolate ganache filling can be found here.
- To make it, place both the milk chocolate (750 grams – about 2 bags of chocolate chips) and heavy cream (250 grams) in a heat proof bowl, and heat for 30 second increments (stirring between).
- Usually after about 2 minutes of heat, all the chocolate is melted. Once the mixture is fully incorporated, place plastic wrap over the top of the ganache, and let it sit overnight (or at least a few hours).
- Before adding the room temperature ganache to a cake, give it a slow stir with a spatula to ensure it’s nice and smooth, and the right consistency.
Chocolate Cake Layers
- Begin by preheating the oven to 350 F /175 C.
- Line four seven-inch or three 8-inch pans with parchment rounds and spray with non-stick baking spray.
- Add 2 1/2 cups sugar and 1 cup butter into the bowl of a stand mixer. Cream together on a high speed for 1-2 minutes with a whisk attachment or hand mixer. The mixture should become light in color.
- Mix in 4 large eggs on a medium speed, two at a time.
- Add 1 tsp baking soda, 1 1/2 baking powder, and 1 tsp salt. Mix on high for another minute.
- In a separate bowl, combine 1 cup of hot water, and 1 cup of buttermilk. Pour in 1 cup of black cocoa and whisk until no clumps remain.
- Next, add 1 cup of flour into the butter/egg mixture. Scrape the sides of the bowl with a spatula, to ensure the flour is fully incorporated.
- Pour in half of the buttermilk/cocoa mixture and gently pulse the mixture to incorporate the liquid (if you don't, you'll end up splattering the cocoa mixture all over you kitchen!)
- Mix in the 2nd cup of flour, at a low speed. Pour in the remaining buttermilk/cocoa mixture, and again gently pulse, then mix on low until fully combined.
- Add in the last cup of flour, and mix on low until the flour is incorporated.
- Evenly divide between the prepared pans. I like to use a kitchen scale to ensure each pan has exactly the same amount of batter.
- Bake for 32-35 minutes, or until a toothpick comes out clean.
- Allow layers to cool in the pans for about 10 minutes, then run an offset spatula around the edge of the pans to help separate the layers from the pans.
- Place the pans in the freezer for about 45 minutes, to accelerate the cooling process. Once the layers are fully cooled, carefully flip the pans and remove the layers from the pans.
- Use a serrated knife to level the tops of the layers, and then frost as desired.
Hot Cocoa Simple Syrup
- It's important to make the hot cocoa simple syrup ahead of time as well, to allow it to cool before adding it to the leveled cake layers. I like to make it while the cake layers bake and cool.
- Mix together the water and granulated sugar into a pot, and heat on high until the mixture just begins to bubble. At this point the sugar should be fully dissolved.
- Turn off heat and remove pan from stove. Mix in the hot cocoa, and set aside to cool.
Marshmallow Buttercream Frosting
- While the cake layers bake and cool, make the marshmallow buttercream frosting.
- Beat 2 cups of butter on a medium speed for 30 seconds with a paddle attachment or hand mixer, until smooth.
- Add in 1 cup of marshmallow fluff and 1/2 tsp of salt. Mix on low the ingredients are fully incorporated.
- Slowly add in 6 cups of powdered sugar, 1 cup at a time. Half way through adding the powdered sugar, pour in 1/2 cup of heavy cream or milk to make it easier to mix the frosting.
- Beat on low until the ingredients are fully incorporated, and the desired consistency is reached.
- If the frosting is too thick, add an extra Tbsp of heavy cream. If it's too thin, add in another 1/2 cup of powdered sugar.
- Stir by hand with a rubber spatula for a couple minutes to get the frosting SUPER smooth.
To Assemble this Hot Cocoa Cake:
- Once each component of the cake is ready, it's time to assemble the cake!! Begin by using a large kitchen paint brush to lightly soak each cake layer with the hot cocoa simple syrup.
- Then add a dab of frosting onto your cake board or cake plate. This will help keep your cake layers in place as you frost and stack the layers.
- Use a large offset spatula to spread an even layer of marshmallow frosting and milk chocolate ganache onto each cake layer.
- If you have trouble with the two blending together, you can always chill the cake in the freezer for a couple minutes after adding the marshmallow buttercream, to keep the two fillings cleanly layered.
- Sprinkle mini marshmallows on top of the ganache, and gently press into place using you fingers. This will help keep them in place as you assemble cake, and help reduce air from being trapped between the layers.
- Repeat until all four cake layers are stacked. Next, cover the cake in a thin layer of frosting and chocolate ganache! Place dabs of both the ganache and buttercream around the cake, then gently spread them around the cake to cover the layers.
- Use a bench scraper to get the frosting really nice and smooth. Normally I add a second, thicker layer of frosting, but I decided to give this cake a semi-naked look.
- I just loved the way the ganache and frosting swirled together. It reminded me of whipped cream melting into a warm mug of hot cocoa!
- Place the cake into the freezer for about 5 minutes, to chill it before adding on the warm ganache drips.
- Place the remaining ganache into a piping bag fitted with a french tip, and set aside.
- Add an extra splash of heavy cream to the remaining ganache, and heat in the microwave for about 10 seconds. Stir, and repeat until the ganache has a thinner consistency that will allow you to add drips to the cake.
- MAKING A TEST DRIP IS SUCH A CRUCIAL STEP!!! Make one drip on the side of your cake, and let it flow. Allow it to sit for a couple minutes.
- See what it looks like, if it’s the length and look you’re after. If not, adjust as needed.
- Either pop the ganache into the fridge for a couple minutes to allow it to cool off a bit more if the drips are too long or thin, or pop the bottle (or bowl) in the microwave and heat for 5-10 seconds to get less thick and longer drips.
- Once you've covered the cake in ganache drips, pipe some ganache dollops around the top of the cake.
- Place mini marshmallows on top of each frosting dollop. If desired, dust the top of the cake with hot cocoa powder.
- I swear this cake really will warm you up on a cold winter day! The filling is rich and decadent, and the mini marshmallows add such a fun texture to each bite.
- This cake feeds 20-25 people, so make a big batch of hot cocoa and invite your friends over!!
Notes
Make your cake layers in advance and freeze them. It breaks the process up and make it more approachable.
Make your frosting ahead of time too, or save any leftover frosting! It can be stored in an airtight container in the fridge for up to a month, or in the freezer for up to 3 months. Be sure to give it a good stir once it thaws to get the consistency nice and smooth again.
A frosted cake can last in the fridge for up to a week, or in the freezer for up to a month. The buttercream locks in all the moisture, keeping the cake fresh and delicious!
If you cut into the cake and have leftovers, use any remaining frosting to cover the cut section to keep it moist and store in the fridge for up to a week.
Nutrition Information
Yield
24Serving Size
1Amount Per Serving Calories 450Total Fat 16gSaturated Fat 9gTrans Fat 0gUnsaturated Fat 5gCholesterol 61mgSodium 274mgCarbohydrates 73gFiber 3gSugar 54gProtein 5g
Ashley
Sunday 12th of March 2023
I made this cake today for my birthday. It is absolutely delicious! I only have 9" cake pans so I ran into some troubleshooting (ran out of buttercream and had to make an extra half batch, etc) that I didn't think through in advance. Also the ganache set way way too firm, so I had to thin it out with a little more cream and heat in brief increments until it was a spreadable consistency then let it cool before using. In the end it all came together well, looks, and tastes great...I just didn't account for just how much bigger a 9" pan really is compared to an 8." No fault with the recipe, that's on me. My only real complaint is the marshmallow buttercream didn't taste at all like marshmallow...in the future I would play with adding more marshmallow fluff.
Melissa
Saturday 12th of December 2020
Can I use swiss meringue buttercream for this cake
Kelsey Ellis
Tuesday 1st of December 2020
I'm planning on making hot cocoa cupcakes but I only need 12... Any advice on how to cut the recipe down?
Carly Dacruz
Sunday 7th of June 2020
I'm really wanting to make this cake but I dont know what the equivalent to powdered sugar is here in the uk as I cannot find that anywhere, also is the confectioners powdered sugar the same as normal as I've noticed it's used alot in your recipes so just for future reference lol :) your cakes are absolutely amazing and have defo inspired me to try baking xx
Lucy
Tuesday 7th of April 2020
Hey,
I would like to make this cake but I want only two or three cake layers. What would be the proportions of the ingredients?
Thanks
Chelsweets
Wednesday 8th of April 2020
Hi Lucy,
That can vary a ton based on the size of you cake pans! One batch of this batter can be used to make 3, 8" cake layers. Hope that helps!!