
I have a confession…I loved the shattered glass Halloween cupcakes I made last week so much that I decided to make a shattered glass CAKE!!
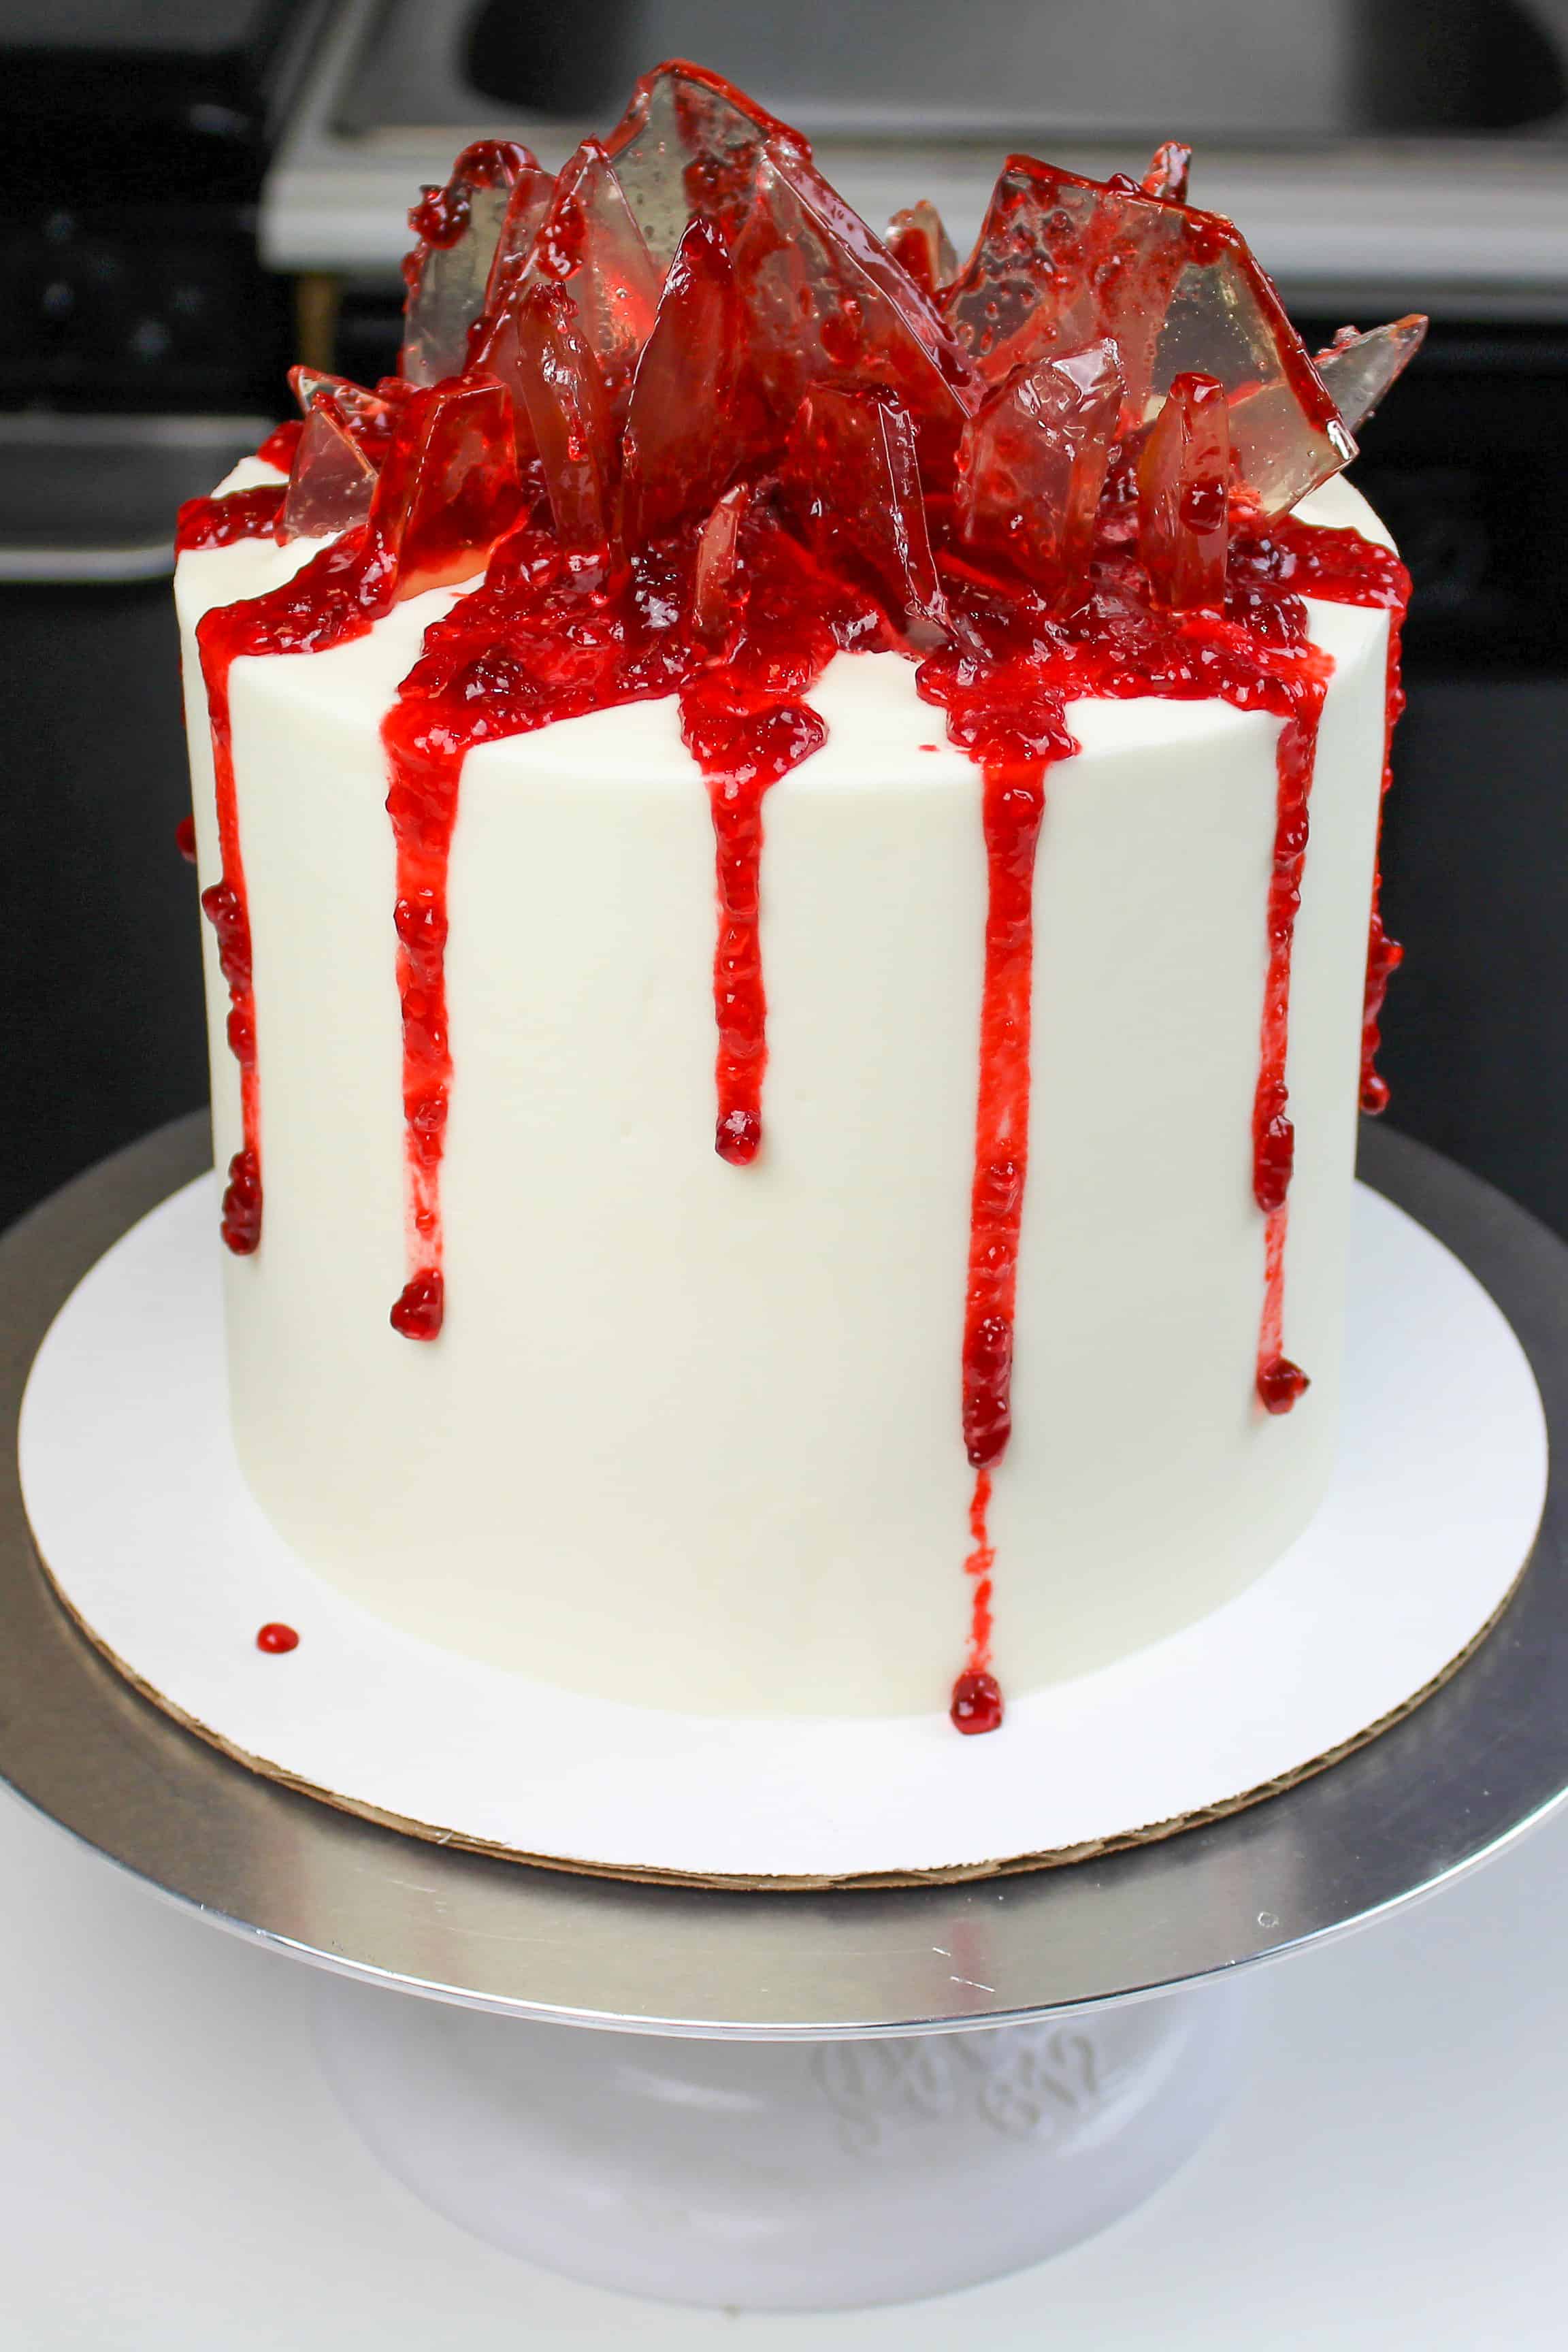
It somehow looks more bloody than the cupcakes, but it tastes just as delicious.
If you’re looking for a more intense (and slightly gory) cake, some sugar glass shards will do the trick!

The end result is wild, especially if you incorporate some strawberry jam into the mix.
How to Make Edible Glass Shards
While any recipe involving a candy thermometer may seem intense, I promise making edible glass is easier than you’d think.
You basically dump all your ingredients into a pot, and stir the mixture it until it reaches 300 degree F. This is known as hard ball stage, which just means the sugar mixture will be hard once it’s cooled.
You really need to heat the sugar to this temperature, or else it won’t fully harden. This means you won’t be able to shatter it into a million perfect pieces for your cake.
It’s important to watch the temperature too, because if you heat the mixture for too long, the sugar can begin to caramelize, and you’ll end up with yellow “glass!”
Edible Glass Ingredients:
- 1 cup water
- 1/2 cup light corn syrup
- 1 3/4 cup sugar
- 1/2 tsp cream of tartar
- candy thermometer
To make the edible glass shards, mix 1 cup water, 1/2 cup corn syrup, sugar, and cream of tartar in a large saucepan or pot.
Bring mixture to a boil. Use a candy thermometer and boil sugar syrup until temperature reaches 300 degrees, stirring constantly.
When sugar reaches 300 degrees, quickly pour onto a metal baking pan. Cool until completely firm to the touch.
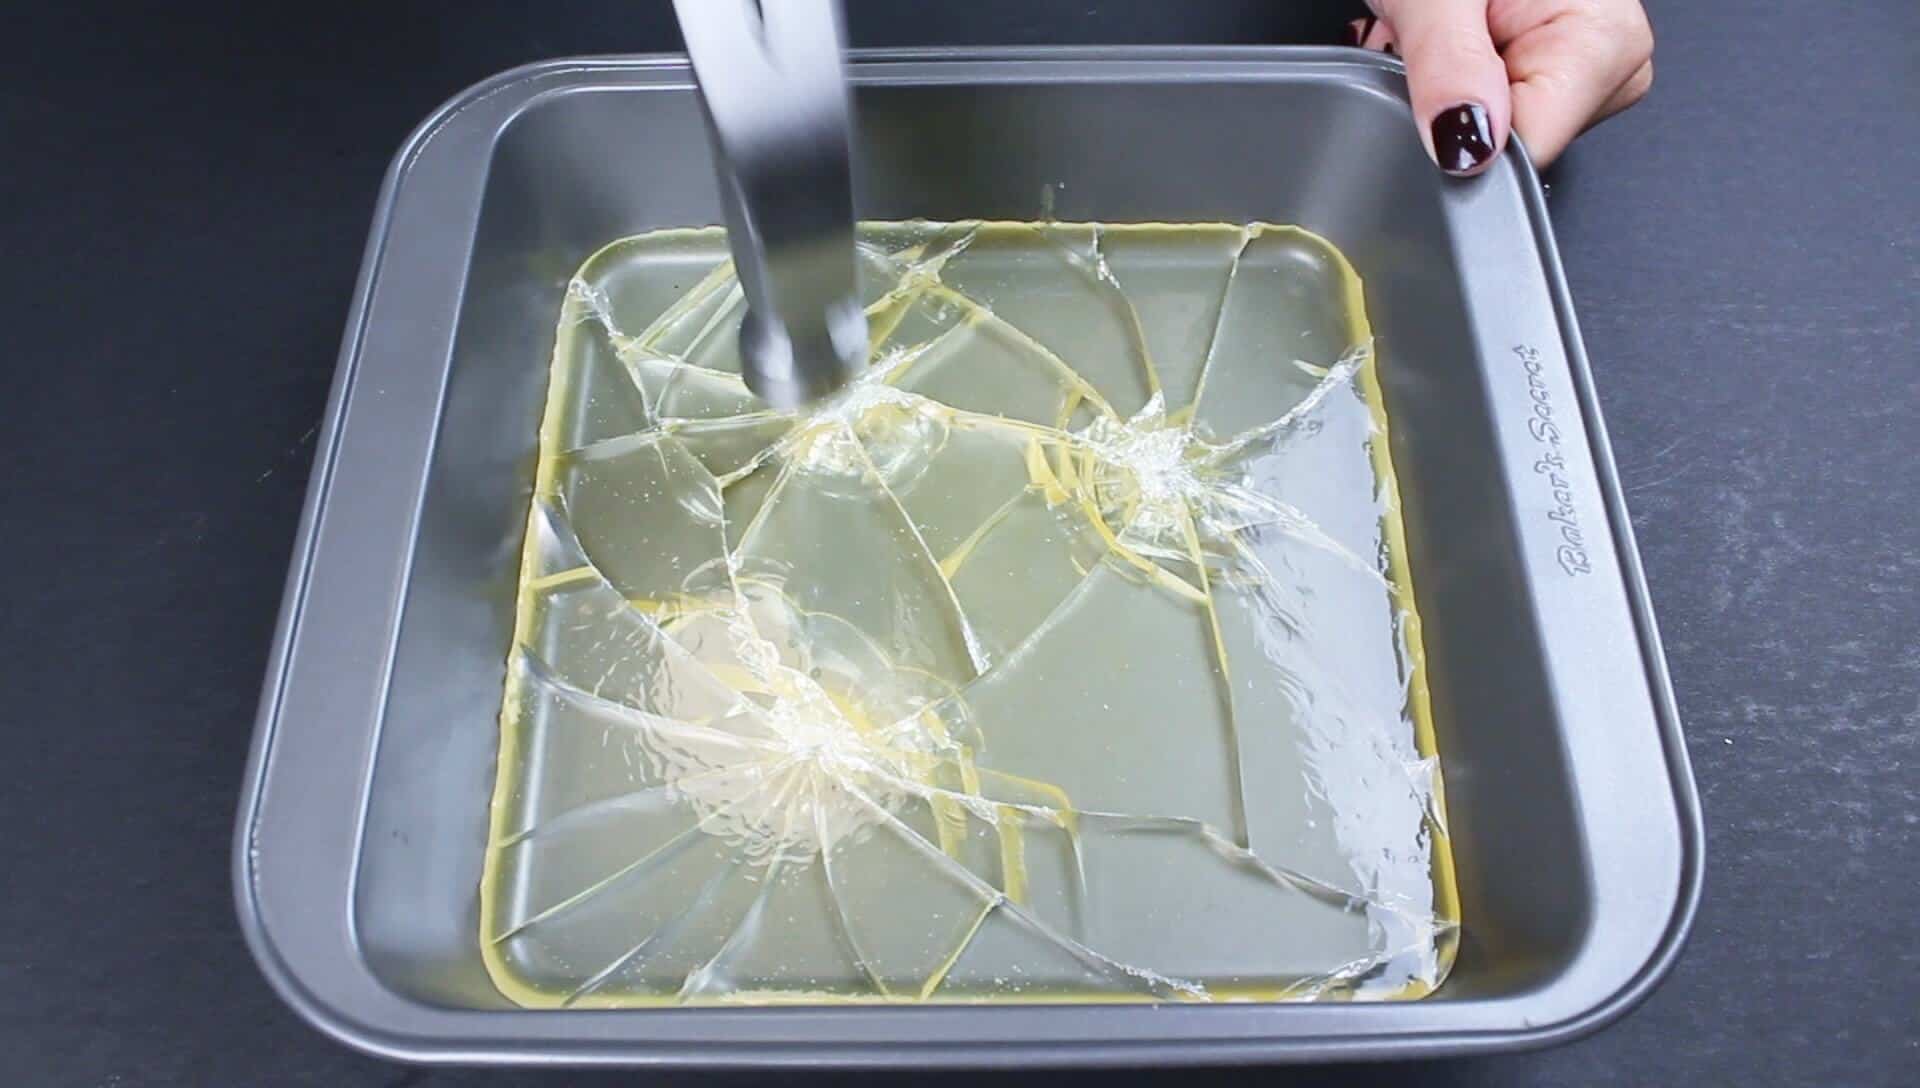
Break into shards using a hard object (I used a clean hammer for this, but a meat mallet would work too!).

The Surprise Inside: Strawberry Jam
As if the bloody glass shards weren’t already enough, I decided to be extra and fill the cake with strawberry jam. It makes for an amazing surprise inside, especially if you cut it open for a halloween party!
To fill the center of the cake, use a 3 inch circle cutter to remove the centers of two of the layers.
Begin assembling the cake using an uncut cake layer.
Frost with an even layer of vanilla buttercream, then top with one of the cake layers.
Gently frost the cake ring, the stack with the other cut layer.
Spread an even layer of buttercream on top of the second cake ring, then smooth frosting into the cut-out center of the cake.
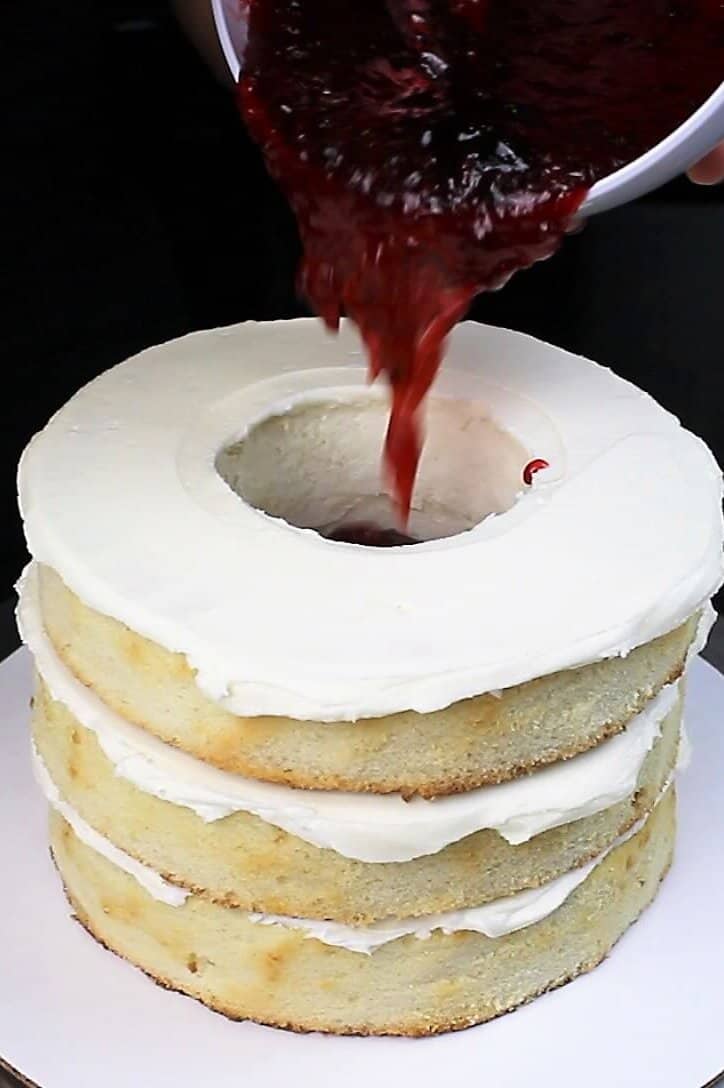
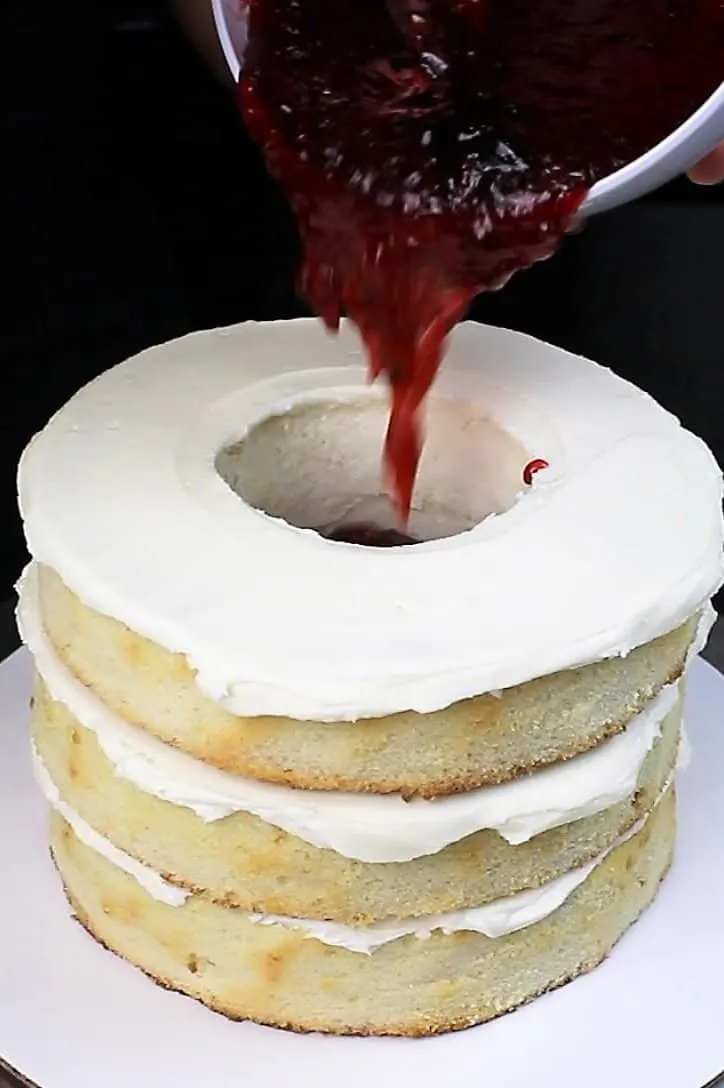
Mix one squirt of red gel food coloring into the strawberry jam, and then carefully pour into the center of the cake.
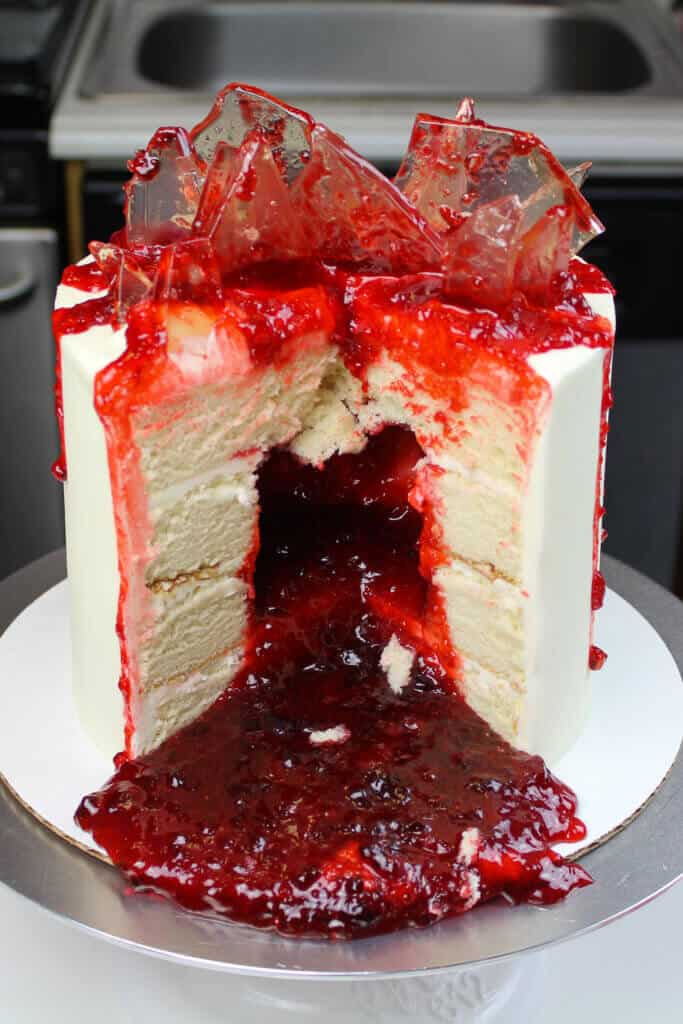

Fill to the top, then place the last cake layer on top. Then try to control your excitement until you’re able to cut into the cake!
Adding the Glass Shards to the Cake
Once the cake is frosted and smooth, it’s time to add the finishing touch.
I chilled my cake for about 10 minutes in the fridge before adding the sugar shards, to make it easier to stand them upright in the frosting.
I carefully (even though it’s sugar, the edges are actually quite sharp!) pressed the sugar shards into the top of the cake. As I did this, I used a decent amount of pressure, to make sure the shards went into the cake layers a bit.
I wanted to make sure they would stay in place, and not fall over as the cake sat out.
To be totally honest, I let my sugar cook a tiny bit too long, and my sugar shards had a yellow tint! I was really upset at first, but then did a bi of creative problem solving.
That’s pretty much all baking is, right?? I decided to drizzle some of the remaining red jam between the shards.
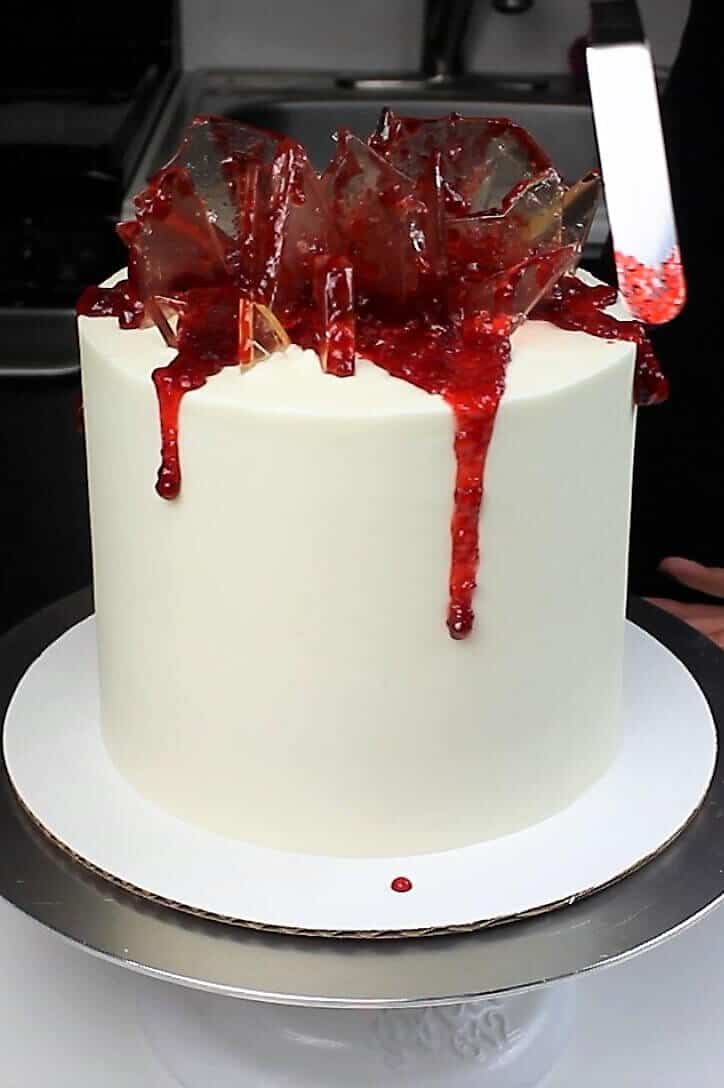
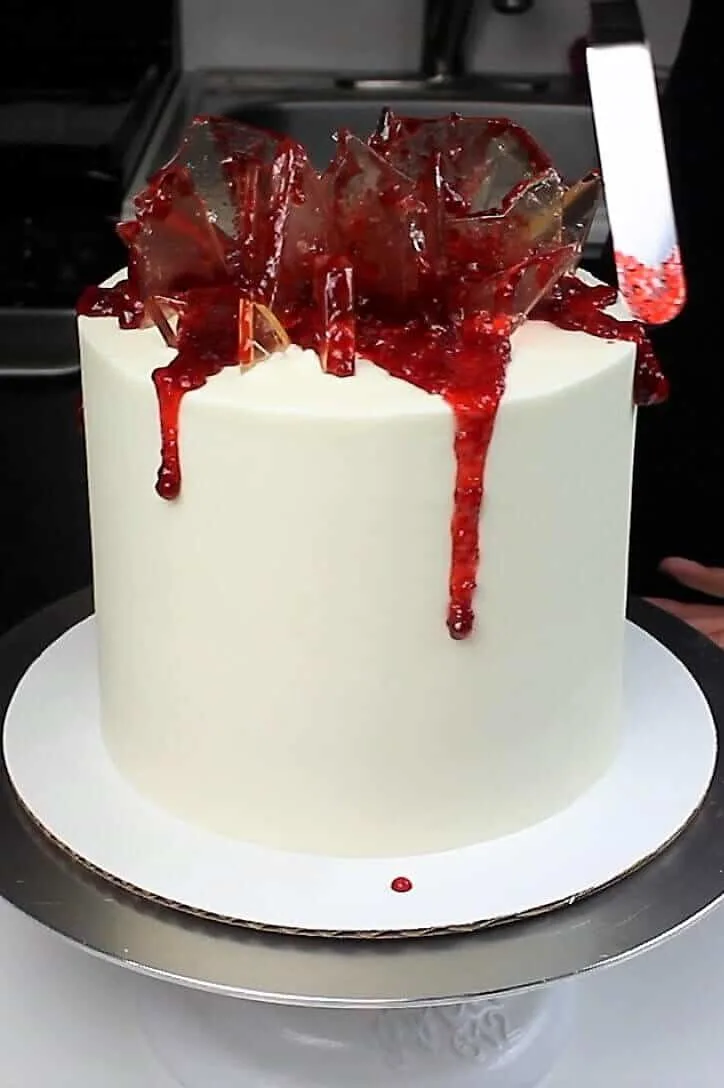
It totally hid any yellow hue, and looked even more intense! I was so into the look, I even let some of the jam drip over the edges of the cake. I loved and was mildly horrified by the final look.
Shattered Glass Cake
This shattered glass cake is perfect for Halloween!! It's made with sugar shards and strawberry jam blood, and it's absolutely horrifying (in the best way)!
Ingredients
Vanilla Cake
- 3 cups all-purpose flour (390 grams)
- 3 cups granulated sugar (600 grams)
- 2 1/2 tsp baking powder (10 grams)
- 1 tsp salt (6 grams)
- 1 cup unsalted butter, room temperature (226 grams) - 2 sticks
- 2 tsp. vanilla extract (8 grams)
- 1 cup pasteurized egg whites from a carton (or about 7 egg whites) (235 grams)
- 1 1/2 cups buttermilk, room temperature (345 grams)
- 1/8 cup vegetable oil (28 grams)
- gel food coloring (if desired)
Vanilla Buttercream Frosting
- 3 cups unsalted butter, room temperature (678 grams)
- 11 cups powdered sugar (1375 grams)
- 1 tsp salt (6 grams)
- 1/3 cup heavy cream (or whipping cream) (75 grams)
- 1 1/2 Tbsp vanilla extract (18 grams)
Sugar Glass Shards
- 1 cup water
- 1/2 cup light corn syrup
- 1 3/4 cup sugar
- 1/2 tsp cream of tartar
- candy thermometer
Additional Ingredients
- 2 14 oz. jars of strawberry jam
- red gel food coloring (if desired)
Instructions
Vanilla Cake Layers:
- Preheat oven to 350°F. Line four 7 inch pans with parchment rounds, and grease with non-stick cooking spray.
- Mix together all dry ingredients (flour, baking powder, sugar, and salt) in a stand mixer with a paddle attachment until fully combined.
- Mix chunks of room-temperature butter slowly into the dry mix, on a low speed. Continue to mix until no large chunks of butter remain, and the mixture becomes crumbly.
- Pour in egg whites, and mix on low until just incorporated. Mix in the buttermilk in two installments, on a low speed.
- Add in vanilla and oil, and mix at a low speed until fully incorporated.
- Scrape down the sides of the bowl with a spatula, then beat on low speed for about 15 seconds (the key is to mix until the ingredients are JUST incorporated, so that the batter isn't over mixed).
- Divide batter evenly between the prepared cake pans (about 450 grams per pan).
- Bake for 34-35 minutes, or until a toothpick comes out clean. Allow the pans to cool for 10 minutes, then run an offset spatula around perimeter of the pan to separate the cake from the pan.
- Place cake layers into the freezer for 45 minutes, to accelerate the cooling process. Once the layers are fully cooled, carefully flip the pans and remove the layers from the pans.
- Use a serrated knife to level the tops of the layers, and then frost as desired.
Vanilla Buttercream Frosting:
- While the cake layers bake and cool, make the vanilla buttercream frosting.
- Beat the butter on a medium speed for 30 seconds with a paddle attachment, until smooth. Slowly add in the powdered sugar, 1 cup at a time. Alternate with small splashes of cream.
- Once fully mixed, add in the vanilla and salt, and beat on low until the ingredients are fully incorporated, and the desired consistency is reached.
- If the frosting is too thick, add in additional cream (1 Tbsp at a time). If the frosting is too thin, add in more powdered sugar (quarter of a cup at a time).
Sugar Glass Shards:
- Mix 1 cup water, 1/2 cup corn syrup, sugar, and cream of tartar in a large saucepan or pot.
- Bring mixture to a boil. Use a candy thermometer and boil sugar syrup until temperature reaches 300 degrees, stirring constantly.
- When sugar reaches 300 degrees, quickly pour onto a metal baking pan. Cool until completely firm to the touch.
- Break into shards using a hard object (I used a clean hammer for this, but a meat mallet would work too!)
To Assemble The Cake:
- To fill the center of the cake, use a 3 inch circle cutter to remove the centers of two of the layers.
- Begin assembling the cake using an uncut cake layer.
- Frost with an even layer of vanilla buttercream, then top with one of the cake layers.
- Gently frost the cake ring, the stack with the other cut layer.
- Spread an even layer of buttercream on top of the second cake ring, then smooth frosting into the cut-out center of the cake.
- Mix one squirt of red gel food coloring into the strawberry jam, and then carefully pour into the center of the cake.
- Fill to the top, then place the last cake layer on top.
- Apply a thin coat of frosting around the cake, to fully cover the cake layers. Smooth using a bench scraper, then chill the cake in the fridge (20 minutes) or freezer (5 minutes) until the frosting is firm to the touch.
- Add a second, thicker layer of frosting to the cake, and smooth using a bench scraper.
- Insert sugar shards into the top of the cake, and drizzle with leftover strawberry jam.
Notes
One batch of cake batter makes about 1800 grams, so when I'm making a cake with four layer, I add 450 grams of batter into each pan.
Once the layers have fully cooled, I sometimes like to trim the caramelized bits from the sides of the layers using a serrated knife.
These cake layers can be made in advance!! Learn more about how far in advance they can be made, and how to properly wrap them in my post on how to make cake layers ahead of time.
Since this frosting will be used to decorate a cake, it is important to mix the buttercream on the lowest speed at the end of the process for a couple minutes, to get out any extra air that might have be incorporated during the mixing process.
You can also stir the frosting in a bowl with a rubber spatula, pushing it from side to side, to get rid of any air bubbles.This will make it easier to get super smooth sides on your cake!
The frosting recipe above is 1.5 batches of my American buttercream, which is the amount I usually make for 7 or 8 inch cakes. This makes enough buttercream to add a generous amount between the cake layers, and to have leftover buttercream for any special decorations. If you have extra buttercream you don't use, it can be stored in an airtight container for up to a month in the fridge.
Nutrition Information
Yield
24Serving Size
1Amount Per Serving Calories 826Total Fat 33gSaturated Fat 20gTrans Fat 0gUnsaturated Fat 11gCholesterol 86mgSodium 313mgCarbohydrates 132gFiber 1gSugar 112gProtein 4g
How To Make Sugar Glass Cake Decorations | Cake Karma
Friday 8th of December 2023
[…] it truly one-of-a-kind. Consider combining different shapes and sizes of sugar glass flowers to create a visually appealing arrangement that cascades down the sides of the […]
Murder Cake – Holy Forkin Cakes
Thursday 18th of November 2021
[…] more visual interest (and pieces that are more edible). When I stumbled upon Chelsweet’s shattered glass cake post, I knew I had found my murder cake. It was perfect, not only did it look like a bloody […]
Susan
Tuesday 19th of October 2021
How far in advance can I put the sugar glass on the cake? I’m making red velvet with cream cheese buttercream.
Laurie
Monday 11th of October 2021
I made shattered glass and, after being at room temperature for a little while, it starts to bend and get sticky. It’s not even too warm in my kitchen but it bent anyway. I read that this is common. Any tips on keeping glass shards hard so that the cake design can last a while? Thanks in advance.
Erin
Thursday 23rd of January 2020
I meant to respond to this before, sorry! I used the sugar glass recipe to make a Game of Thrones cake for the final season's premiere - it was awesome (I have a pic, but not sure how to attach here), thanks for the tutorial!
Chelsweets
Tuesday 28th of January 2020
No worries Erin! I know, it's so annoying that we can't upload photos in the comments :/
But I'm happy to hear that the tutorial worked great for your Game of Thrones cake!!